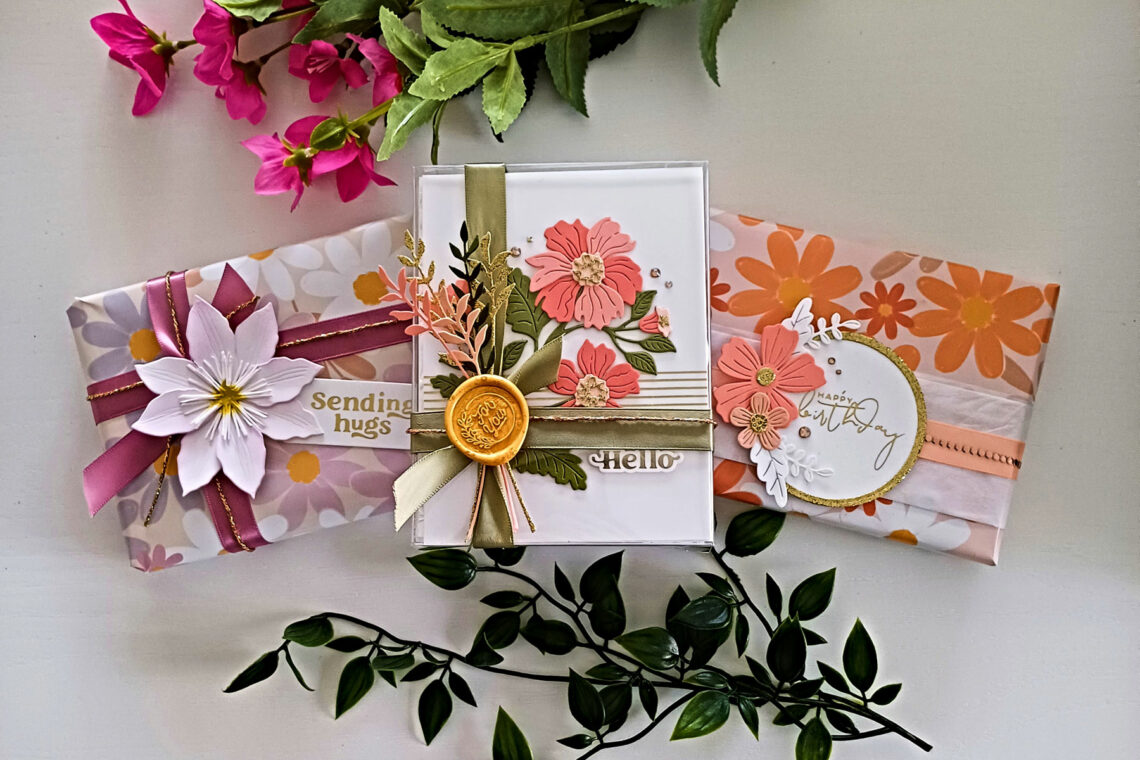
Packaging Ideas With Clear Boxes You Need To Try!
Hello there! This is Lisa from My Card Trip and I am excited to be a guest again on the Spellbinders blog. Today I am sharing a few ideas for gift wrapping clear acetate boxes using beautiful papers and ribbons and also my own decorations.
The Crystal Clear boxes I am using today come in a pack of 25. They are so simple to put together as all you need to do is open the box up and tuck the flaps in. The acetate is scratch resistant and the tabs fold very easily. Not only that but the boxes have been made with a material that won’t brittle or crack over time, so they are ideal to use for packaging your cards as a gift to someone special.
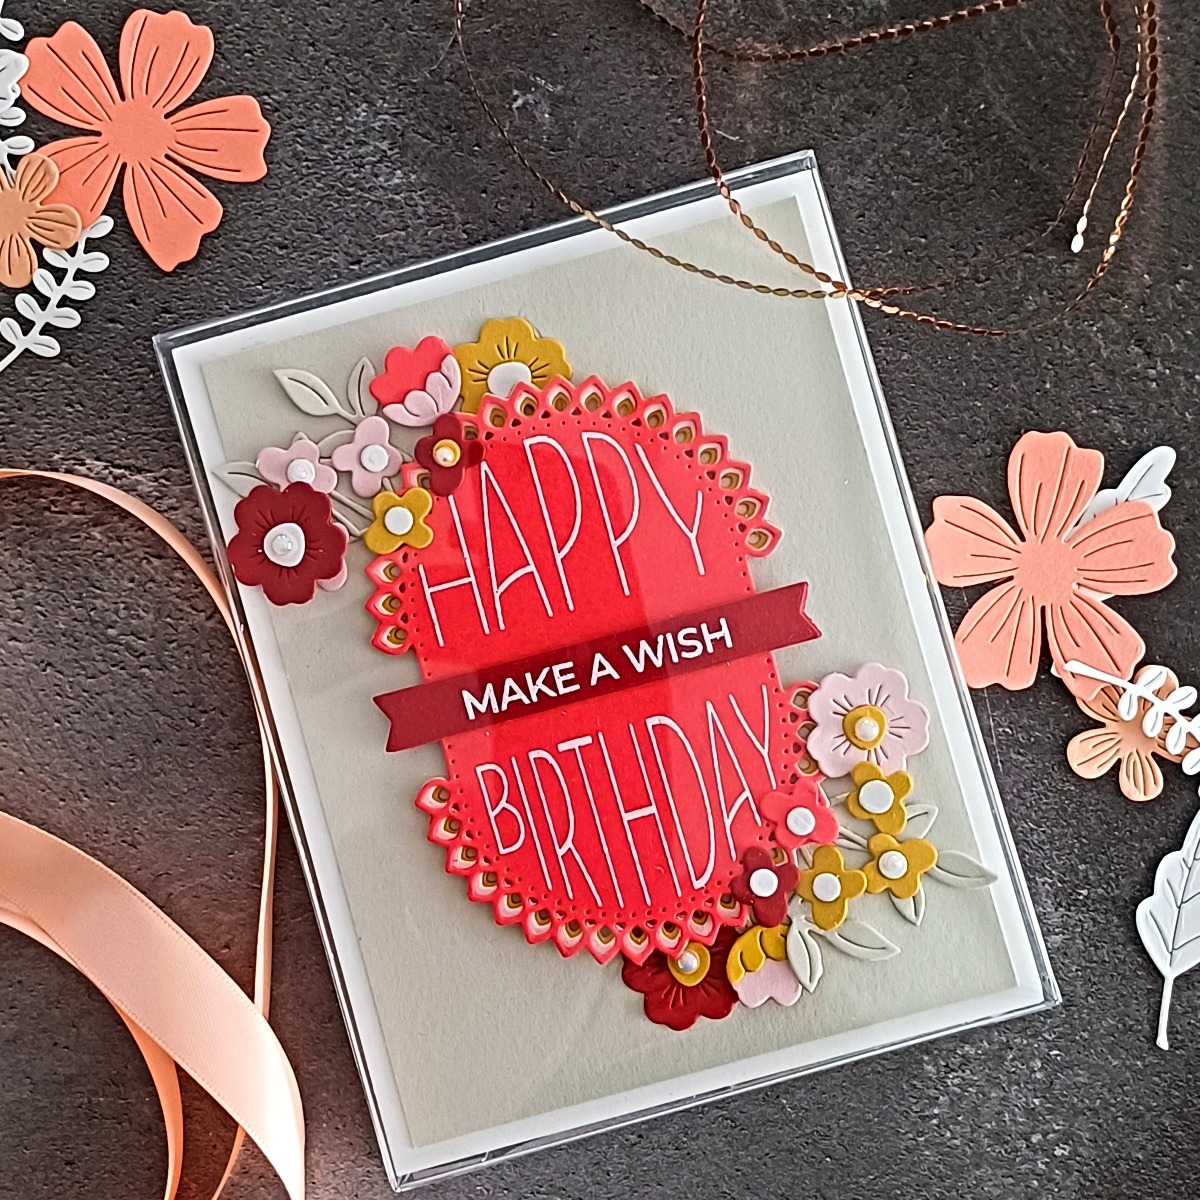
I show two ways to wrap the box and I also show another way to wrap the box without any paper, so you let your cards do the talking! My cards often end up having quite a few layers to them and I could fit four or five in each box.
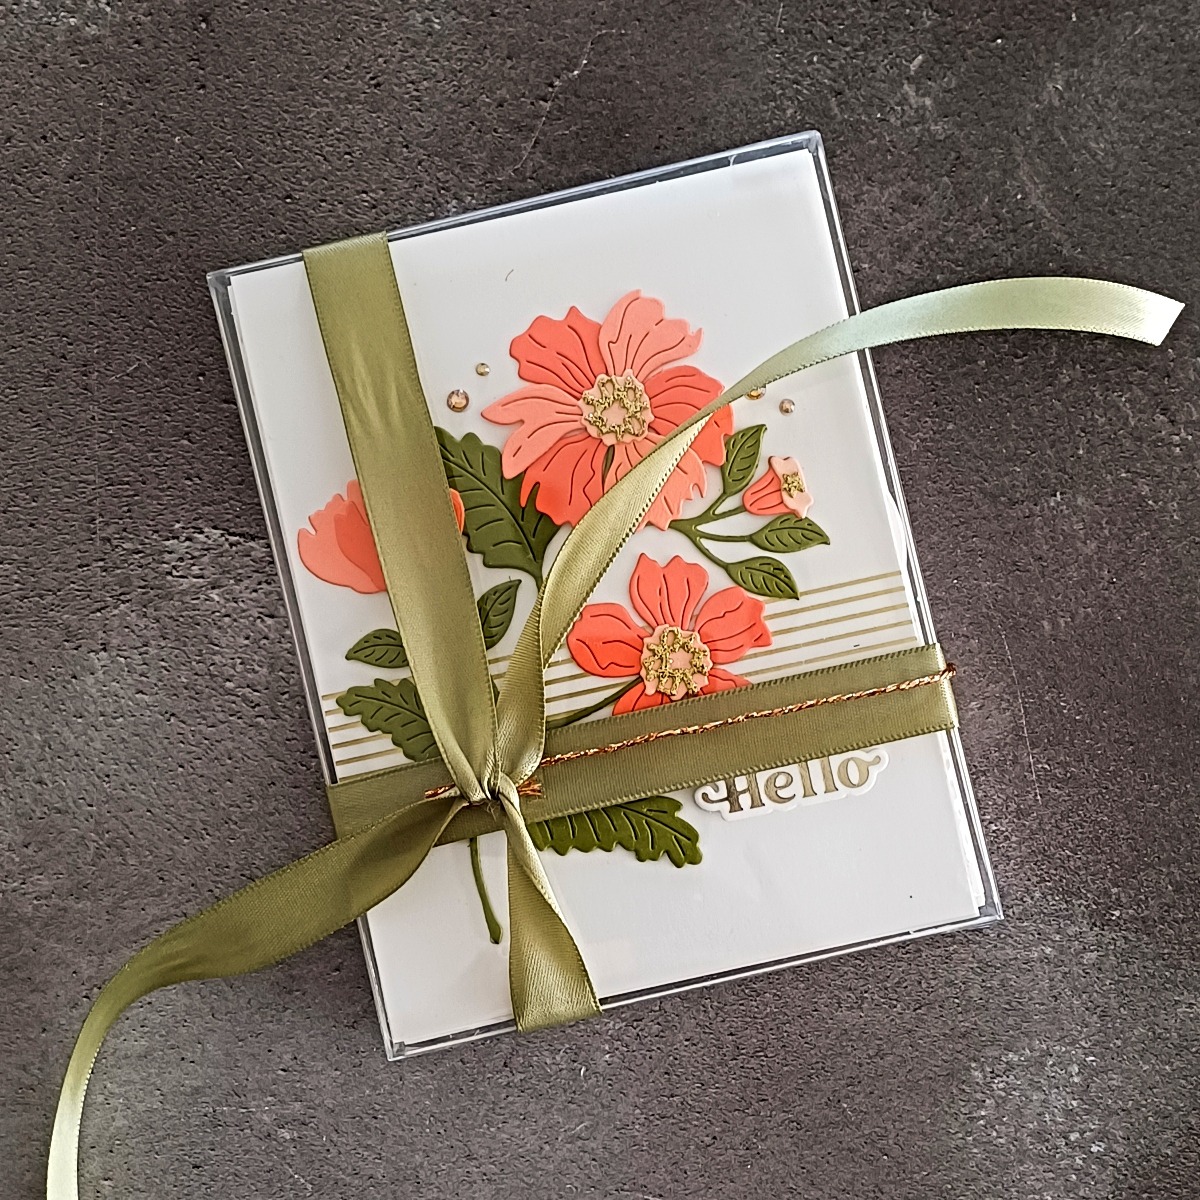
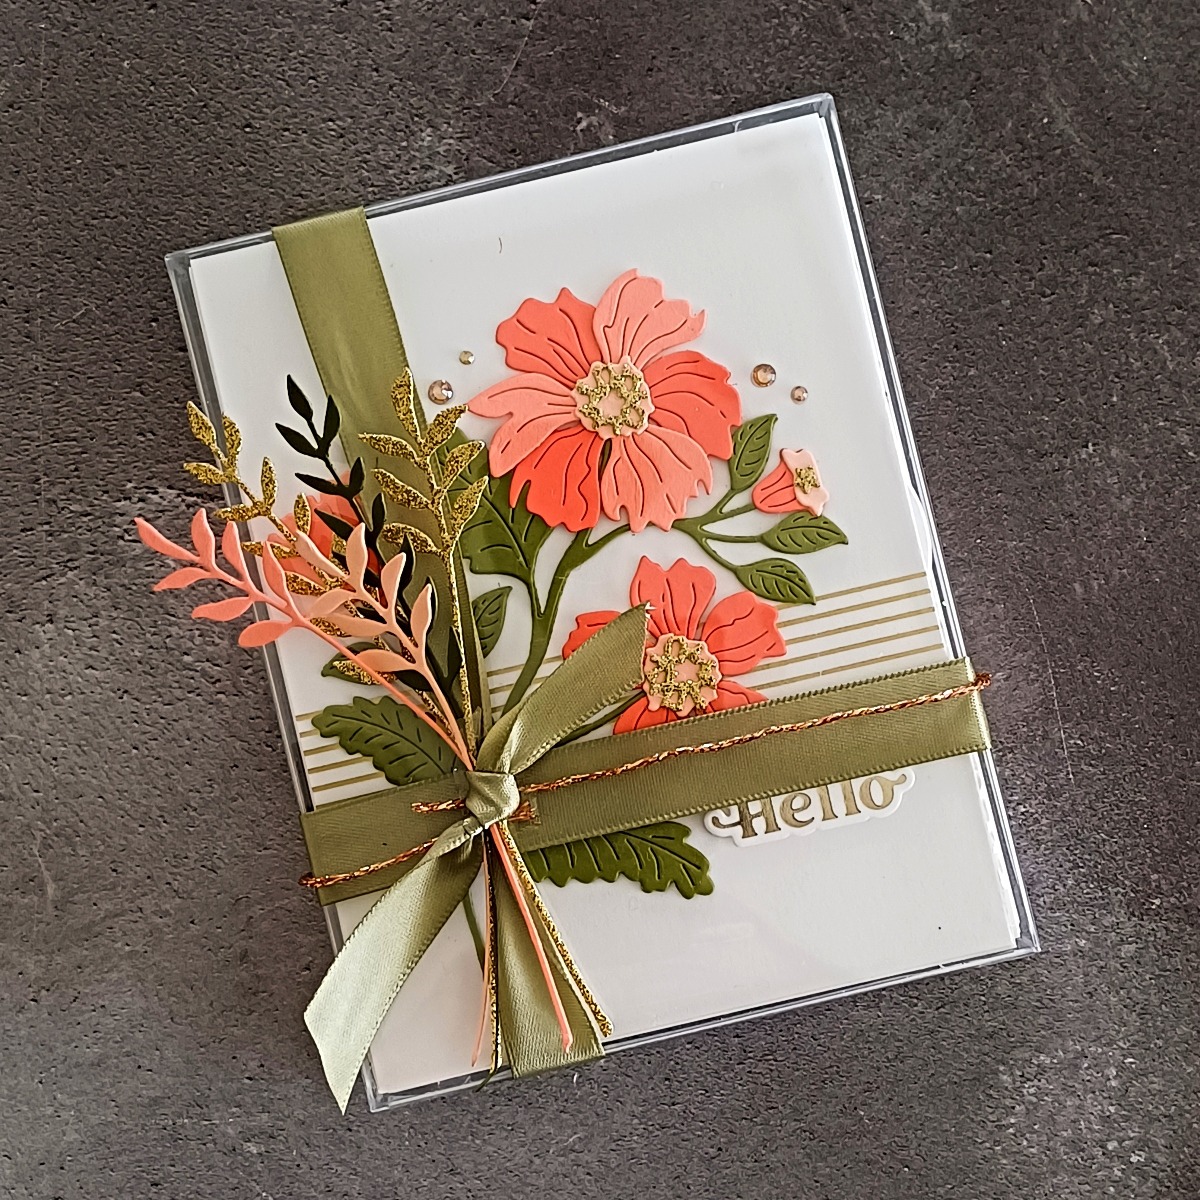
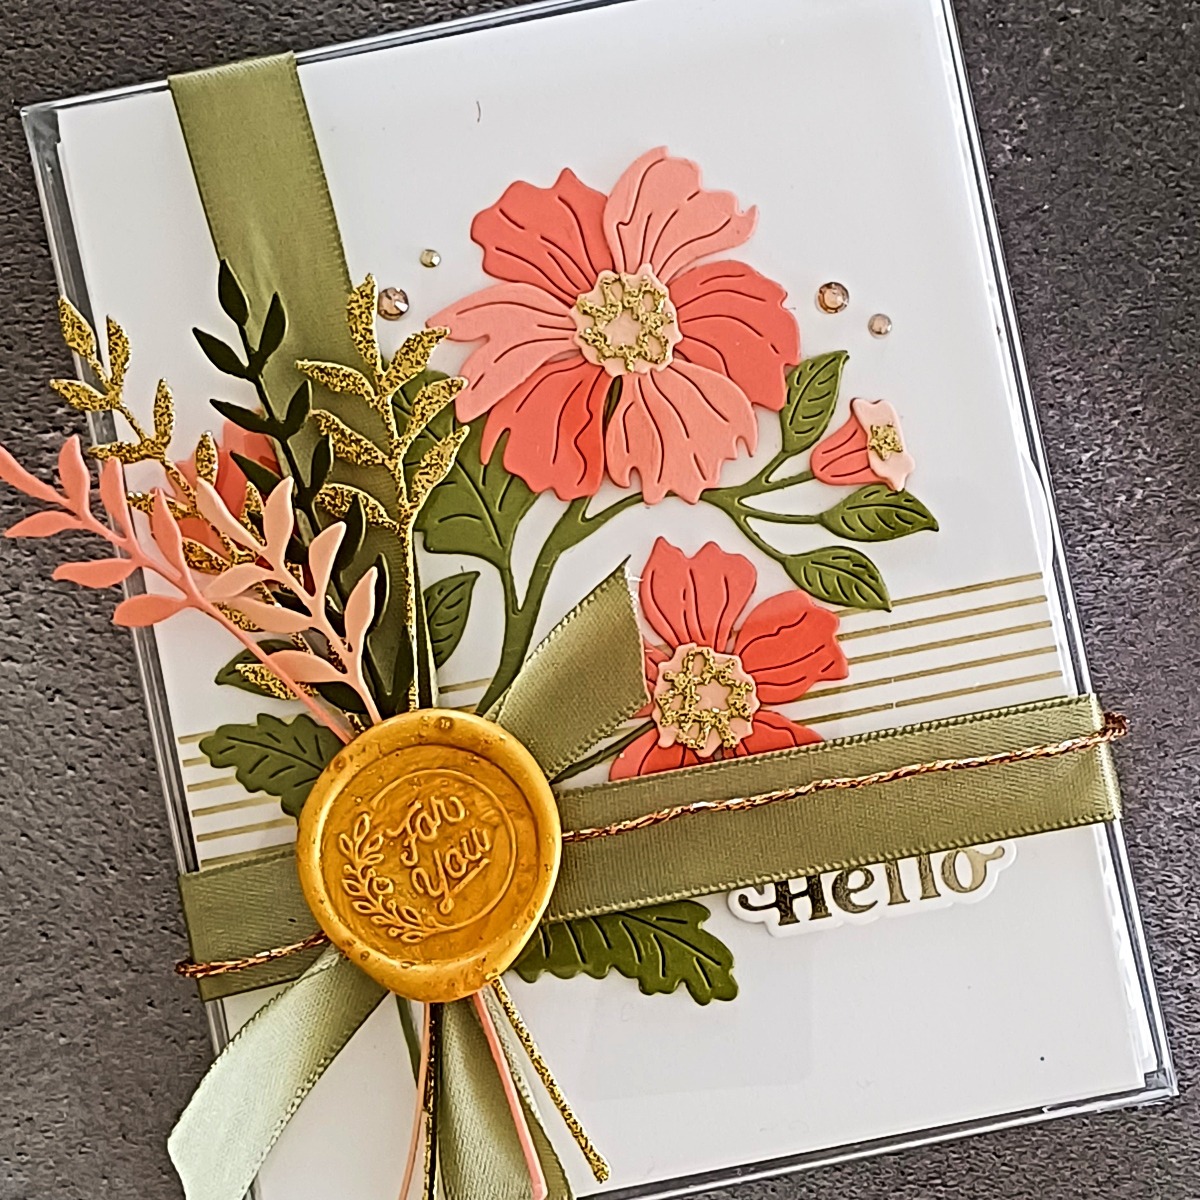
Idea #1 – Adding A Die Cut Flower Spray
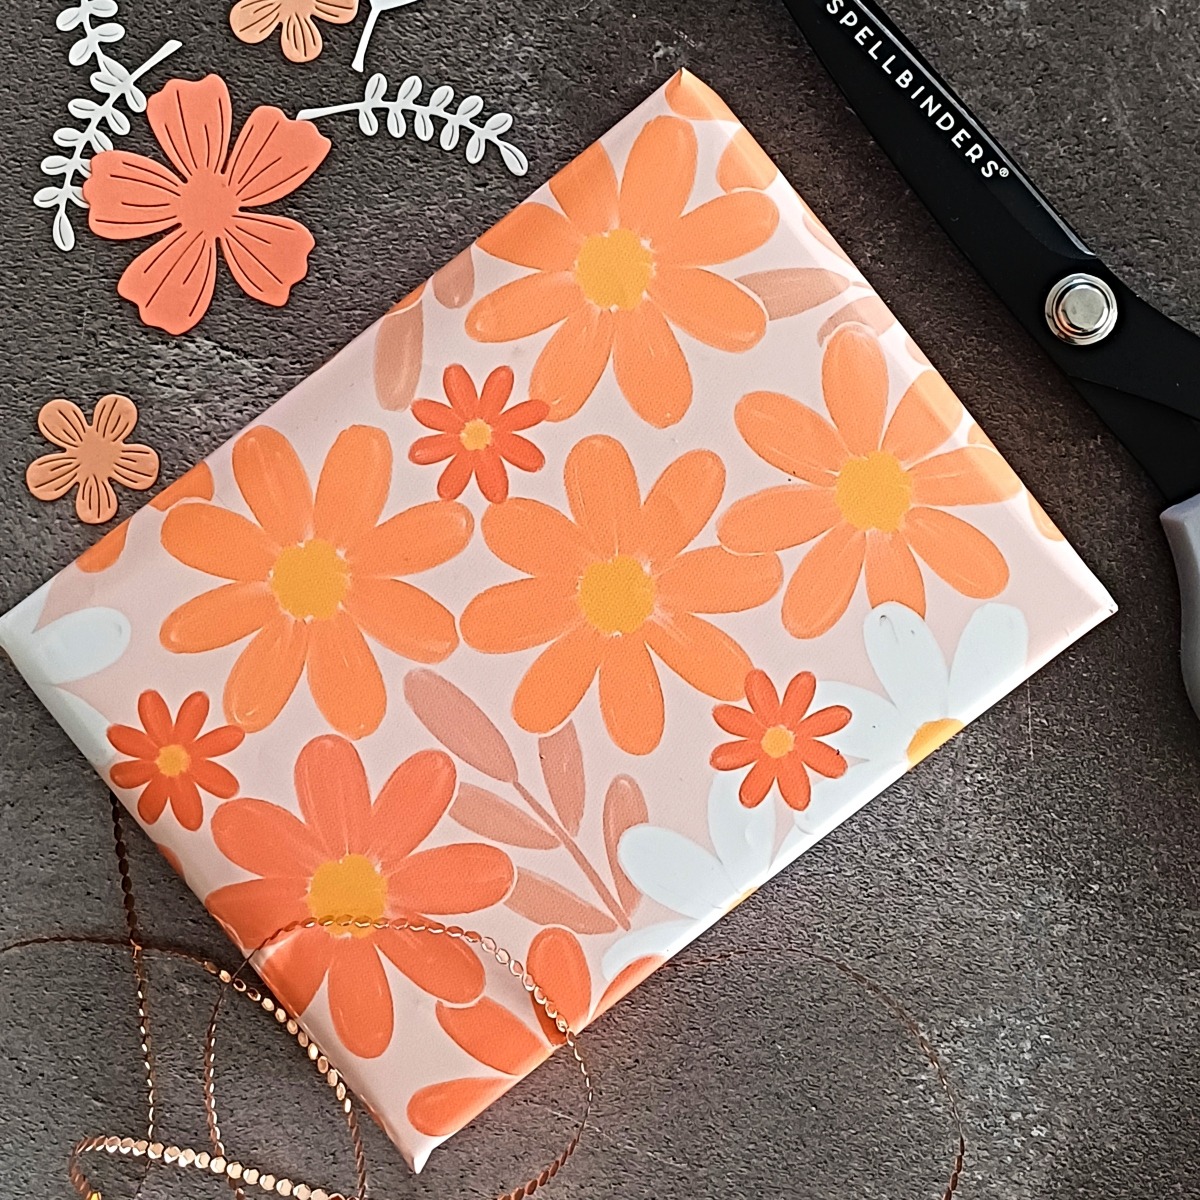
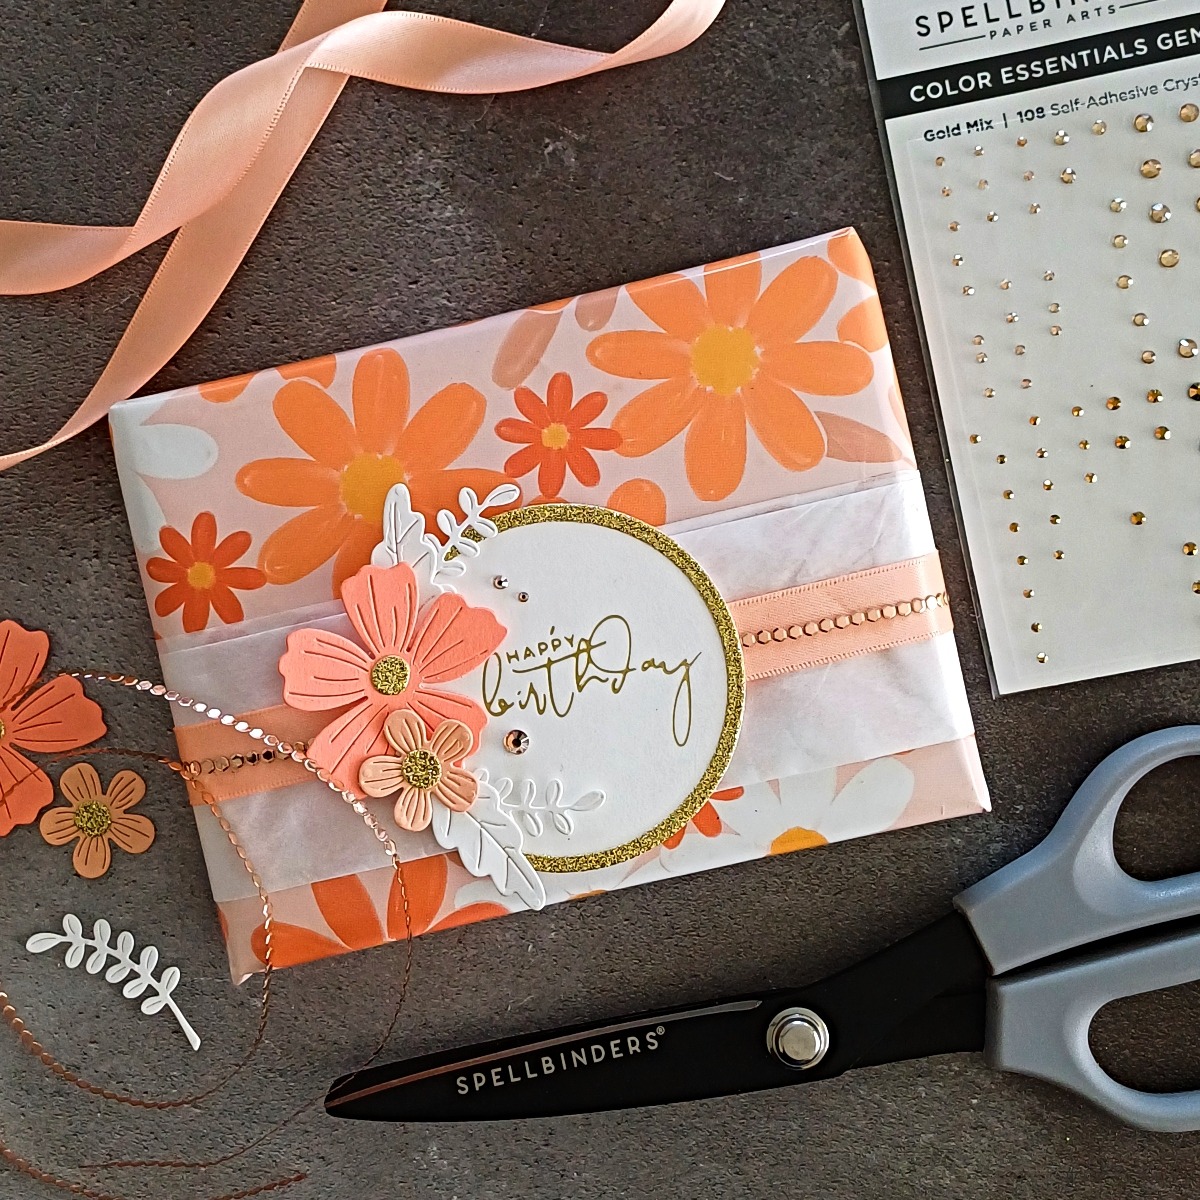
For my first box, I am going to wrap it with pretty wrapping paper! So, I assembled the box and I filled it with some of my cards. For this example, I wrapped it using the peach side of the wrapping paper by Elyse Breanne. This paper is gorgeous and it is double-sided. I use the other side on my final box so that you can see both colourways.
This is a beautiful high quality paper that is quite thick so make sure that you wrap and secure your box well. I used clear tape for most of the wrapping, occasionally using double-sided tape if it looked better.
After covering the box, I cut and folded some white tissue paper so that I could make a belly band. My finished tissue paper is 2” wide. I wrapped it from the back around to the front of the box, taped each end down and cut off any excess. All your joins for the tissue paper, ribbon and cord will be hidden behind the circle so you can go to town and make sure it is all secured tightly.
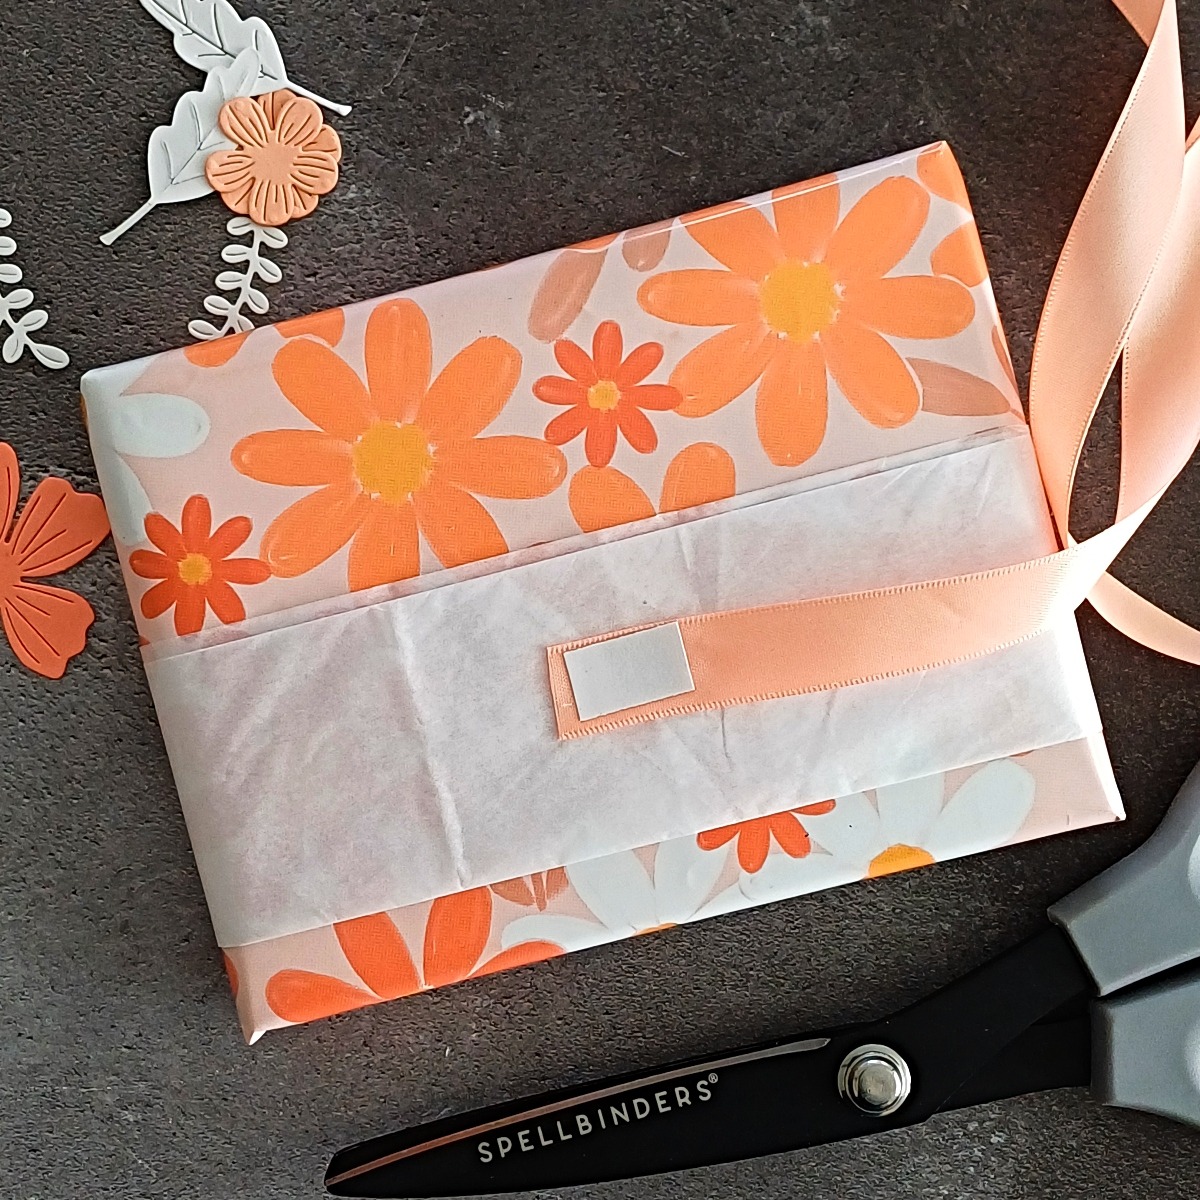
I then took some Vivant Double Face Satin Salmon Ribbon and placed it down over the tissue. I added a small piece of double-sided tape onto the back of it, so it would stick to the tissue paper, and then I added a small piece on the top so that I can adhere the left side ribbon to it once I had bought it around the back to the front.
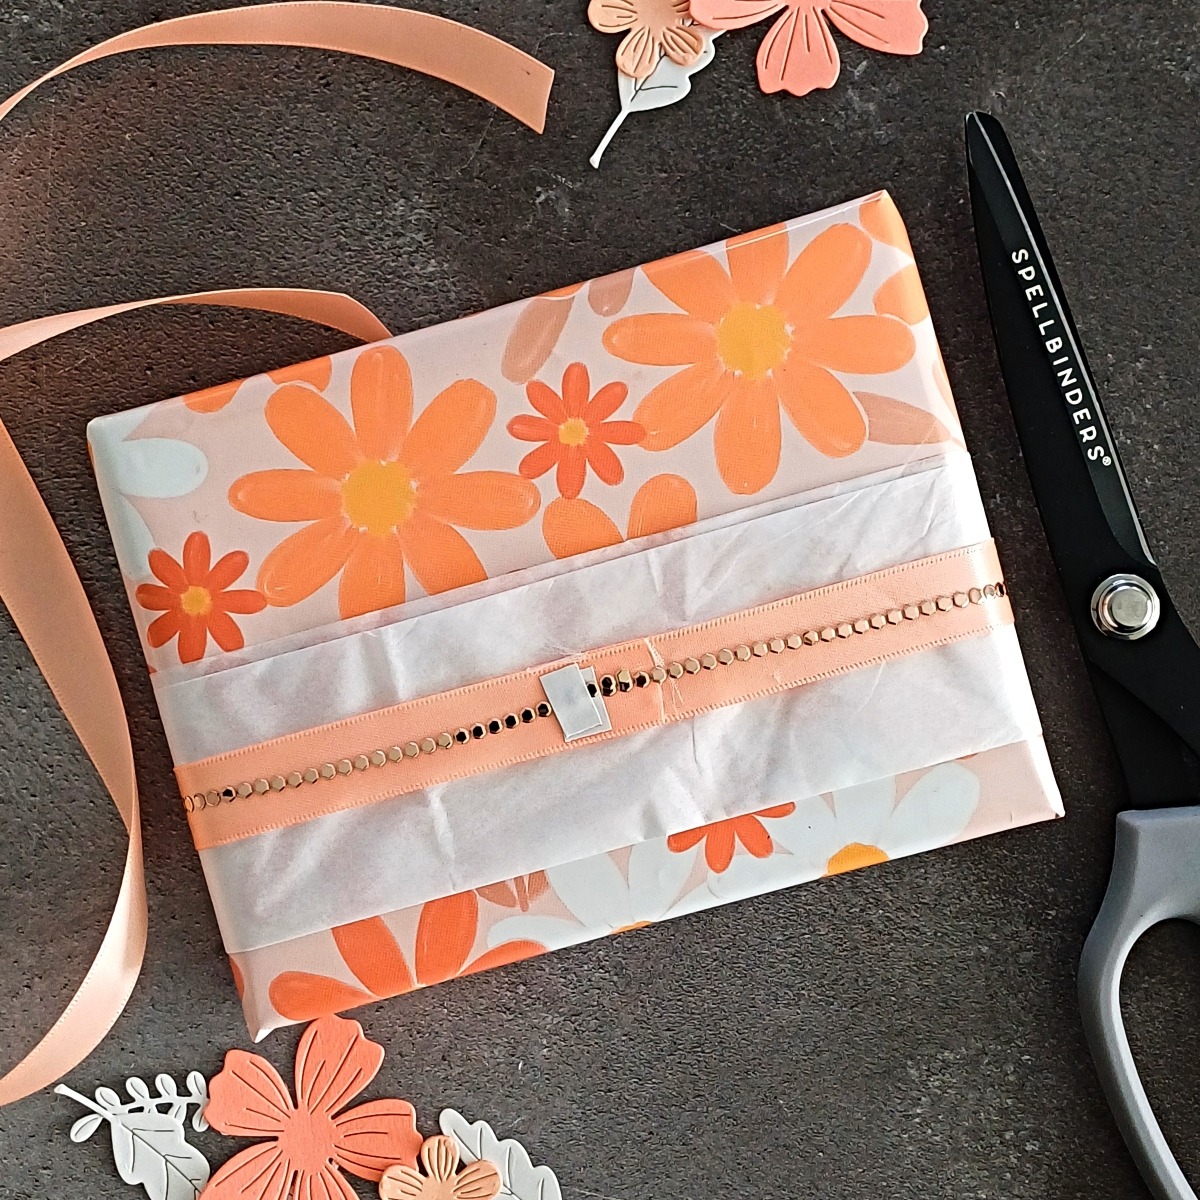
I then did the same with the Vivant Circle’ Rose Gold Metallic Cord and you can see how I held both ends in place.
I popped on my Glimmer Hot Foil System, waited for it to be ready and then foiled the “Happy Birthday” sentiment from Yana’s Sentiments Glimmer Hot Foil Plate and Die Set using Matte Gold Glimmer Hot Foil. I offset the sentiment a bit to the right as I knew I would be adding my flowers down the left-hand side. The circle was cut using Everlasting Circles Etched Dies.
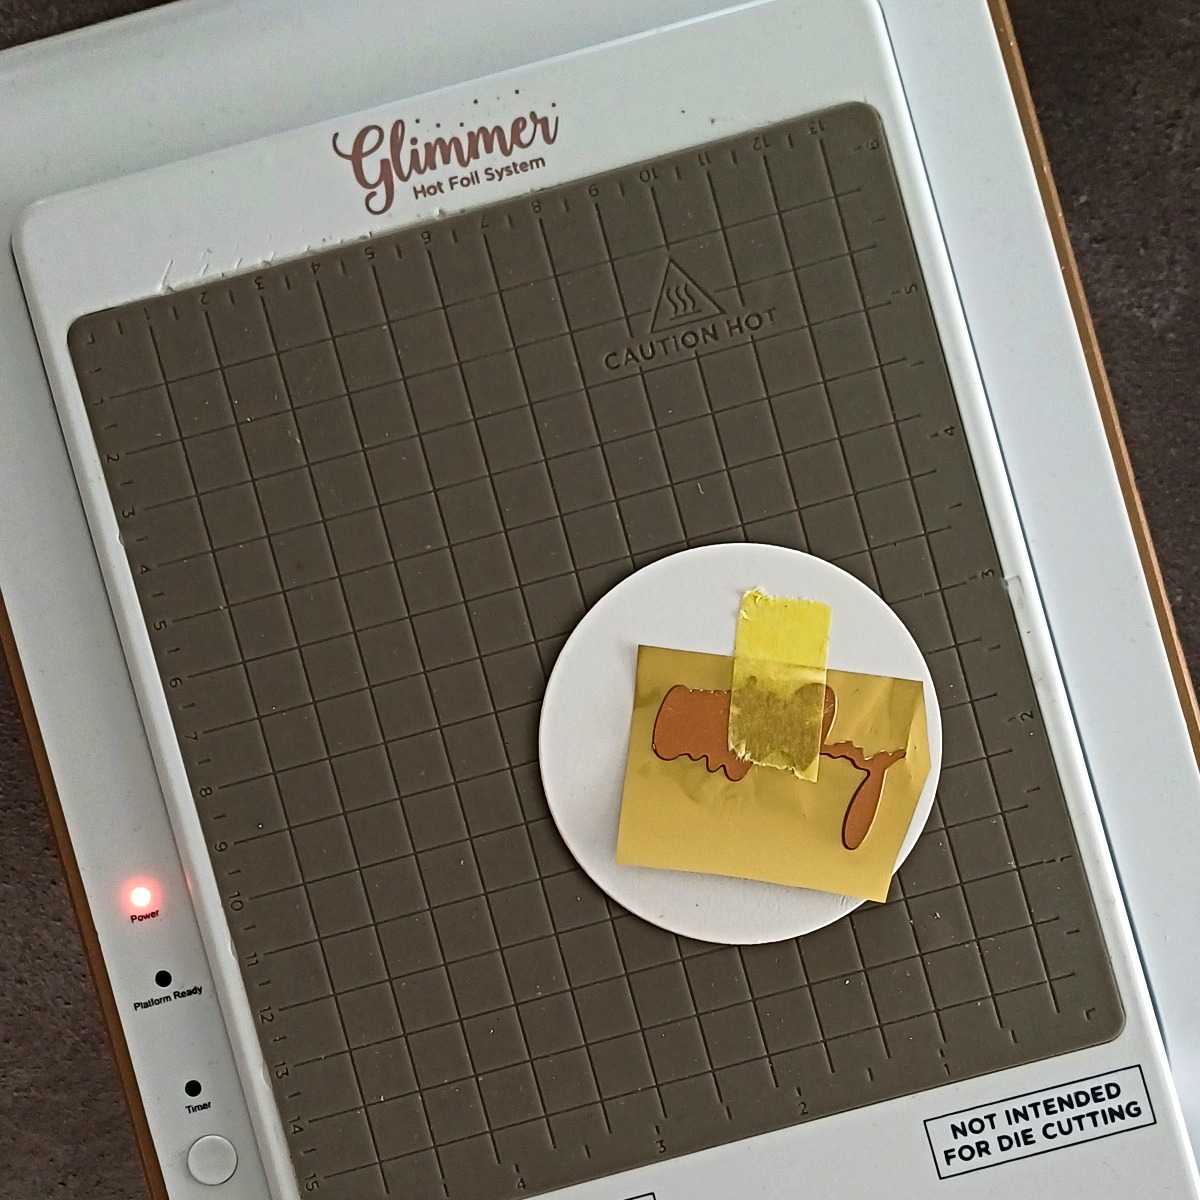
I then set the foiled circle to one side to do my die-cutting.
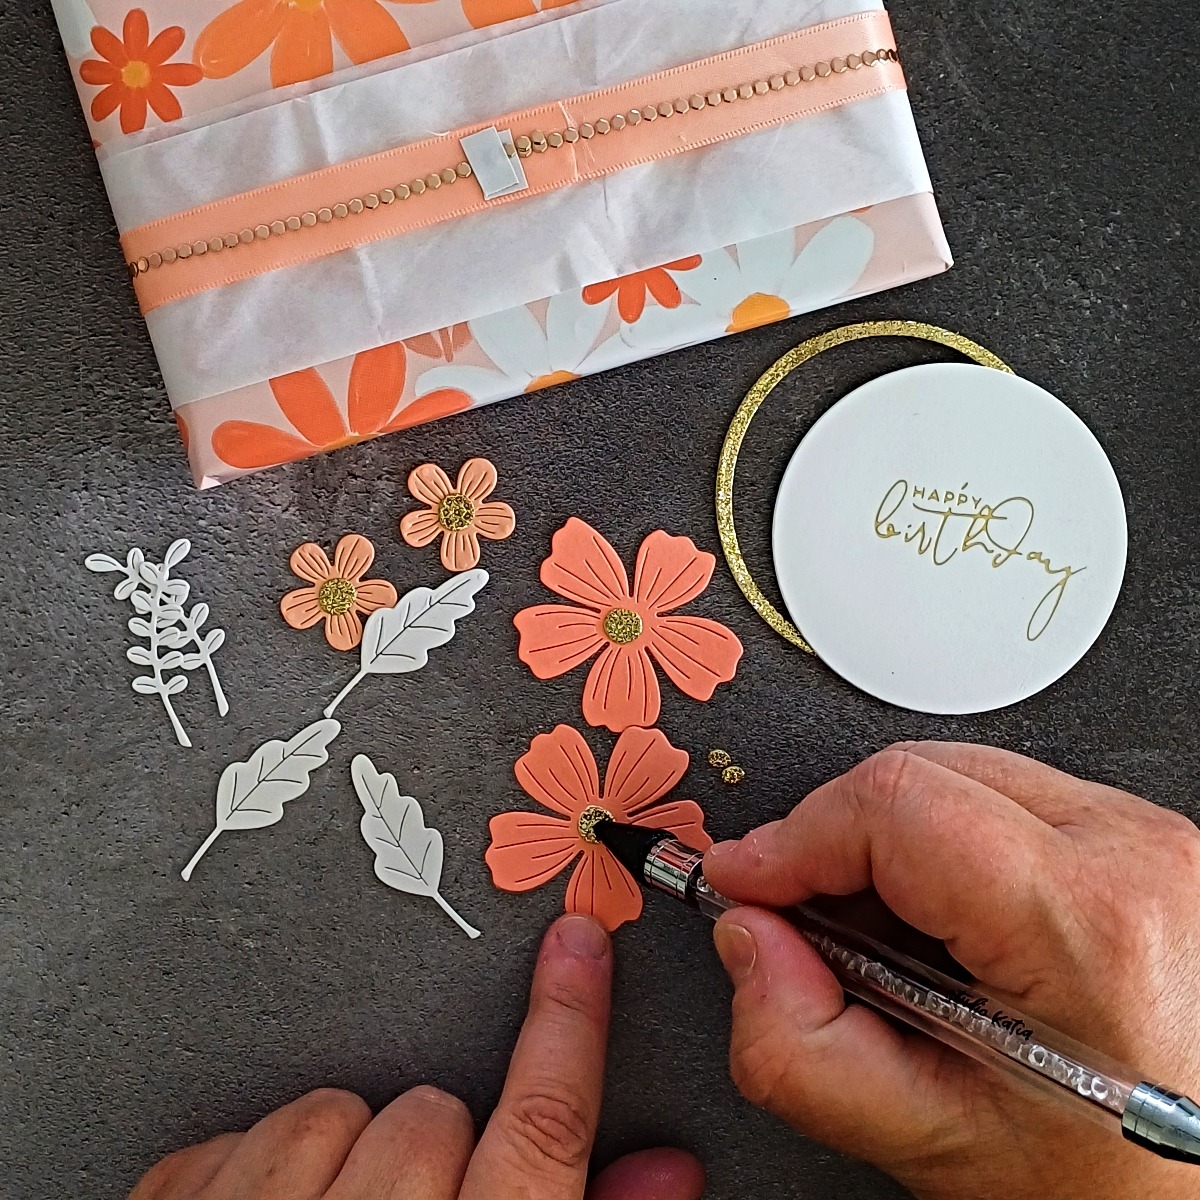
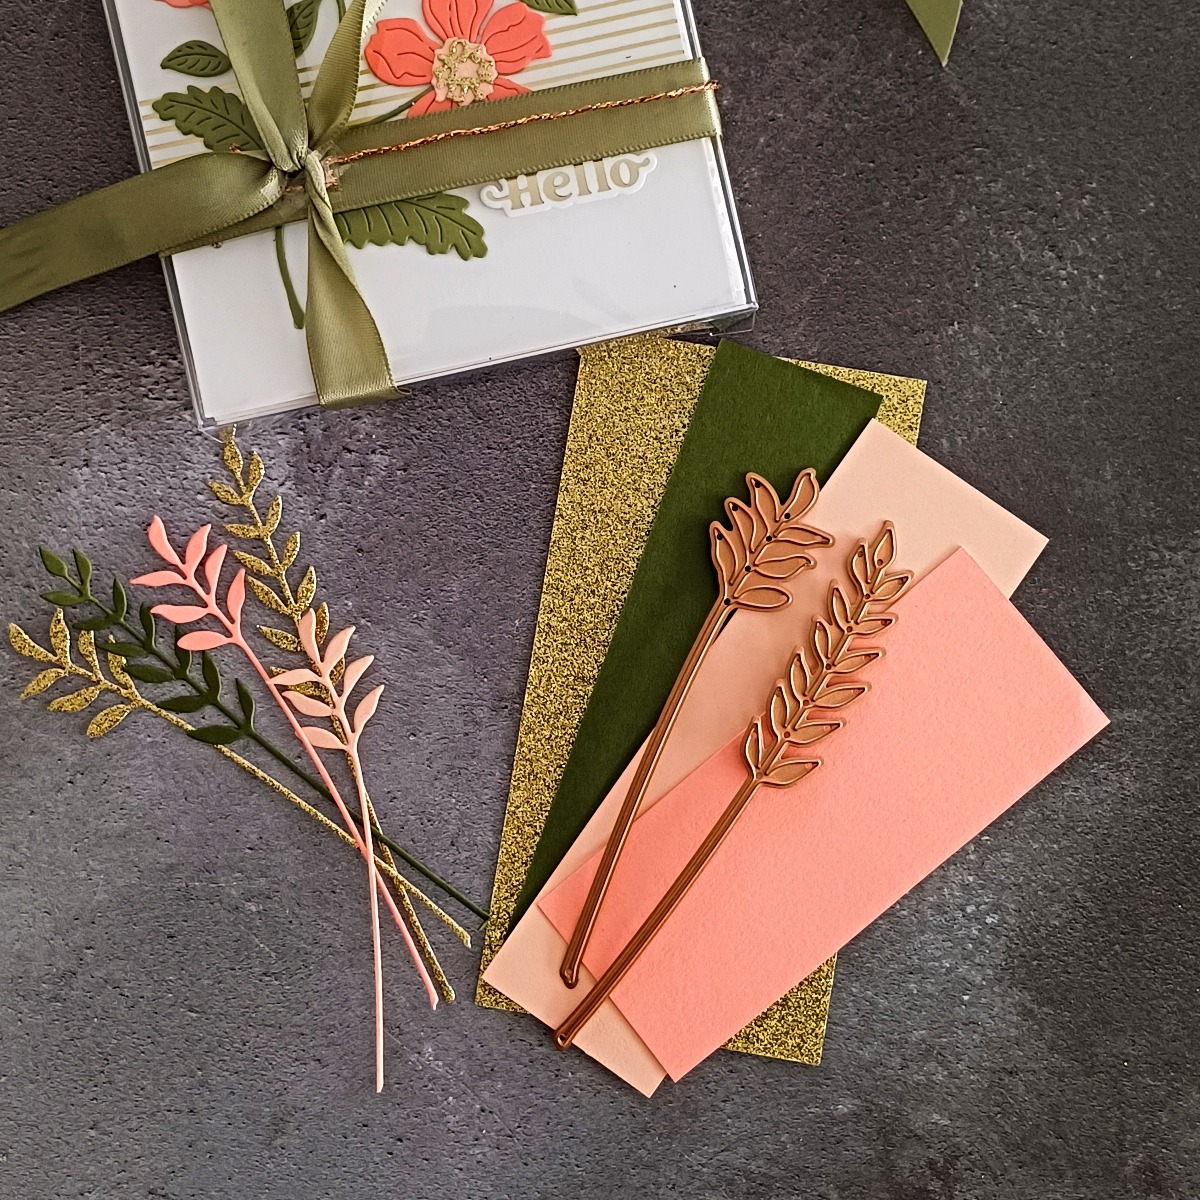
For my flowers, I am using the gorgeous Be Bold Blooms Etched Dies. These are my most loved floral dies. It is such a versatile set and I love to make little sprays of flowers from it! So, I die cut a small selection of leaves and flowers from Peach Sorbet Cardstock, 80lb white card and some dark peach from my stash.
I then adhered the circle over the ribbon using double-sided tape. I cut a gold glitter frame using Everlasting Circles Etched Dies and added that with Bearly Art Glue. The two flowers were added with some thin foam tape and then the leaves with wet adhesive.
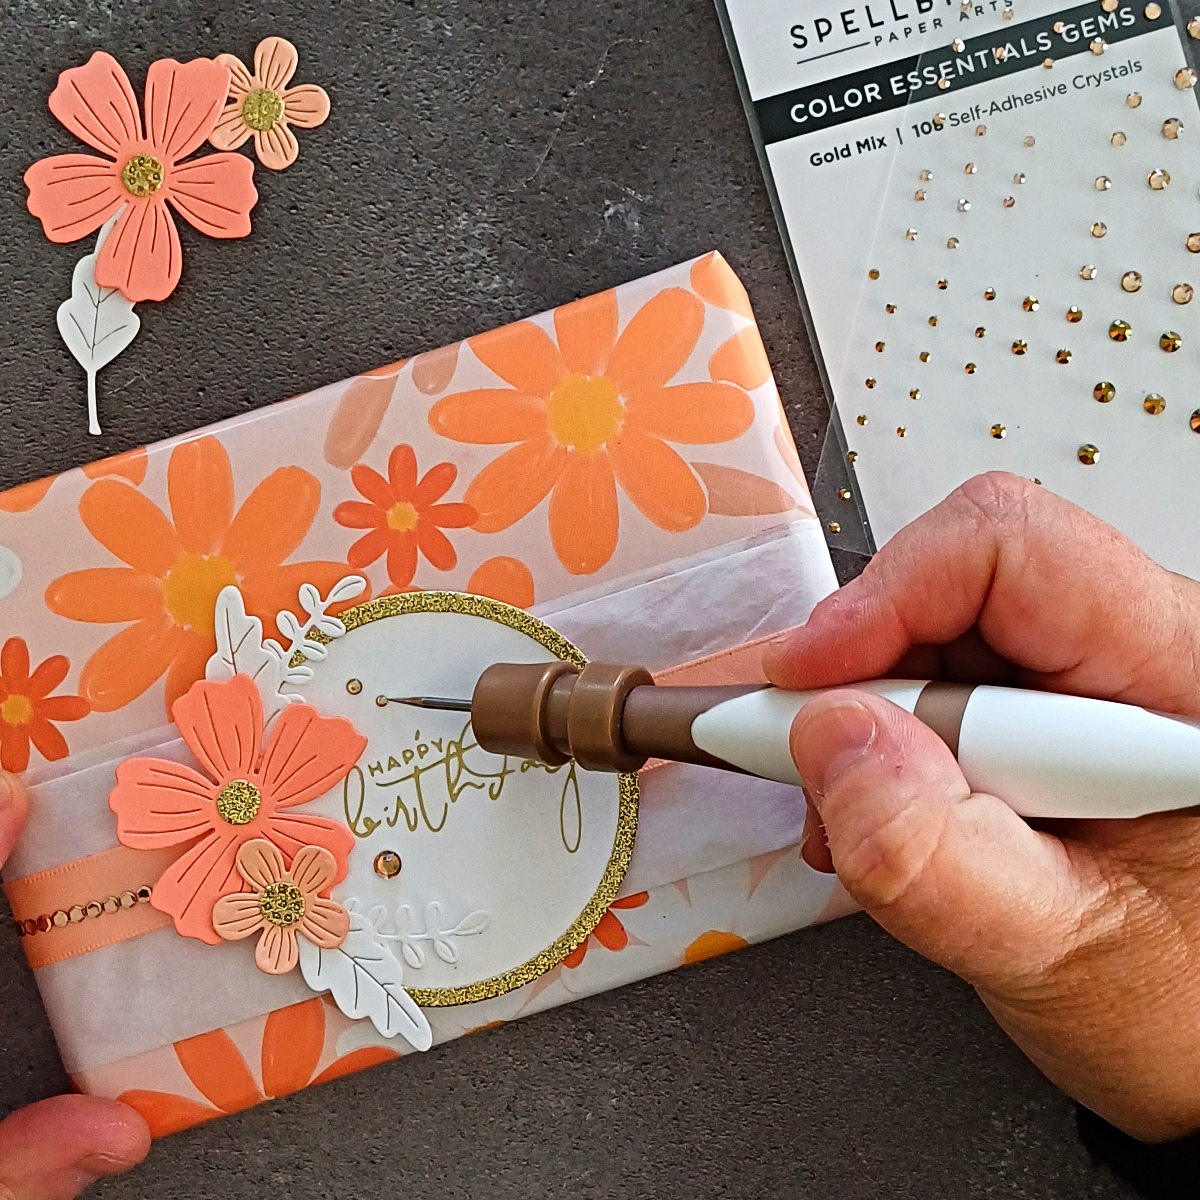
To finish I added some Gold Mix Gems.
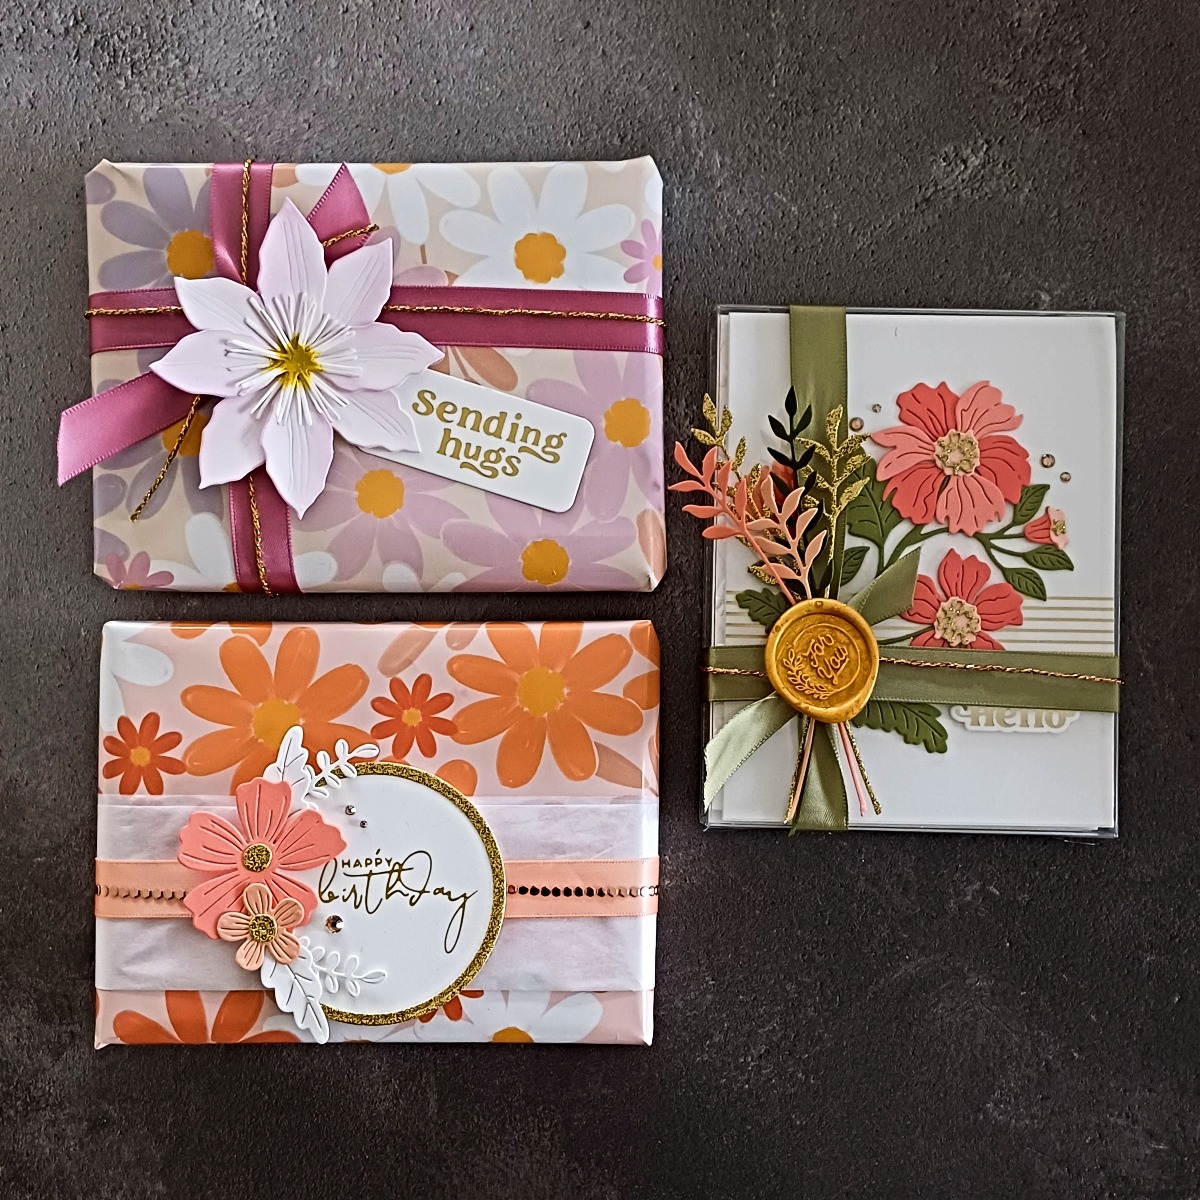
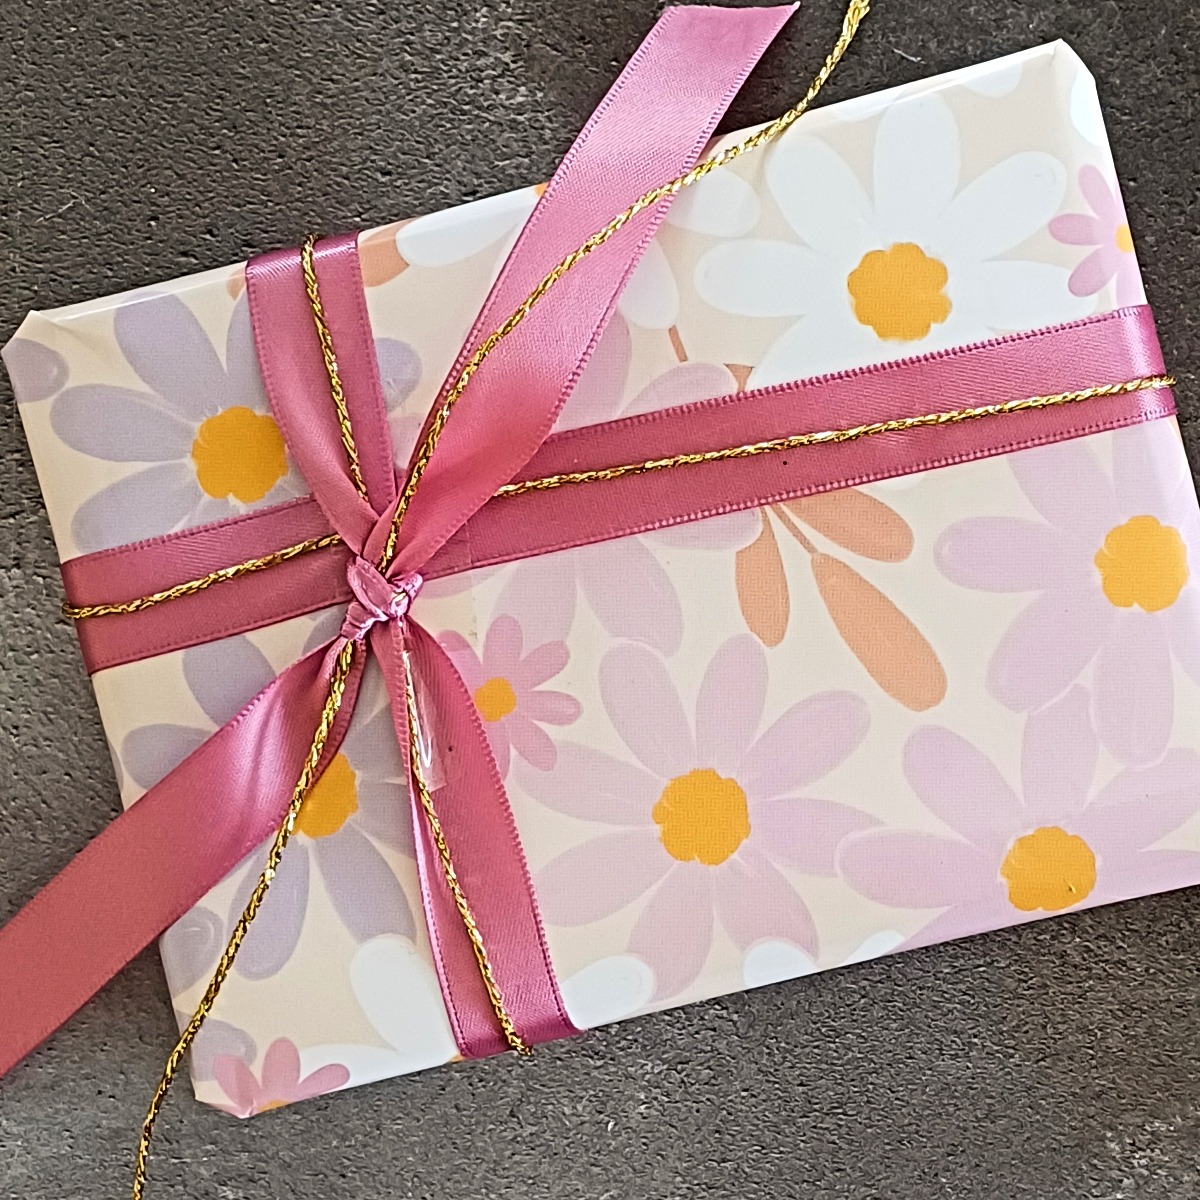
Idea #2 – Show Off Your Cards
For our second box, we are going to show off our cards! So, I am not going to add any packaging to the box at all. To make my box look cohesive and not a total mish-mash of colour, I tried to coordinate my colours with the card on the top of the pile.
I began by taking some Vivant Double Face Satin Green Gold Ribbon and wrapping it around the lower section of the box, starting from the front to the back. I secured the ribbon onto the acetate box with a little bit of clear tape to hold it in place and then I added the Vivant Flashy Copper Metallic Cord over the top but this time bringing the two ends of the cord from around the back. Once the two ends meet at the front, I secure it in place with another small piece of clear tape. You won’t see the tape at the end and it helps to keep things steady otherwise you get in a bit of a mess trying to make sure the ribbons all stay together! Clear tape is your best friend I learned 😊
Next, take the green ribbon and cross it over at the back and bring the two ends around to the front and tie them together.
I then took the Sealed Wildflower Etched Dies and cut five foliage pieces from Peach Sorbet, gold glitter, green and peach cardstock.
I made a little bundle from them and secured them again with a tiny piece of tape which won’t be visible at the end. This helps to keep them in place so that you can then tie them tightly to your green ribbon.
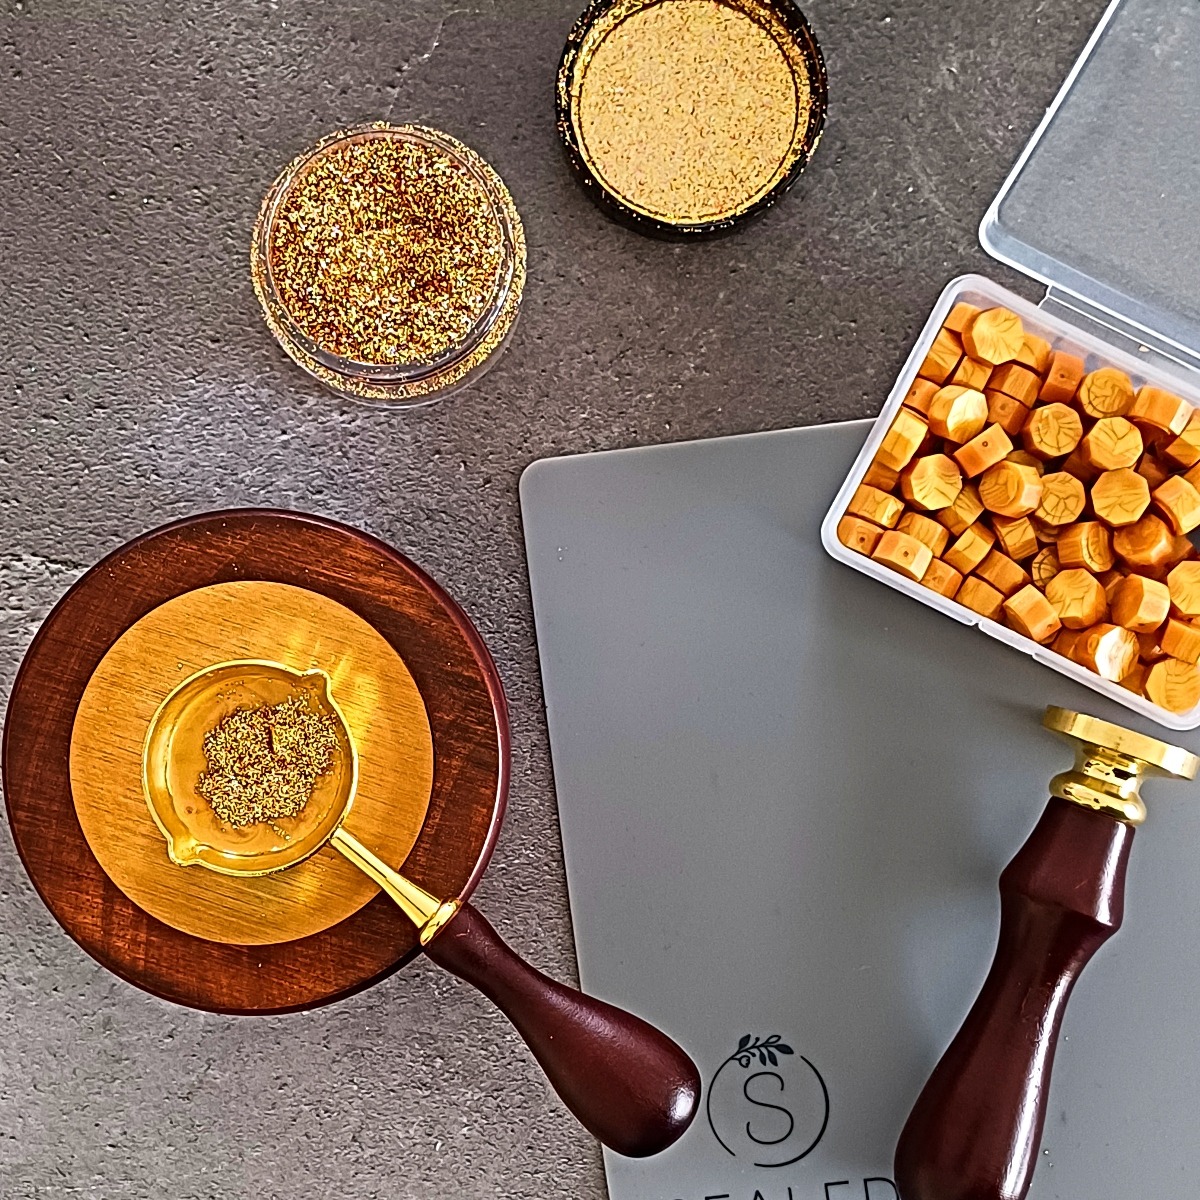
To finish the gift box, I thought I would add a seal on top. This also hides the knot! I took the Wax Seal Starter Kit and put four gold wax beads into the spoon. I let them melt a little and then added some Solaria Gold Art Glitter into the melted wax. Once I felt everything had fully melted, I stirred it a bit before pouring it out onto the silicon mat and adding my wax seal on top. I used the wax seal from the kit and it reads “For You” so it’s a great generic seal which can be used for many different occasions.
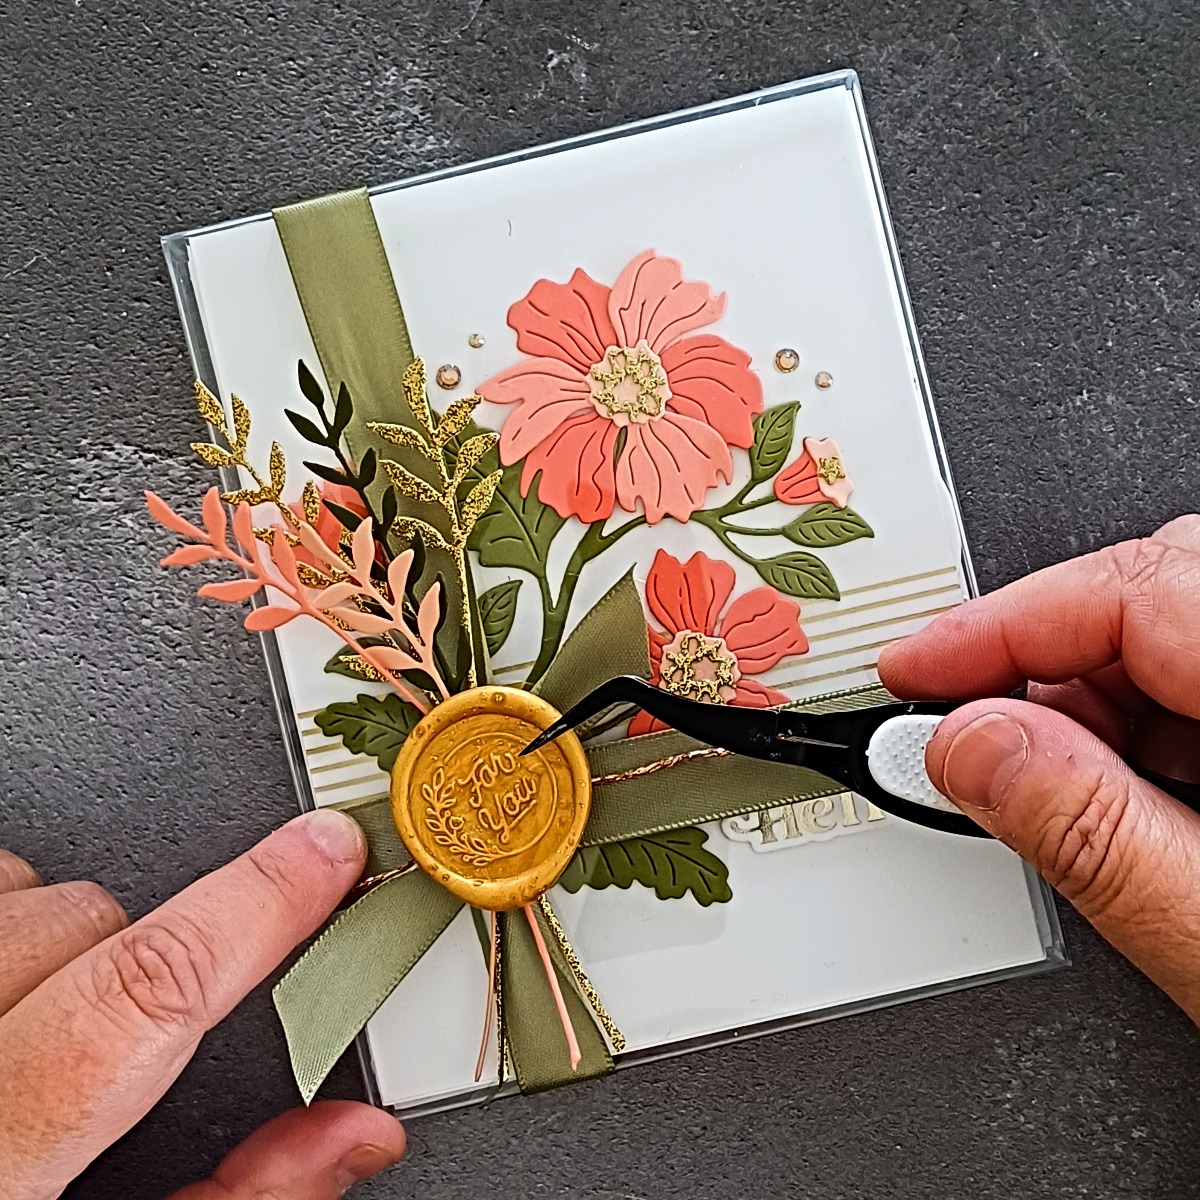
To adhere my seal, I added some strong double-sided tape onto the back of it and added it on top of the ribbon. This box is quite bulky as you have the knot of the green ribbon under the wax seal, so I would probably package this in a box if sending it through the mail or possibly even hand-deliver it to the recipient.
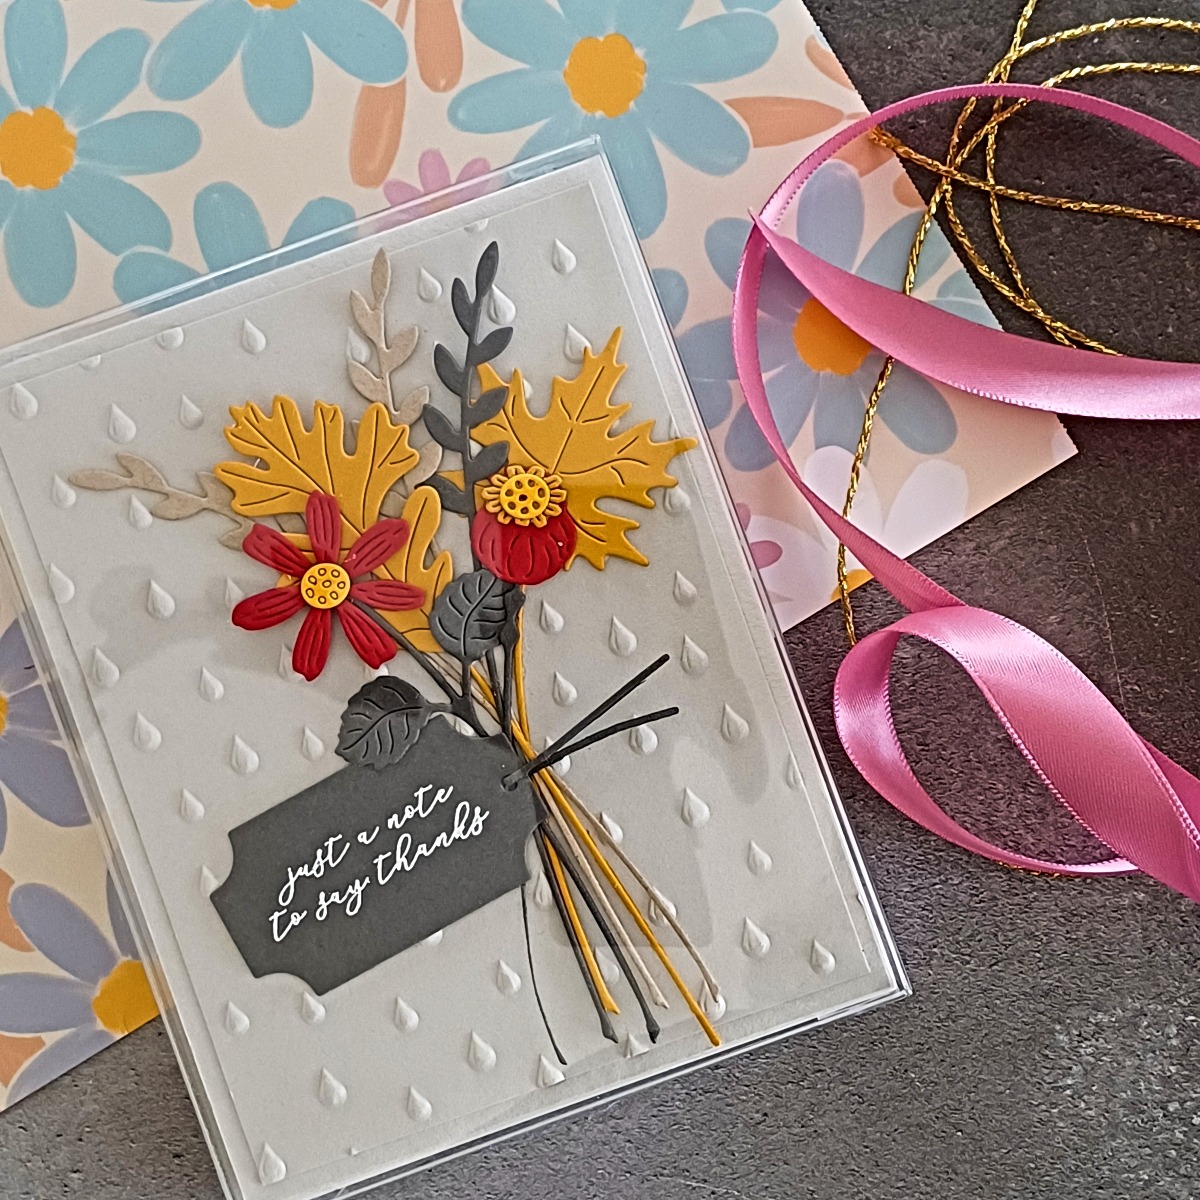
Idea #3 – Adding Ink Blended Flowers
For my final box, we are going to use die cuts again but this time, we will add some ink blending onto them.
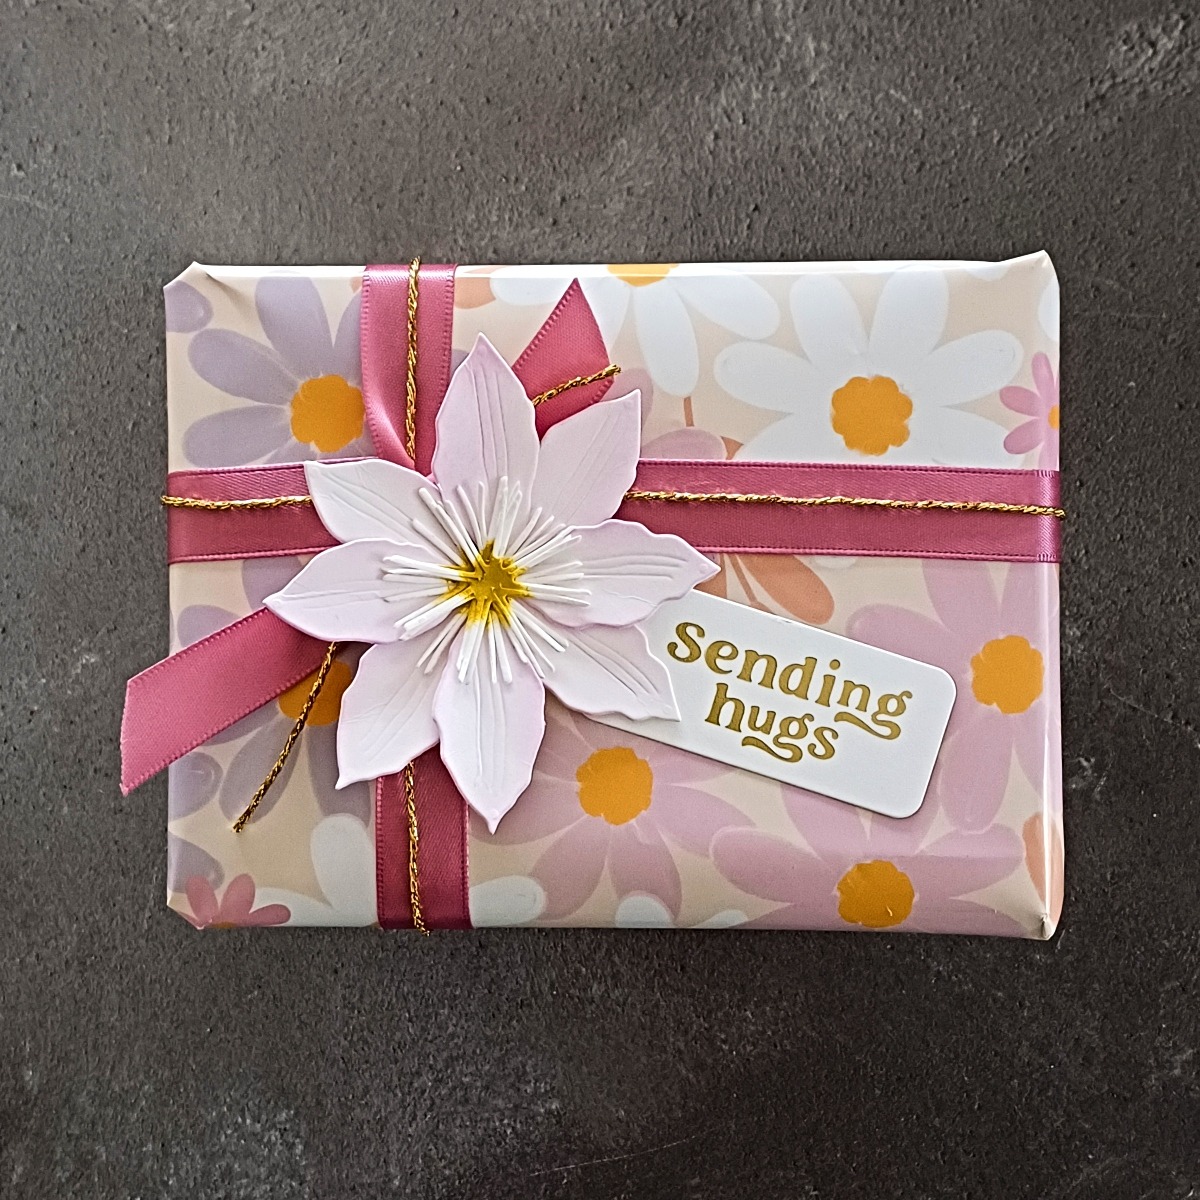
For this box, I used the other side of the Elyse Breanne gift wrapping paper along with some Vivant Double Face Satin Old Rose Ribbon and some metallic cord.
I wrapped the box and then laid out the Old Rose Satin Ribbon onto my work surface before placing the Vivant Flashy Gold Metallic Cord on top. It was secured in the middle with some clear tape. I then wrapped both the ribbon and cord across the front, around to the back. I then crossed the ribbons and bought them back around to the front and then tied them in a knot. I secured the metallic cord on all four sections of the cord which were near the ribbon knot so they would be hidden and this keeps the cord in place. I trimmed the edges off the ribbon at a slant.
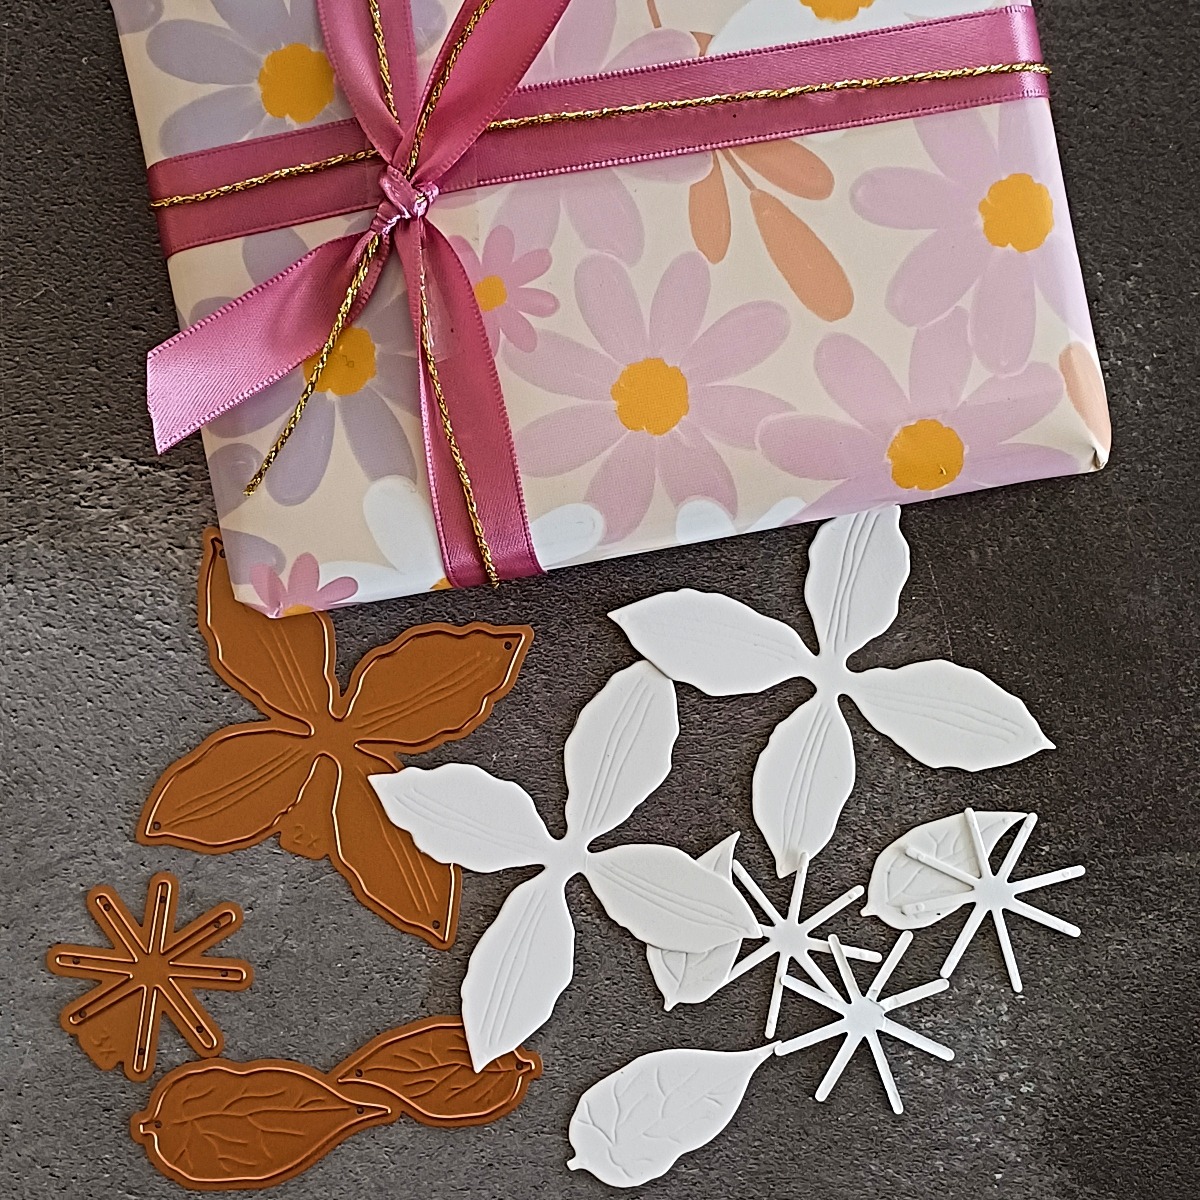
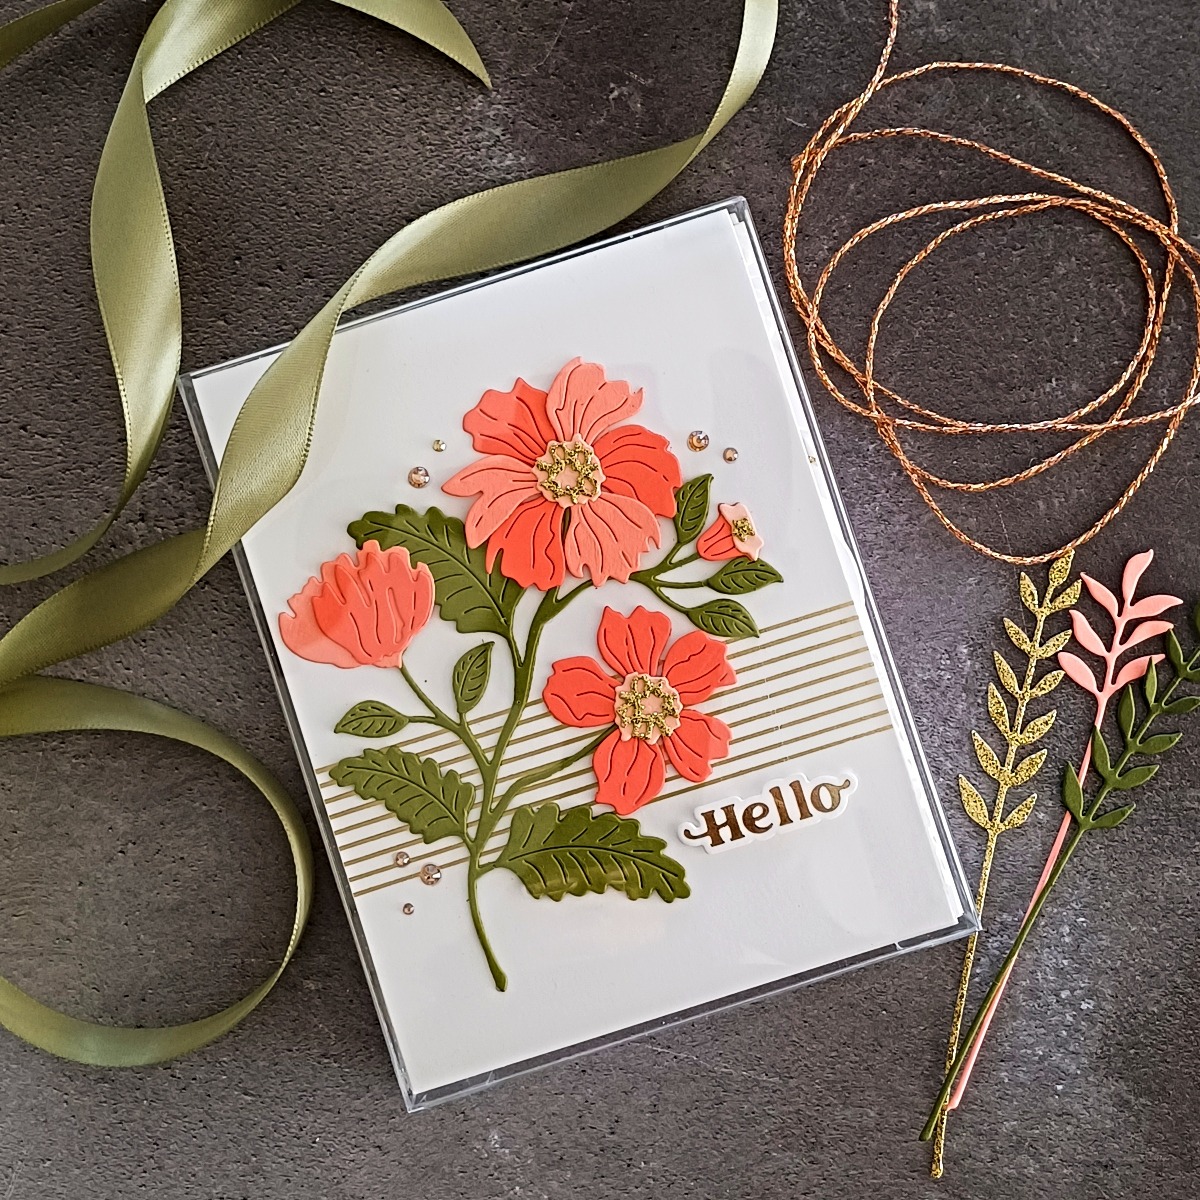
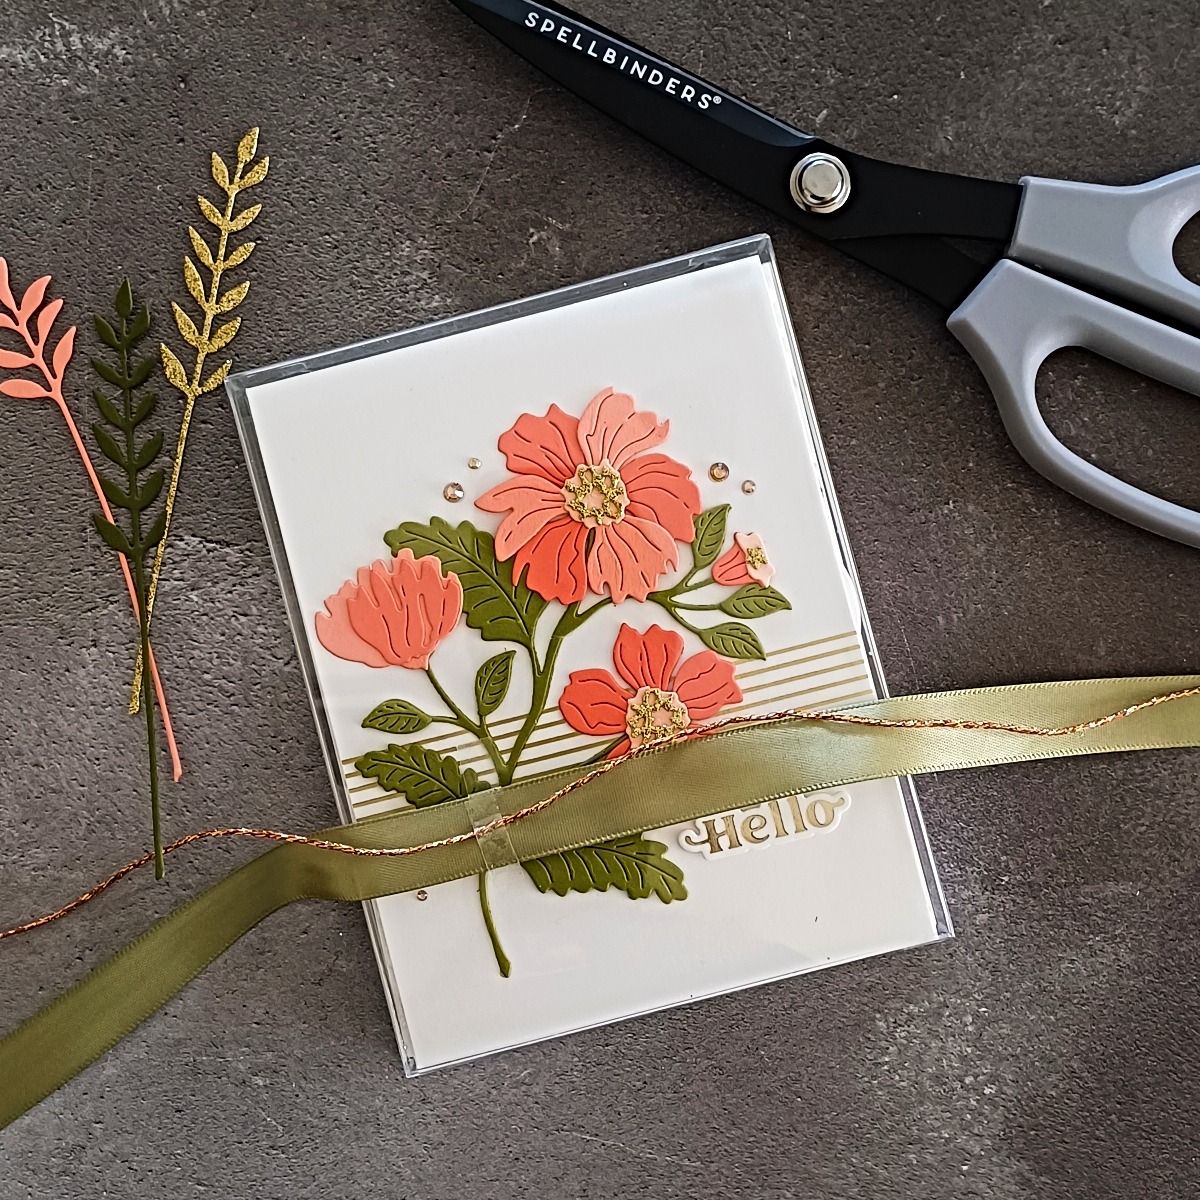
For my flower on this last box, I took the Clematis Etched Dies from the Garden Favorites Collection and cut them from Neenah Solar White Classic Crest 80lb cardstock. The dies have a tiny number plate on them which tells you how much you need to die cut of each which is super helpful! So, two clematis, three centre pieces and then just a few leaves. I didn’t actually end up using the leaves but wanted to have them as an option in case.
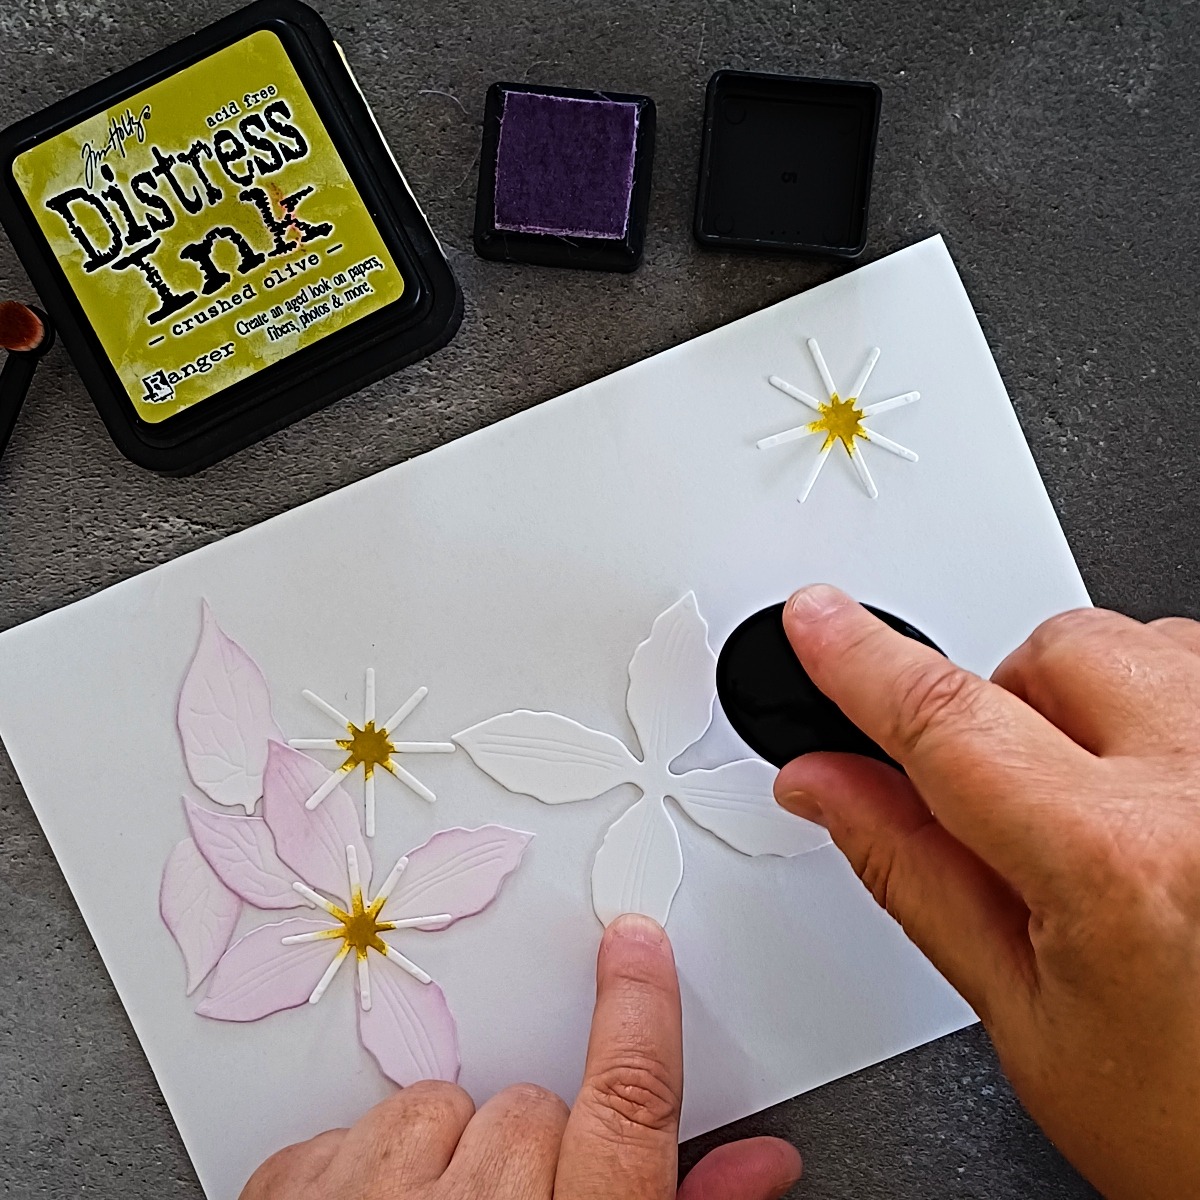
Using blending brushes, I blended a little Crushed Olive Distress Ink onto the centres of each of the three flower centres. I then added a light blend of Milled Lavender Distress Ink to the petals and leaves. Both Crushed Olive and Milled Lavender pick up the colours, or contrast well, with this particular wrapping paper.
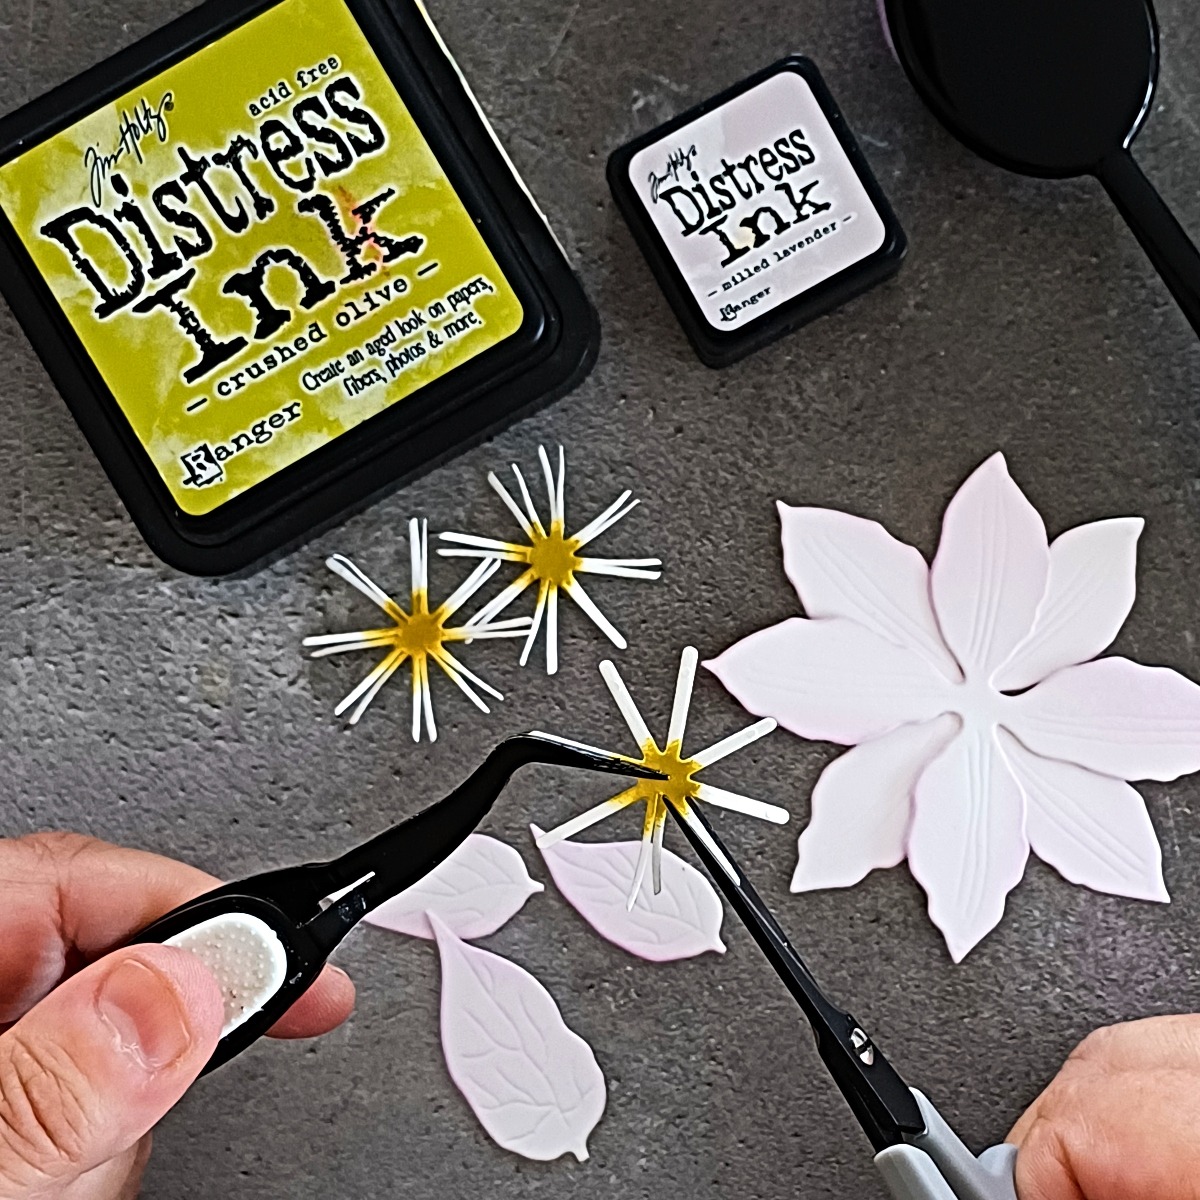
I assembled the flower using a bit of Bearly Art Glue and I also shaped the edges of the leaves upwards using my fingers, so that it isn’t a totally flat Clematis. Next, I took my Spellbinders 4” Detail Scissors and cut each “spoke” of the centre to break them up. I did this with all three centre pieces and then added them into the middle of the flower. I love how cutting up the sections in the centre pieces results in this lovely fluffy middle area.
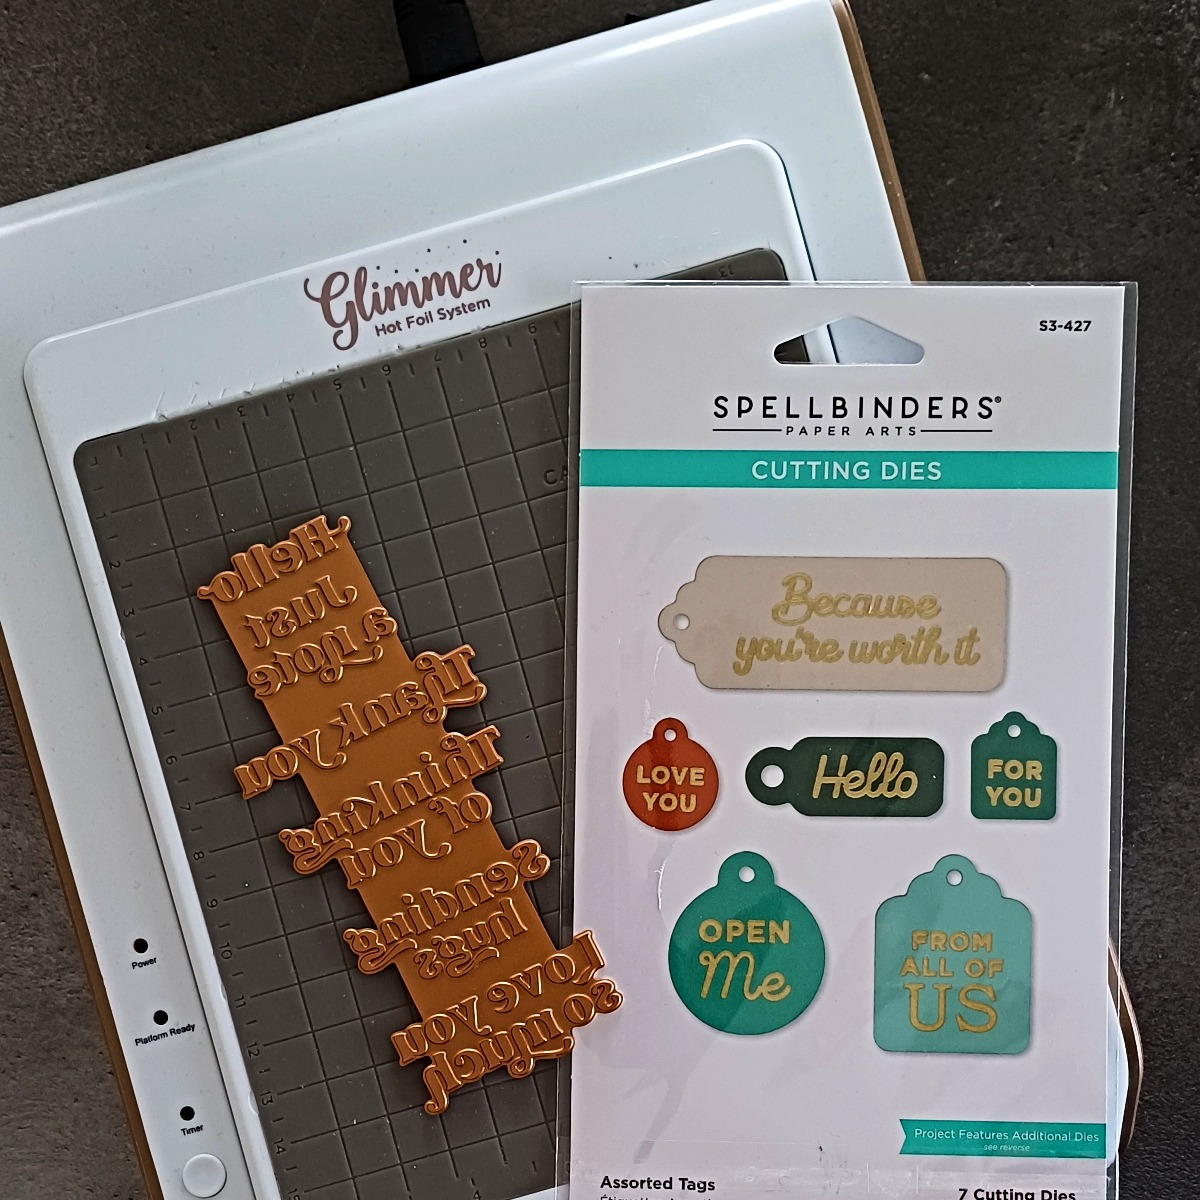
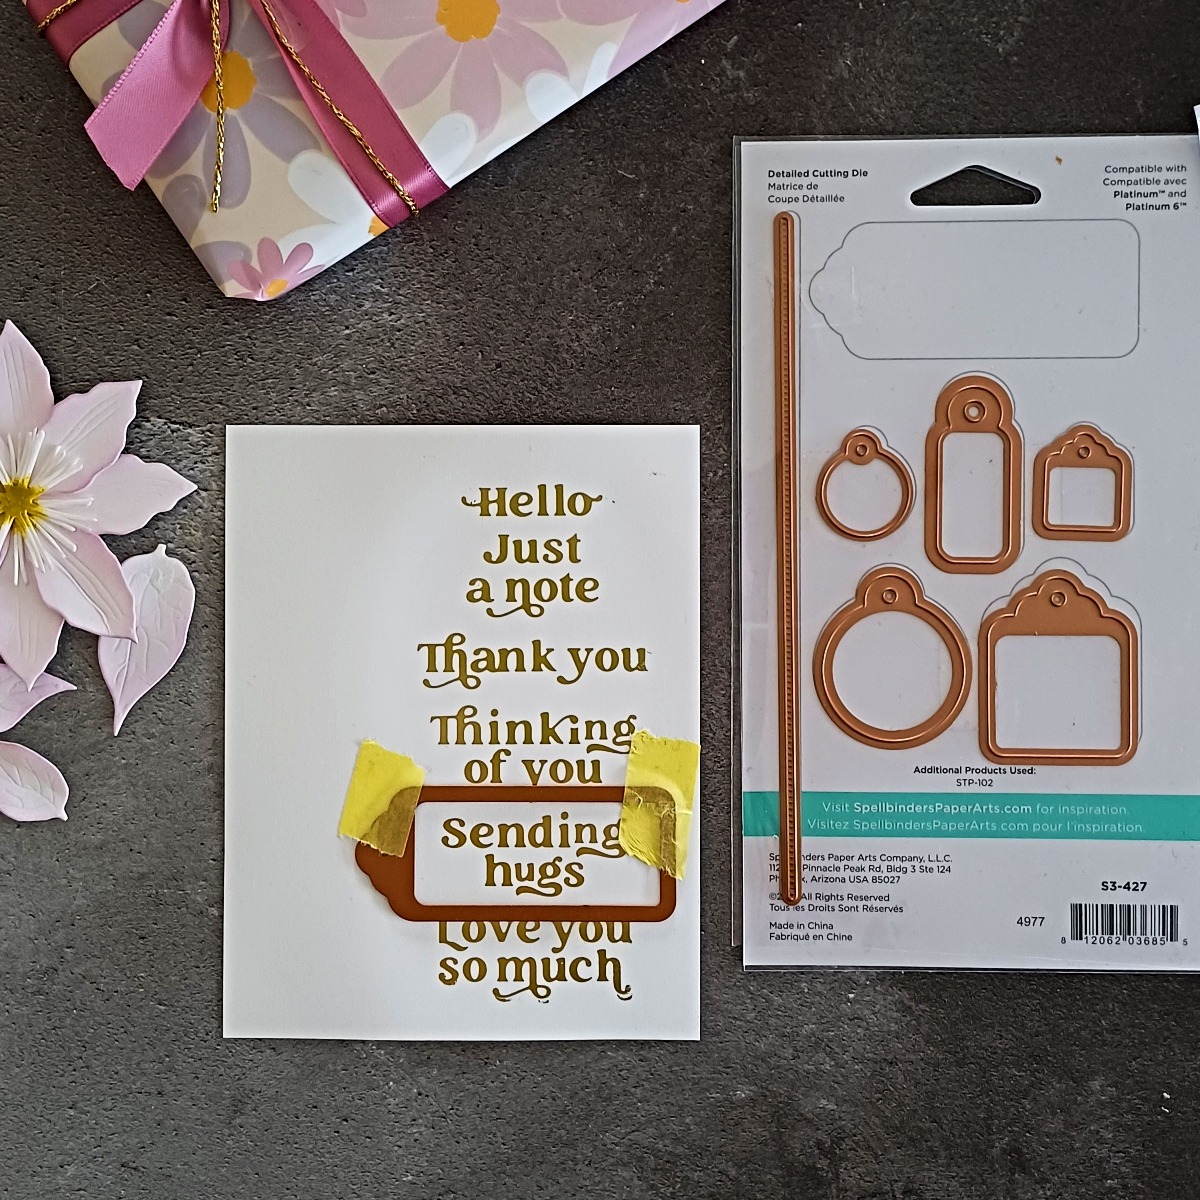
I then switched on my Glimmer Hot Foil System and foiled the Must-Have Sentiments Glimmer Hot Foil Plate and Die Set onto a white card using Matte Gold Hot Foil. Next, I took the largest tag from Assorted Tag Etched Dies and die cut the “Sending Hugs”. It fits just perfectly!
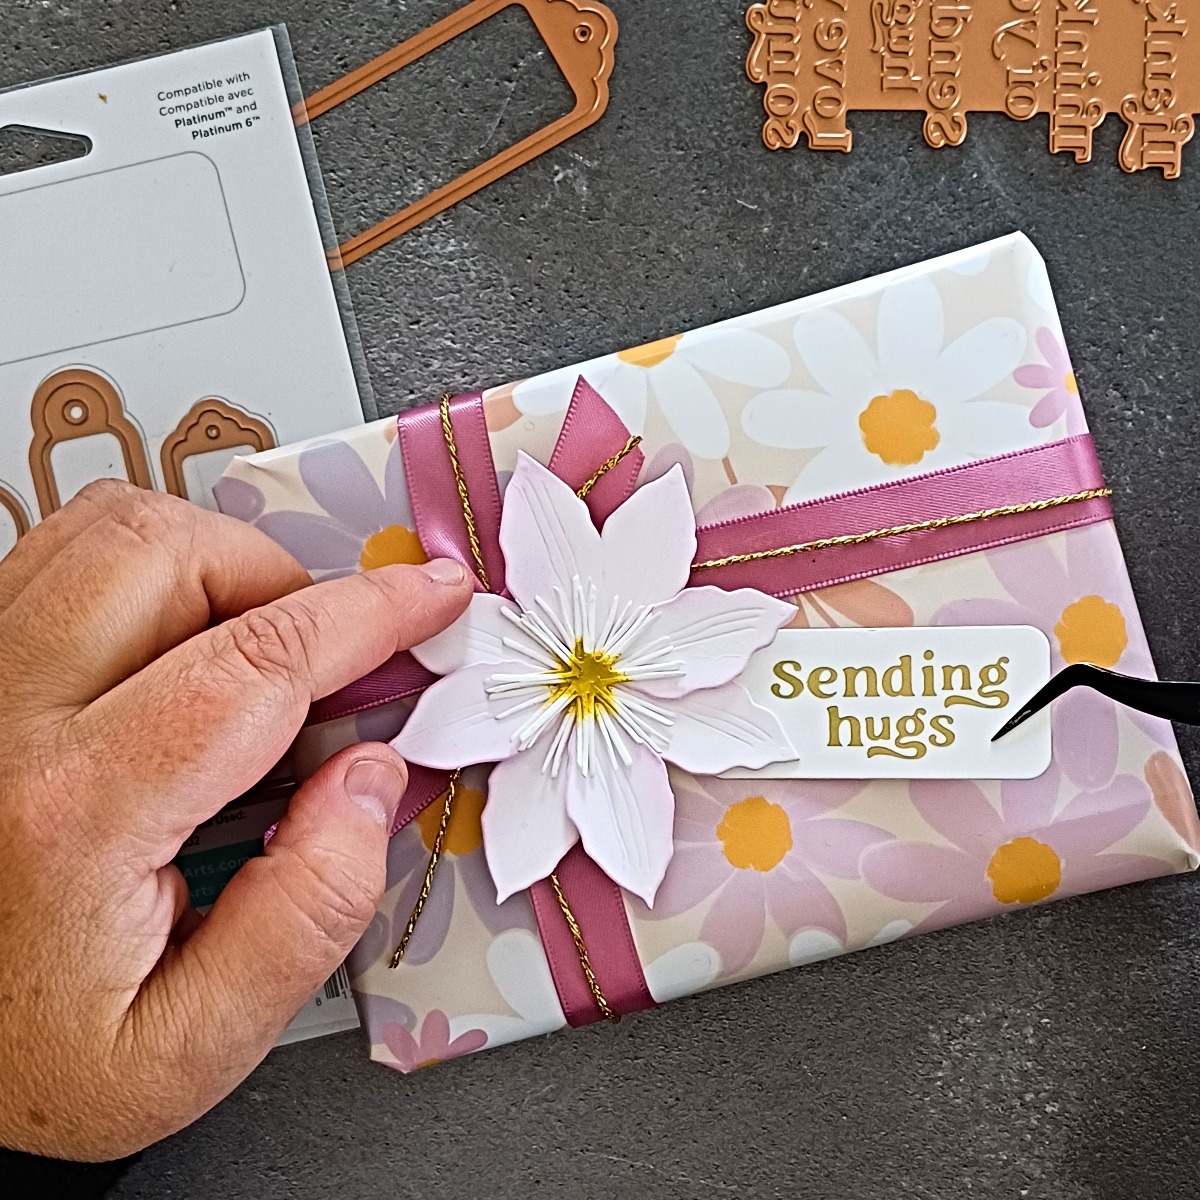
I added the flower onto the box with a double layer of thin foam tape and then adhered the tag just underneath with glue.
That brings us to the end of the post! I hope this gives you some inspiration for wrapping your boxes. Spending that extra time on wrapping the gift really helps to kick up your gift-giving a notch and also gives some love to your crafting supplies in a different way. Thank you so much for joining me here today, If you want to see more of my work, do hop over to follow me at my blog, YouTube or Instagram. I hope that you have a wonderful day, thank you for joining me here today!
Spellbinders Supplies:

Other Supplies
Die Cutting Machine, White Tissue Paper, Hero Arts Glitter Paper Holiday Sparkle, Neenah Solar White Classic Crest 80lb, Concord & 9th Grapefruit & Artichoke, Double Sided Tape, Distress Ink Milled Lavender, Distress Ink Crushed Olive, Thin Foam Tape, Blending Brushes, Hero Arts Tweezers

One Comment
Nancy Huck
I love all your cards and boxes. They are all very pretty. You are very good at what you do. Also love the color peach.