3 Expert Monochrome Techniques featuring Letter Pressed Cards
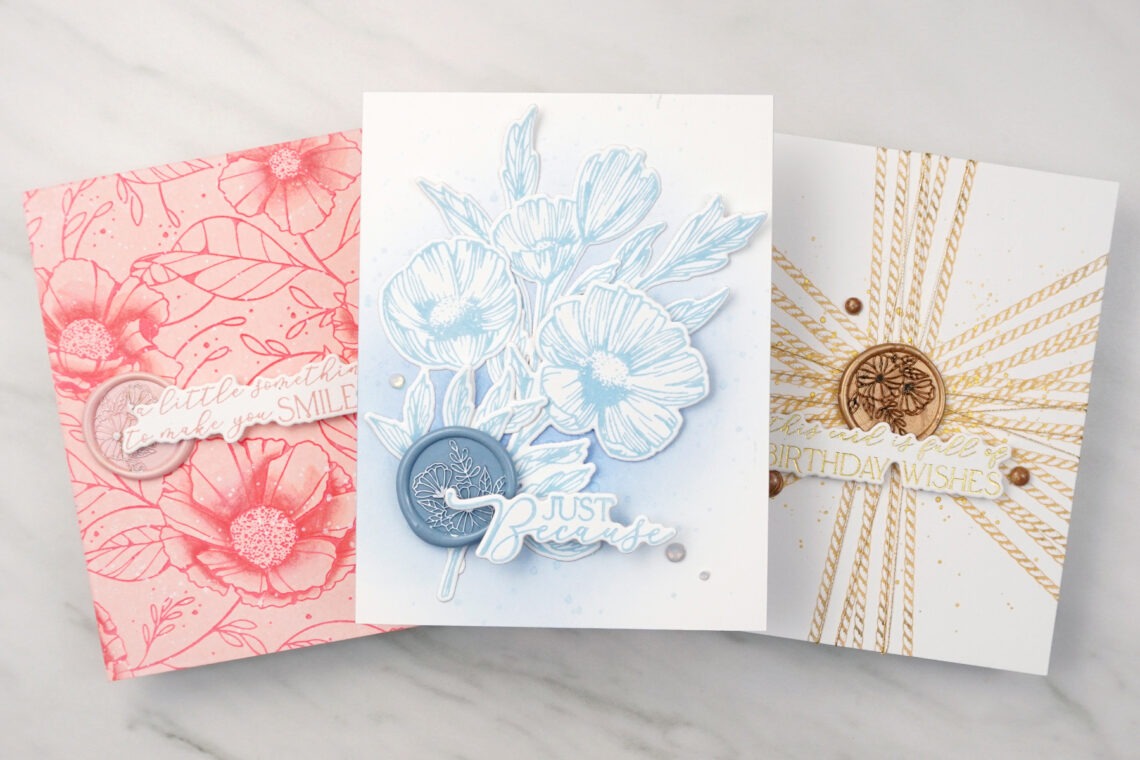
Hi there my Spellbinders’ friends! My name is Jaycee Gaspar and I’m so excited to share three cards featuring the Pressed Posies Collection. This collection features eight sets with one of the products being a Wax Seal Stamp. Let’s focus on monochromatic cards centered around the Timeless Blooms Wax Seal Stamp with designer tricks on getting perfect single-tone letter-pressed cards.
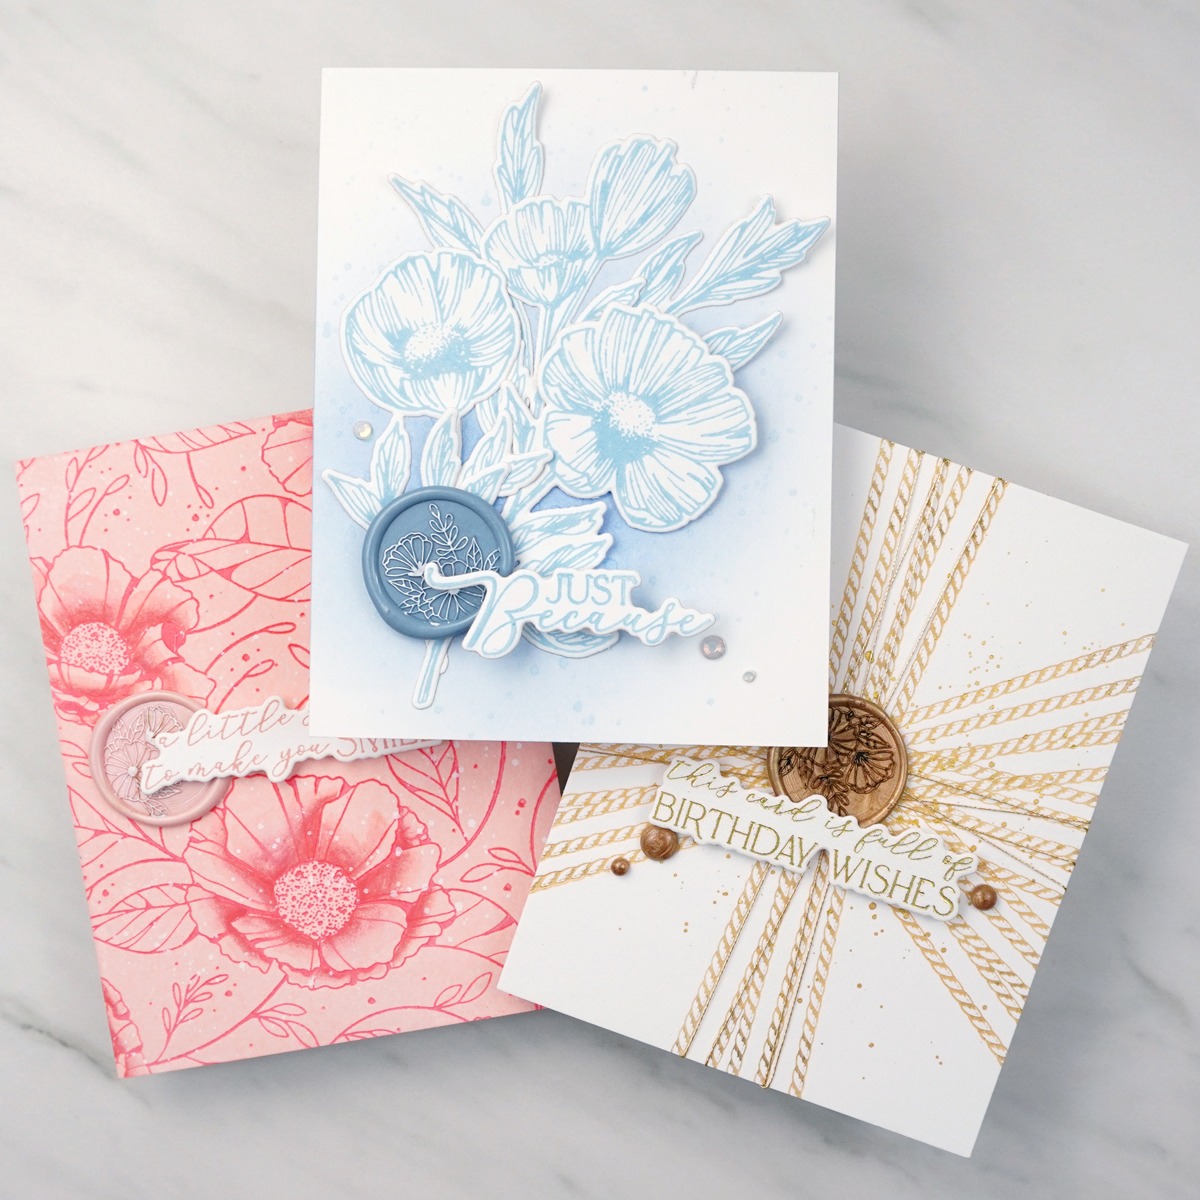
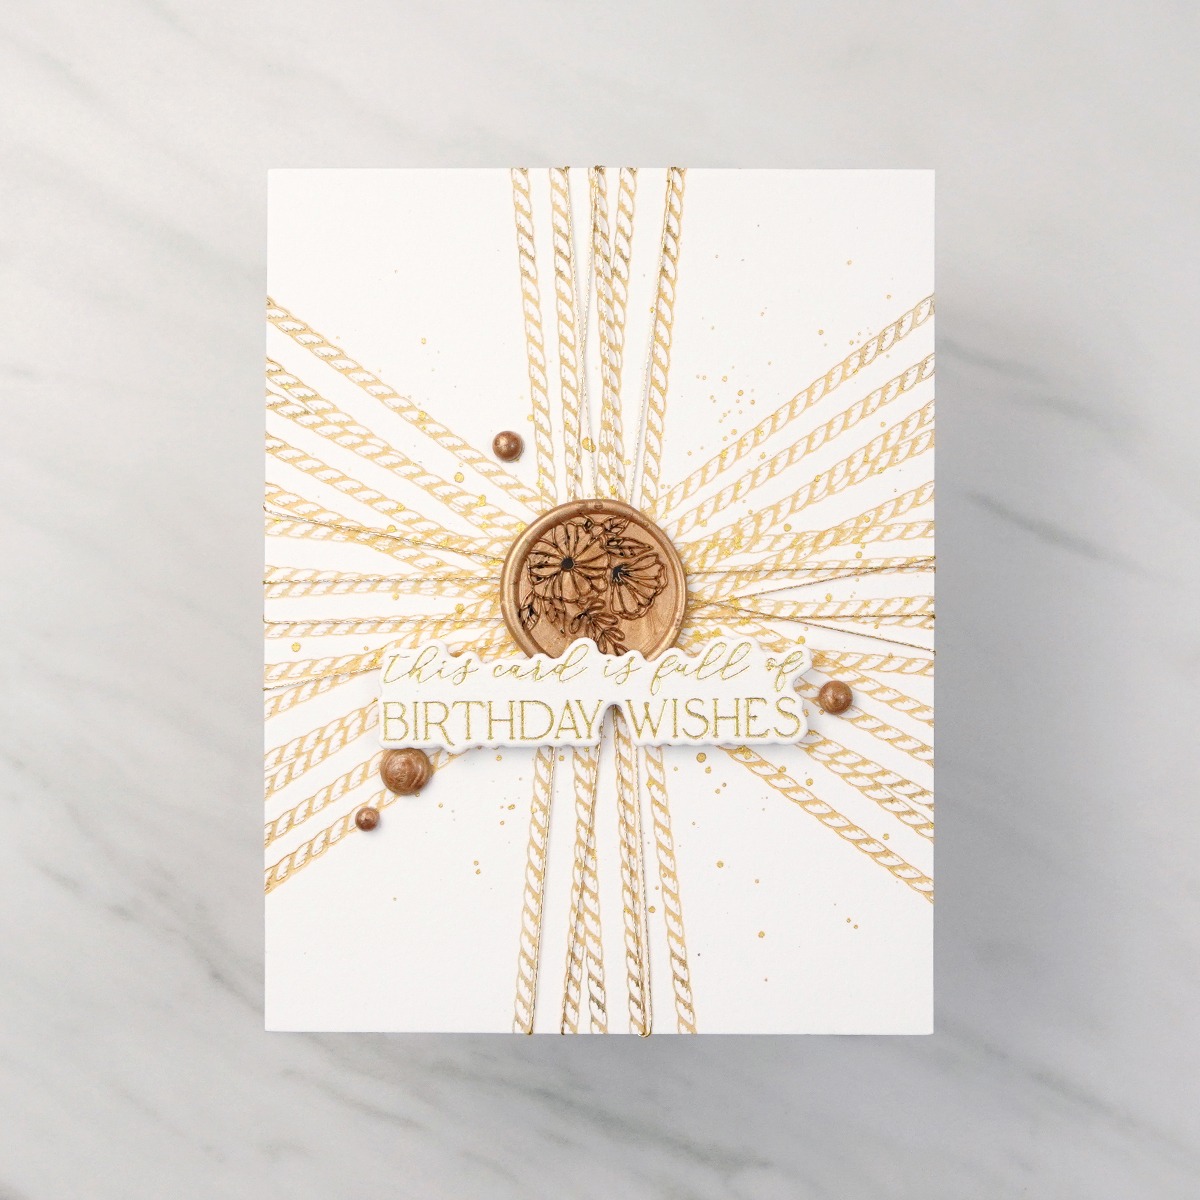
This first card focuses on the Sealed Cord & Faux Seal Sentiments Press Plate and Die Set. I love the whimsical feel of this baker’s twine card which is sure to make a simple yet stunning focal element on your card. The coordinating sentiments also act as faux wax seals for any occasion. To make this card I centered and pressed the sealed cord press plate onto a cotton card panel. I rotated and pressed the image multiple times to get a fully wrapped card front with a gold pigment ink. When making monochromatic cards I like to mix textures to create even more interest on a card front. In this card example, I mixed in gold thread to contrast the sealed cord press plate. I also added Golden Wax Bead ‘enamel dots’ to frame and accentuate the Timeless Blooms Wax Seal. This wax seal also contributes an additional element of texture. I finished this card with metallic gold splatters and a coordinating You are Everything Sentiment Press Plate birthday banner.
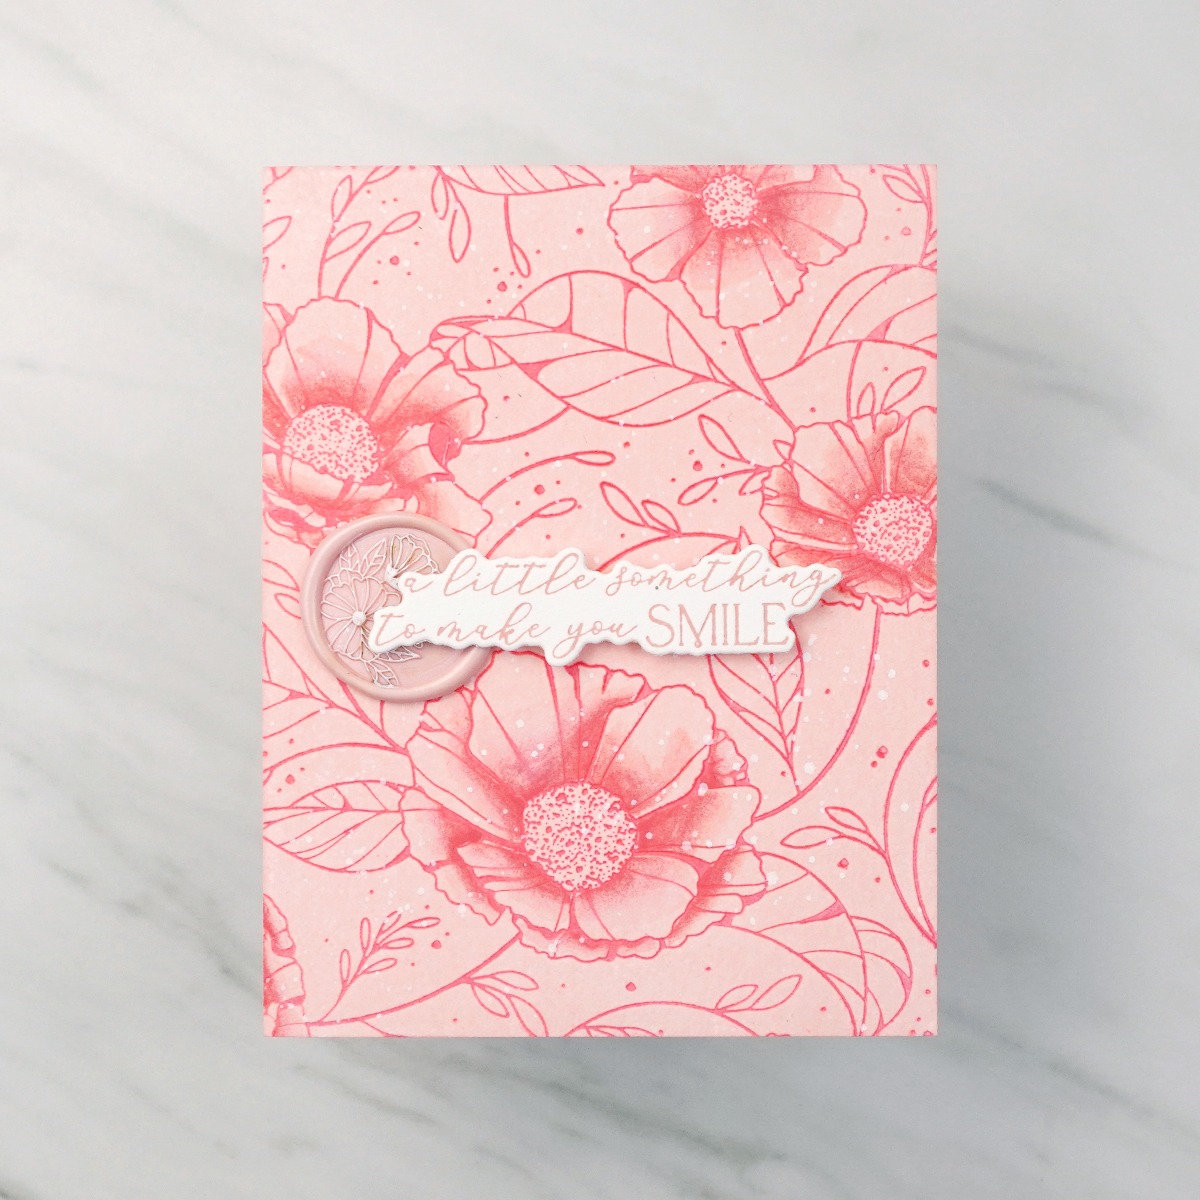
The Cosmos Backdrop Press Plate instantly fills a cotton cardstock panel with beautiful blooms and Art Nouveux-type swirls. The coordinating stencil also makes for quick coloring on the focal elements—though I did not use the coordinating stencil on this card. Instead, I started by pressing a similarly colored ink pad to Velvet Rose Wax Beads to a cotton cardstock panel. Then with a darker tone in the same color family, I pressed the Cosmos Backdrop Press Plate to the inked background. Using a watercolor palette, I added gradients to the petals of the cosmos flowers. I added a Velvet Rose Wax Seal embellishment and pressed a You are Everything sentiment. To highlight focal areas on this beautiful press plate background, I recommend creating gradients of color to offset the linear structure of the press plate. This way, you have contrast and interest on your card front.
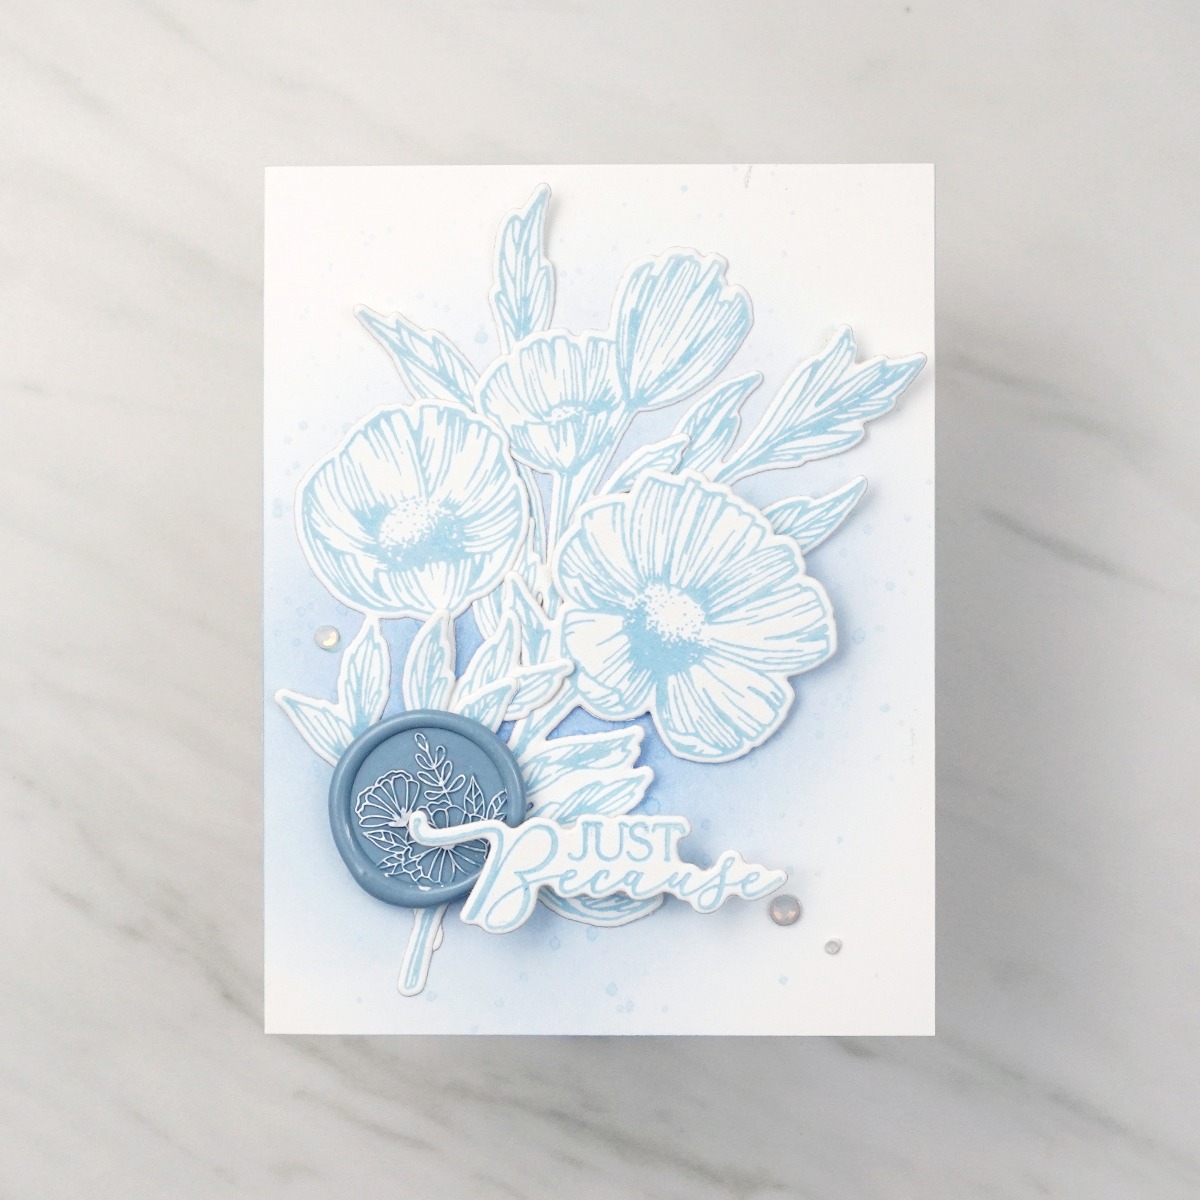
For my final card and design trick, I’ll use the Flower Stems Press Plate & Die Set. This die set features small cosmos stems, foliage, and their coordinating steel dies. I started with dye inks similar in color to the Cloudy Sky Wax Beads. I used the same beads to press the Timeless Blooms Wax Seal image. With this single dye ink, I pressed all the Flower Stems images onto cotton cardstock. Then I used the coordinating dies to cut the three flower and two foliage images. Before arranging the letter-pressed elements to my background, I created a soft gradient to highlight the blooms. After arranging the flower elements, I embellished the card with another sentiment, the wax seal, and some Crystal Mix gems. When creating large monochromatic focal areas, I recommend a distinct foreground area of the card. In this case with the Flower Stems, I made the bouquet my singular focal element to help frame the wax seal and sentiment.
Spellbinders Supplies:

Other Supplies
Altenew-Fresh Dye Inks, Altenew-Ink Blending Tools
Huge thanks to the Spellbinders team for letting me share these three Pressed Posies monochrome projects with you all! You can find more of my card projects on YouTube, Instagram, and at my blog. I hope to see you all again very soon!
4 Comments
Ann
I am awe-struck by how seemingly perfectly circular your wax seals turn out! I’d love to know how you do that!! Do you have a video tutorial for that?
JGaultier
Hi Ann, sadly I do not have a video tutorial on getting perfectly round seals. But I do ensure I don’t melt too many wax beads before ‘stamping.’ Four beads is just the perfect amount for the look I want. And if I don’t like the result, I just melt it again.
Ann
You can by wax seal moulds
Merla Parker
Have you tried glimmering on Better Press Paper? Wanted to combine these two techniques but the glimmering was a huge disaster and other paper doesn’t works so well with the BetterPress.