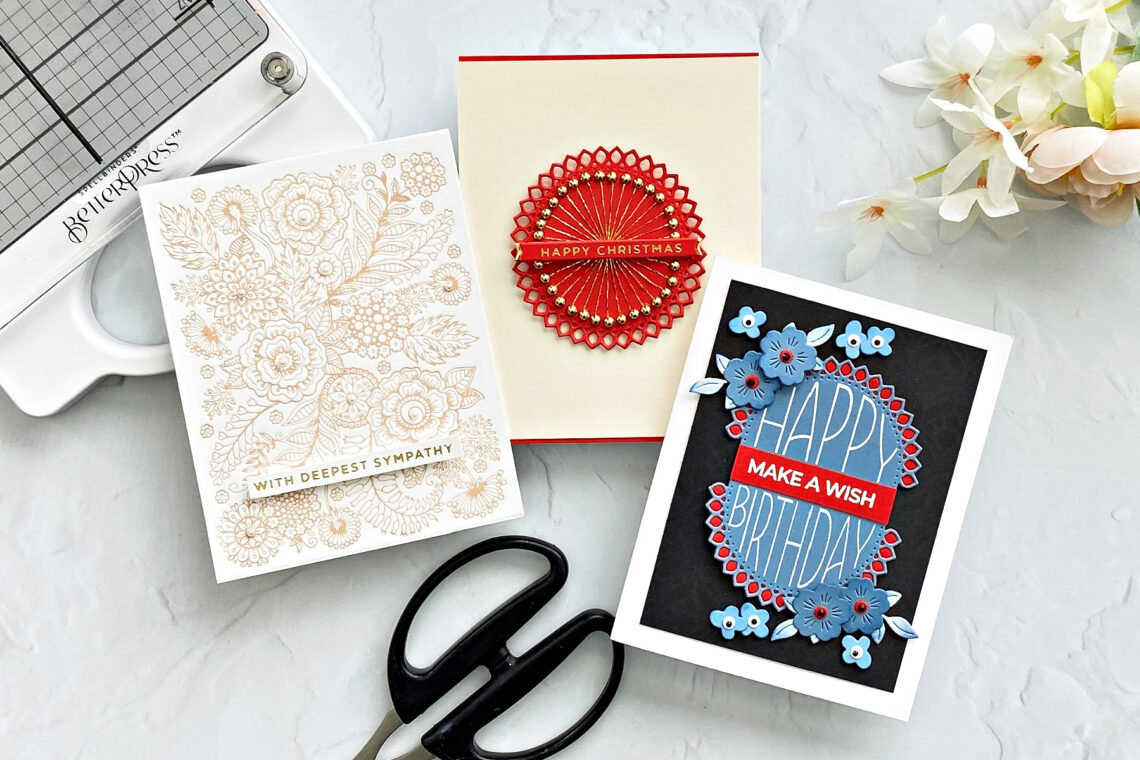
Kaleidoscope Arch – Versatile Products Rock!
Hello crafters! Joan Bardee here. Today I’m sharing a few cards using the Kaleidoscope Arch Collection. This collection has a little bit of everything – beautiful dies, a coordinating clear stamp set, and a gorgeous BetterPress LetterPress plate.
I love products that can be used in different ways. Versatility keeps us from getting bored and stretches our crafty dollars. Here are a few ideas.
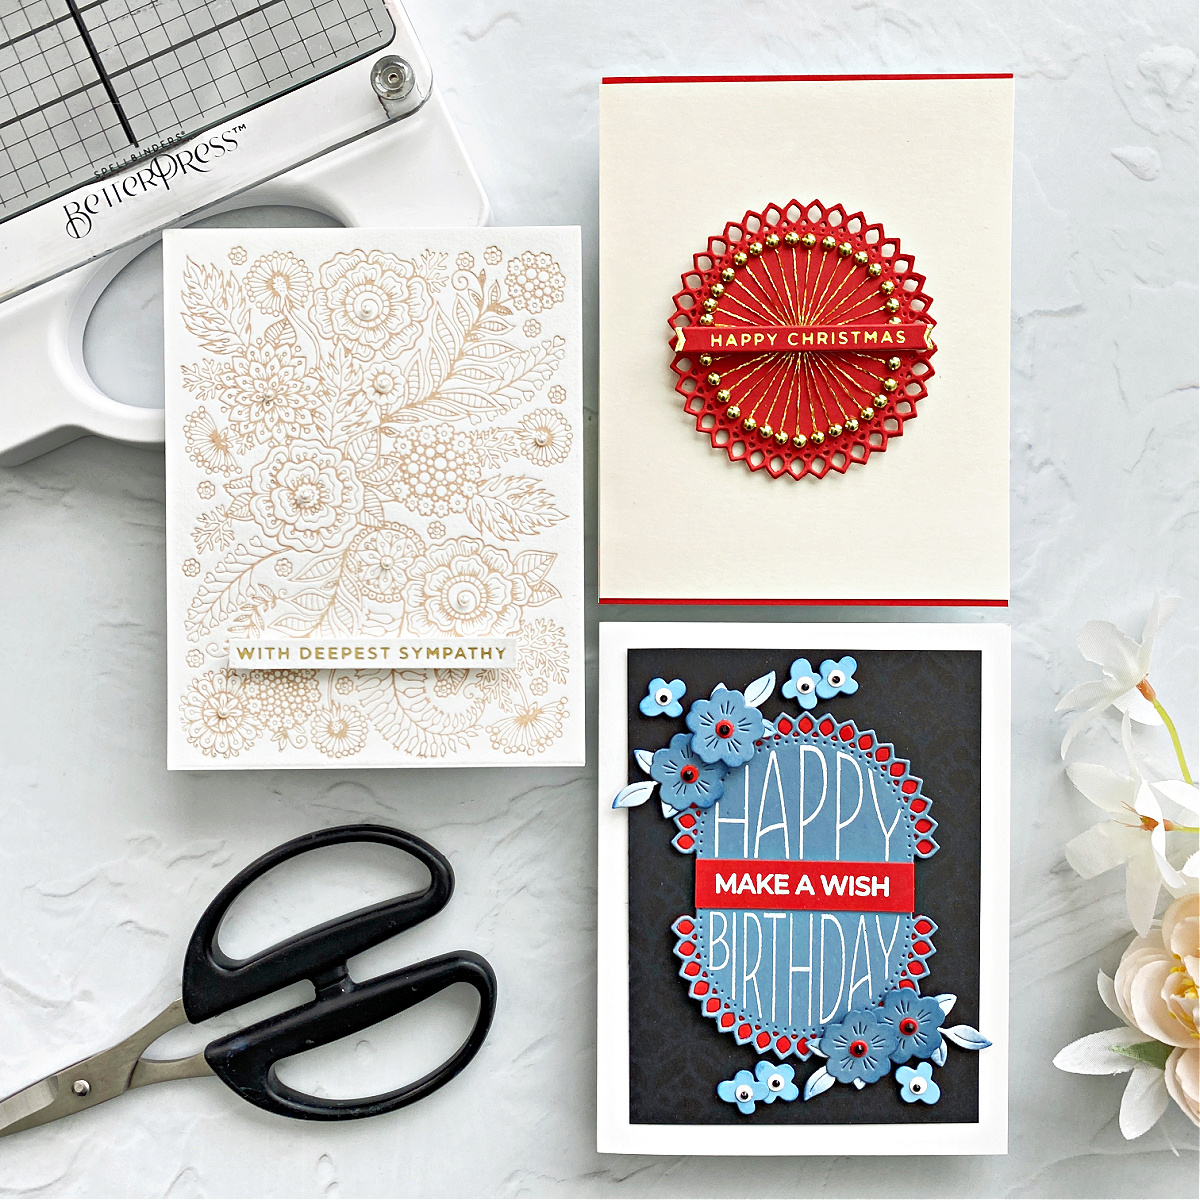
Quick and Elegant Sympathy Card
Confession: I rarely make sympathy cards. My cards seemed too “crafty” for such a solemn occasion. But the BetterPress LetterPress produces professional quality results – one that is worthy of a sympathy card.
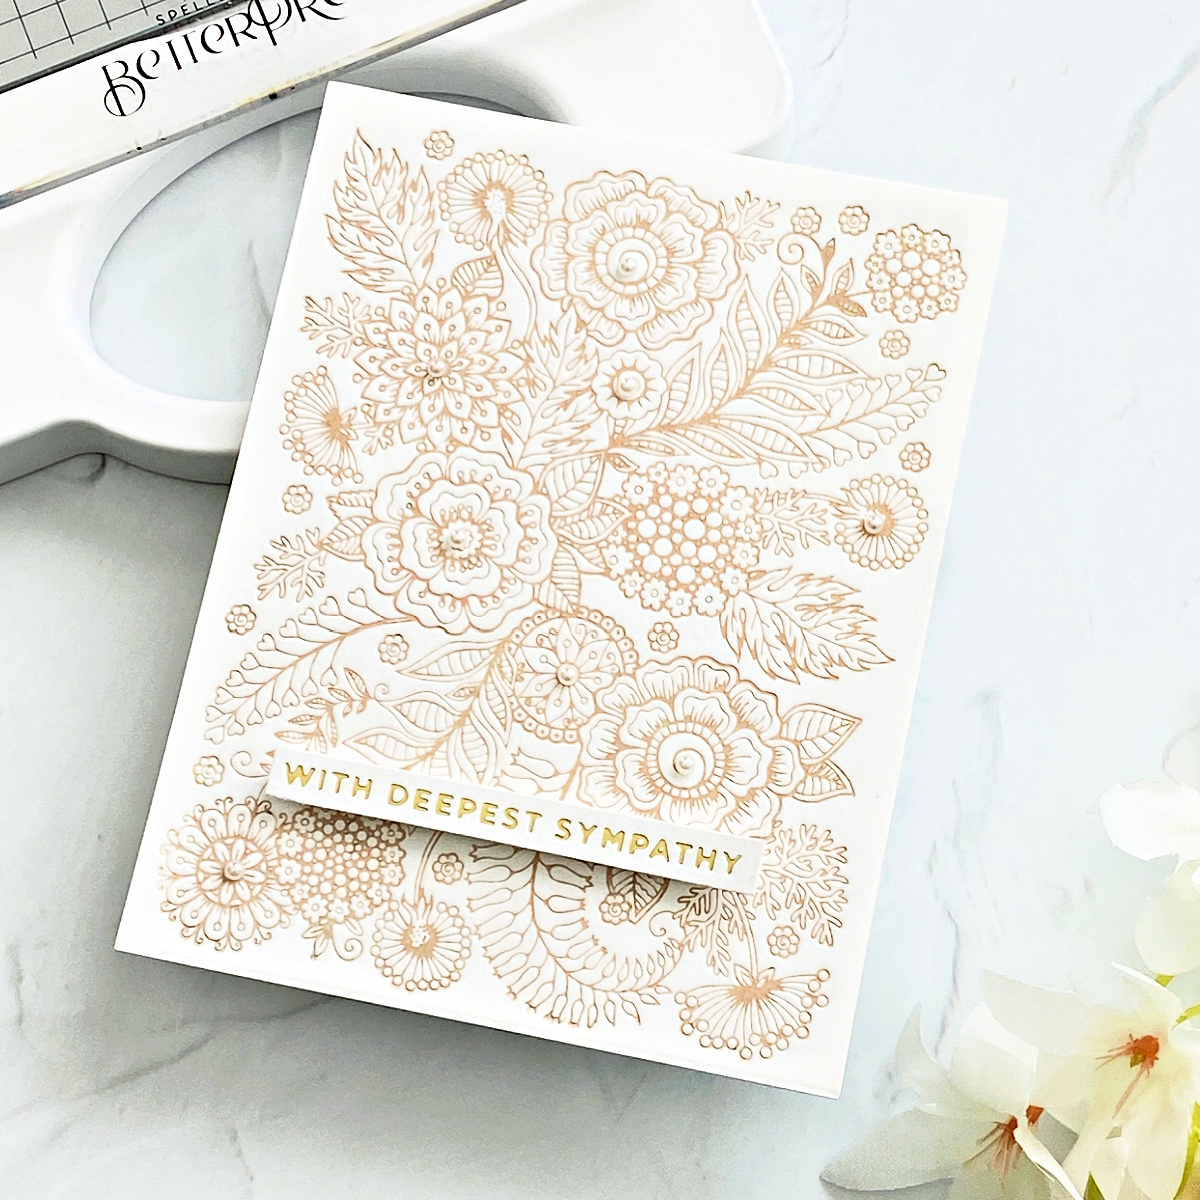
- Ink up the Kaleidoscope Flowers Press Plate with beige dye ink.
- Run the plate through the BetterPress onto a piece of Porcelain BetterPress LetterPress
- Hot foil a sentiment from Mini Everyday Sentiments Hot Foil plate with gold foil and trim.
- Adhere the sentiment with foam tape and adhere the panel to an A2 white card.
- Adhere Fashion Oyster Color Essential Pearl Dots.
That’s it. You’ve made a simple elegant card, and it took so little time that you clean up your mess, have a cup of coffee, and start on the next one!
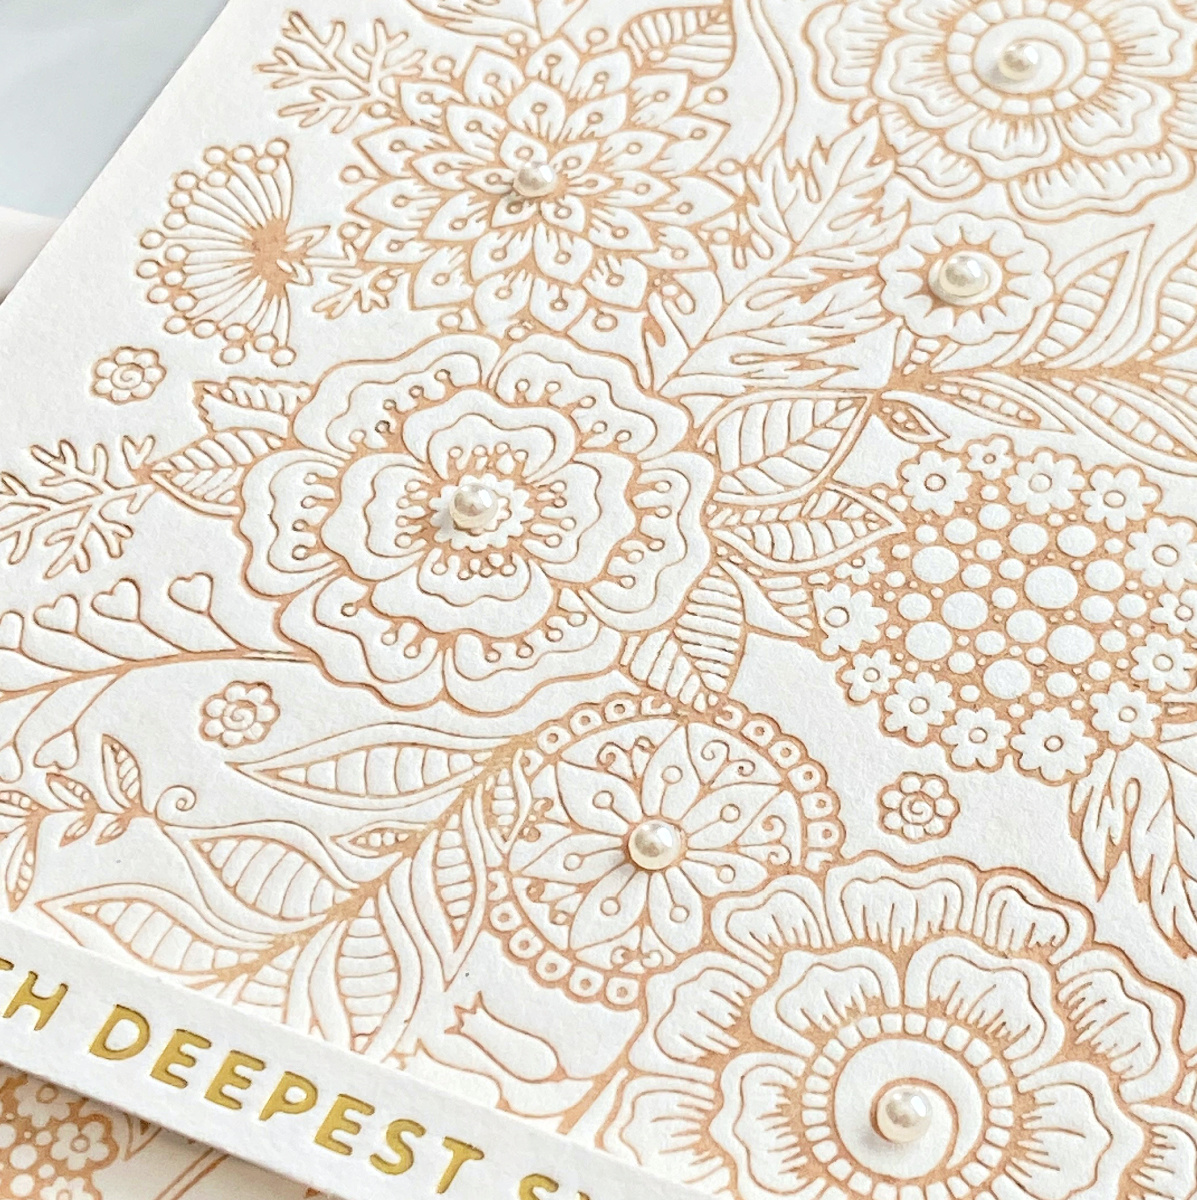
I didn’t have a BetterPress ink color that was pale enough for the look I wanted. I used a felt dye ink cube instead. BetterPress ink would have resulted in an even more crisp result, but I am smitten with this. So, experiment with the inks you have. And if we had touch-o-vision you could run your hand over this and feel the impression.
TIP: Do not fear the BetterPress! I bought it in June, and it was unopened until October. I thought it would be tricky. A child could get a perfect result. And, to stretch the use of this product, you can hot foil with the BetterPress plates. (See below)
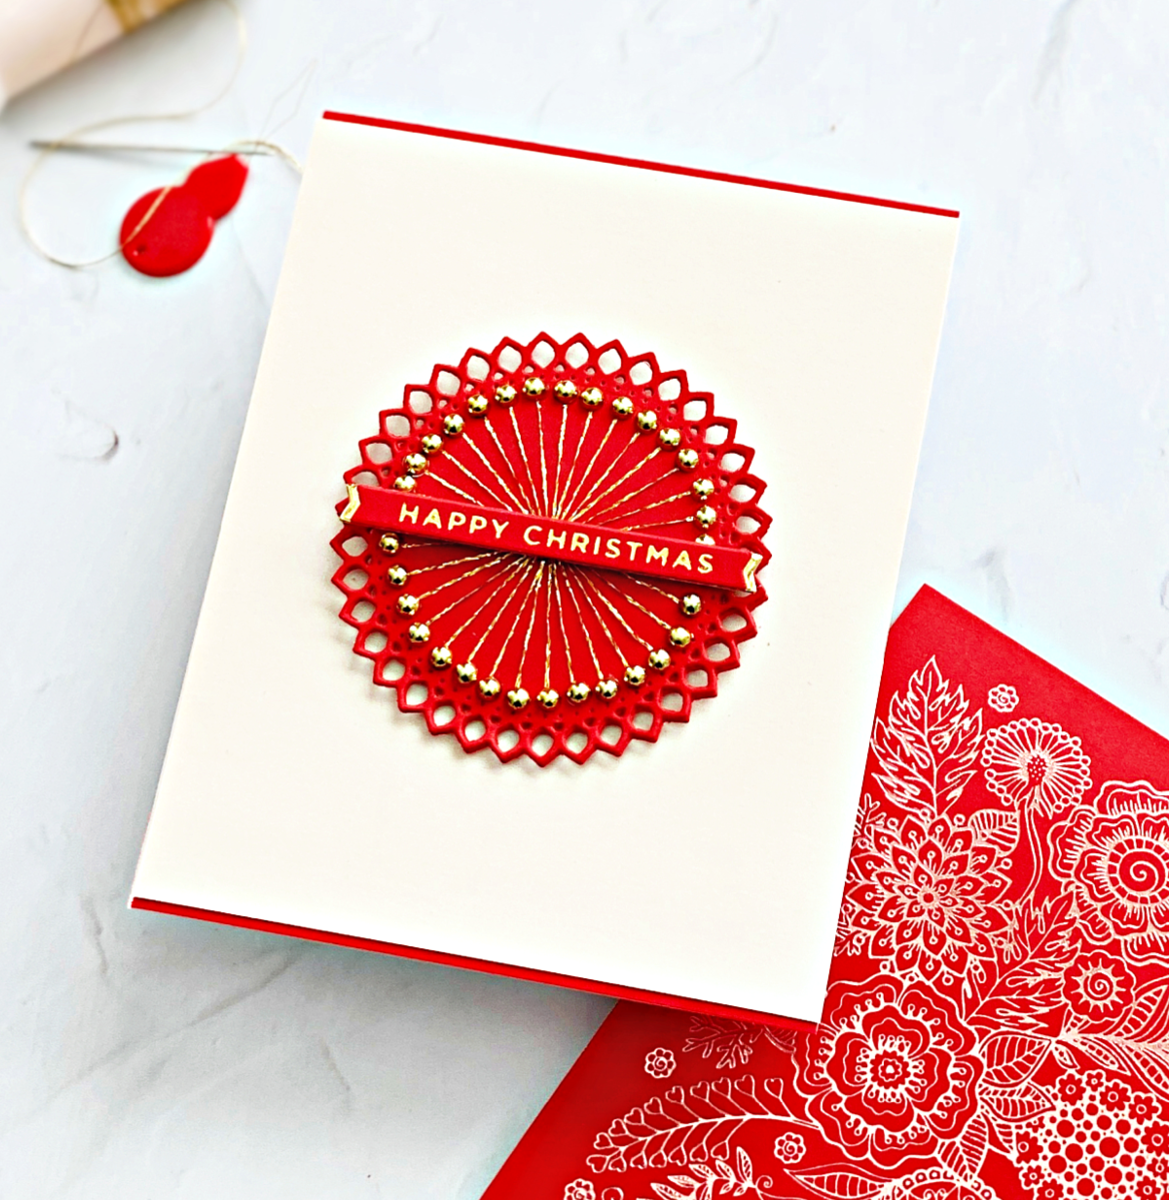
Red and Gold Christmas Card
The Stitched Kaleidoscope Arch Etched Dies give you the option of using them stitched or non-stitched. This type of versatility makes my heart happy!! Here’s how they work.
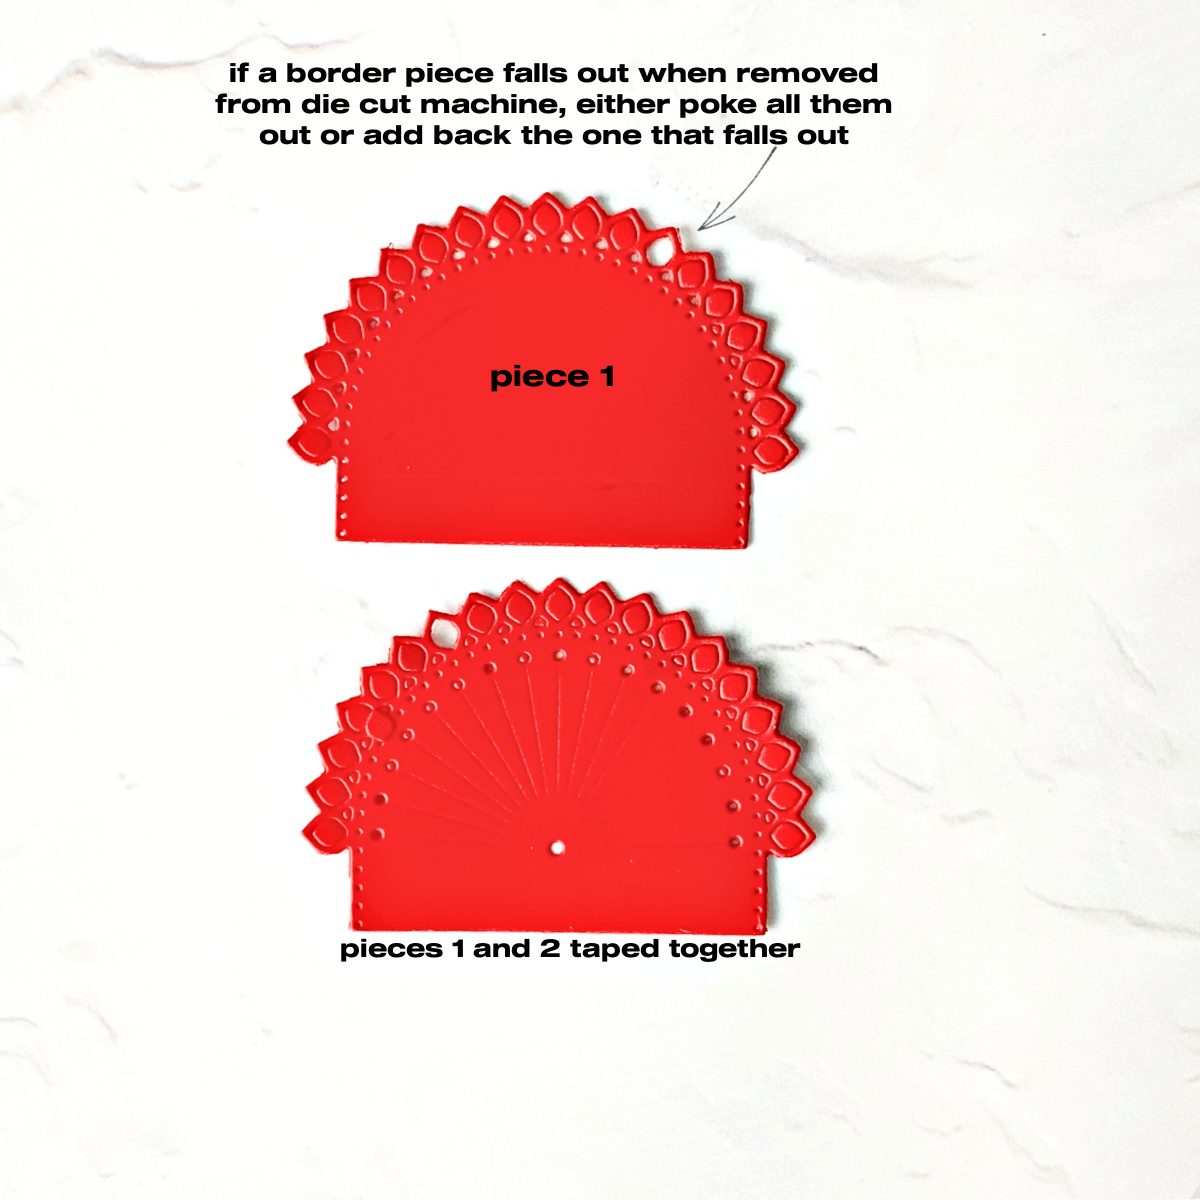
If you look closely at the photo, you can see that I have taped piece 2 inside piece 1 so that it will only cut out one image. (It was crooked, so I straightened after the photo!)
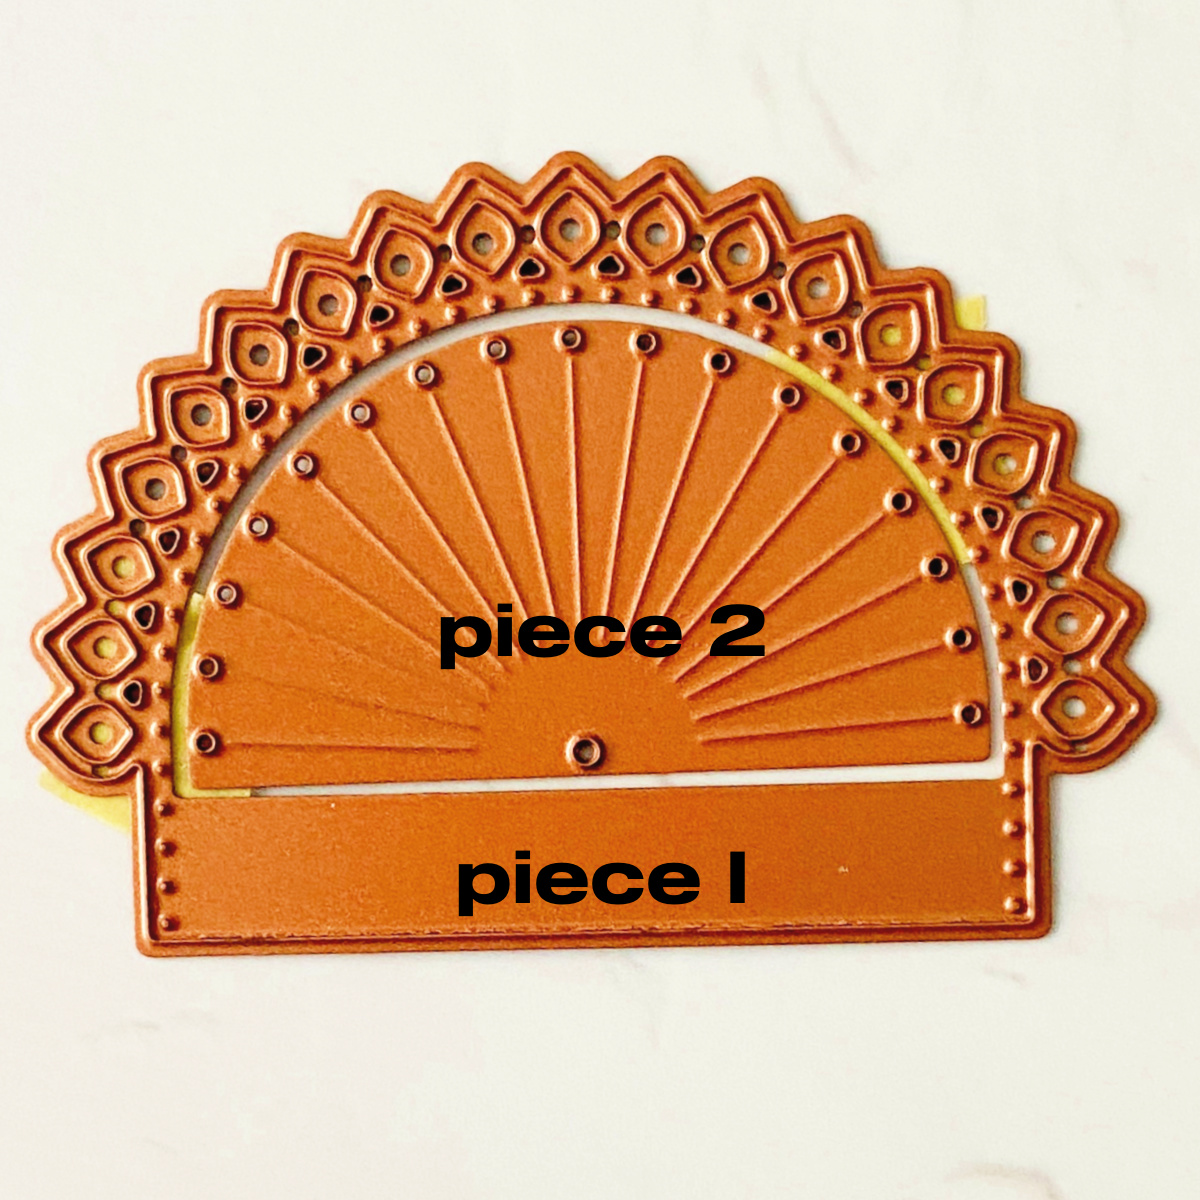
Here’s are the results if you run just piece 1 through your die-cuting machine, or if you run both pieces 1 and 2.
To Make the Red and Gold Christmas Card
- Tape both pieces 1 and 2 of the dies together, making sure that piece 2 is centered.
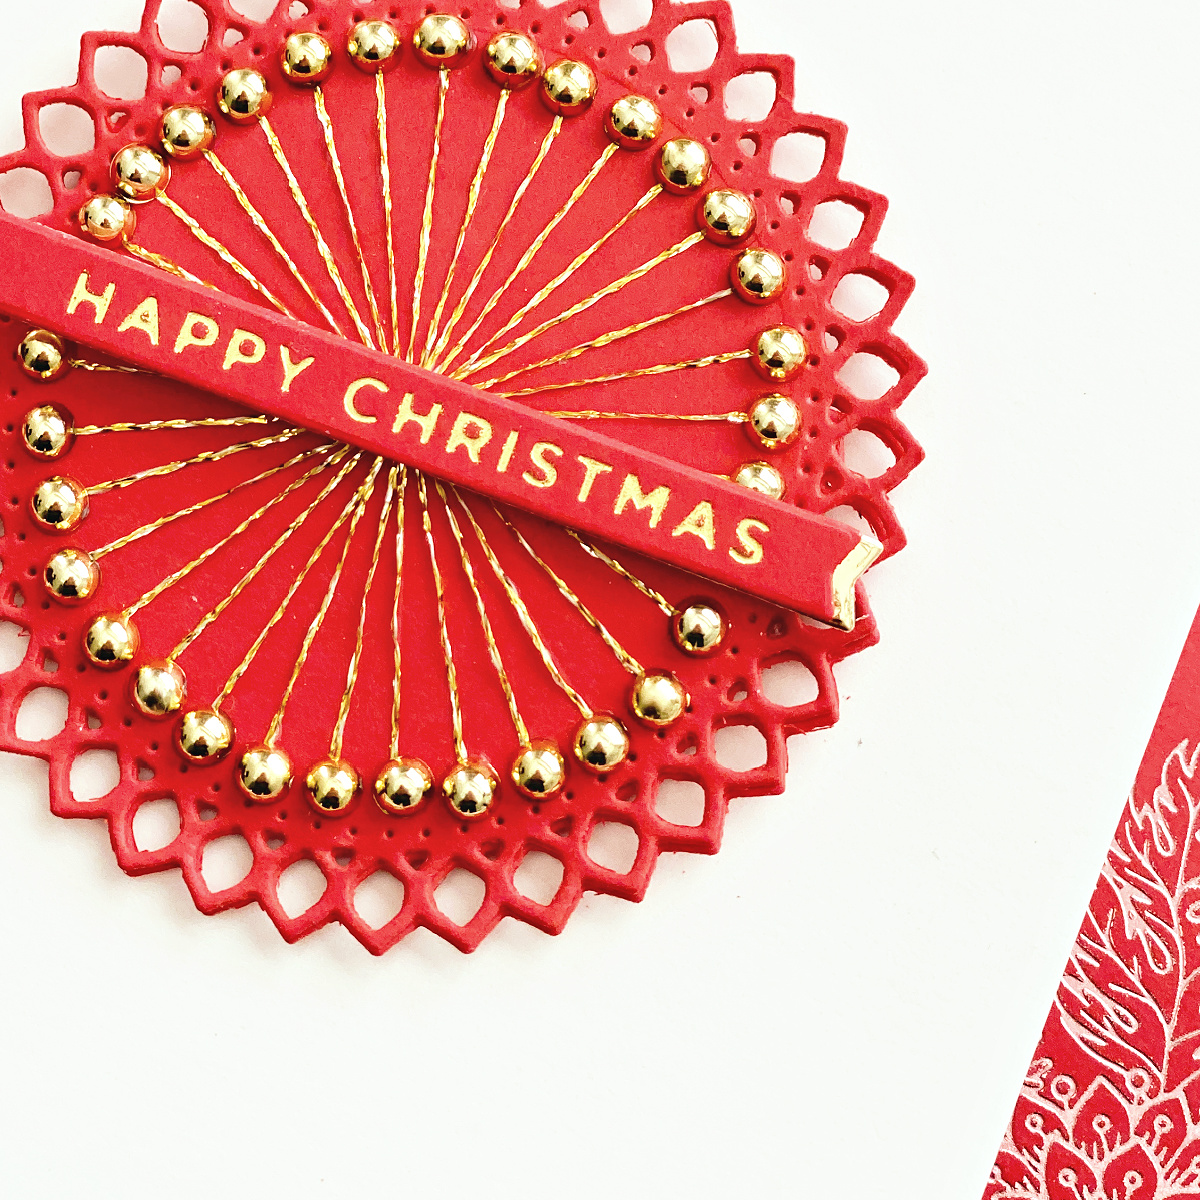
- Run the taped dies from Stitched Kaleidoscope Arch Etched Dies through Platinum 6 twice in Poppy Field cardstock.
- Stitch both Poppy Field die cuts using DMC Light Gold Diamant Metallic Thread.
- Trim off the bottom of the Poppy Field die cuts (without cutting the center bottom hole) so that the 2 dies form a circle.
- Die cut — using Piece 1 only — a piece of Poppy Field cardstock two times and trim. This isn’t necessary but it will make the stitched circle medallion sturdier.
- Adhere both sides together on the back of the stitched circle.
- Hot foil a sentiment from Glitter Wishes Glimmer Hot Foil Plate in gold on Poppy Field cardstock.
- Adhere Fashion Gold Embellishments.
- Trim Alabaster cardstock and adhere the medallion in the center.
- Add strips of Poppy Field cardstock to the top and bottom of the Alabaster panel.
- Adhere to a white A2 card.
- A holiday card with a non-holiday product. Love that.
Too much red and gold can overwhelm a design. That is why I left most of this card plain. You can see in the picture above that I hot-foiled in gold a piece of Poppy Field cardstock using the Kaleidoscope Flowers Press Plate. It came out perfect – but that’s a lot of intense color for one card. Still deciding how to use it.
No Stitching Happy Birthday Card
Because there is no stitching in this card, I’m using piece 1 only and not piece 2 of the die.
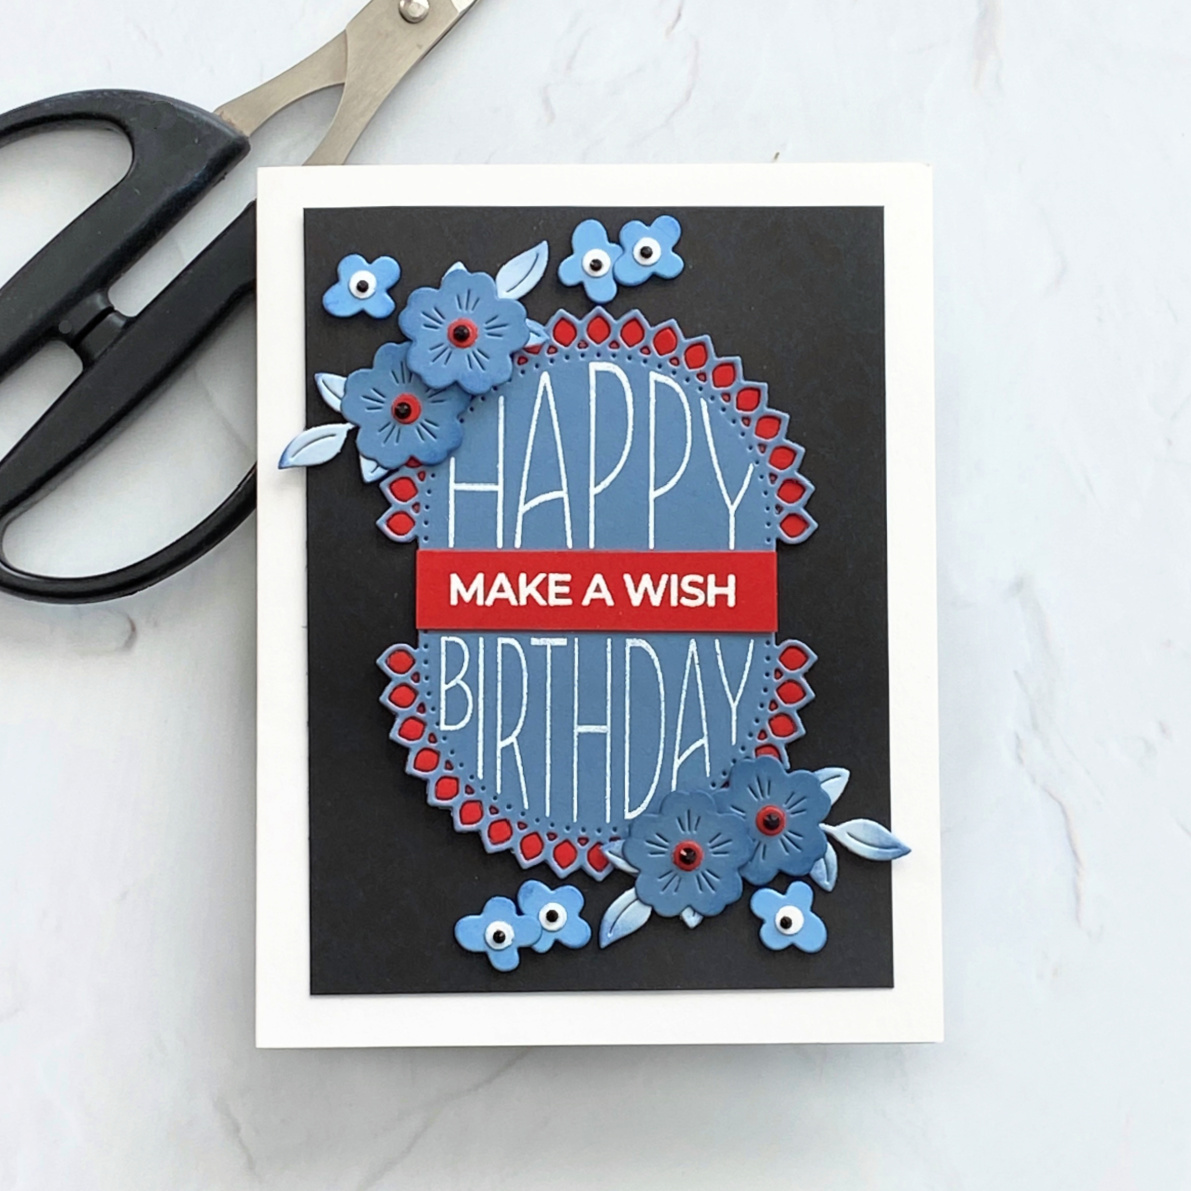
- Die cut most of the flowers and leaves in Stitched Kaleidoscope Arch Etched dies as shown using 3 shades of blue Spellbinders Essentials Cardstock – Partly Cloudy, Raindrop, and Glacier, and in Poppy Field, and White.
- Ink blend around the flowers and leaves and adhere centers to flowers. Set aside.
- Stamp Happy and Birthday from Kaleidoscope Arch Sentiments Clear Stamp Set, trim, on 2 separate pieces of Partly Cloudy cardstock in Versamark and emboss in white.
- Die cut using piece 1 the sentiments and poke out the Partly Cloudy pieces that form a border.
- Die cut using piece 1 the main image twice again (one for the top and one for the bottom) in Poppy Field cardstock.
- Using small pieces of Best Ever Craft Tape, tape the back of the die cut so that the small Poppy Field cardstock pieces will not fall out.
- Adhere the Partly Cloudy layer to the Poppy Field layer and voila, a beautiful border to frame the sentiments.
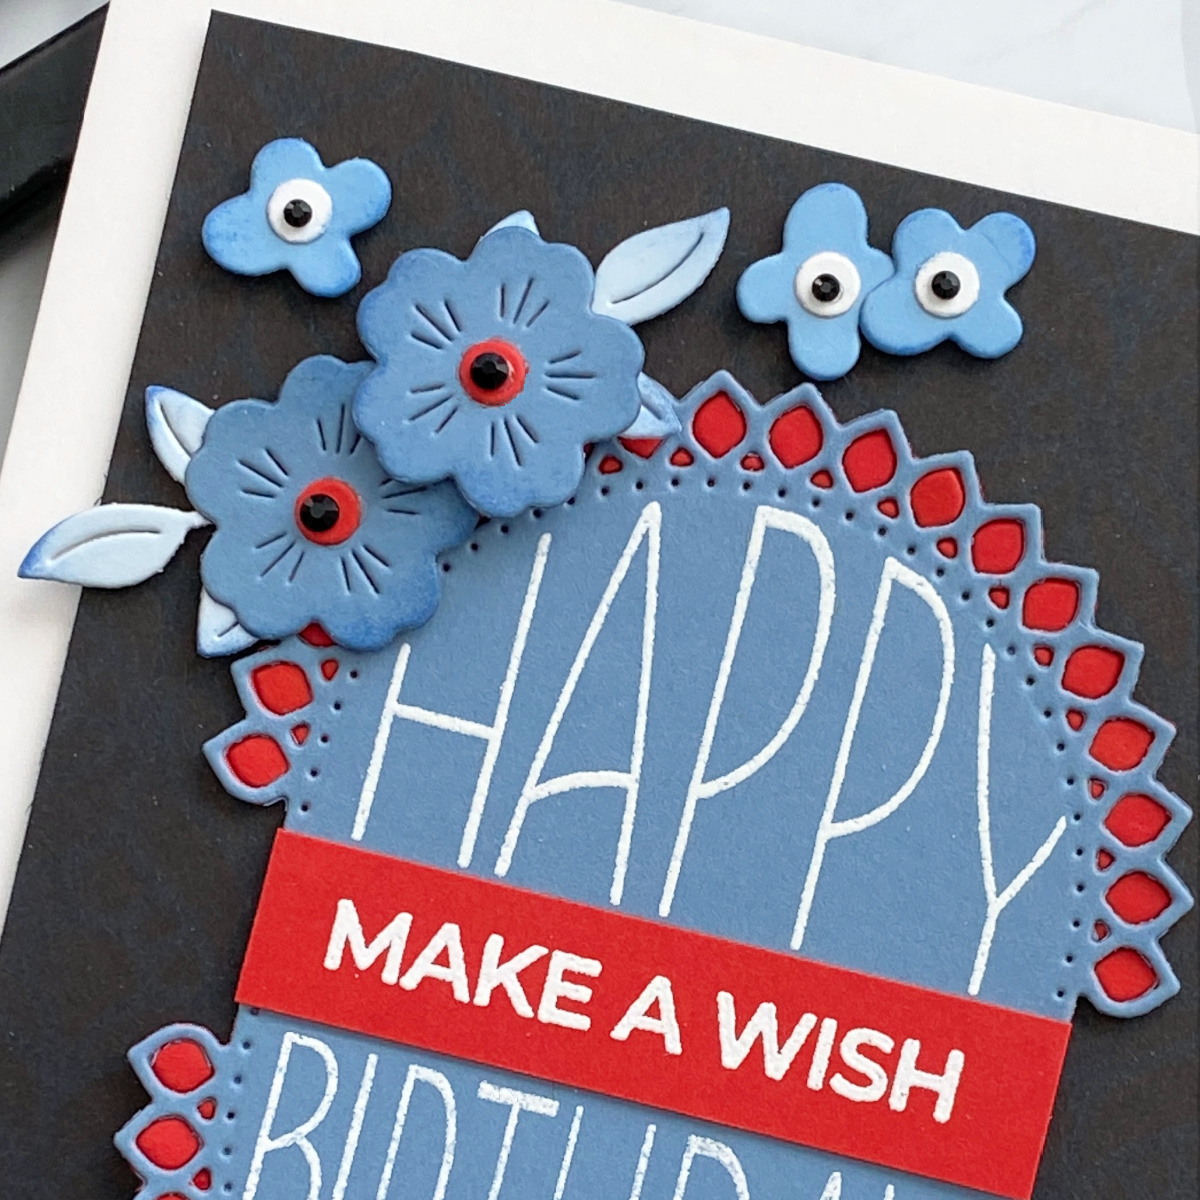
- Stamp and emboss the Make a Wish sentiment from Kaleidoscope Arch Sentiments Clear Stamp Set, trim, and adhere.
- Glue the framed sentiment to the center of a 5” x 3 ¾” panel of Onyx
- Frame the flowers and leaves around the sentiment and add Onyx Color Essential Gems to the centers.
- Adhere to a white A2 card.
Thanks for reading and thanks to Spellbinders for having me.
Spellbinders Supplies:

Other Supplies
Paper trimmer; Versamark, foam tape, blender brush, scissors.
3 Comments
Delia Wilkes
Absolutely beautiful cards, love them! Thank you for sharing your amazing creativity.
Kelly Bryant
So clever, Joan! I do love your clean and simple esthetic. Sympathy cards are challenging and your take is perfection. Thanks for sharing!
Katalin Penner
Thes card are so beautiful! Love them all.