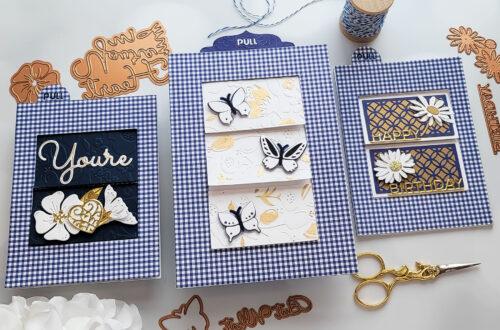
Easy Masculine Cards with the Fair Winds Collection
Hi there, this is Annie Williams and I’m thrilled to be back on the blog today to share a couple of easy masculine cards made with the Fair Winds Collection by Dawn Woleslagle. The beautiful nautical stamps, stencils and dies in the collection inspired me to create three simple yet pretty cards for a variety of occasions.
Father’s Day Postcard
The Uncharted Waters Stencil Set creates such a beautiful painterly scene, I wanted to feature it like a piece of art with a simple frame and just a couple of die-cuts for this easy Father’s Day card.
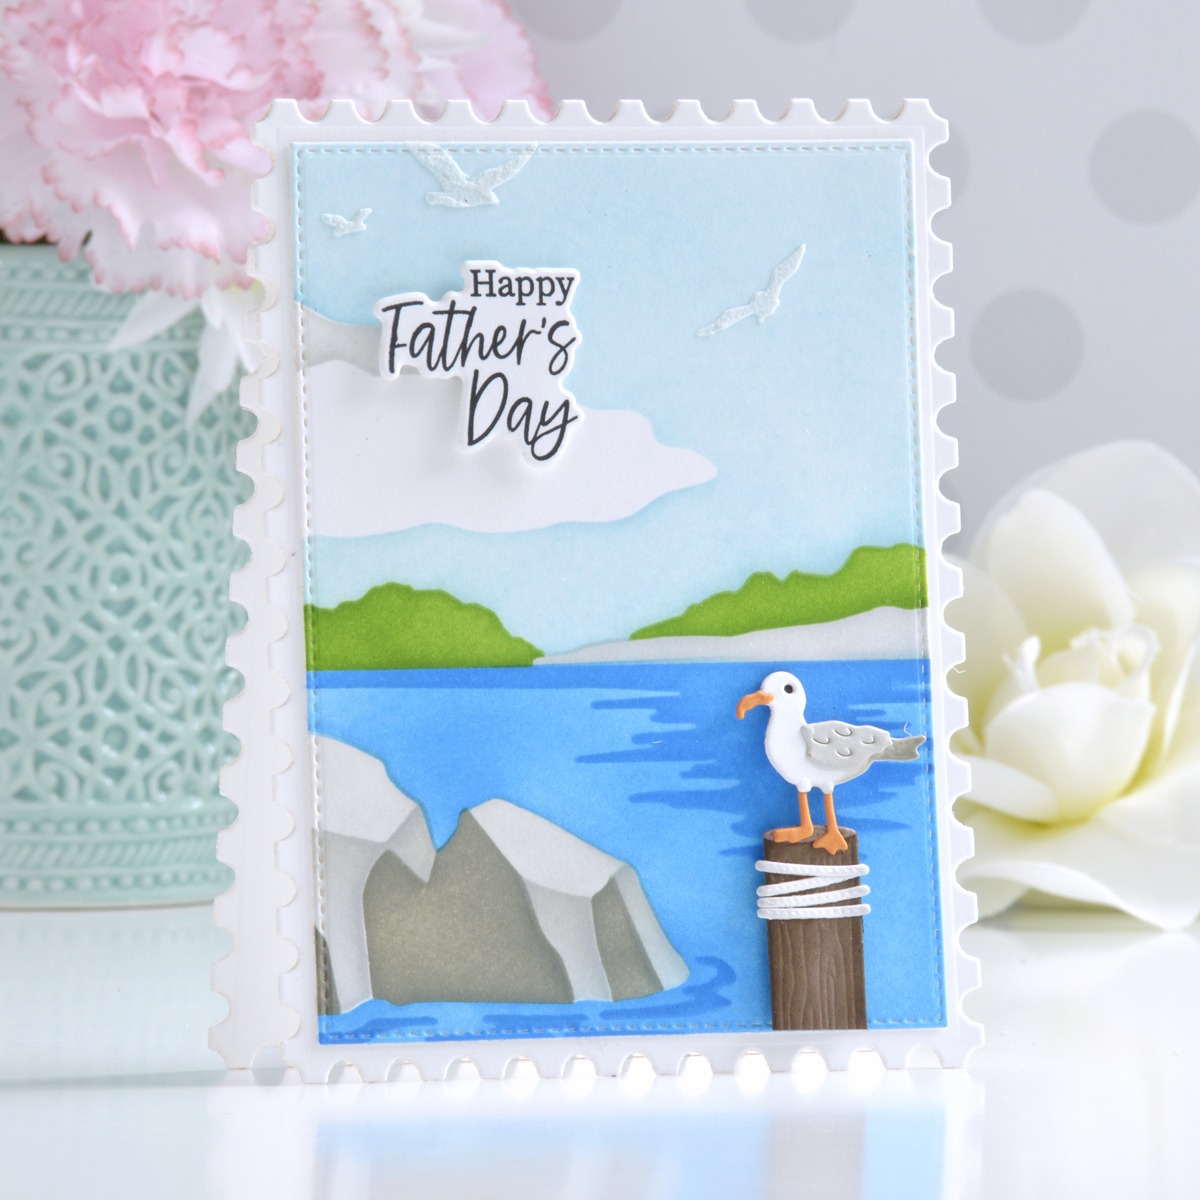
Create the background for the card by inking through each layer of the Uncharted Waters Stencil Set onto a piece of white cardstock using Lost Shadow and Pumice Stone Distress Inks for the rocks, Tumbled Glass for the Sky, Mowed Lawn for the greenery, and Salty Ocean for the water (apply the second layer more heavily for a layered look). To keep the birds in the sky pretty subtle, I used a thin layer of white embossing paste. Die cut the scene using the Inner Square A Die from the Nested Postage Labels & Tag Die Set.
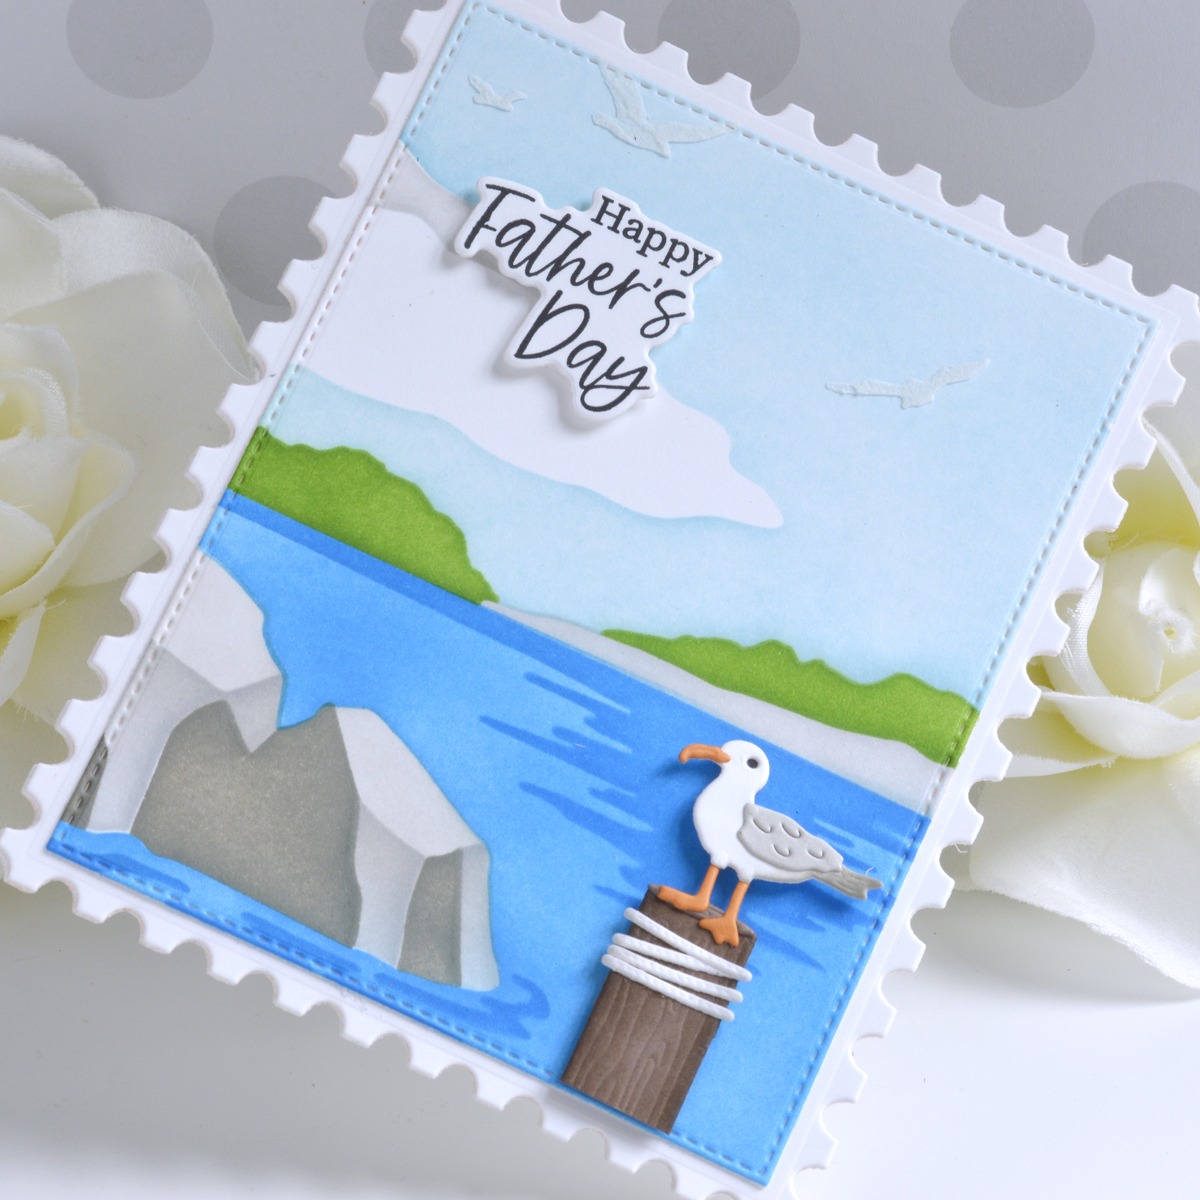
Die cut white cardstock twice using the Postage A Die from the Nested Postage Labels & Tag Die Set. Score one of the die-cuts about a half-inch from the top, burnish to fold, and add liquid glue to the small flap to attach it to the back of the other die-cut, creating a postage-edged card base. Adhere the stenciled scene to the card front with a tape runner. Die cut white, Persimmon, and Latte Cardstock using the Oh, Buoy Die Set, assemble with liquid glue, and add the seagull and piling to the lower right corner with foam adhesive. Stamp a sentiment from the Fair Winds Sentiments Stamp & Die Set in black ink, cut it out with the coordinating die, and adhere it to the top corner with foam adhesive.
Nighttime Lighthouse Mini Slimline Card
When I saw the Guiding Light Die Set, I knew I wanted to create a scene where the lighthouse could really shine…at night! With some simple inking techniques, I created a dramatic backdrop for this fun mini slimline card.
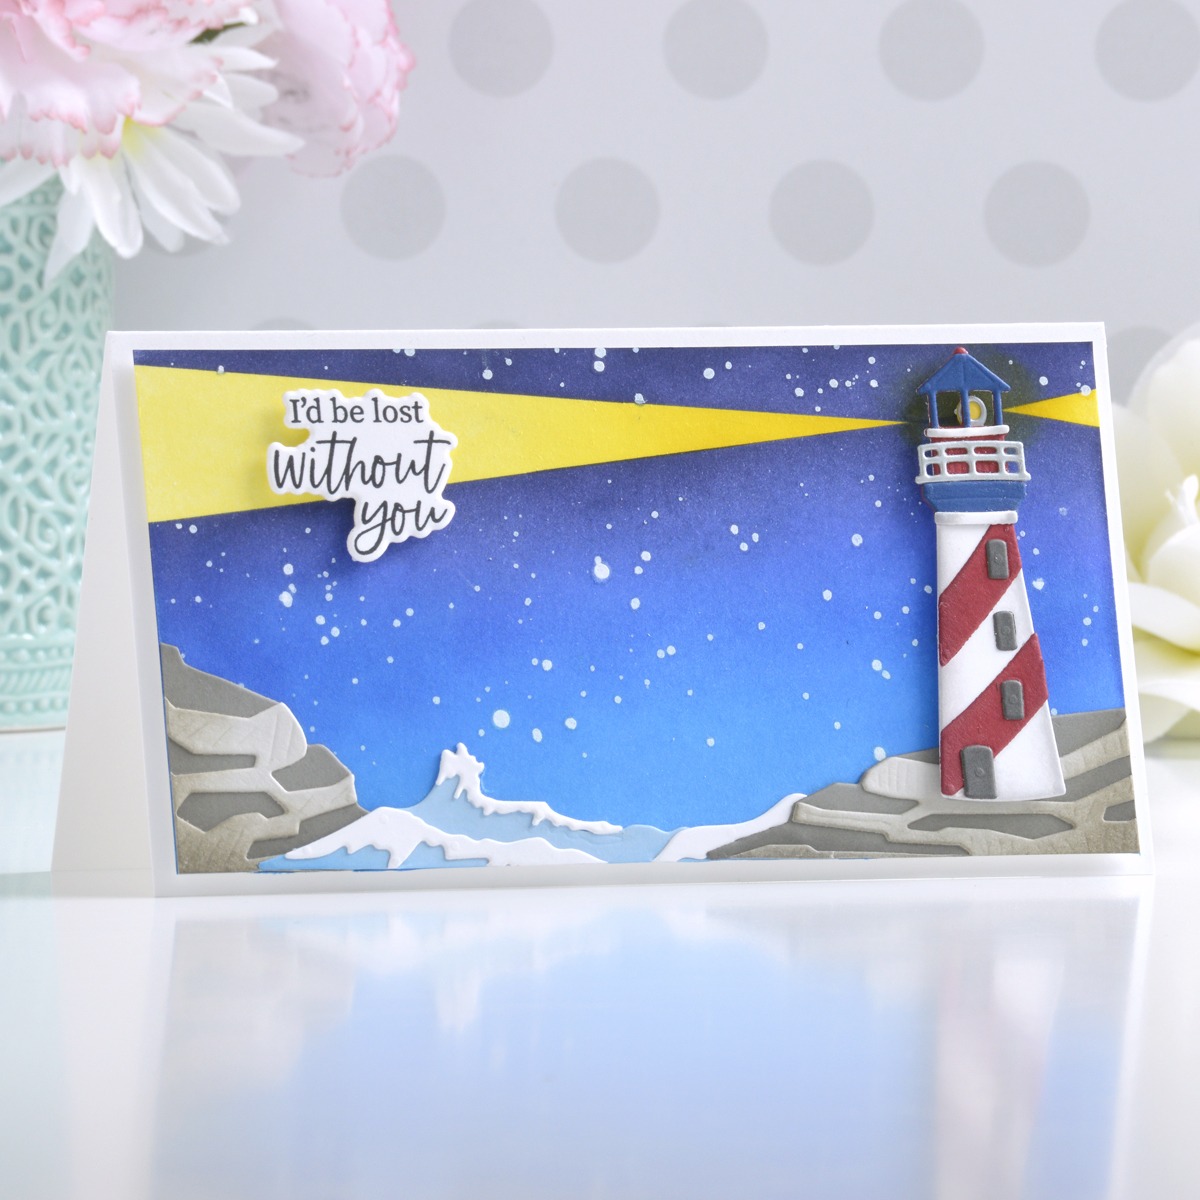
Die cut the lighthouse and rocks out of white, Crimson, Cosmic Sky, Graphite, and Brushed Silver Cardstock using the Guiding Light Die Set, add a little shading around the edges with Pumice Stone Distress Ink, and assemble with liquid glue. Die cut the wave out of white and Raindrop Cardstock using the Set Sail Die Set and assemble with liquid glue. Stamp a sentiment from the Fair Winds Sentiments Stamp & Die Set in black ink and cut it out with the coordinating die.

To create the background, begin by trimming a piece of white cardstock to 3.25” x 6.25”. Using masking paper or Post-It tape, mask off an area for the light beam on the card (it helps to arrange the die-cuts loosely first to determine where the light beam will go) and blend Mustard Seed and Squeezed Lemonade Distress Ink over the area. Reverse the masking (cover the light beam only) and blend Chipped Sapphire, Blueprint Sketch, and Salty Ocean Distress Ink down the panel. Add Splatter White Opaque Watercolor to the panel to mimic a starry sky if desired. Adhere the rocks and wave to the bottom of the panel with liquid glue and trim off any overhanging pieces with scissors before adding the background to a top-folding white card base measuring 3.5” x 6.5” with foam adhesive. Pop the lighthouse and sentiment up on top of the card front with more foam adhesive.
Simple Sailboat Card
Lastly, I wanted to create a simple scene featuring the sailboat from the Set Sail Die Set for this easy encouragement card that would work great for graduation season.

Die cut the sailboat out of white, Crimson, Cosmic Sky, and Lunar Gray Cardstock and the clouds and wave out of white and Raindrop Cardstock using the Set Sail Die Set and assemble with liquid glue. Die cut white and Raindrop cardstock using one of the Fresh Picked Labels & Tag Dies. Trim the Raindrop die-cut to about 1.5” tall, adhere it to the bottom of the white die-cut, and light blend Salty Ocean Distress Ink around the edges of the resulting background panel. Add the clouds and a couple of seagulls from the Guiding Light Die Set to the sky and trim off any overhanging pieces with scissors.
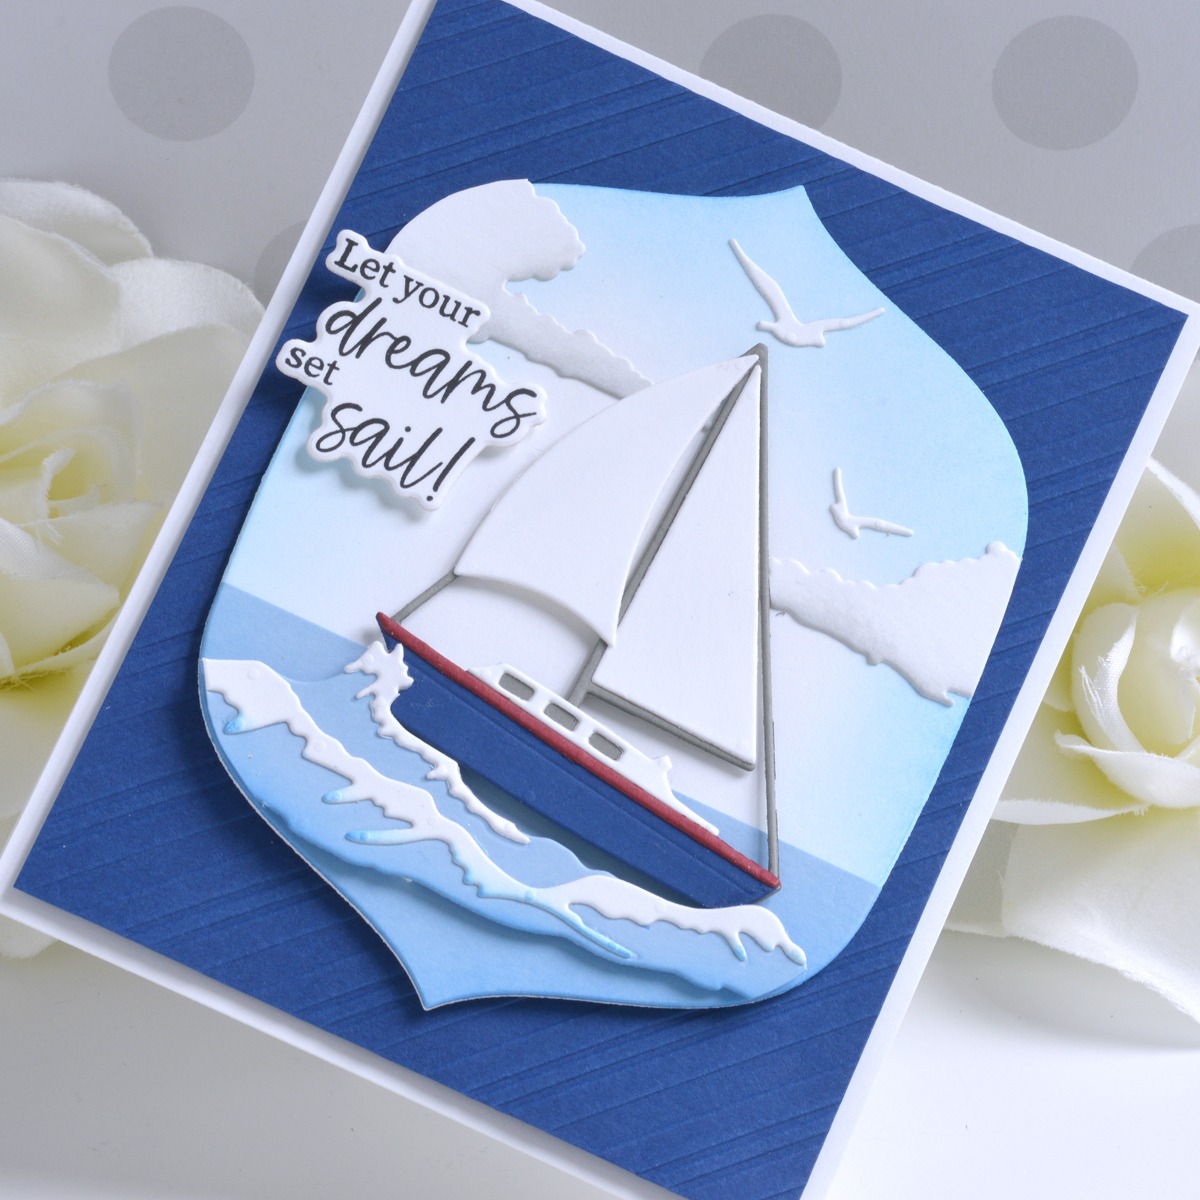
Trim a piece of Cosmic Sky Cardstock to 4” x 5.25”, emboss it using the Peppermint Stripes Embossing Folder, and adhere it to a top-folding A2-sized white card base with foam adhesive. Add the background panel to the center of the card with more foam adhesive and pop the sailboat and wave up on top with more foam adhesive. To finish off the card, add a sentiment stamped and die cut using the Fair Winds Sentiments Stamp & Die Set.
Spellbinders Supplies:

Other supplies
White heavyweight cardstock, Tumbled Glass, Salty Ocean, Mowed Lawn, Pumice Stone, Lost Shadow, Chipped Sapphire, Blueprint Sketch, Mustard Seed, and Squeezed Lemonade Distress Ink, white embossing paste, Versafine Clair Nocturne Ink, blending brush, Post-It tape, tape runner, foam adhesive
I hope you enjoyed these easy masculine cards and thanks so much for stopping by today. You can find more inspiration over at my blog AnnieBWills.com or on Instagram.
Zenspired Holidays Inspiration | Magic of the Holidays with Mona Toth
Simple Foiling Ideas with Inspired Basics Collection and Lisa Mensing