May 2022 Embossing Folder of the Month Kit – Card Inspiration with Annie Williams
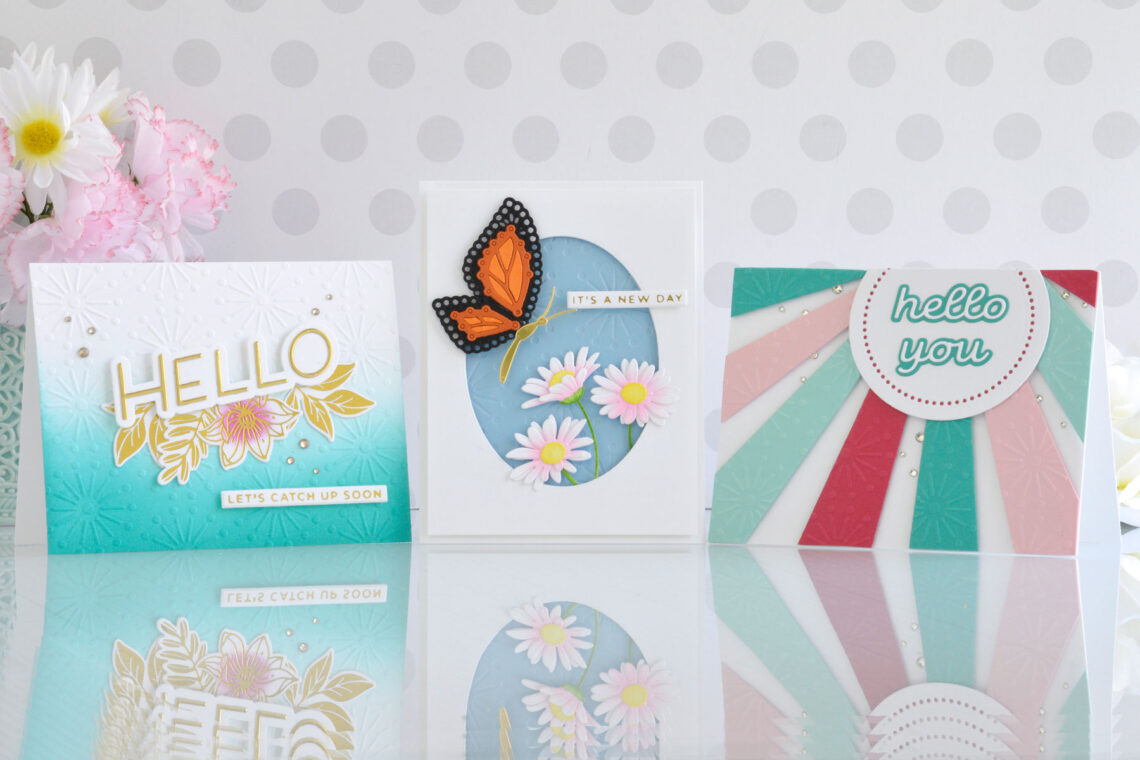
Hi again, this is Annie Williams and I’m excited to be back on the blog today to share a couple of projects using the May Embossing Folder of the Month Kit from Spellbinders. With its pretty and versatile pattern, the Faux Stitch Embossing Folder is one you’ll reach for over and over again to add subtle texture to all kinds of card projects.

Tiny Sunbursts
Although it mimics one of the beautiful patterns in many of the Spellbinders stitching dies, the Faux Stitch Embossing Folder also reminded me of tiny sunbursts. Here I used it to add texture to the background of a bright and pretty springtime scene.

- Trim a piece of white cardstock to 4” x 5.25” and die cut the center out using the Oval Shape Large Die from the Essential Ovals Die Set.
- Trim a piece of Partly Cloudy Cardstock to slightly smaller than the white die-cut panel and emboss it with the Faux Stitch Embossing Folder.
- Apply Gold Hot Foil to white cardstock using one of the sentiments from the Stitched Glimmer Butterflies Plate & Die Set and the Glimmer Hot Foil Machine.
- Trim the sentiment out into a small strip.
- Die-cut Onyx, Terra Cotta, Persimmon, and Mirror Gold Cardstock using the Stitched Glimmer Butterflies Plate & Die Set and assemble with liquid glue.
- Die-cut white cardstock using the flower and stem dies from the Daisy Delight Garden Shutters A2 Card Base Die Set.
- Shade the die-cuts with sponge daubers using Kitsch Flamingo, Squeezed Lemonade, and Mowed Lawn Distress Inks. Assemble with liquid glue.
- Adhere the embossed panel to the center of a top-folding A2-sized white card base with tape runner and then pop the window panel over top with foam adhesive.
- Add the flowers, butterfly, and sentiment to the window with more foam adhesive.

Spellbinders Supplies:

Other Supplies
Heavyweight white cardstock, Kitsch Flamingo, Squeezed Lemonade, and Mowed Lawn Distress Ink, sponge daubers, tape runner, foam adhesive
Subtle Ink Blending
Next, I wanted to add texture all over a fun ink-blended background for this pretty hello card.

- Trim a piece of white cardstock to 4.25” x 5.5” and blend Salvaged Patina and Peacock Feathers Distress Ink over the bottom half or so with a blending brush.
- Emboss the panel using the Faux Stitch Embossing Folder and add a bit more Peacock Feathers Distress Ink over the bottom third of the panel to bring out the embossing even more.
- Adhere the panel to a top-folding A2-sized white card base with a tape runner.
- Die-cut white and Mirror Gold Cardstock using the hello die from the Stitched For You Die Set and adhere together using liquid glue.
- Apply Gold Hot Foil to white cardstock using flowers and leaves from the Magnolia Bouquet and Geo Foliage Glimmer Plate Sets and cut them out with the coordinating dies.
- Add a bit of Picked Raspberry Distress Ink to the center of the flower with a sponge dauber.
- Apply Gold Hot Foil to white cardstock using one of the sentiments from the Mini Sincere Sentiments Glimmer Plate Set and cut it out using the coordinating die.
- Adhere the flower and leaves to the card front with liquid glue and pop the “hello” sentiment up on top with foam adhesive.
- Add the foiled sentiment to the bottom right corner of the card using foam adhesive.
- Embellish with Gold Mix Gems.

Spellbinders Supplies:
Other supplies
White heavyweight cardstock, Salvaged Patina, Peacock Feathers, and Picked Raspberry Distress Ink, blending brush, sponge dauber, tape runner, foam adhesive
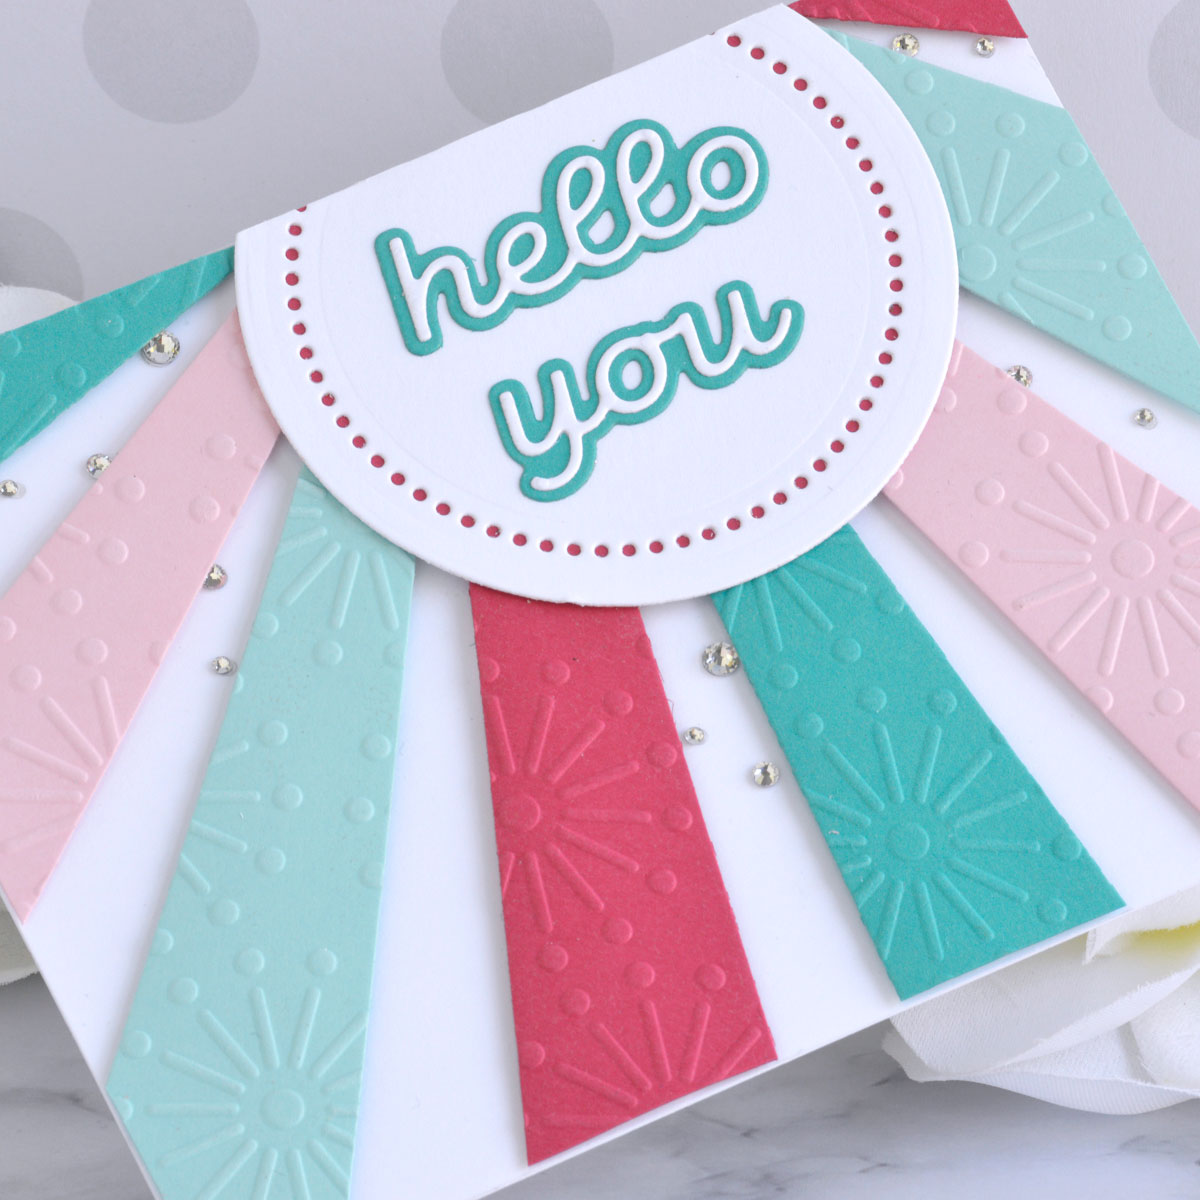
Bright Color Block
Lastly, I thought it would be fun to create a bright color block background, adding a continuous pattern over only the die-cut components.

- Die-cut Pink Sand, Wild Berry, Waterfall, and Teal Topaz Cardstock using the Color Block Slices Die Set.
- Arrange the slices into a sunburst pattern and adhere together temporarily using Press-N-Seal or low-tack tape.
- Emboss the slices using the Faux Stitch Embossing Folder, add foam adhesive to the back while still adhered together with the Press-N-Seal, and press onto a top-folding A2-sized white card base.
- Remove the temporary adhesive and trim away any overhanging pieces with scissors.
- Die-cut white and Wild Berry Cardstock using the large circle from the Essential Circles Die Set.
- Die-cut Teal Topaz and white cardstock using the Layered Mix & Match Sentiments Die Set.
- Adhere the layers together with liquid glue.
- Add the layered circle to the top of the sunburst pattern with liquid glue and trim away any overhanging cardstock with scissors.
- Adhere the sentiment to the center of the circle with liquid glue.
- Embellish with Silver Mix Gems.
Spellbinders Supplies:
Other supplies
White heavyweight cardstock, Glad Press-N-Seal (or low-tack tape), foam adhesive

I hope you enjoyed this trio of bright and cheery embossed cards and thanks so much for stopping by today. You can find more inspiration over at my blog AnnieBWills.com.

Layered Dimensional Die Cutting Series. Episode #1 – Birthday Card featuring Venise Lace collection
July 2019 Stamp of the Month is Here – Age Of Aquarium