Glimmer Holly Background 3 Ways – How-to Step-by-step
Hello there, Michelle Short here to share a step-by-step tutorial with you using the Glimmer Holly Background and Layered Glimmer Holly Background from the De-light-ful Christmas Collection by Yana Smakula. This is such a pretty background and can be used in lots of different ways.
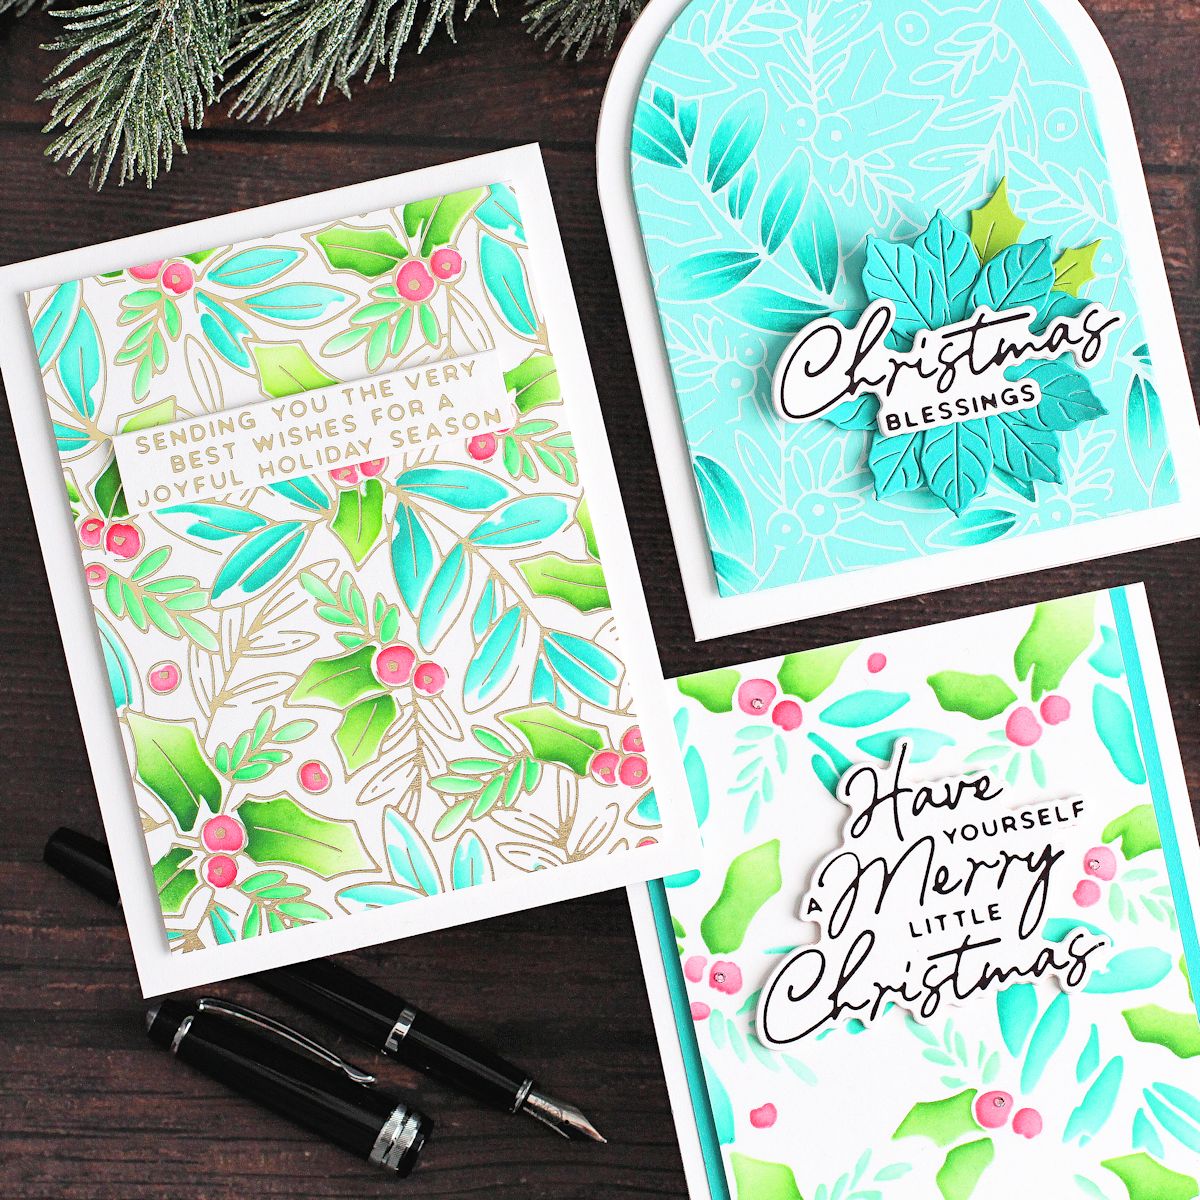
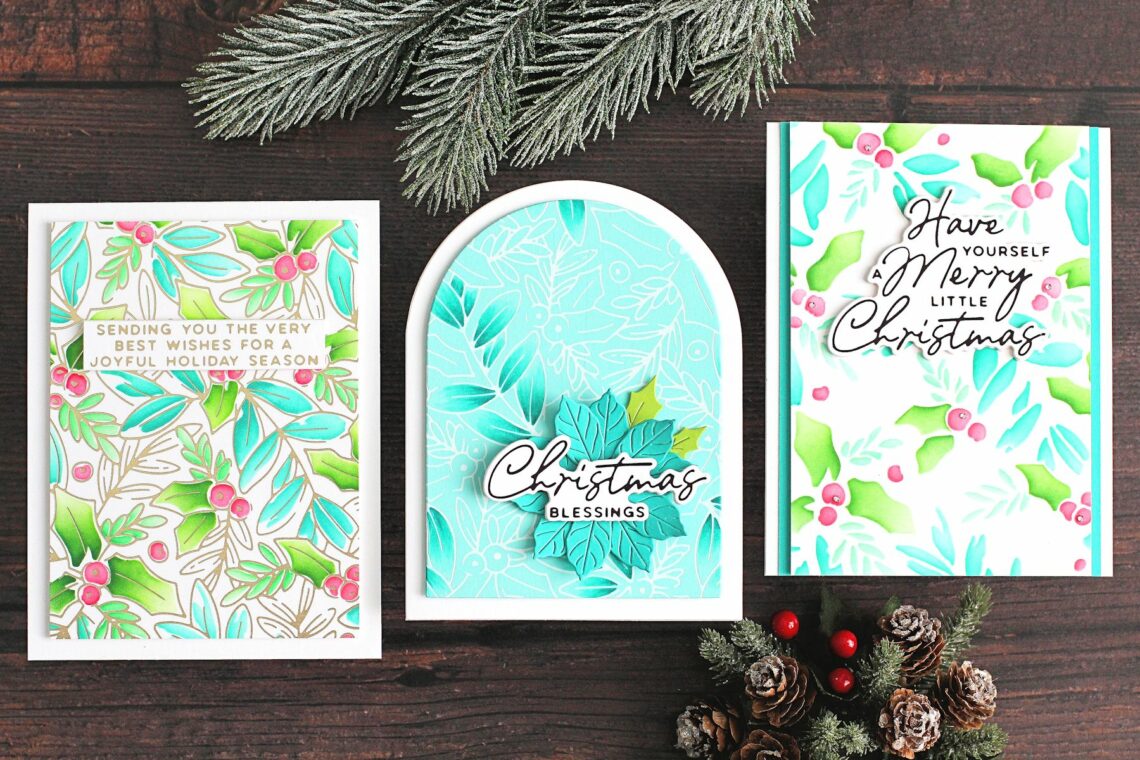
Today I have three cards to share with you – 1. Using the Glimmer Holly Background and Layered Glimmer Holly Background together. 2. Using the Glimmer Holly Background on its own, and 3. Using the Layered Glimmer Holly Background on its own.
GLIMMER HOLLY BACKGROUND + LAYERED GLIMMER HOLLY BACKGROUND
STEP 1
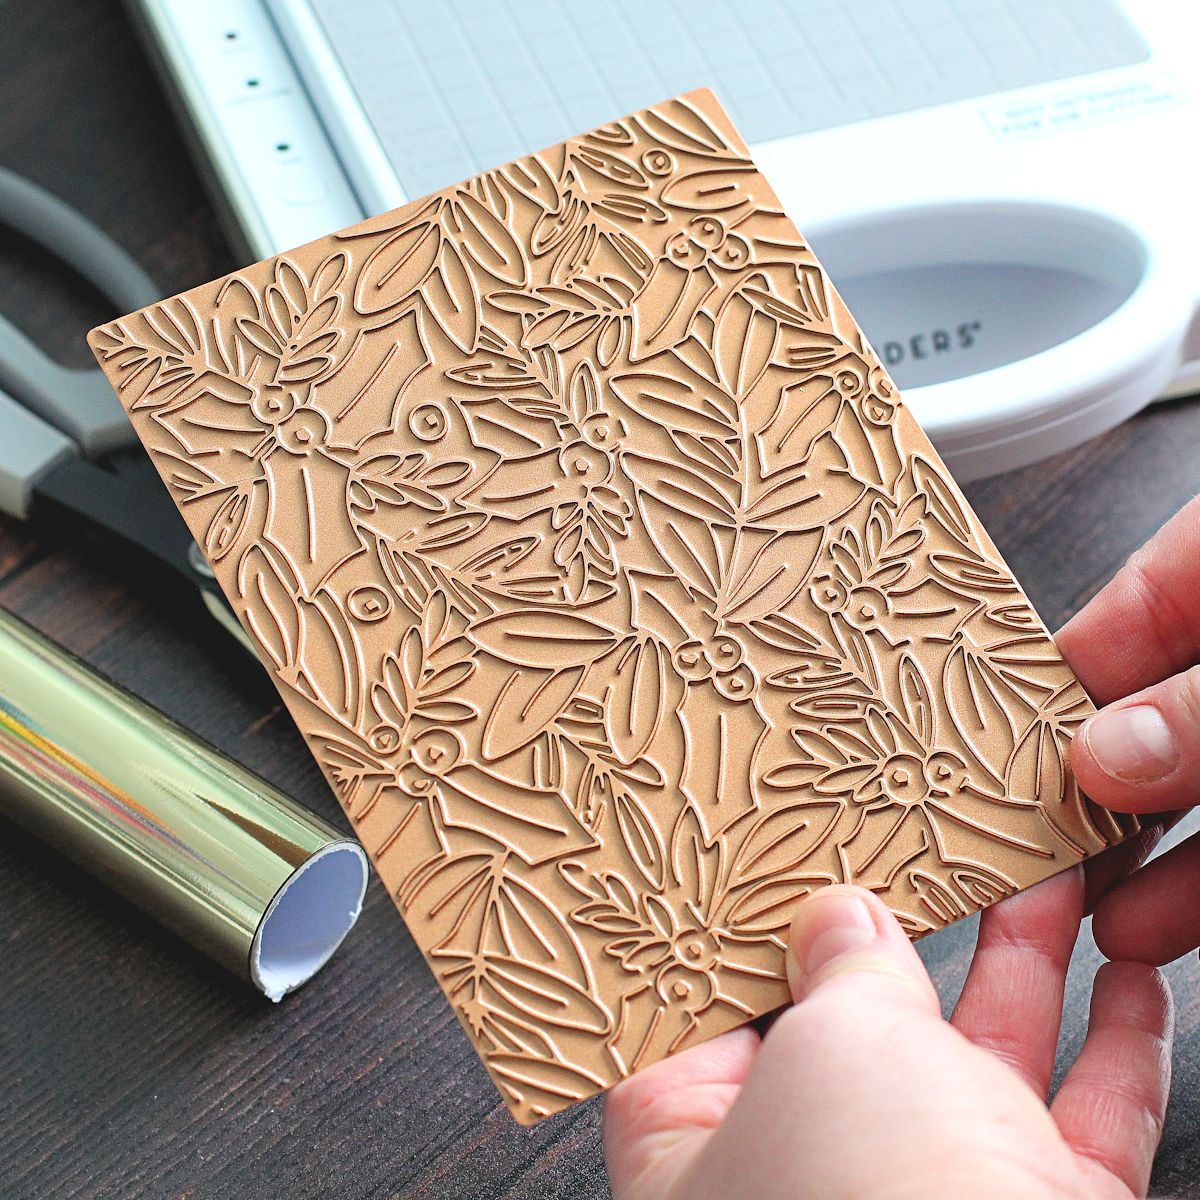
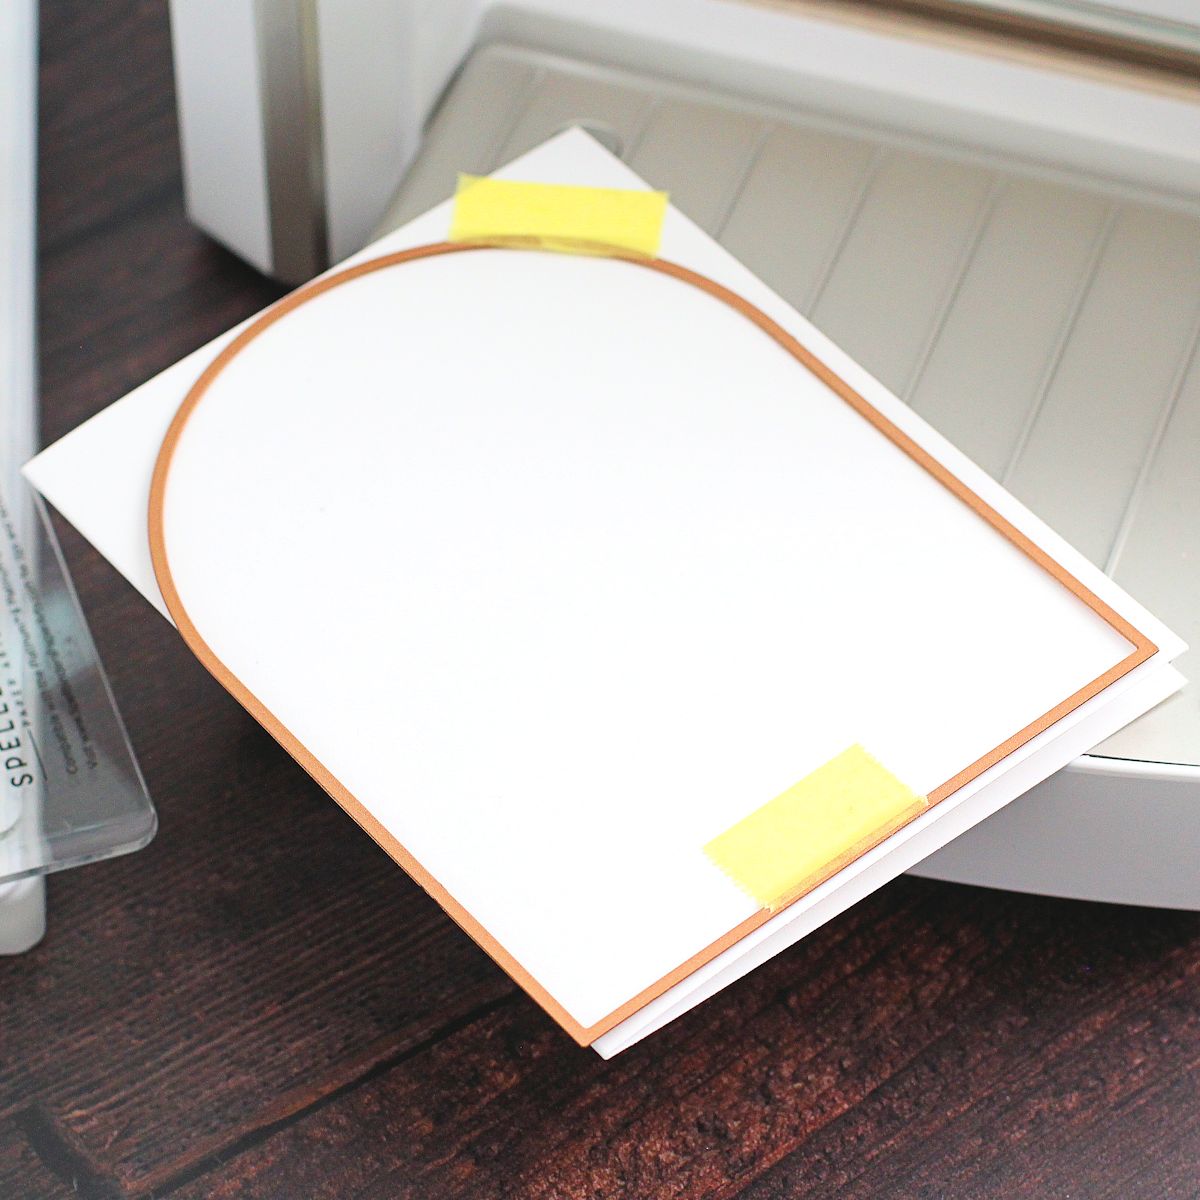
Let the Glimmer Hot Foil System platform heat up while you place Champagne Foil onto a sheet of white cardstock, shiny side up (I find it easier to use a piece of cardstock larger than I need). Place Glimmer Holly Background Hot Foil Plate on top and hold in place with Best Ever Craft Tape.
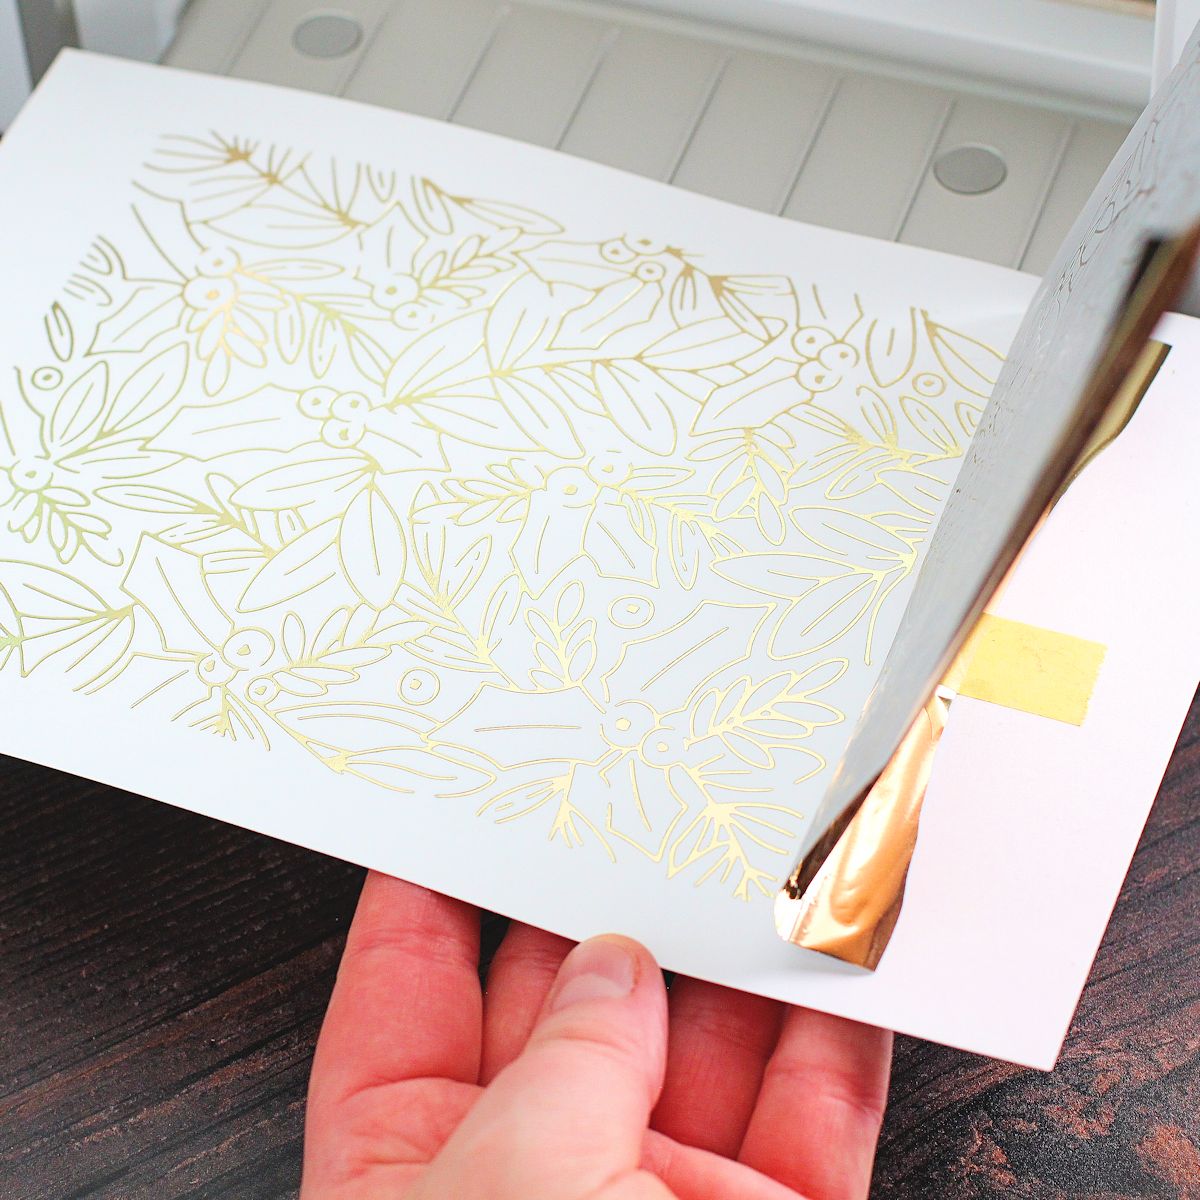
Place on to Glimmer Hot Foil System platform, plate side down. Press the timer button and wait for the plate to heat up and the light to stop flashing. Place shims on top and run the sandwich through Platinum Six. Carefully remove the tape and plate.
STEP 2
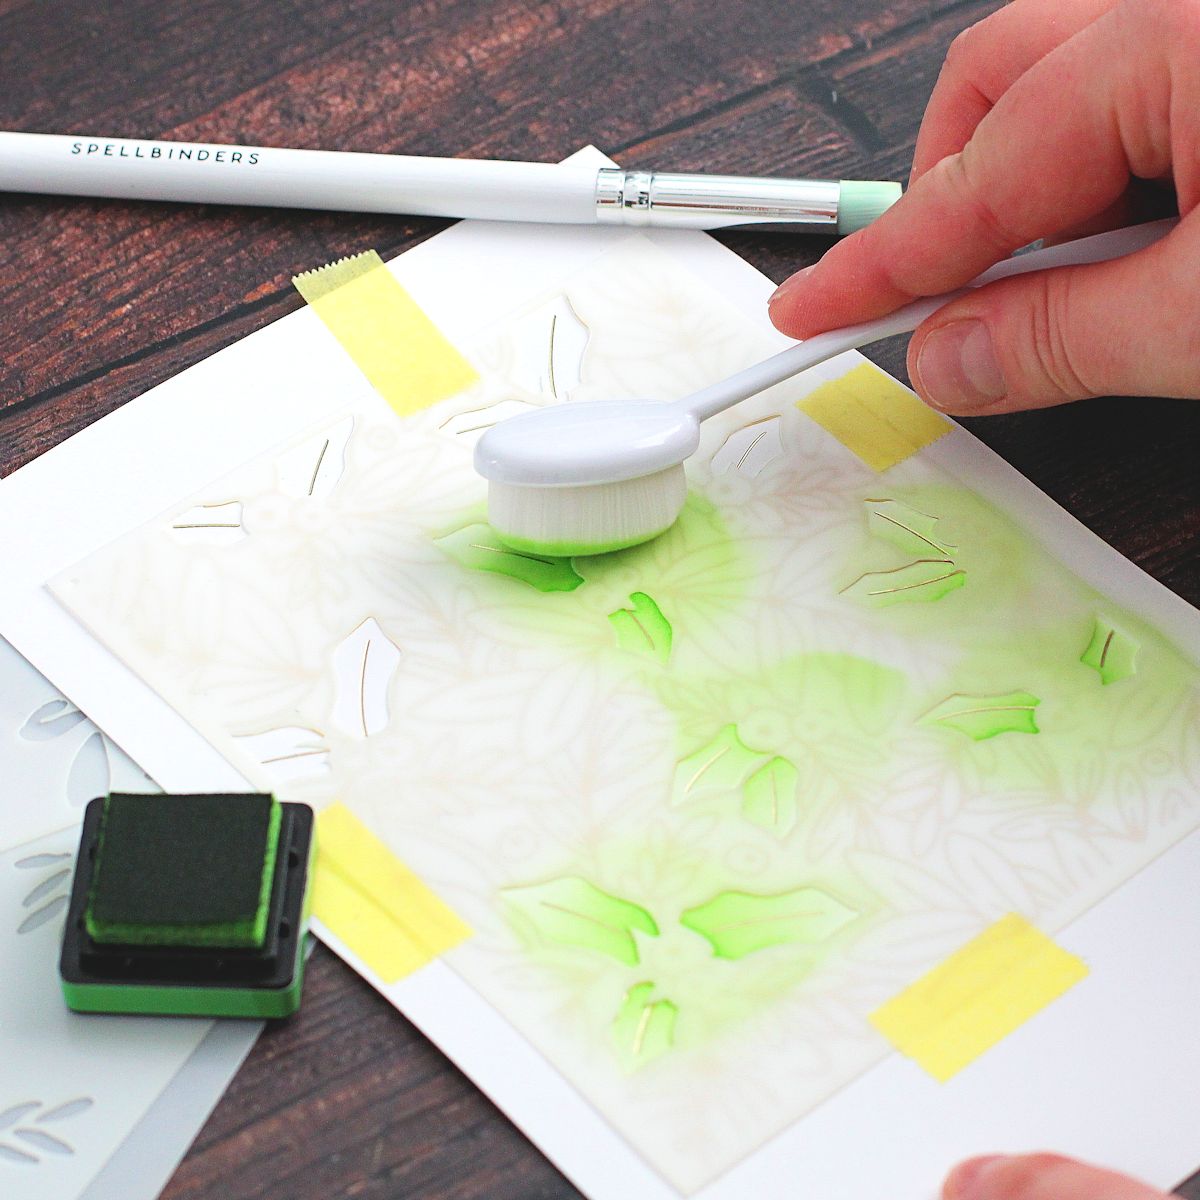
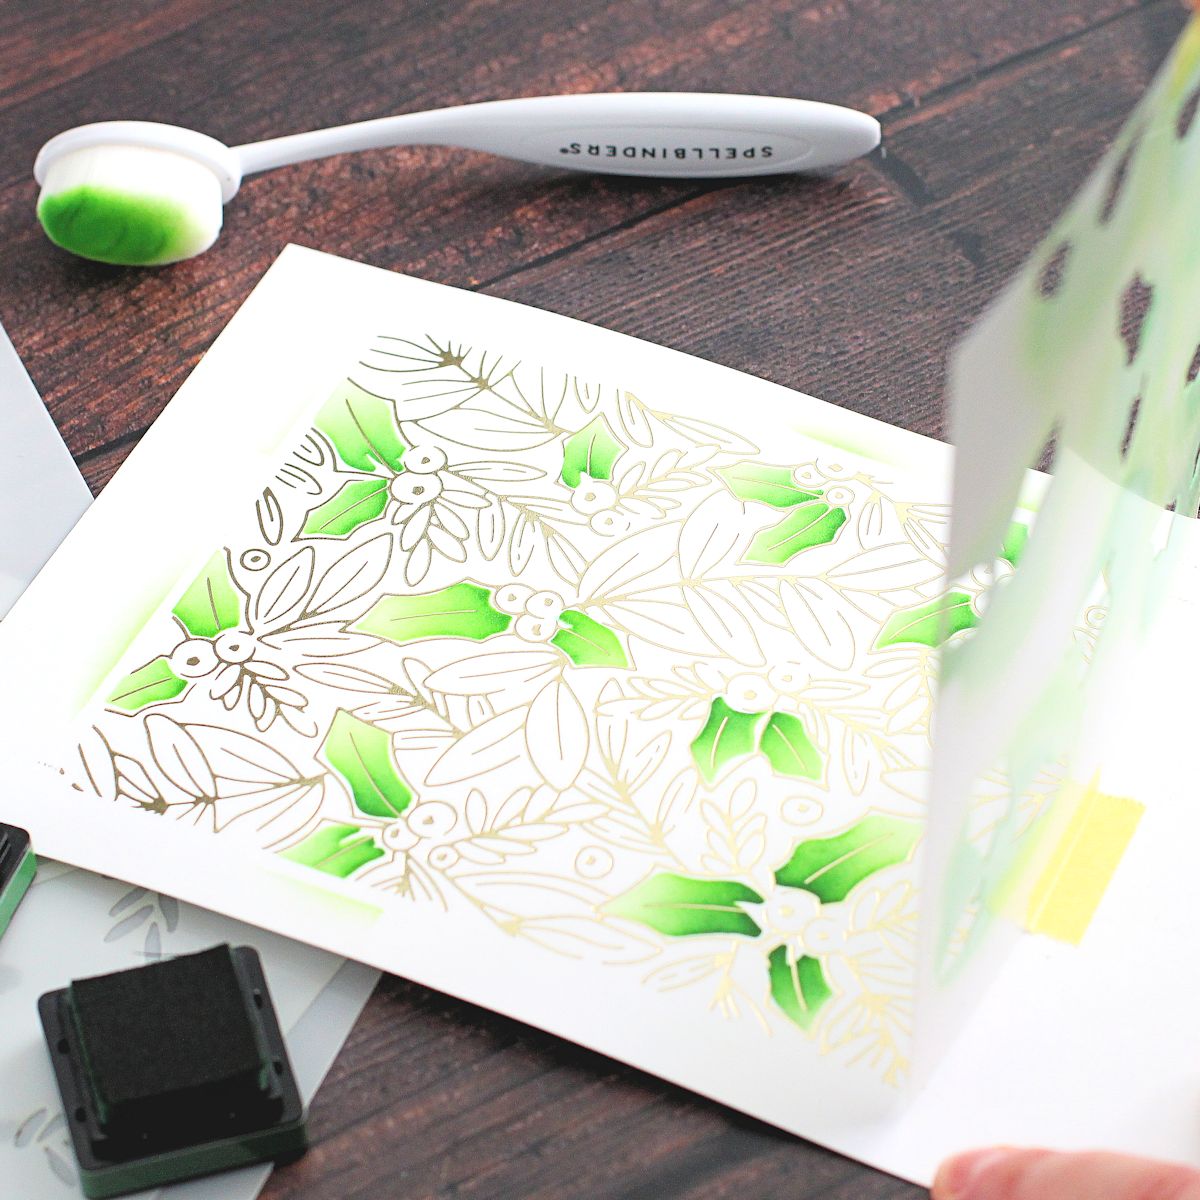
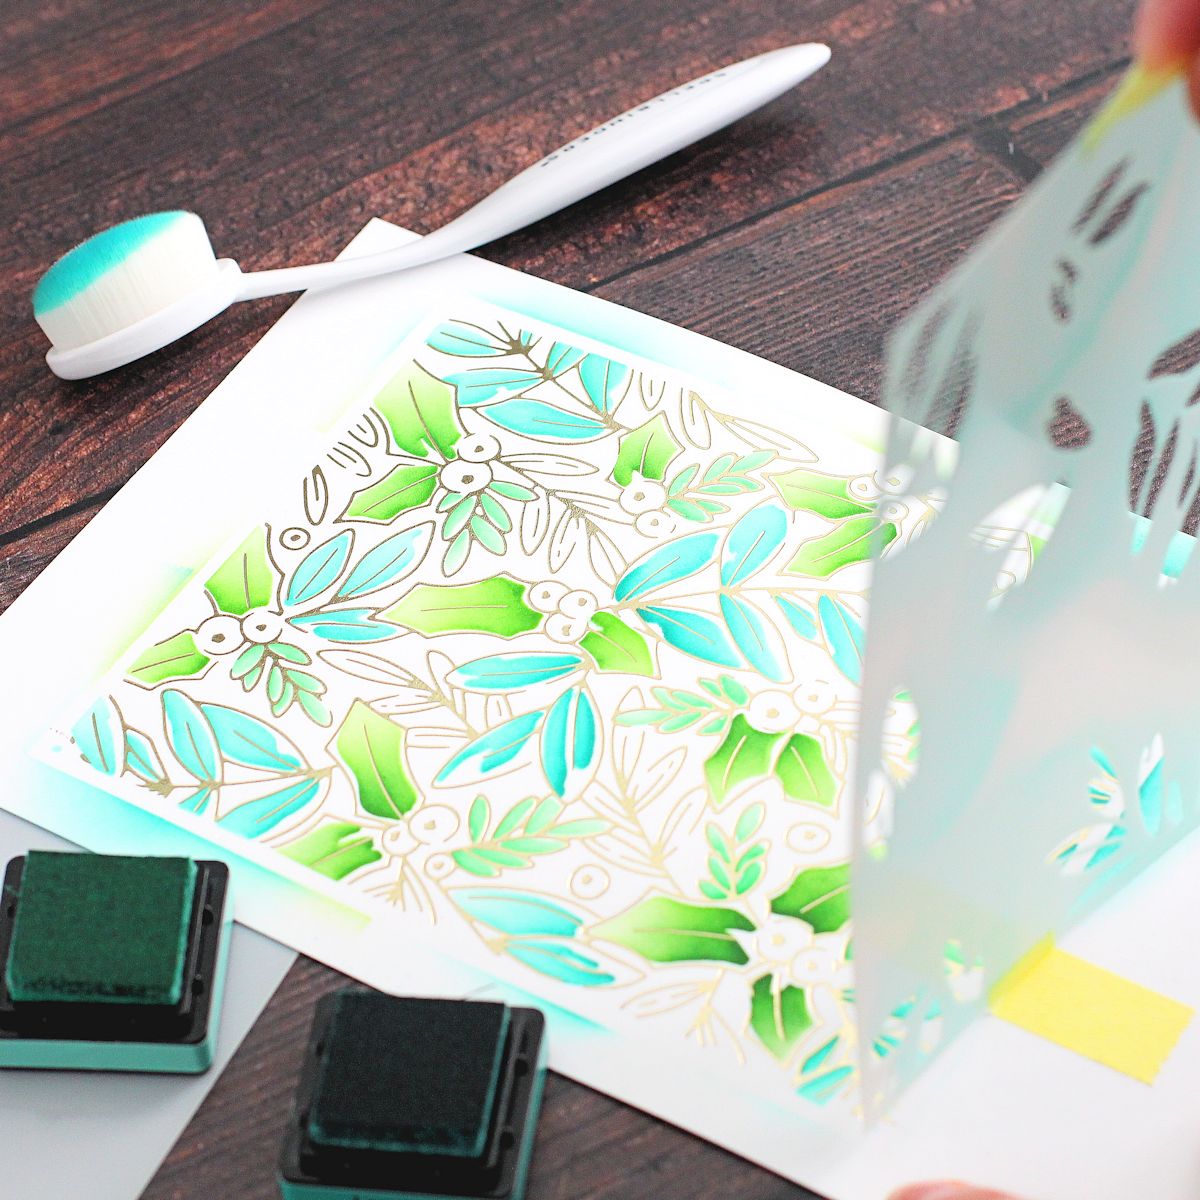
Place first Layered Glimmer Holly Background Stencil on top of the foiled background and secure with Best Ever Craft Tape. This holly part is actually labeled as stencil 3, but I found that you can use them in any order. Using a Blending Brush, blend light green ink over the openings of the stencil to color holly leaves.
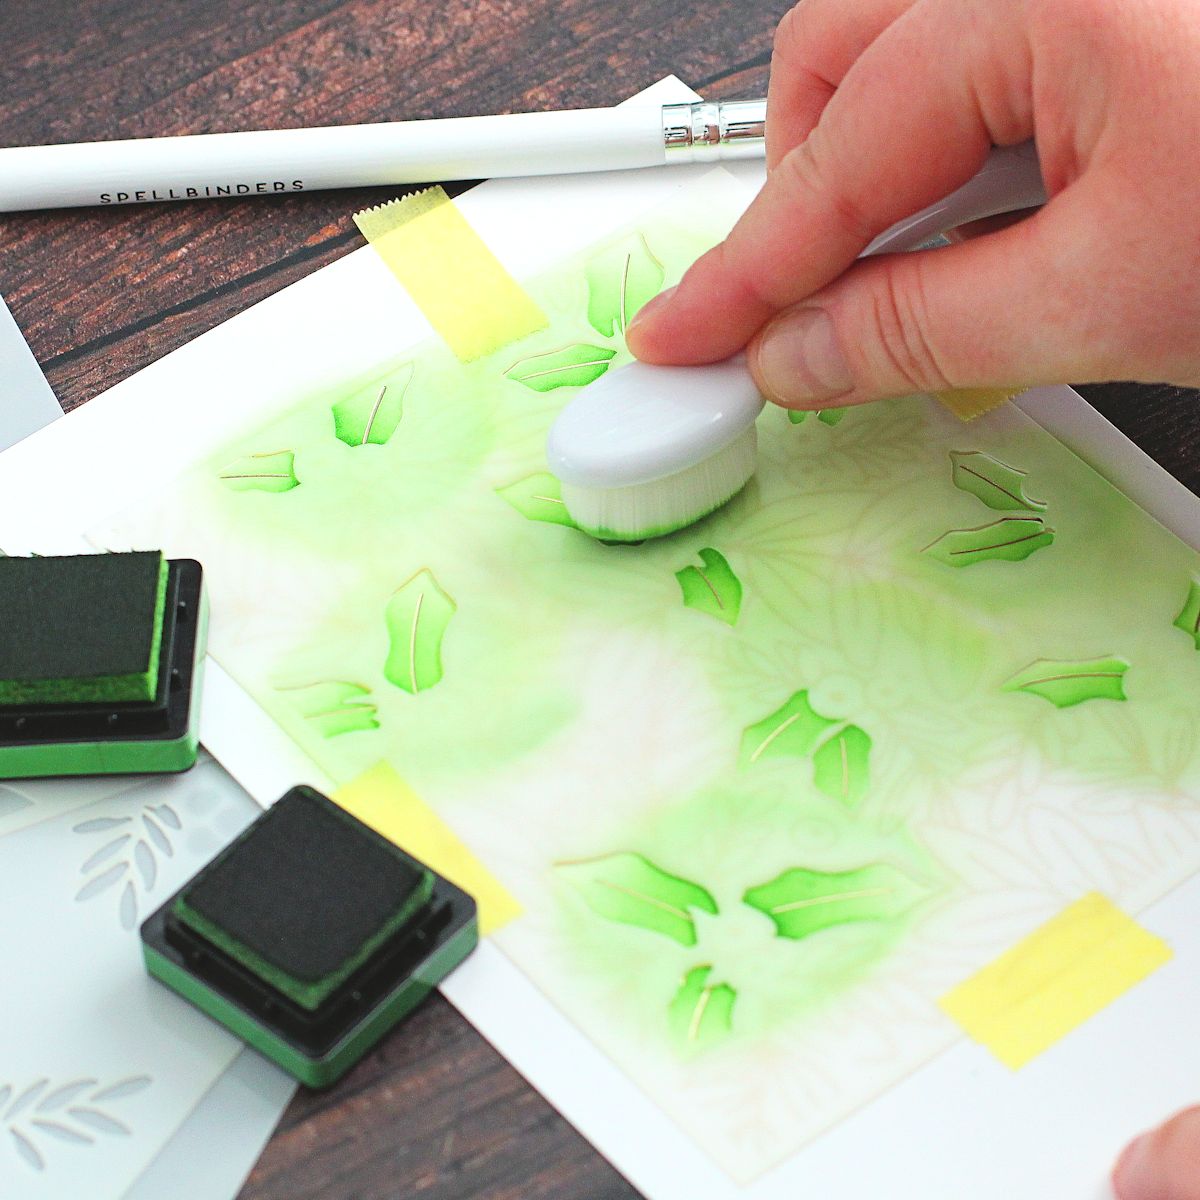
Add a second layer of ink blending using slightly darker green ink. This adds some depth to the leaves. I like to add darker shading to the bottom of the leaves.

Using a Mini Blending Brush, add an even darker green color of ink to the bottom parts of the leaves for added depth. Remove the stencil and save the tape to reuse.
STEP 3
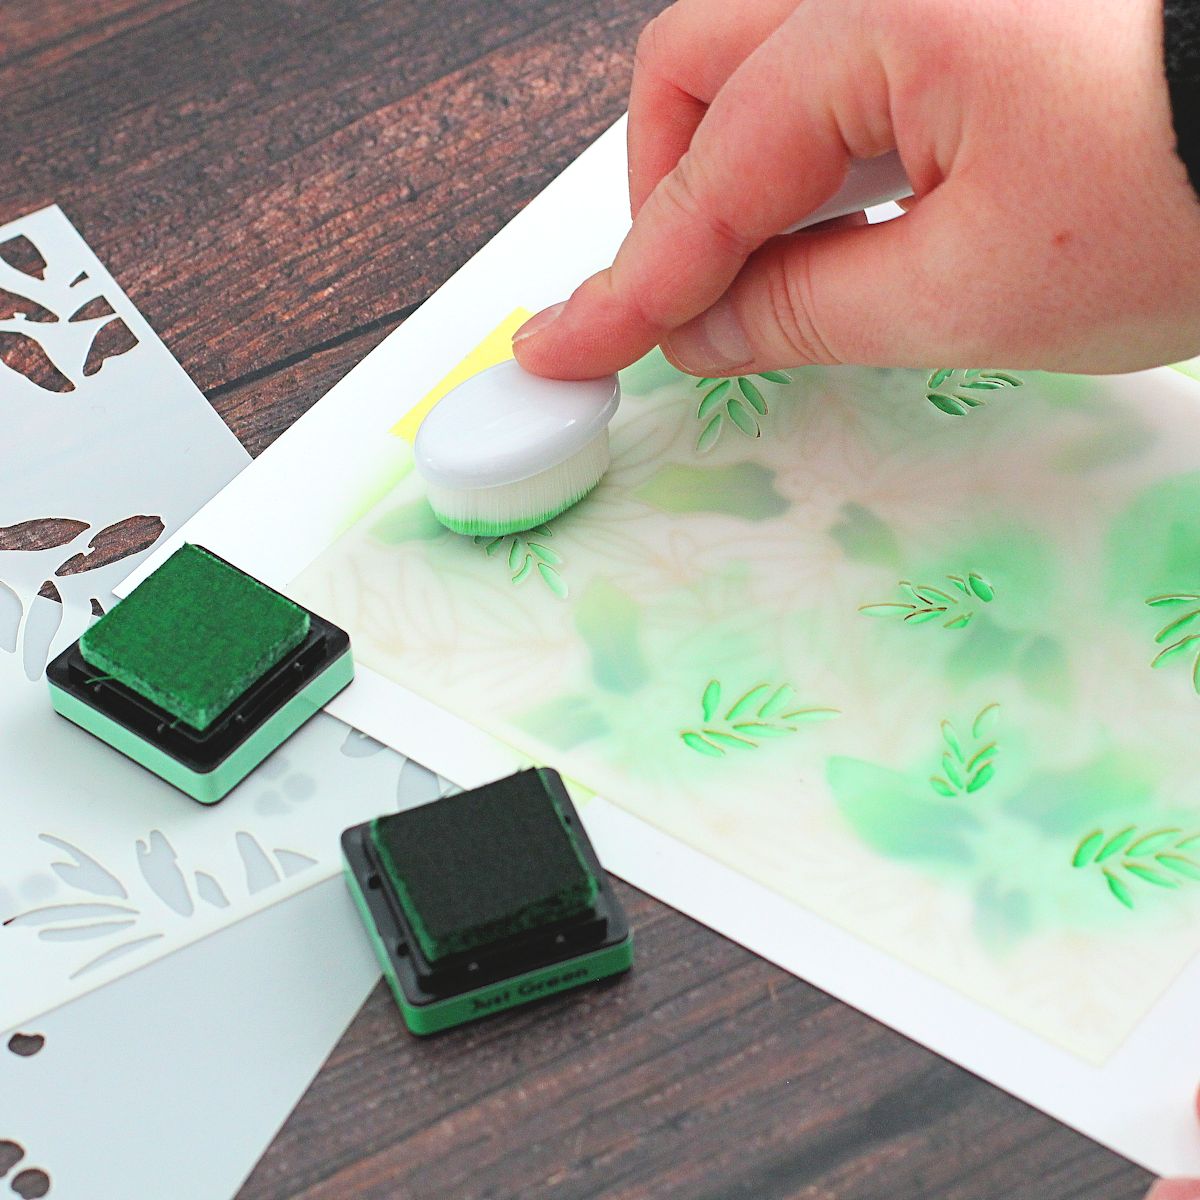
Place the second stencil on top, securing it with the same tape. Blend two shades of mint green ink on top, to color the smaller leaves. Focus the darker color towards the bottom of the leaves.
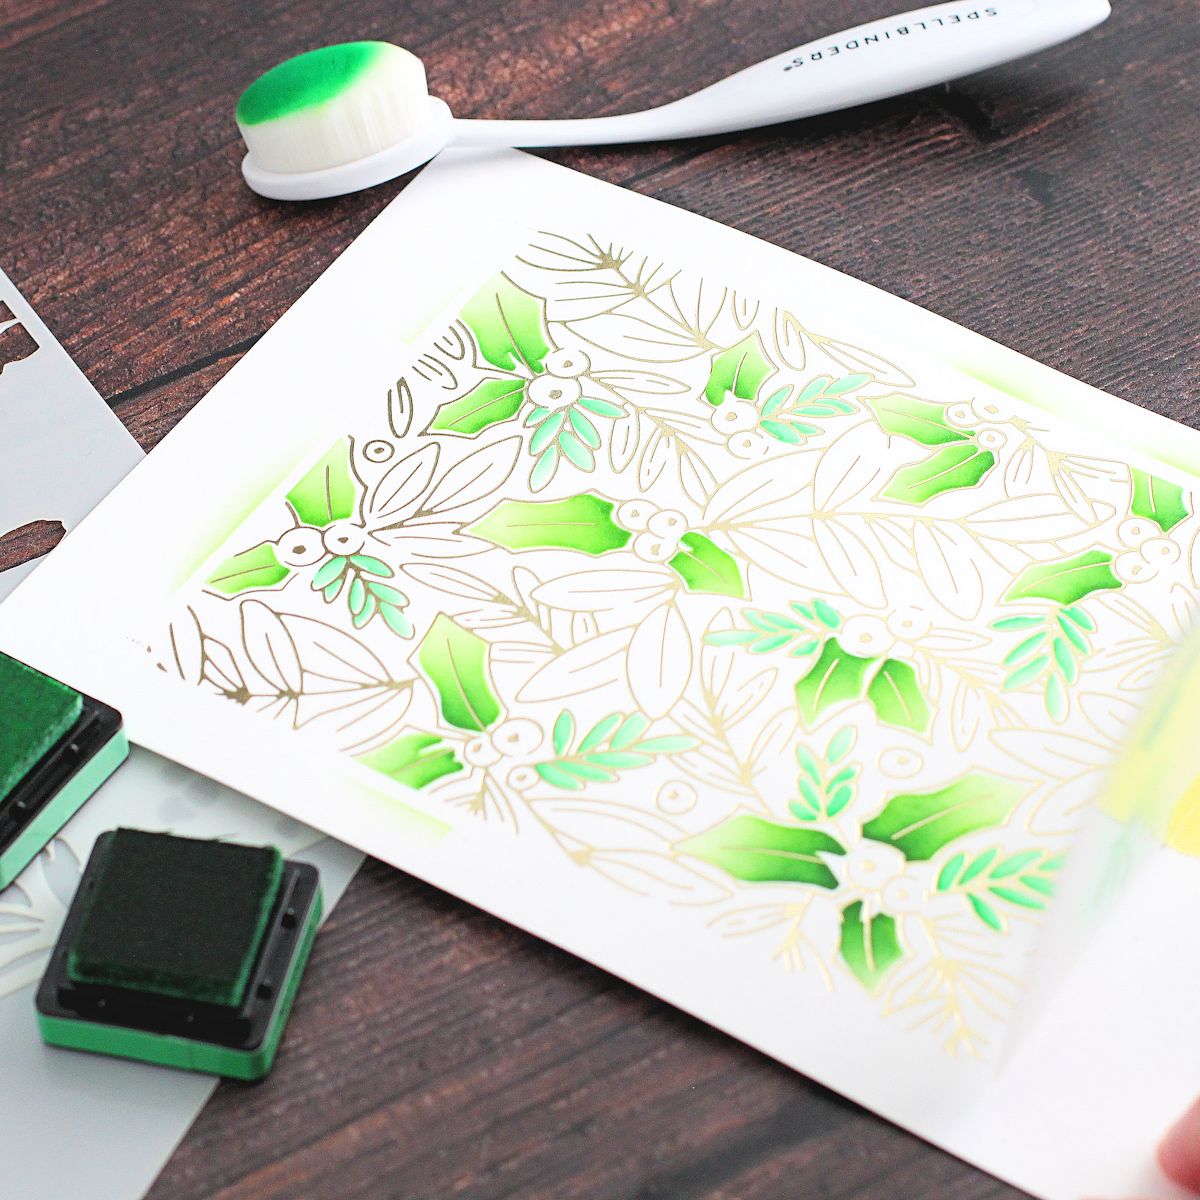
Remove the stencil and save the tape.
STEP 4
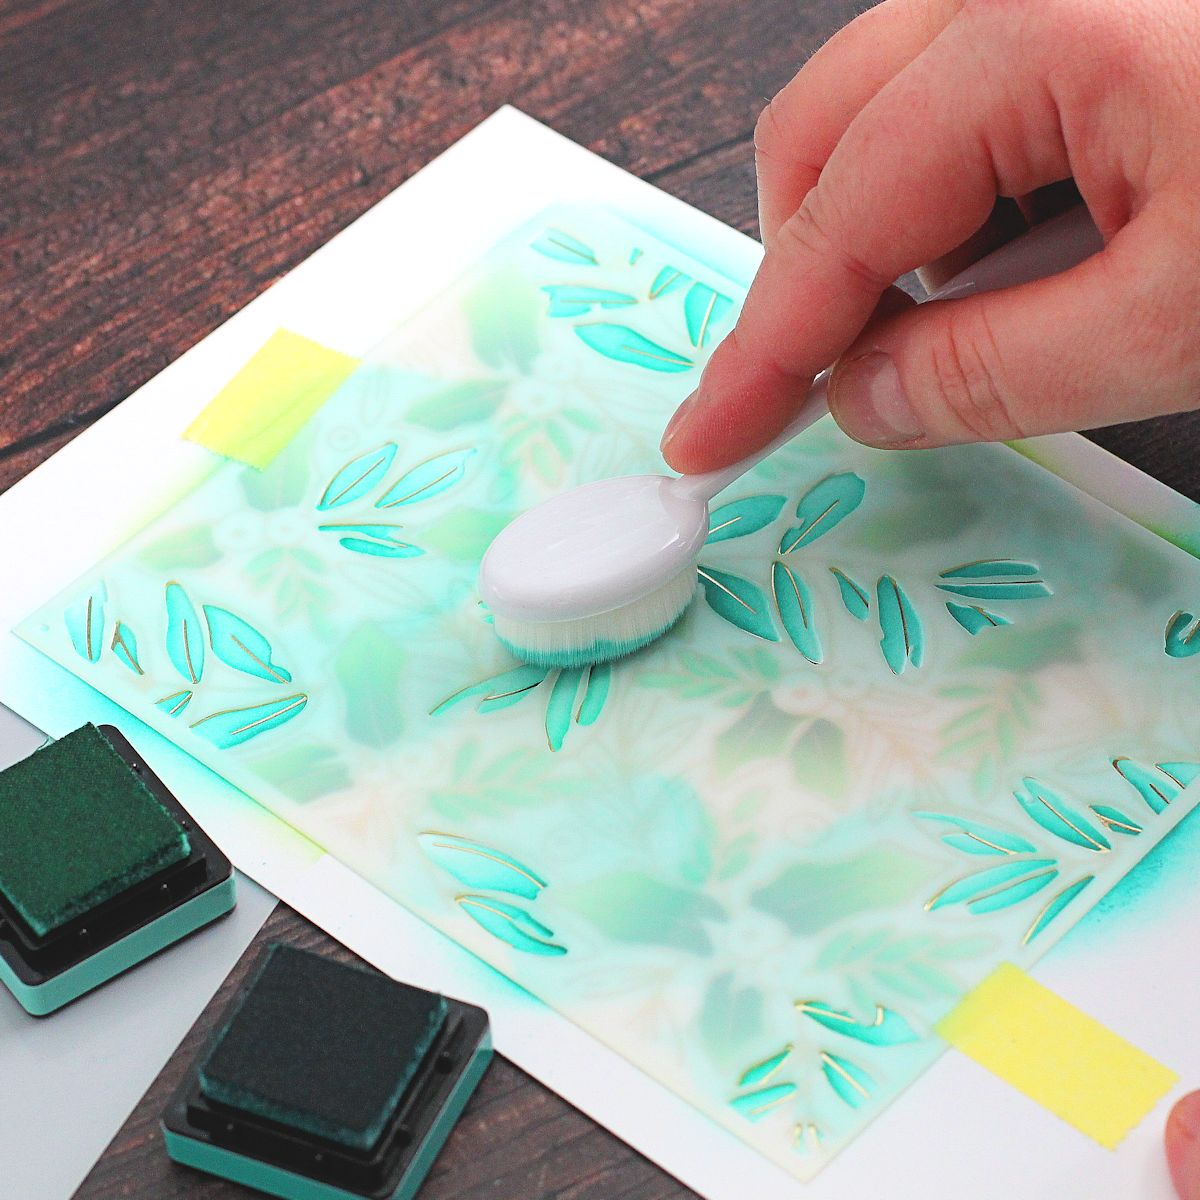
Place stencil 3 (labeled as stencil 1) on top and secure with the same tape. Blend two shades of teal ink for the last leaves. Focus the darker color toward the bottom of the leaves. Remove the stencil and save the tape.
STEP 5
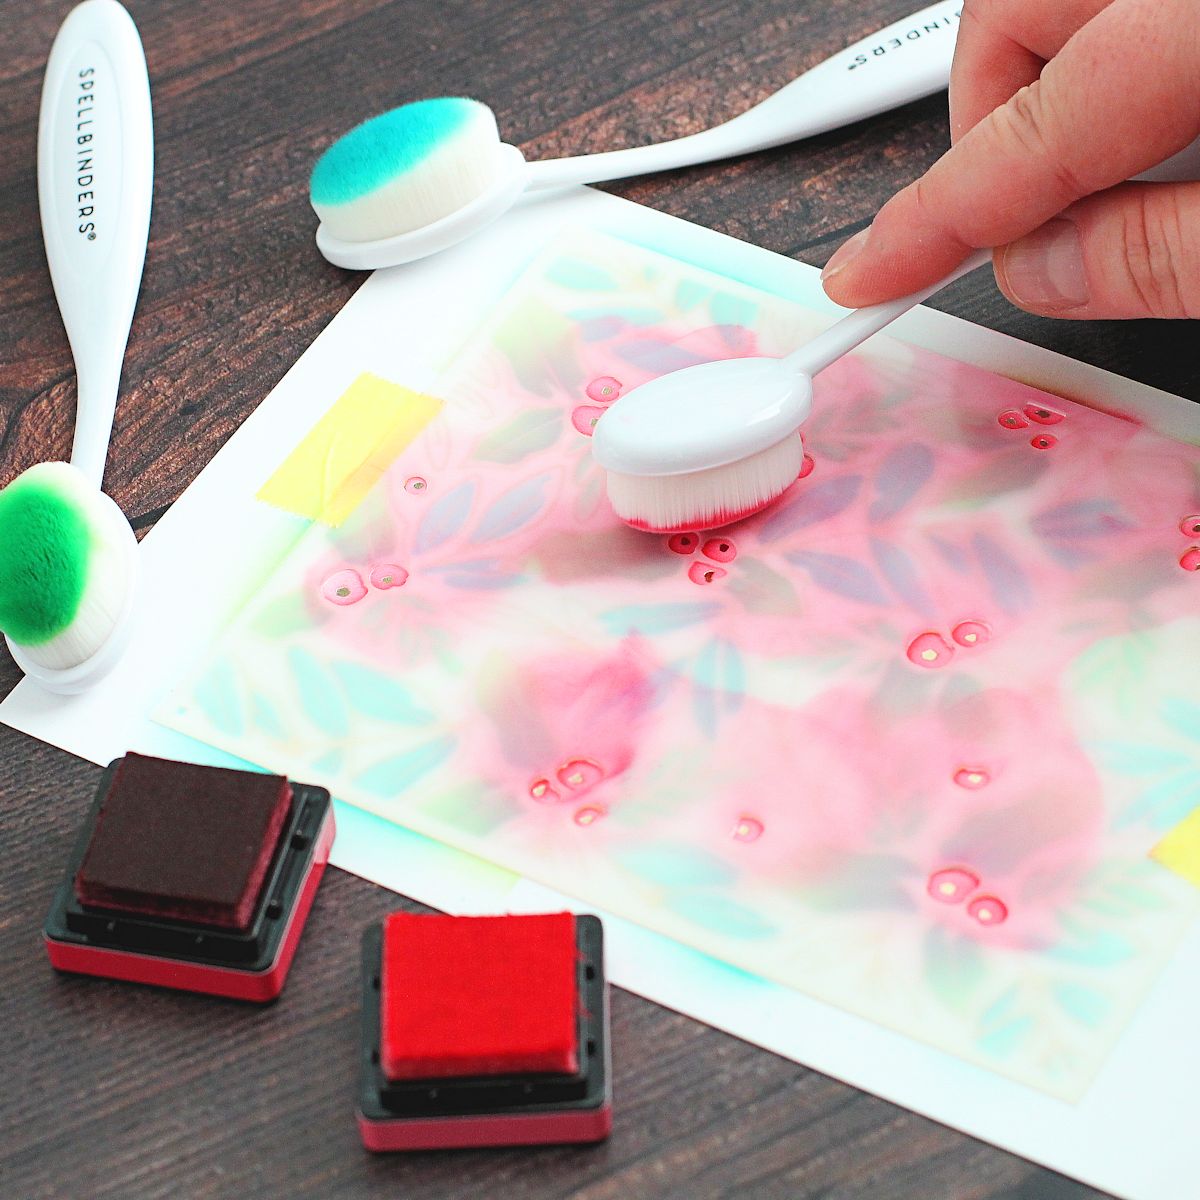
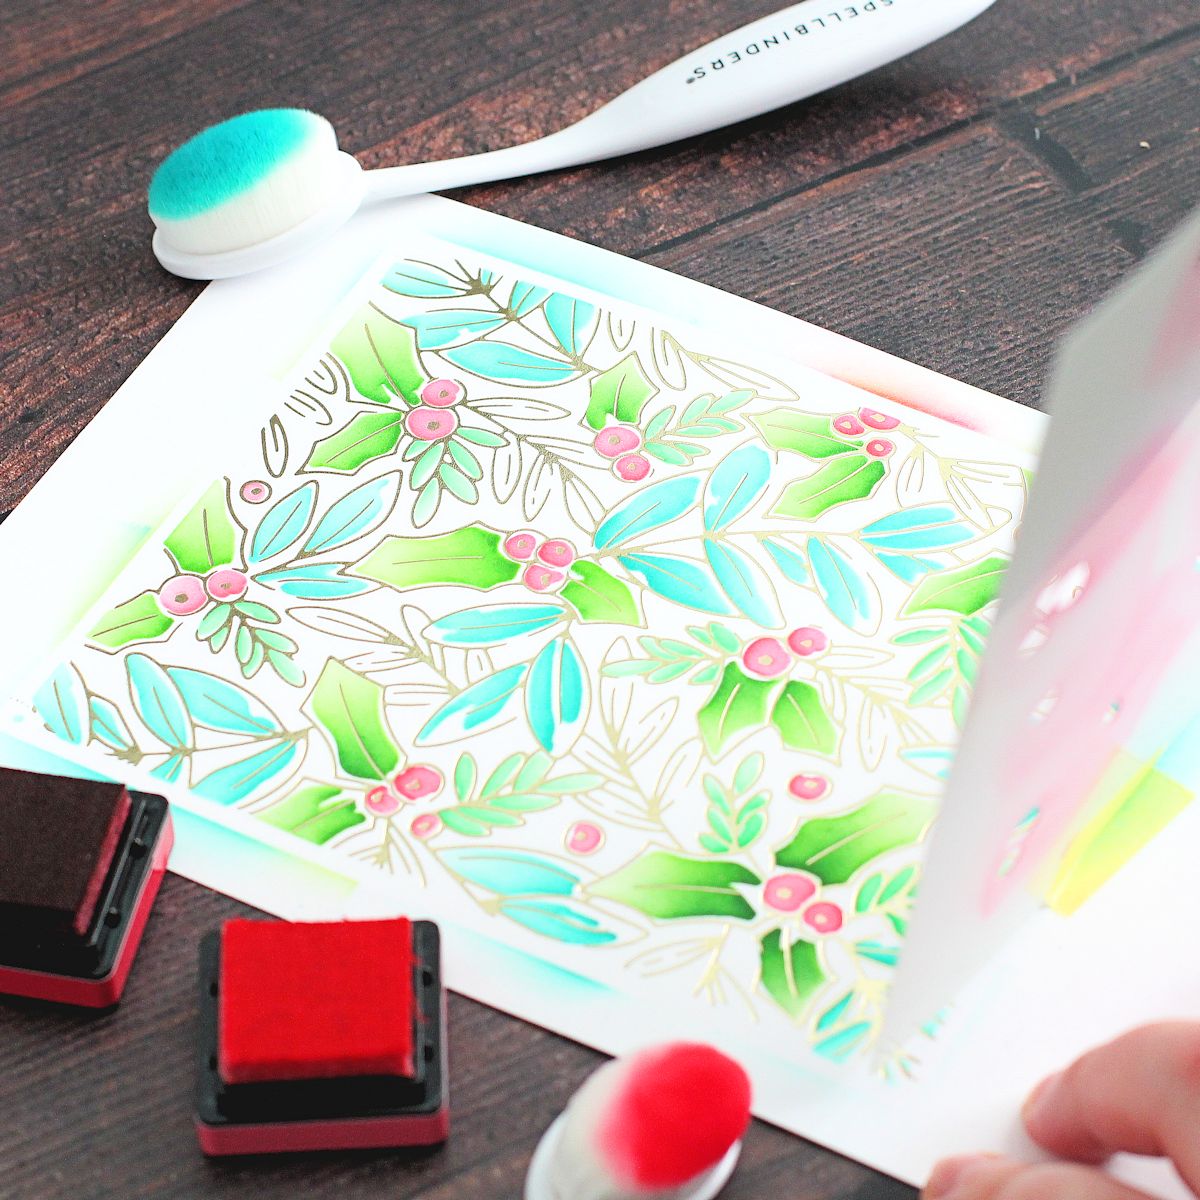
Place stencil 4 on top and secure with tape. Blend on two shades of red ink. Start with a lighter shade and cover the berries. Then blend darker color towards one side of the berries for some added depth. Remove stencil.
STEP 6
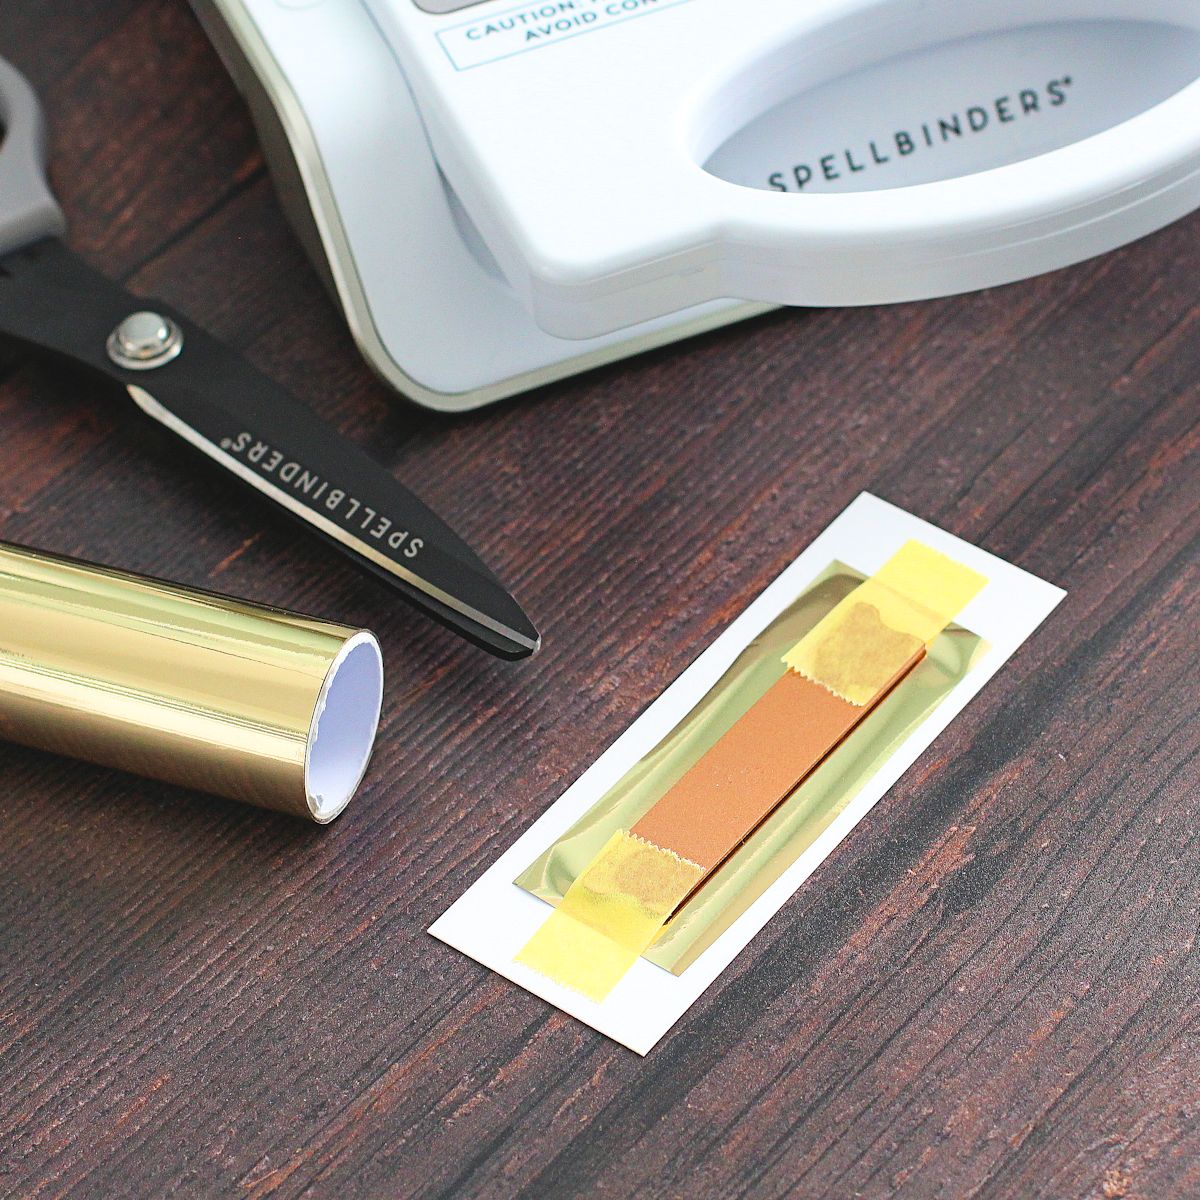
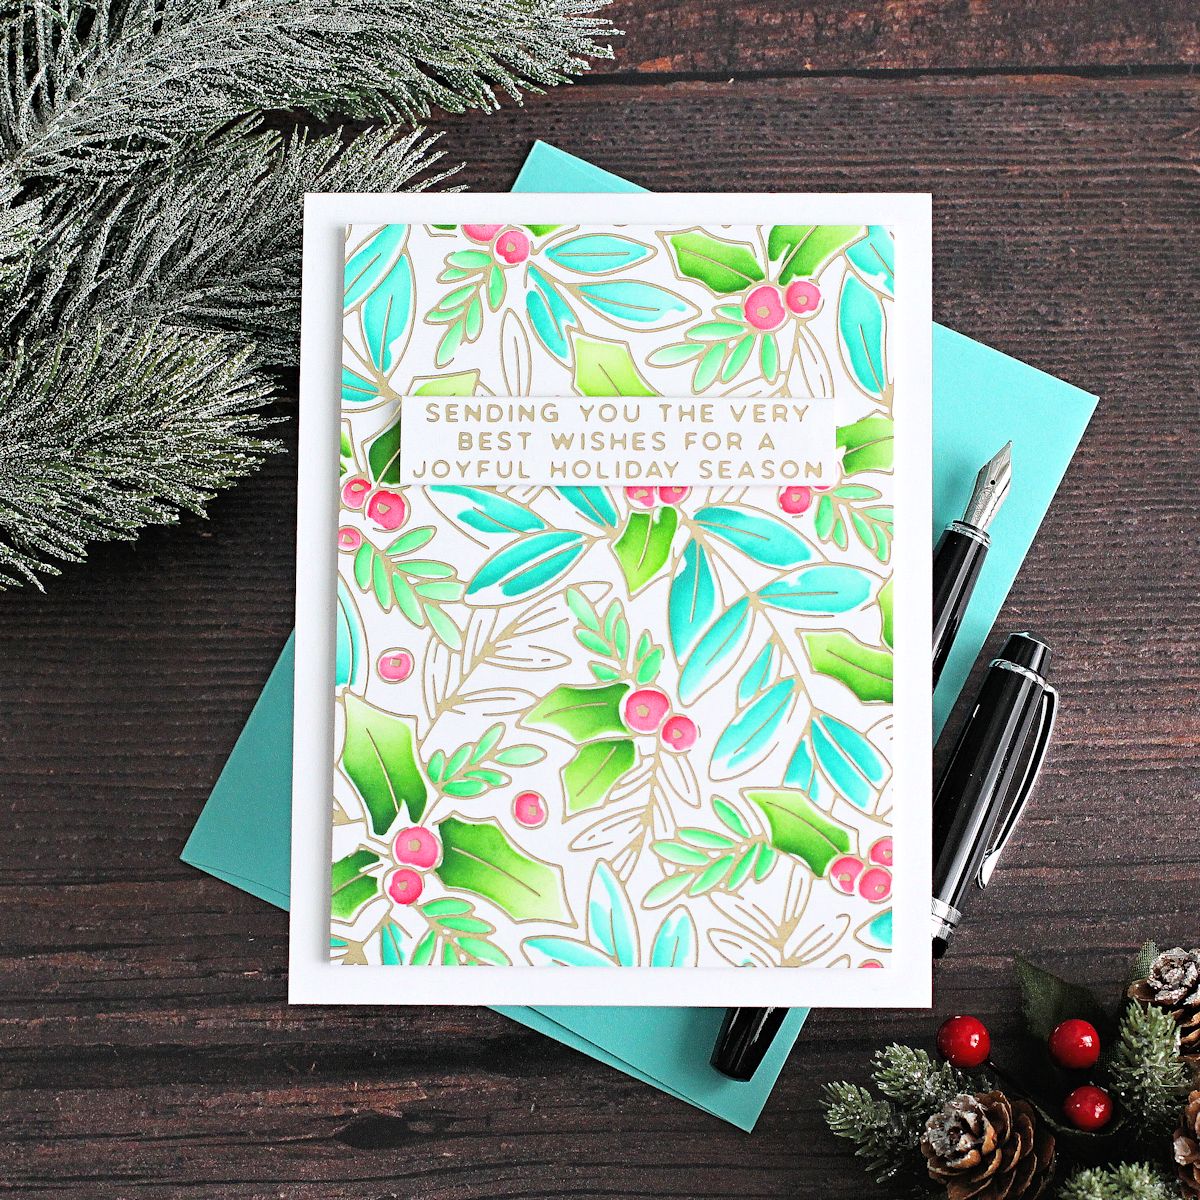
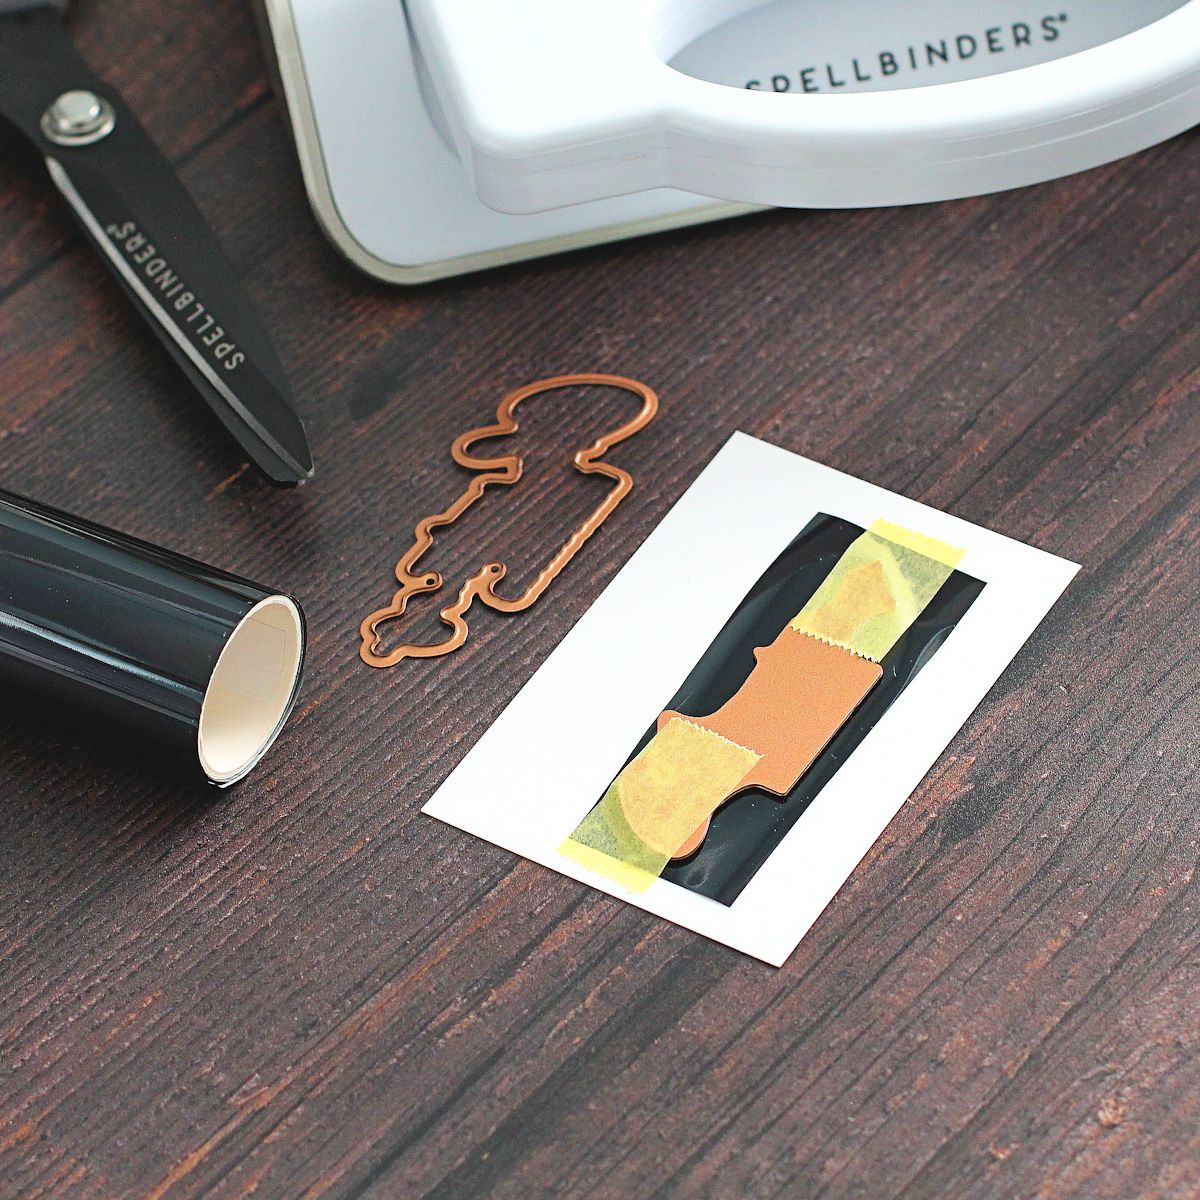
Take sentiment from A Merry Little Christmas Sentiments Glimmer Hot Foil Plate & Die Set and hot foil onto white cardstock with Champagne Foil, as per step 1.
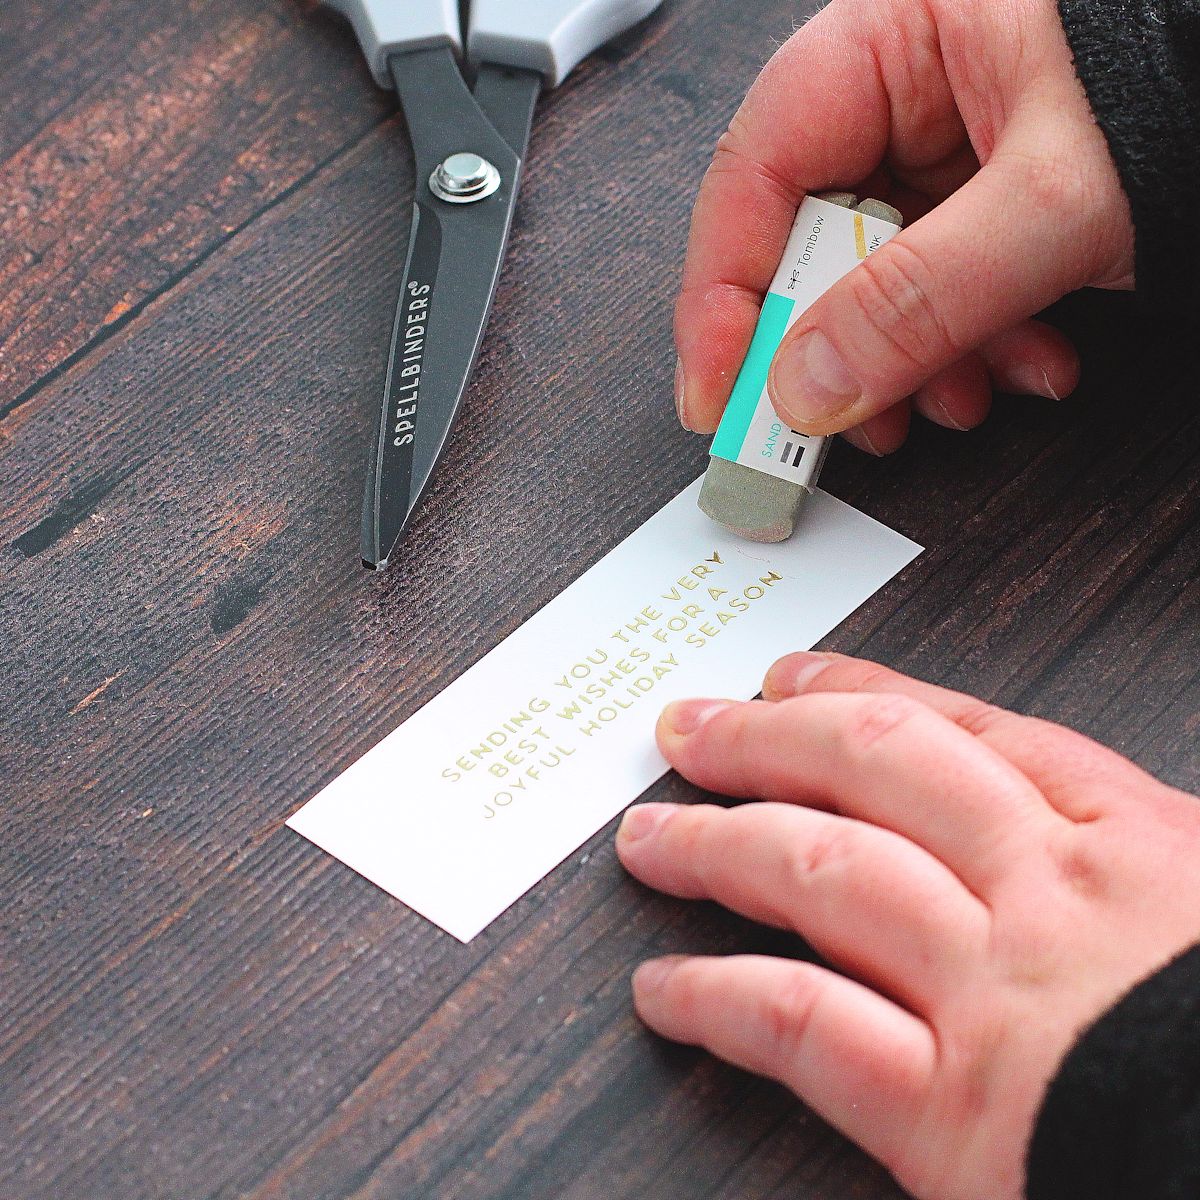
Remove any over-foiling using a sand eraser and cut it into a strip.
STEP 7
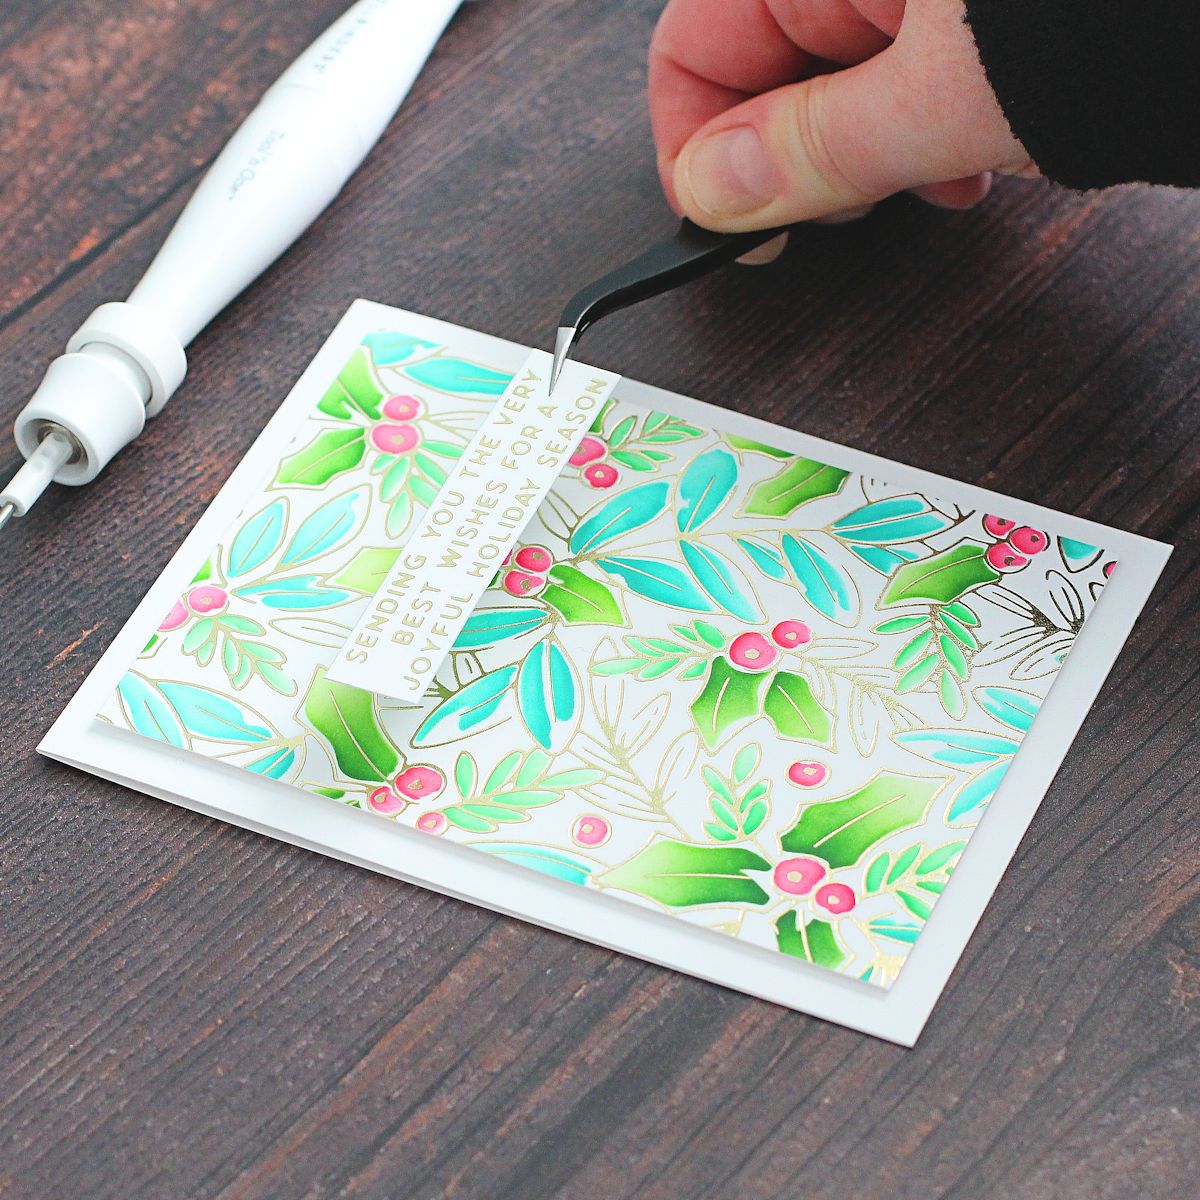
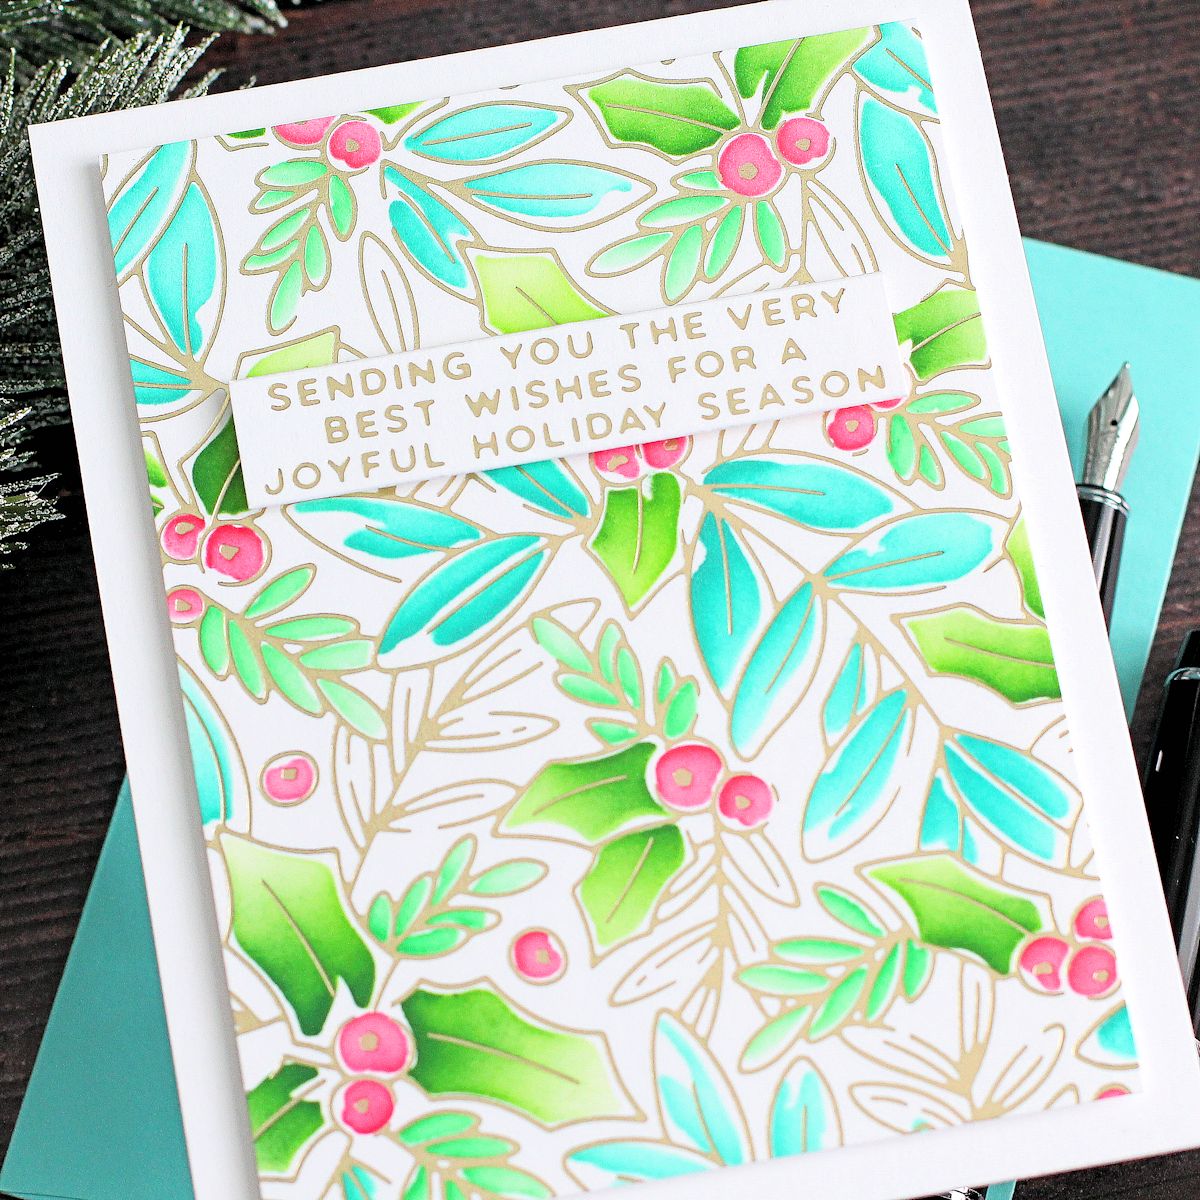
Cut the background panel to 3.75” x 5” and adhere to A2 sized card base using thin foam tape. Adhere sentiment strip on top.
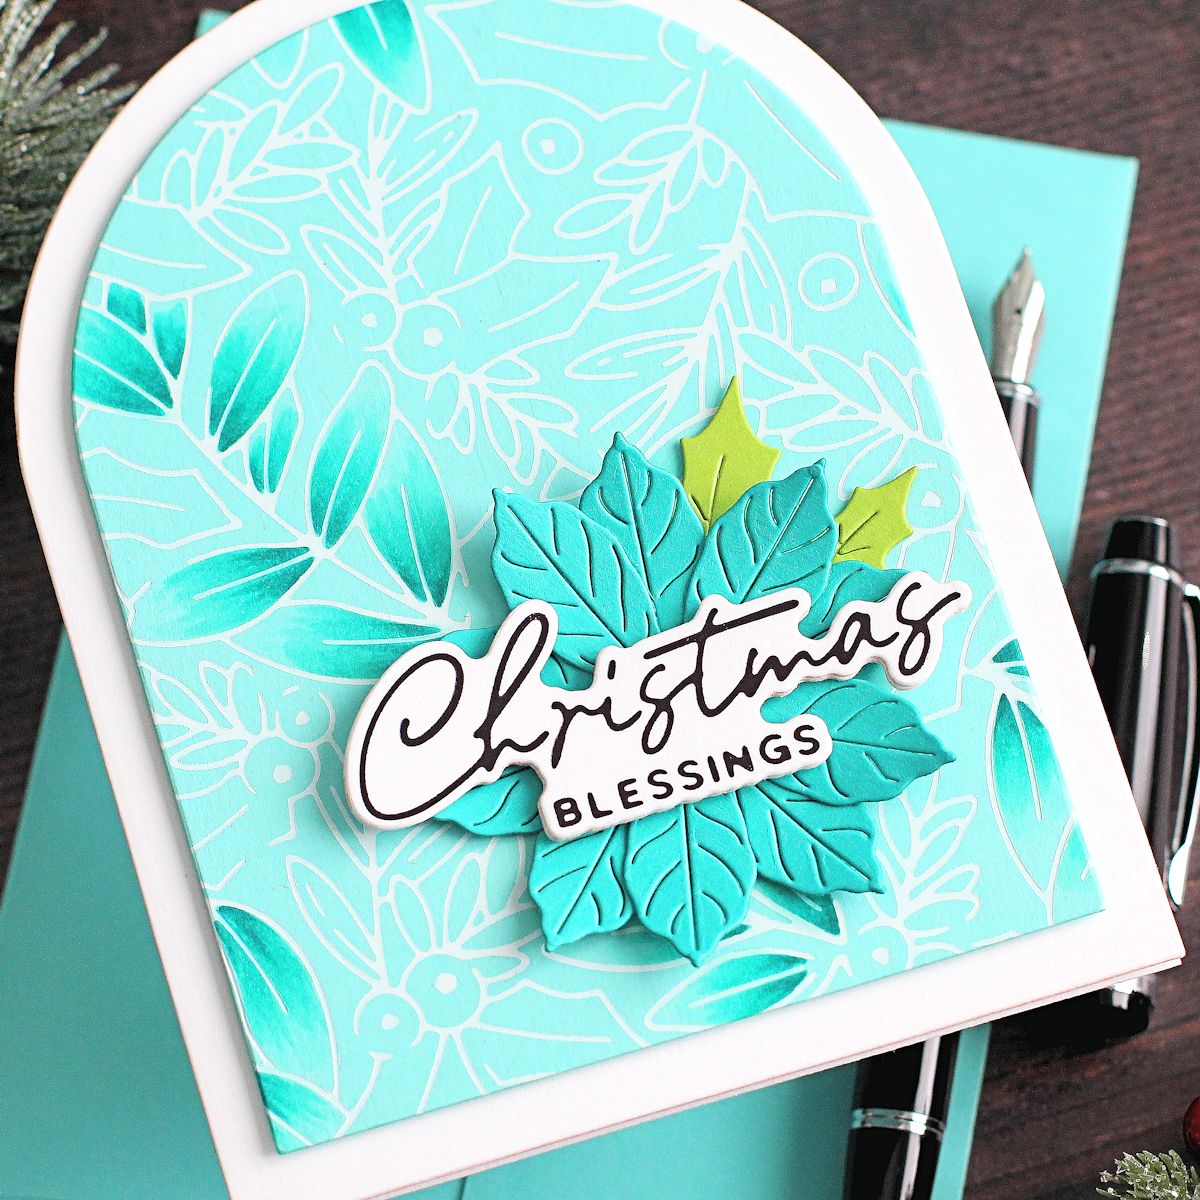
GLIMMER HOLLY BACKGROUND
STEP 1
ʼ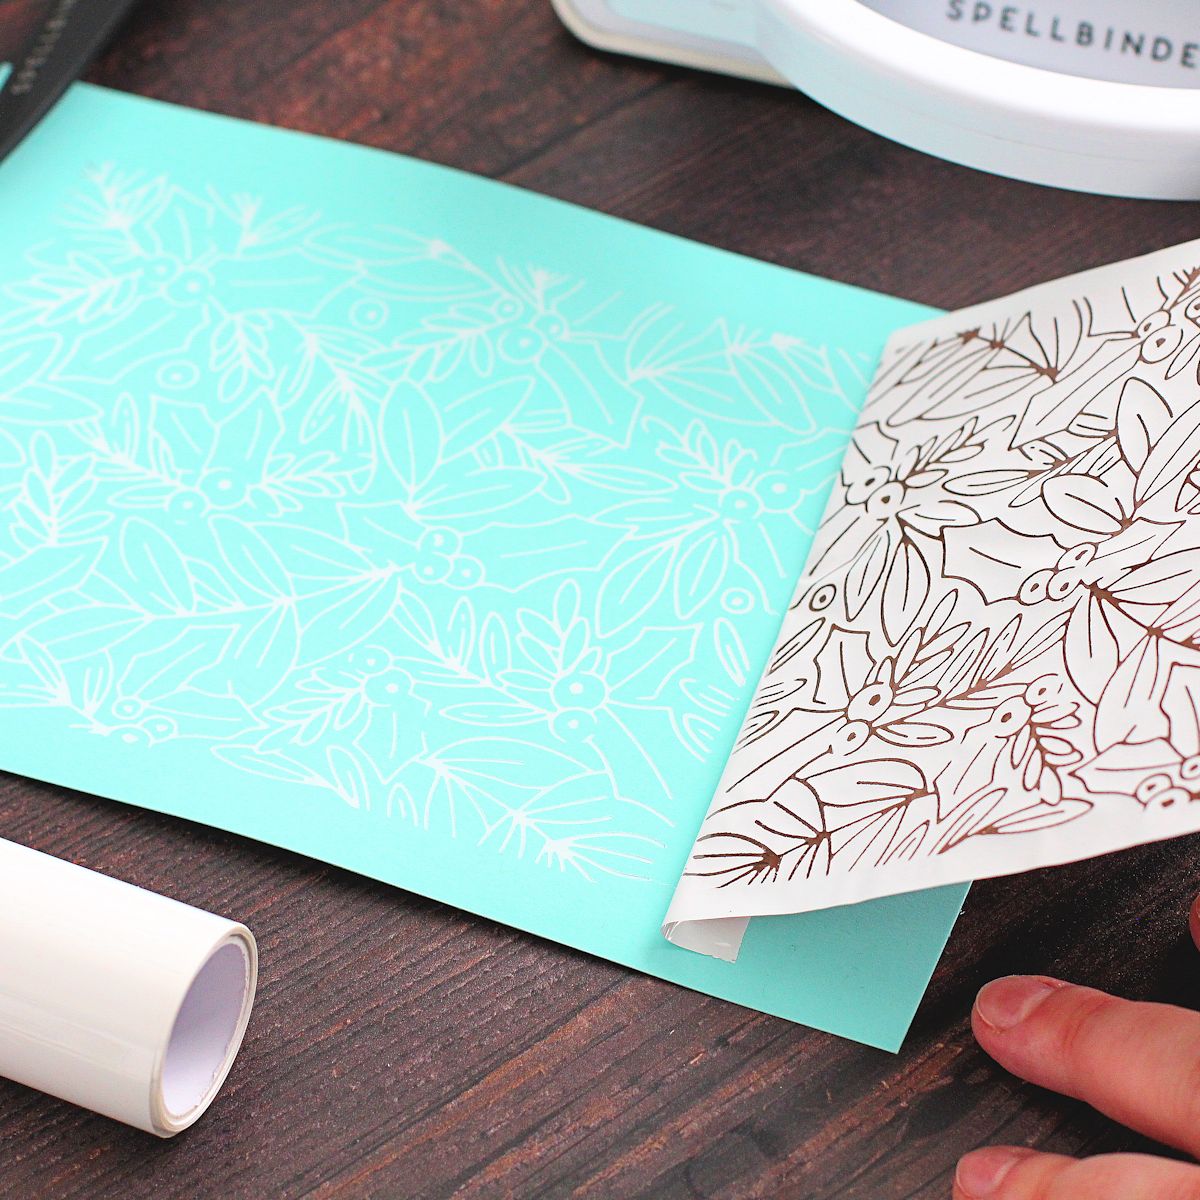
Hot foil Glimmer Holly Background Hot Foil Plate onto Waterfall Cardstock using White Foil, using the same method as the first card.
STEP 2
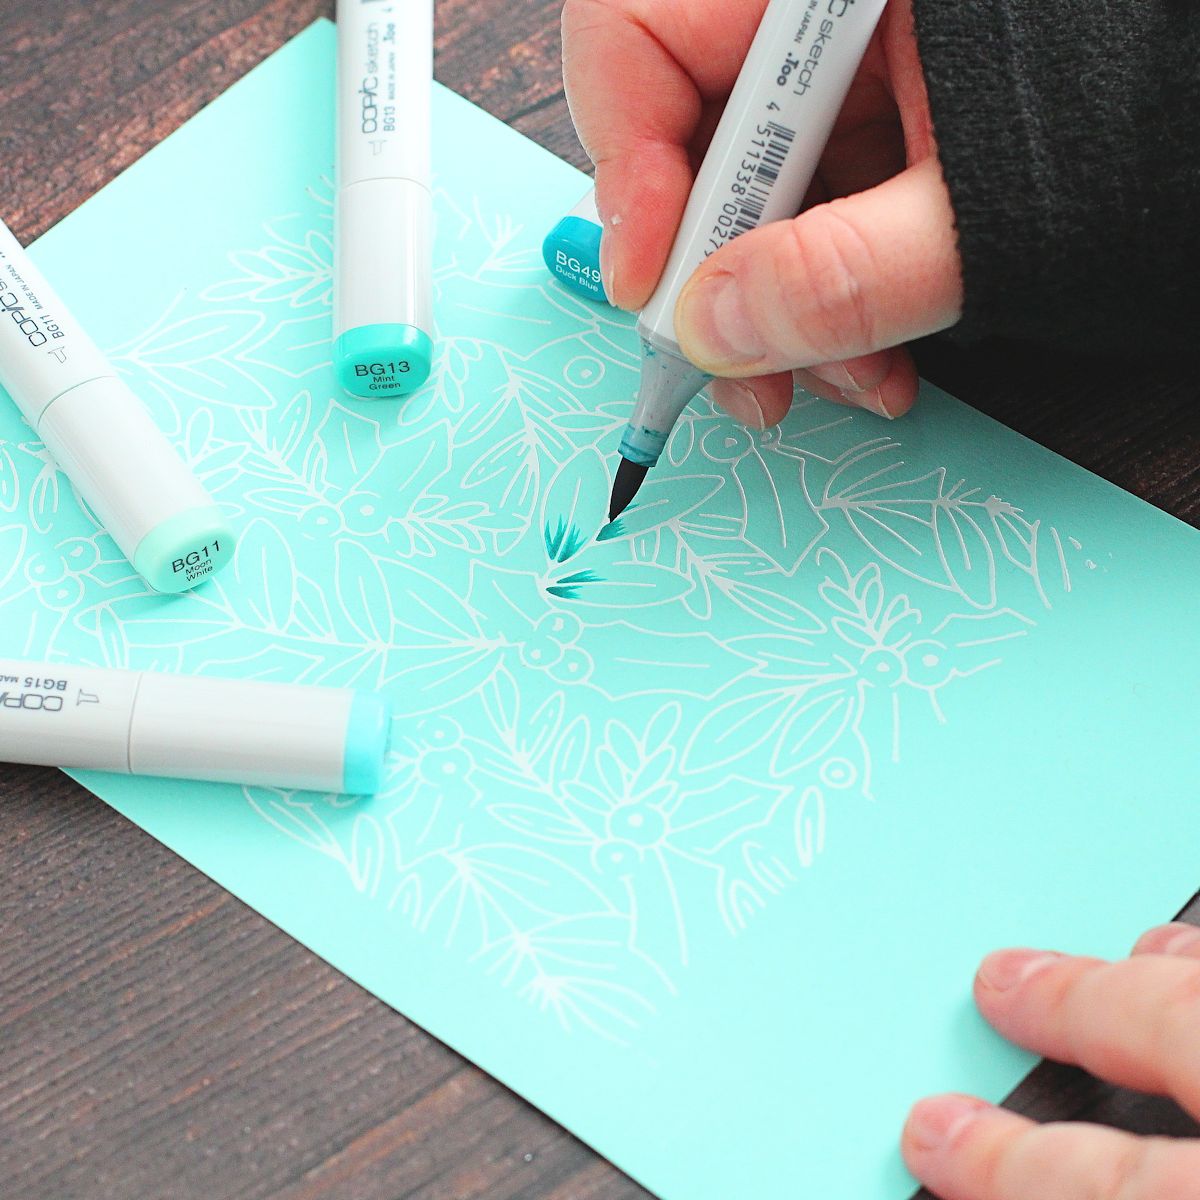
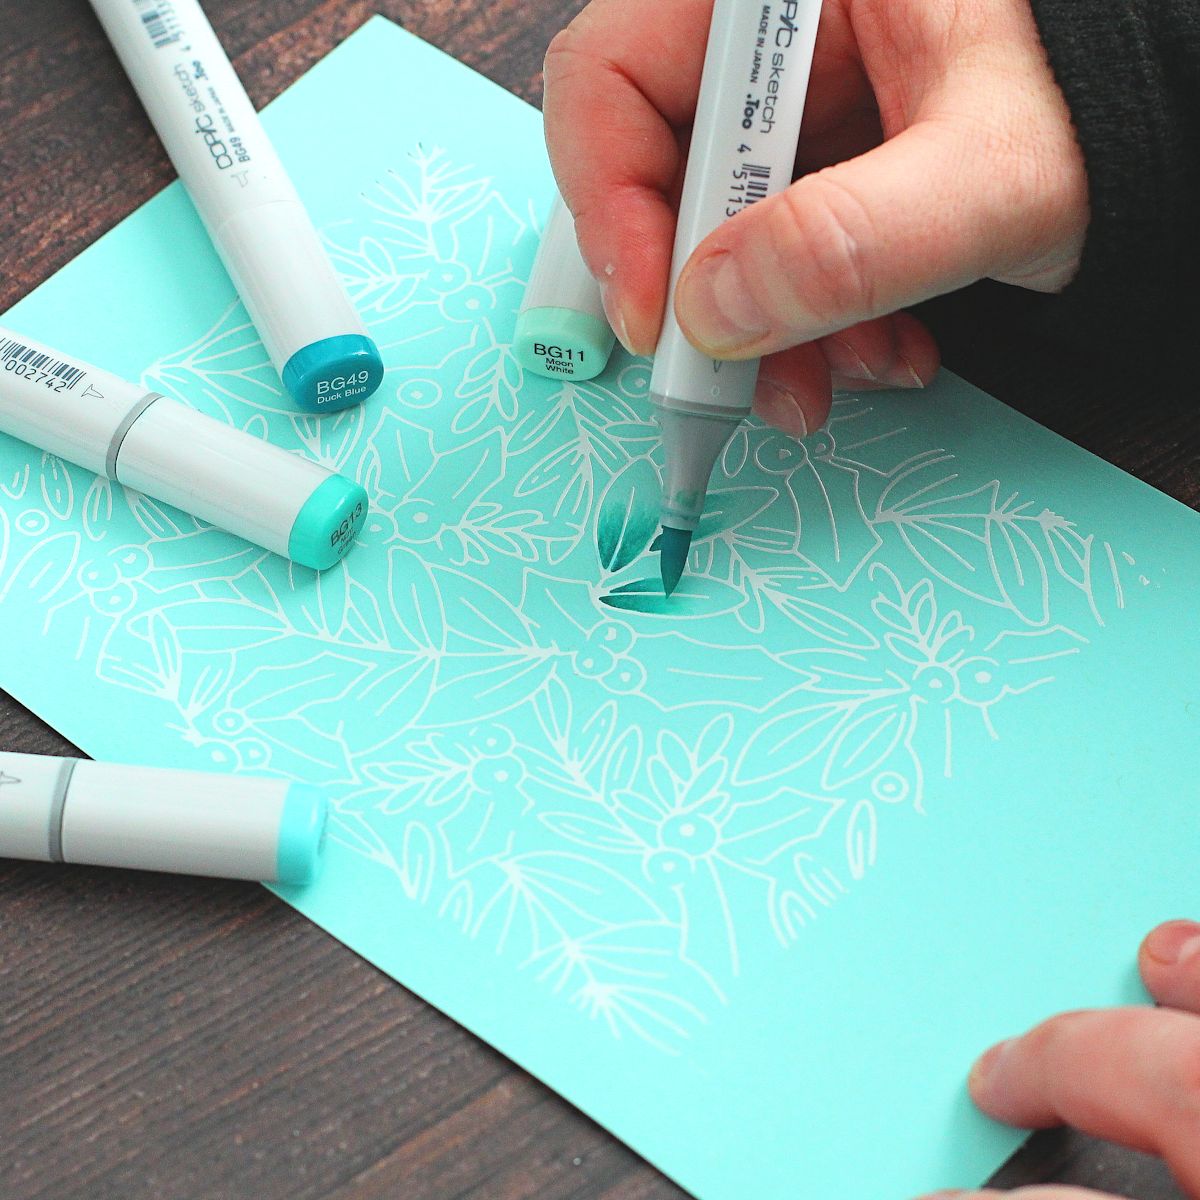
Using alcohol markers, color the larger leaves using teal tones to add shading. I used Copic Markers BG49, BG15, BG13 and BG11.
STEP 3
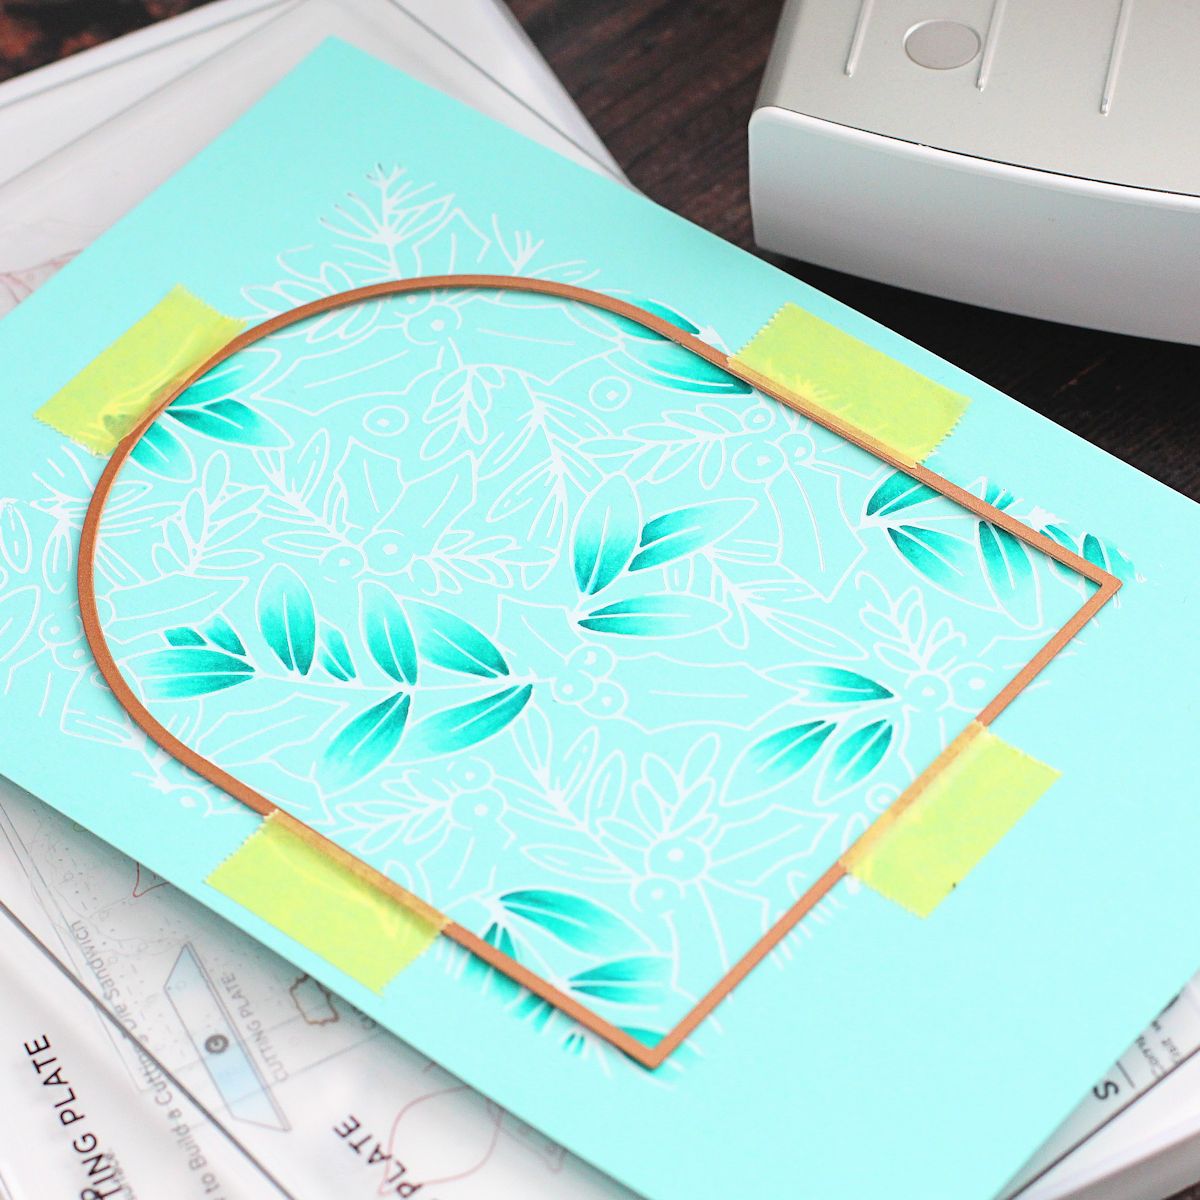
Die-cut panel using Essential Arches Etched Dies. I used the 4th largest size.
STEP 4
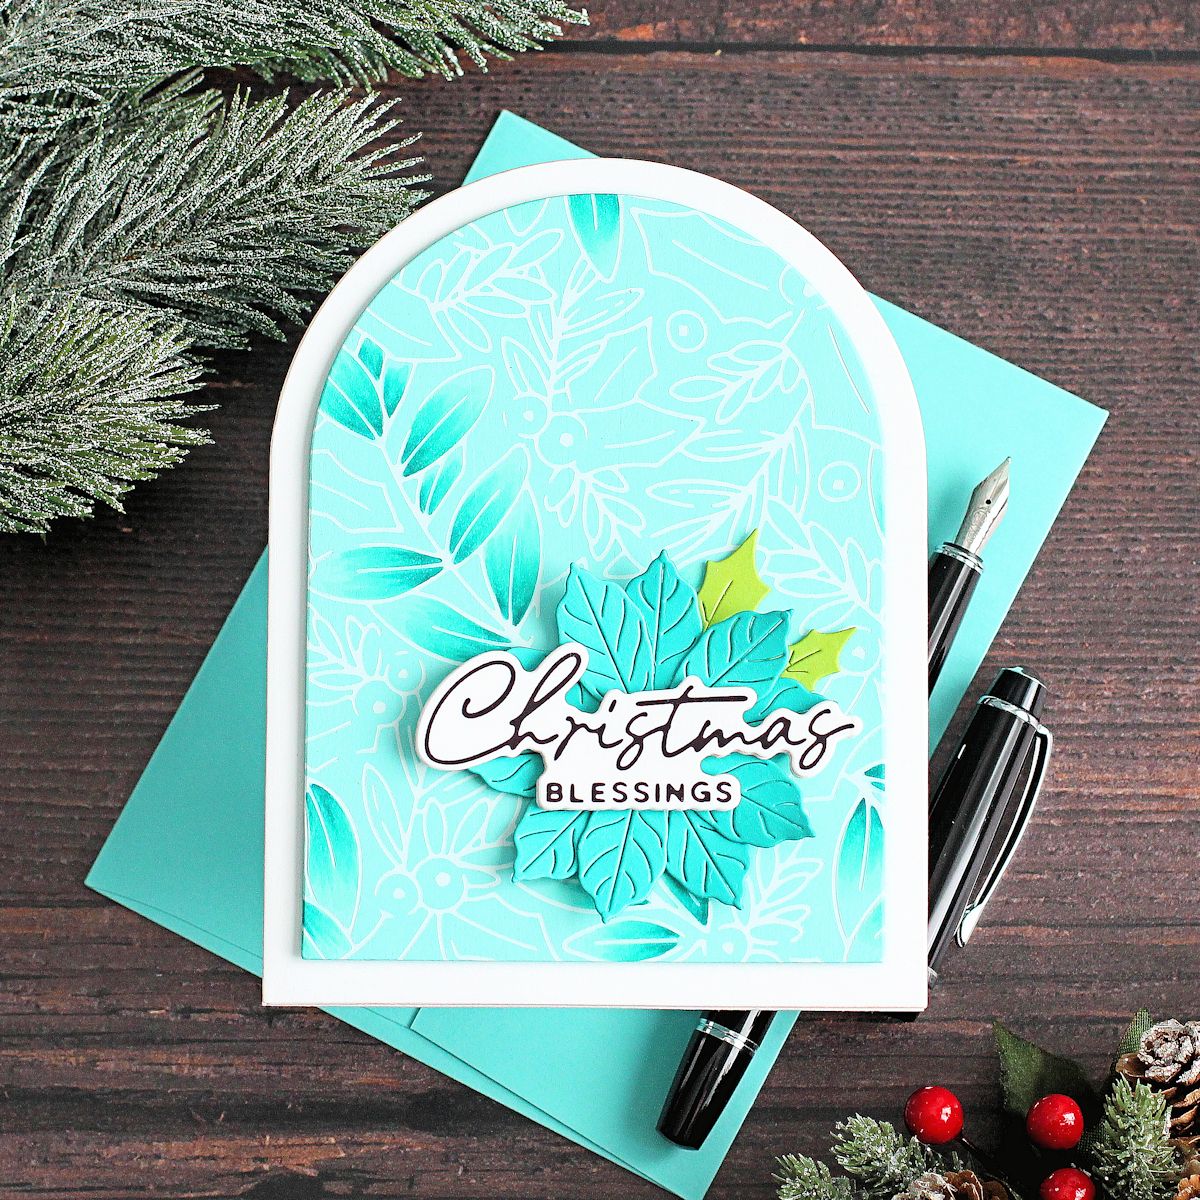
Take A2 side-fold card base and die-cut using the second largest size of Essential Arches Etched Dies. Place the die just over the edge on the left-hand side to keep the fold intact. If the card does not cut all the way through, cut the back piece using scissors. Adhere foiled panel on top using thin foam tape.
STEP 5
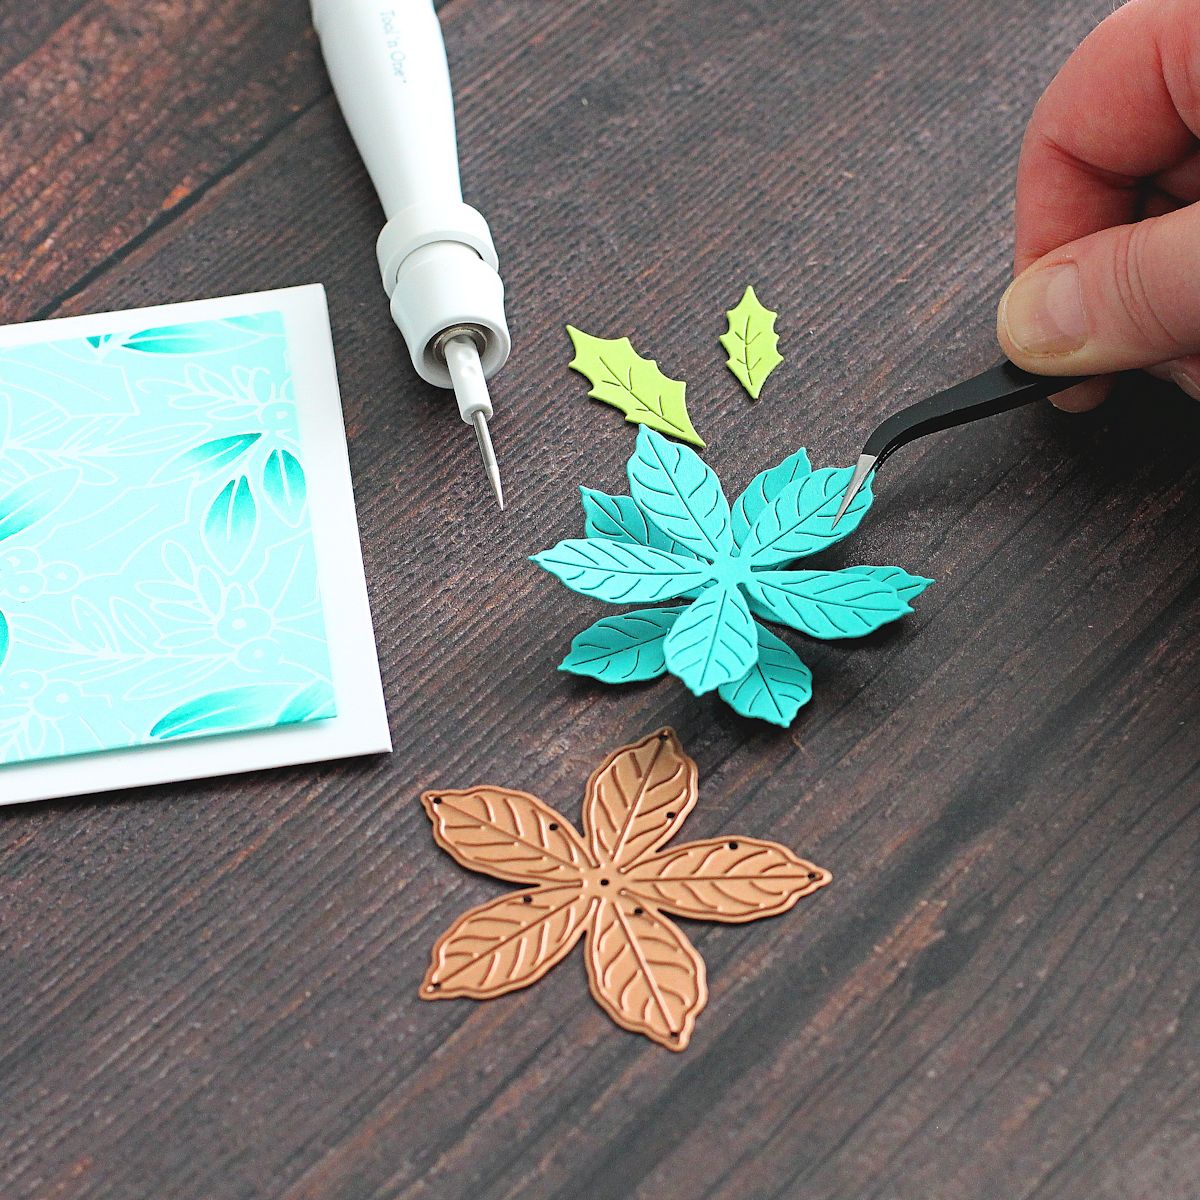
Die-cut poinsettia twice from Teal Topaz Cardstock and holly leaves from Rainforest Cardstock. Adhere two layers of poinsettia together, off-setting petals then adhere to the card using Bearly Art Glue.
STEP 6
Hot foil sentiment from A Merry Little Christmas Sentiments Glimmer Hot Foil Plate & Die Set onto white cardstock using Black Foil. Die-cut using the coordinating die. Die-cut the die a further three times from white cardstock and adhere behind the foiled one for added dimension.
STEP 7
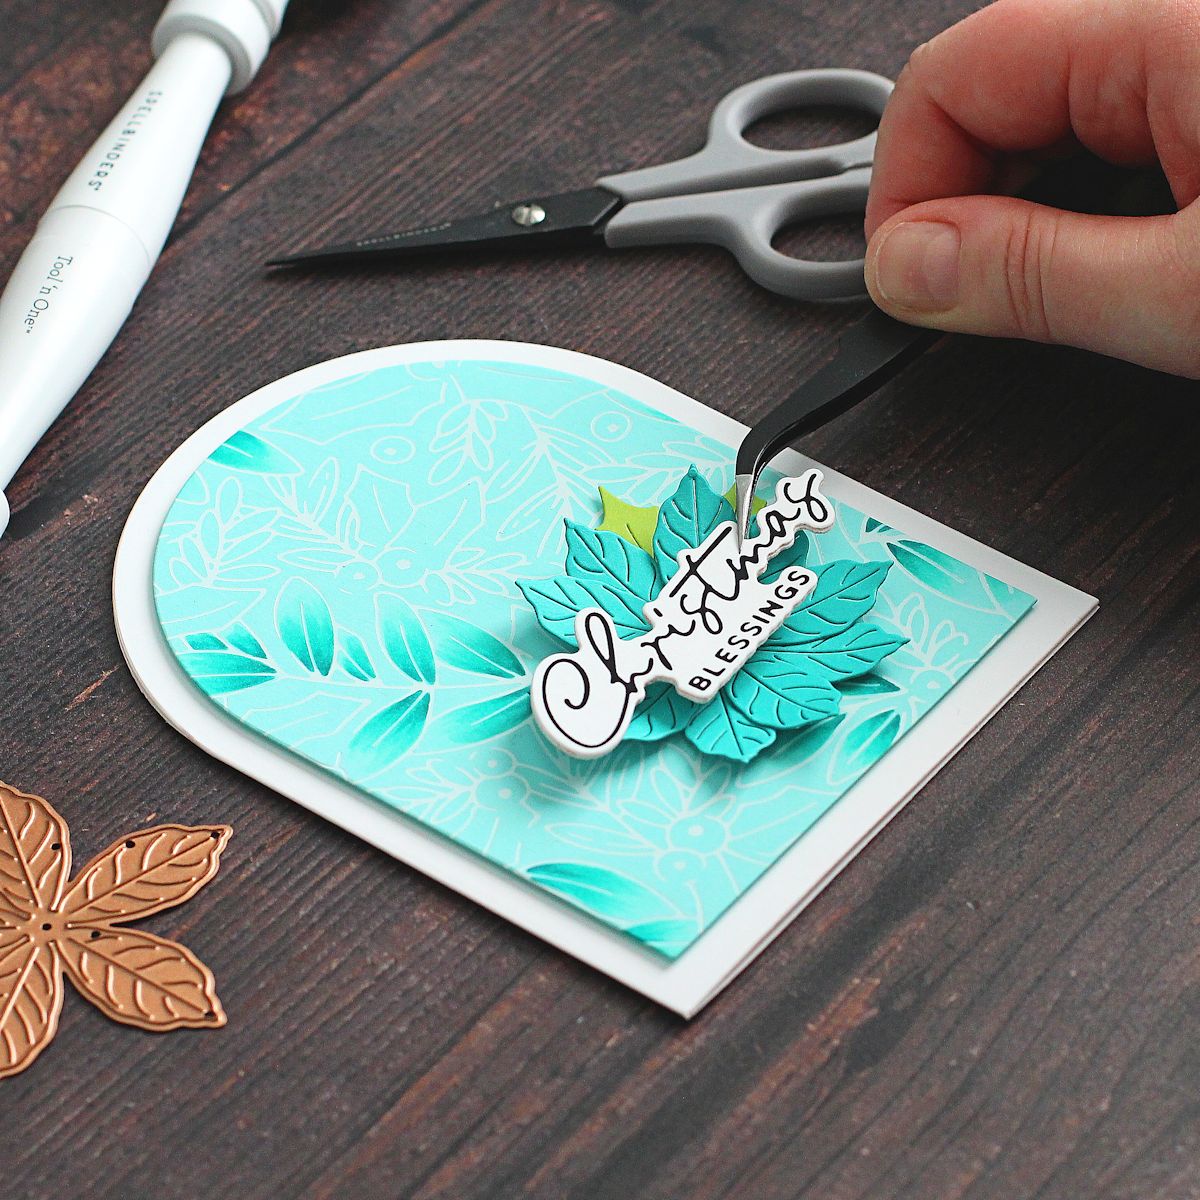
Adhere sentiment to the card, on top of the poinsettia, using foam tape.
LAYERED GLIMMER HOLLY BACKGROUND

STEP 1
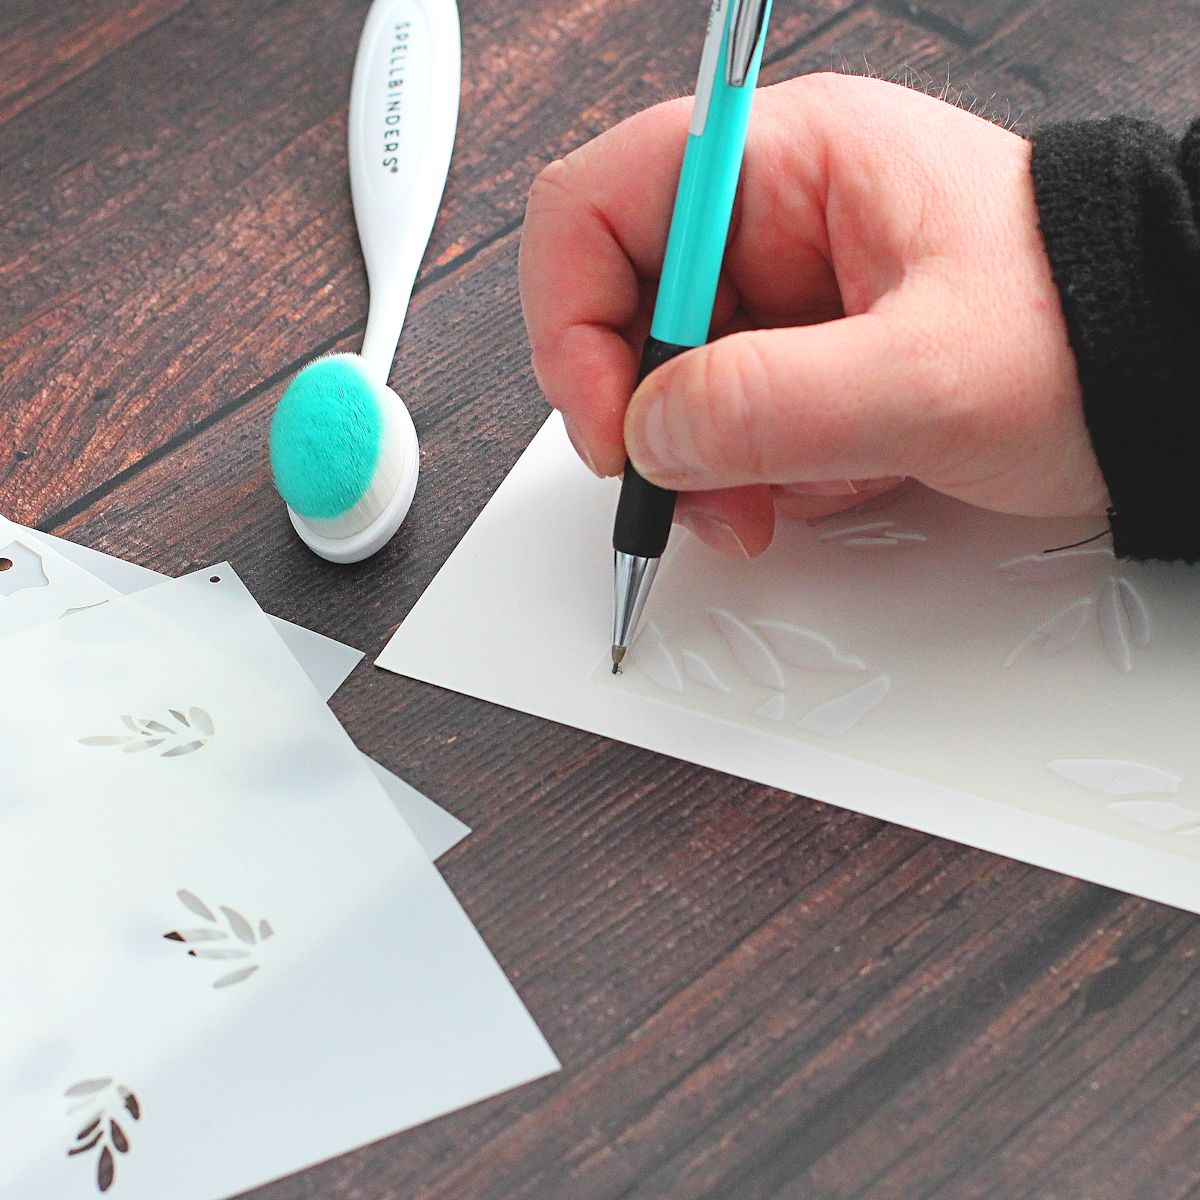
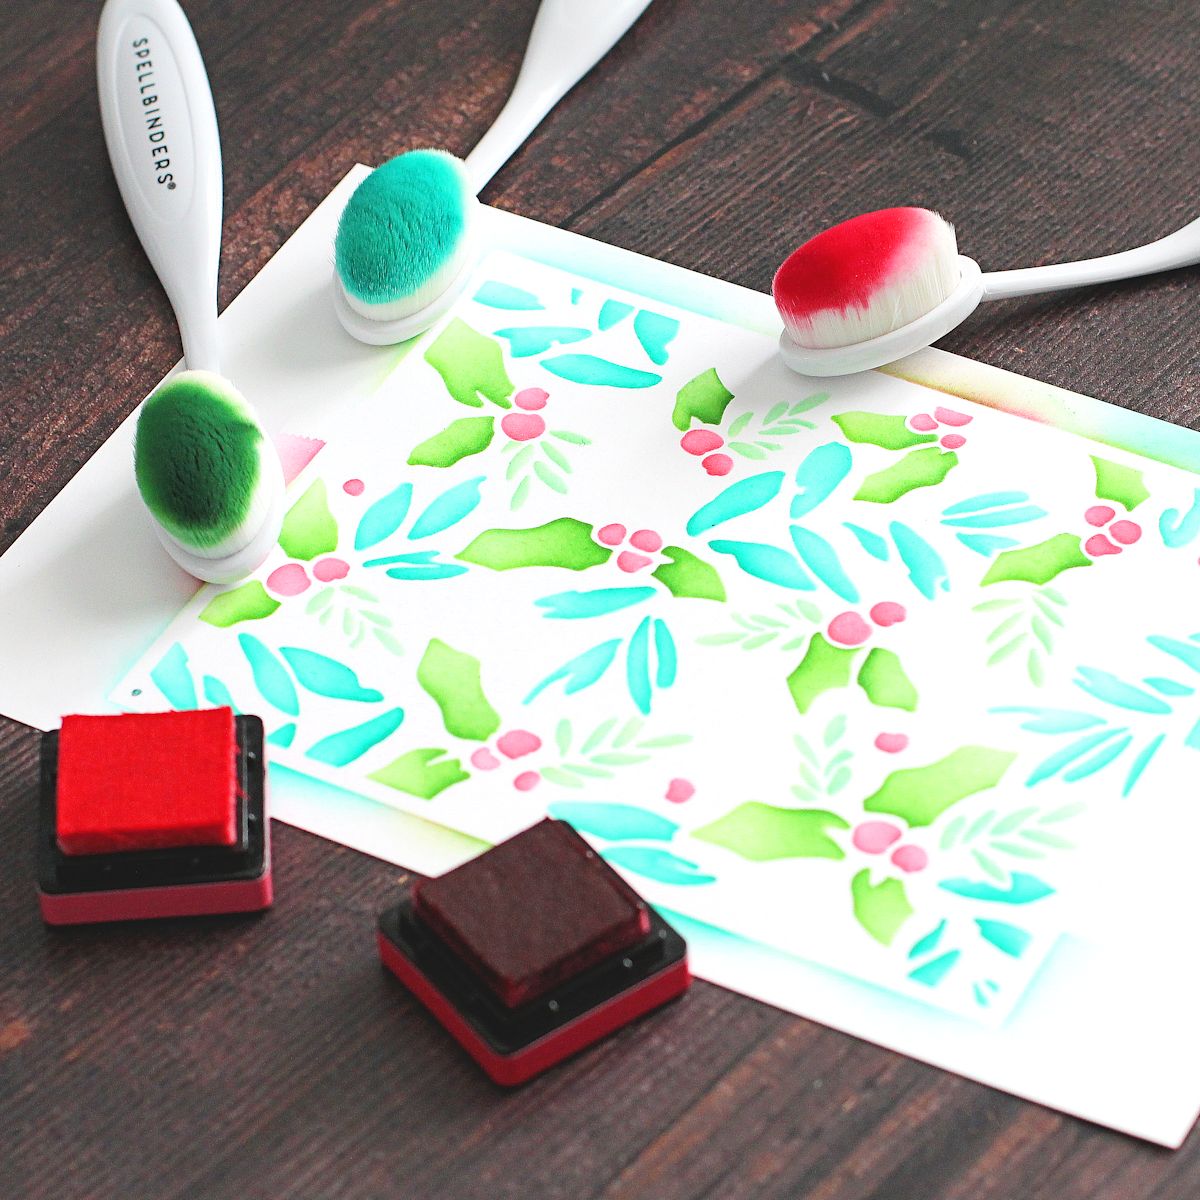
Take a panel of white cardstock and place the first Layered Glimmer Holly Background Stencil on top, securing with Best Ever Craft Tape. In the top left and bottom right corners of the stencils, there is a hole. Draw a mark in each one with a pencil to help you line up the stencils.
STEP 2

Using Blending Brushes and the same inks as the first card, blend teal ink through the openings to color the leaves. Remove the stencil, saving the tape.
STEP 3
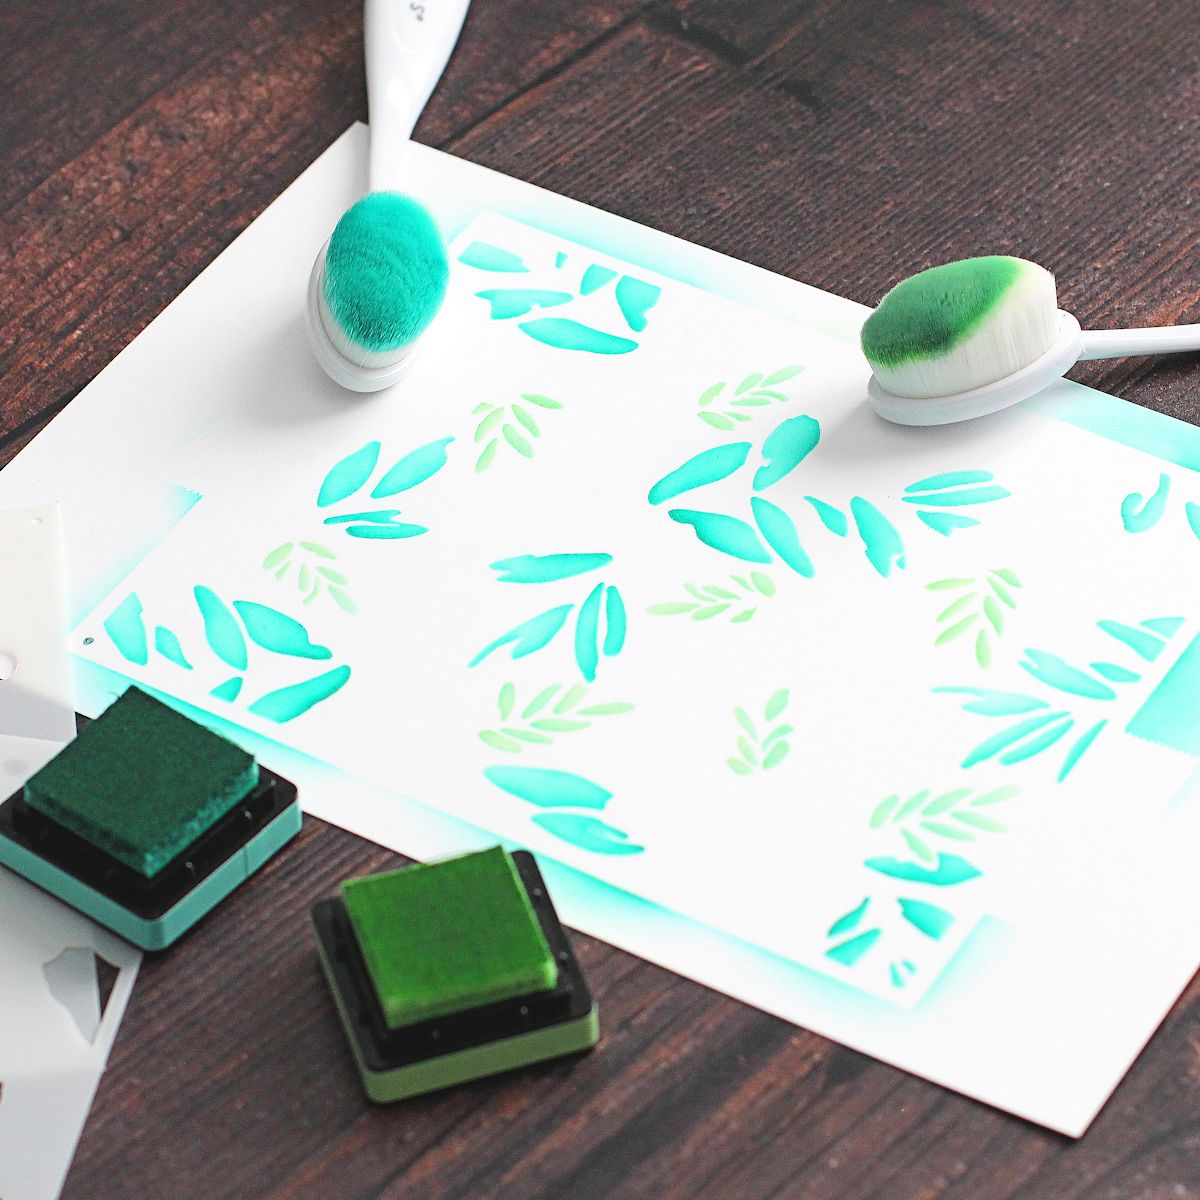
Place stencil 2 on top, lining up the pencil marks inside the holes in the stencil corners, and secure with tape. Blend a light green and a light teal ink for the small leaves. Remove the stencil and save the tape.
STEP 4
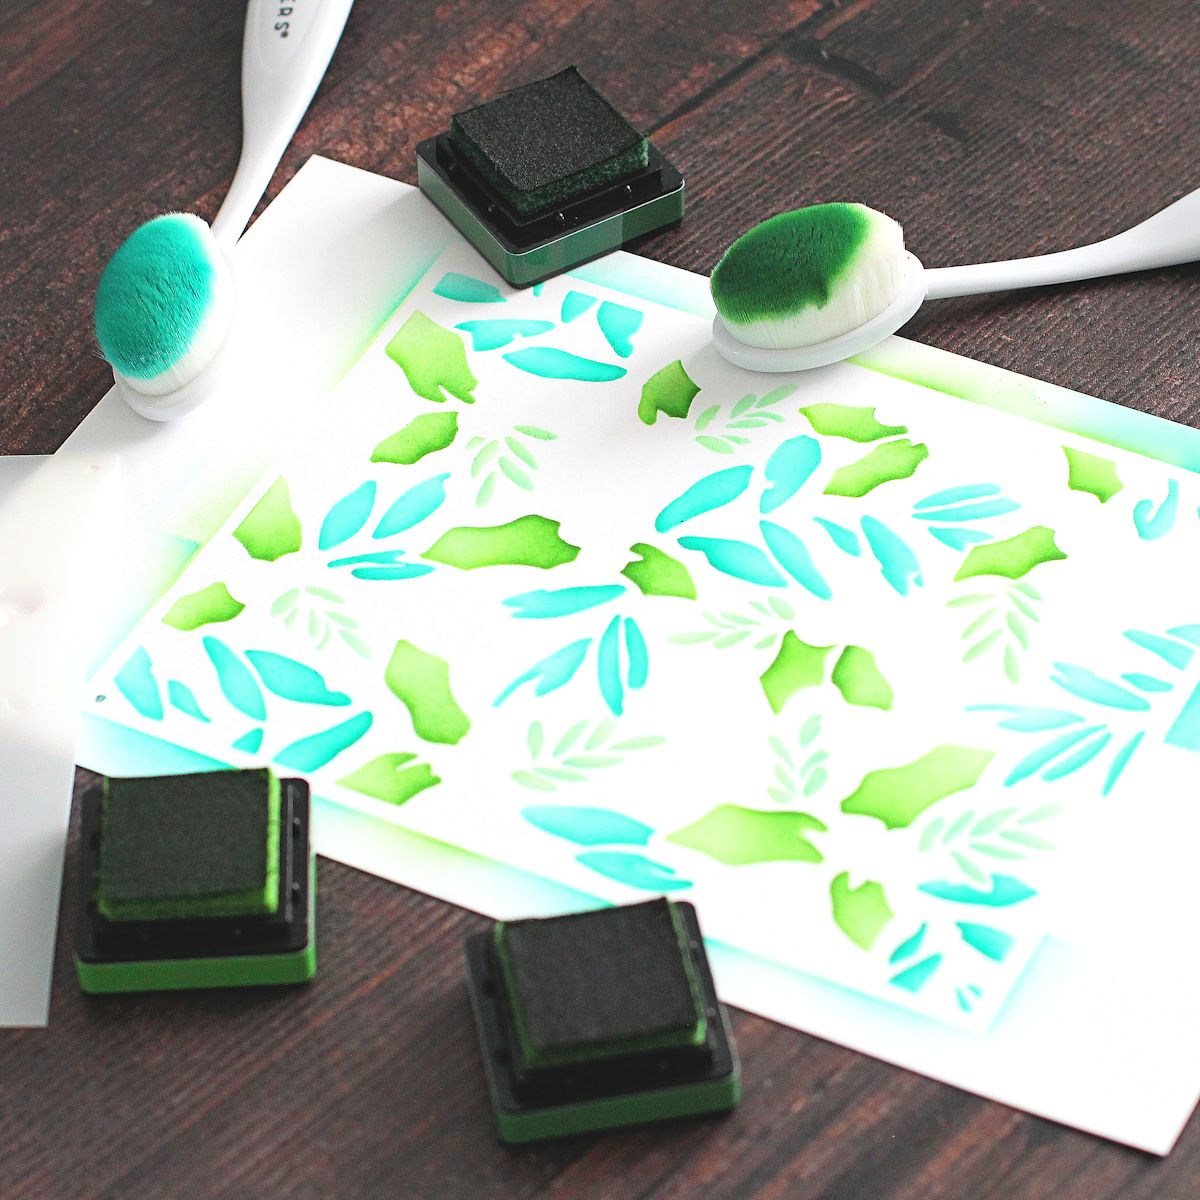
Place stencil 3 on top and secure with tape. Use three shades of green ink to color the holly leaves. Remove the stencil and save the tape.
STEP 5
Place stencil 4 on top and secure with tape. Blend two shades of red ink to color the berries. Remove stencil.
STEP 6
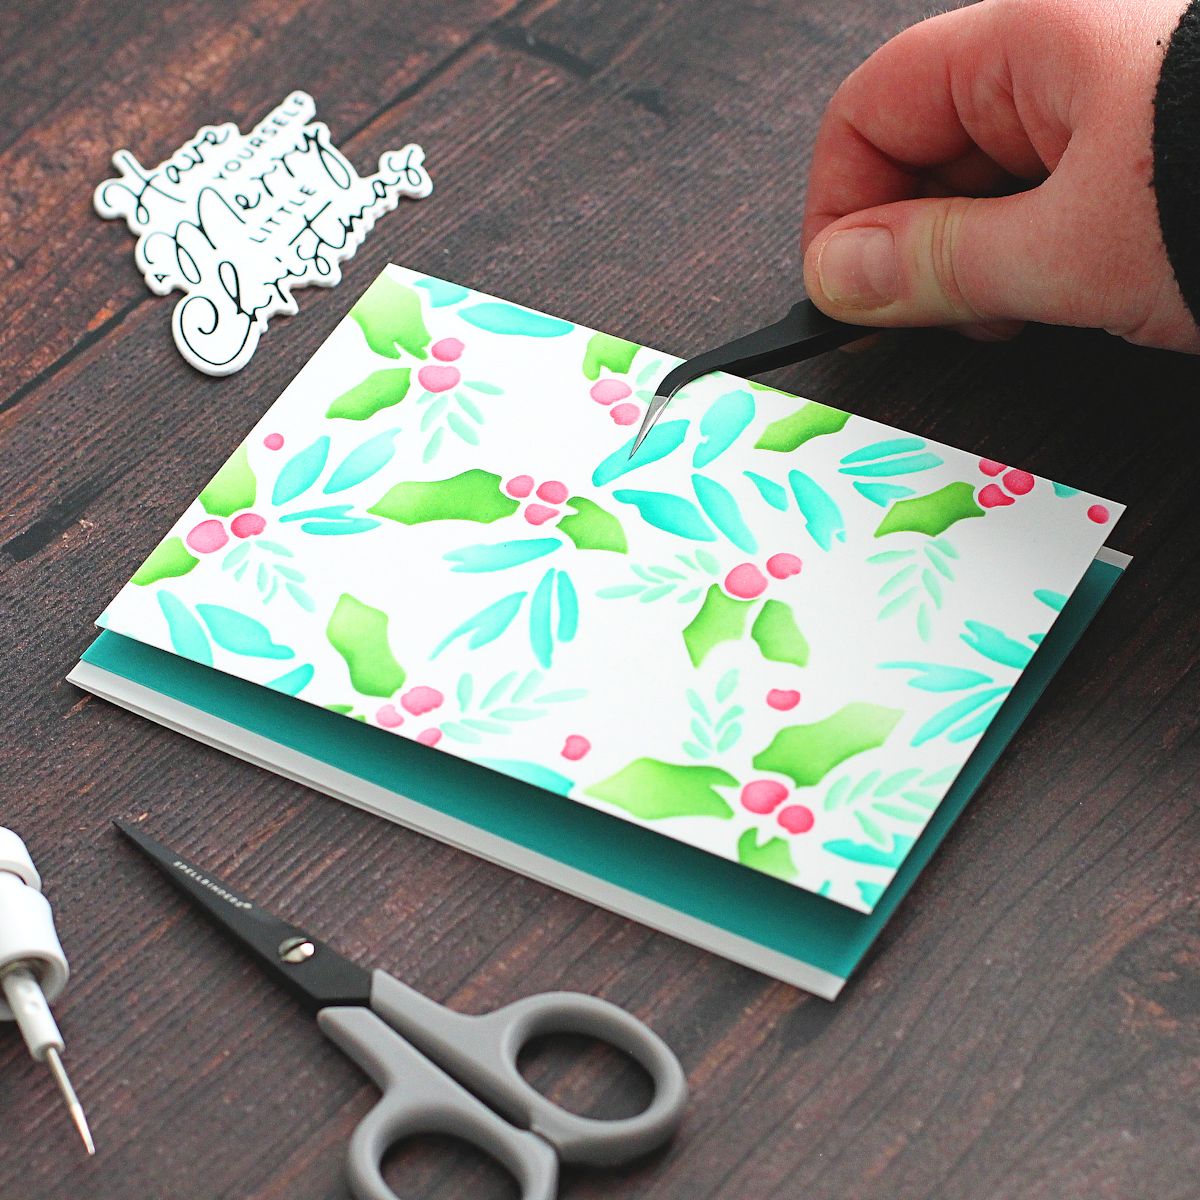
Adhere a panel of Teal Topaz Cardstock to the front of an A2 size white card base. Cut the stenciled panel to 3.75” x 5.5” and adhere on top using thin foam tape.
STEP 7
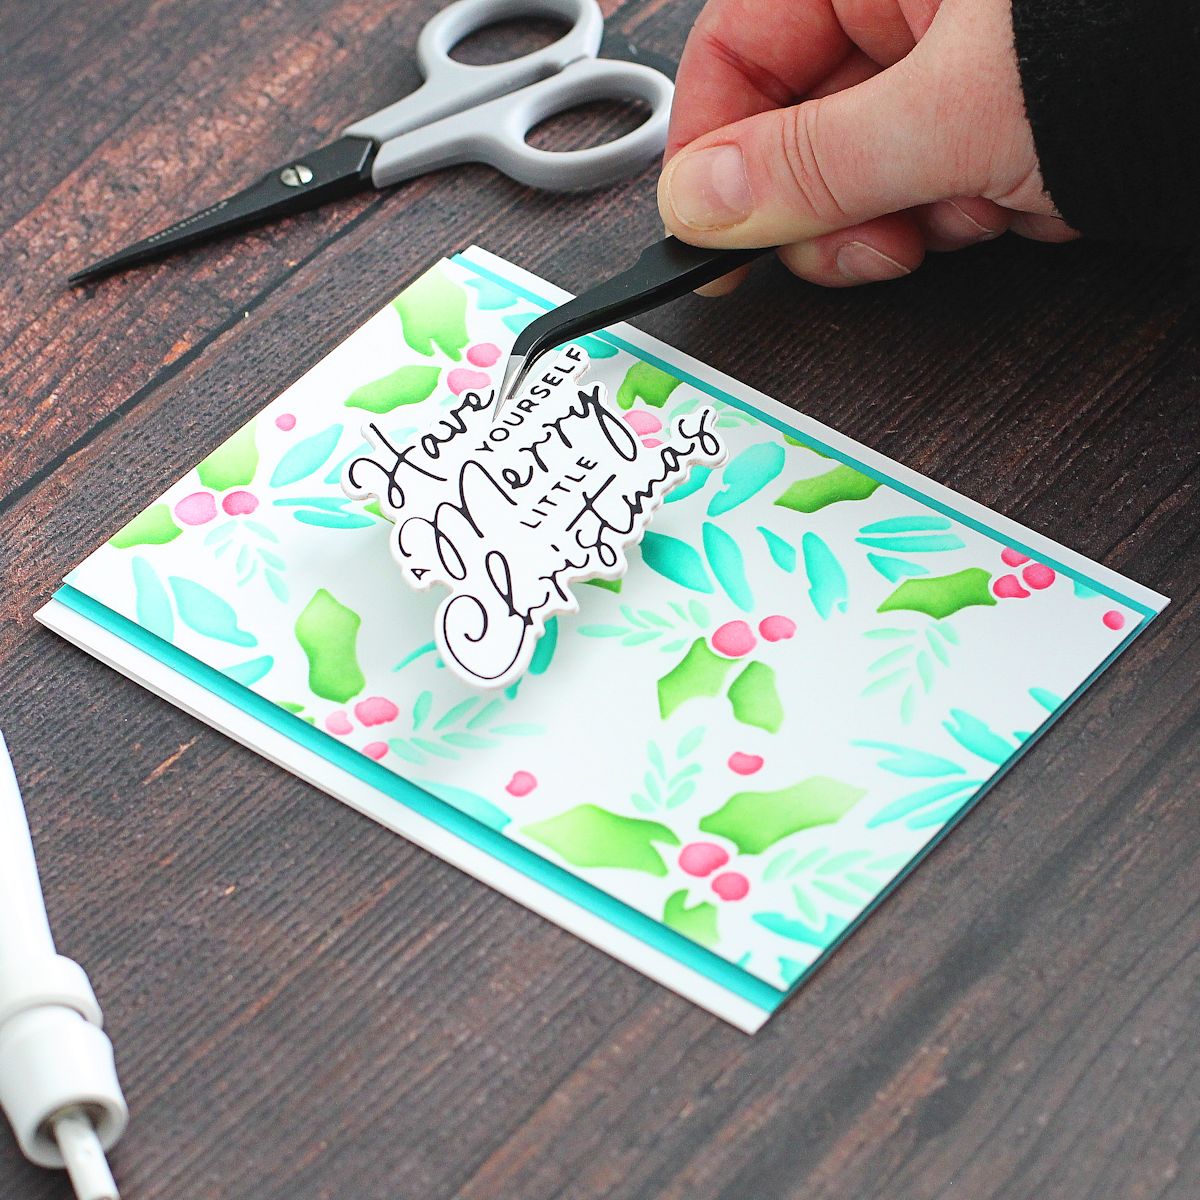
Hot foil sentiment from A Merry Little Christmas Sentiments Glimmer Hot Foil Plate & Die Set onto white cardstock using Black Foil. Die-cut using the coordinating die. Die-cut the die a further three times from white cardstock and adhere behind the foiled one for added dimension. Adhere to the card using Bearly Art Glue.
STEP 8
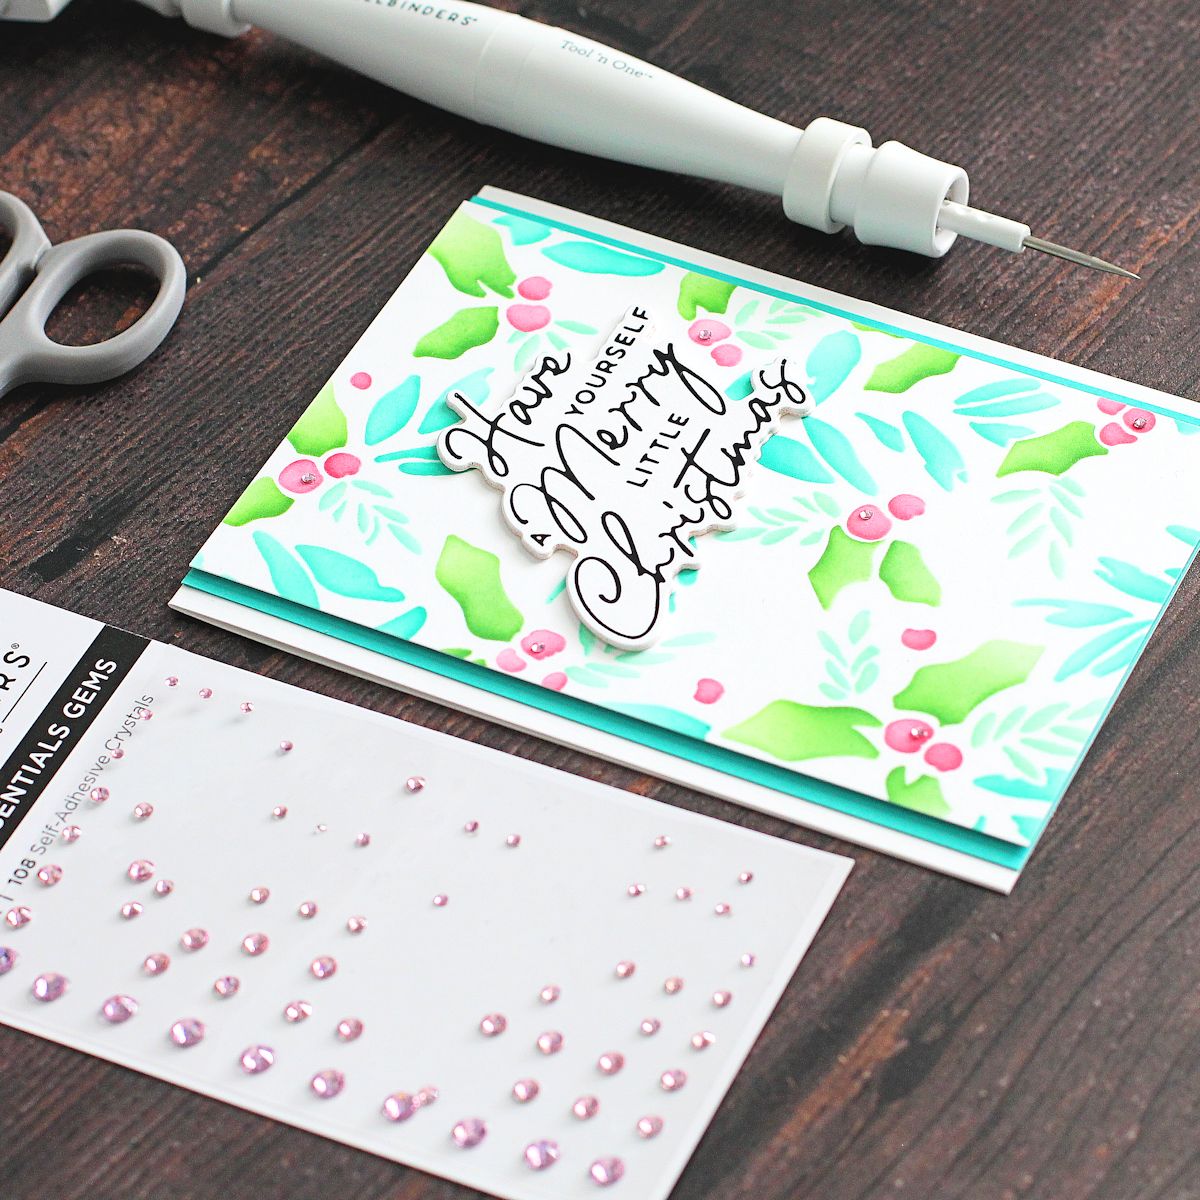
Embellish with Pink Color Essential Gems, adding the smallest size to the berries.

I hope I have given you some inspiration on how to use the Glimmer Holly Background in different ways. I stuck to the same color palette throughout, but there are so many different color combinations that could be used! Thank you so much for stopping by today, have a great day!
Spellbinders Supplies:

Other Supplies
Altenew Green Valley Crisp Dye Inks, Altenew Sea Shore Crisp Dye Inks, Altenew Green Meadows Crisp Dye Inks, Altenew Red Cosmos Crisp Dye Inks, thin foam tape, sand eraser, Copic Markers.

Folk Art Inspiration | Nordic Wreath with Emily

January 2022 Embossing Folder of the Month Preview & Tutorials – Spreading Love