
Simple Techniques with Karin Brushmarker Pro Markers
Hello crafty friends! It’s Rachel Alvarado from RachelAlvaradoDesigns.com. I am here to show you a few simple ways that you can use Karin Brushmarker Pro markers when card making and/or crafting.

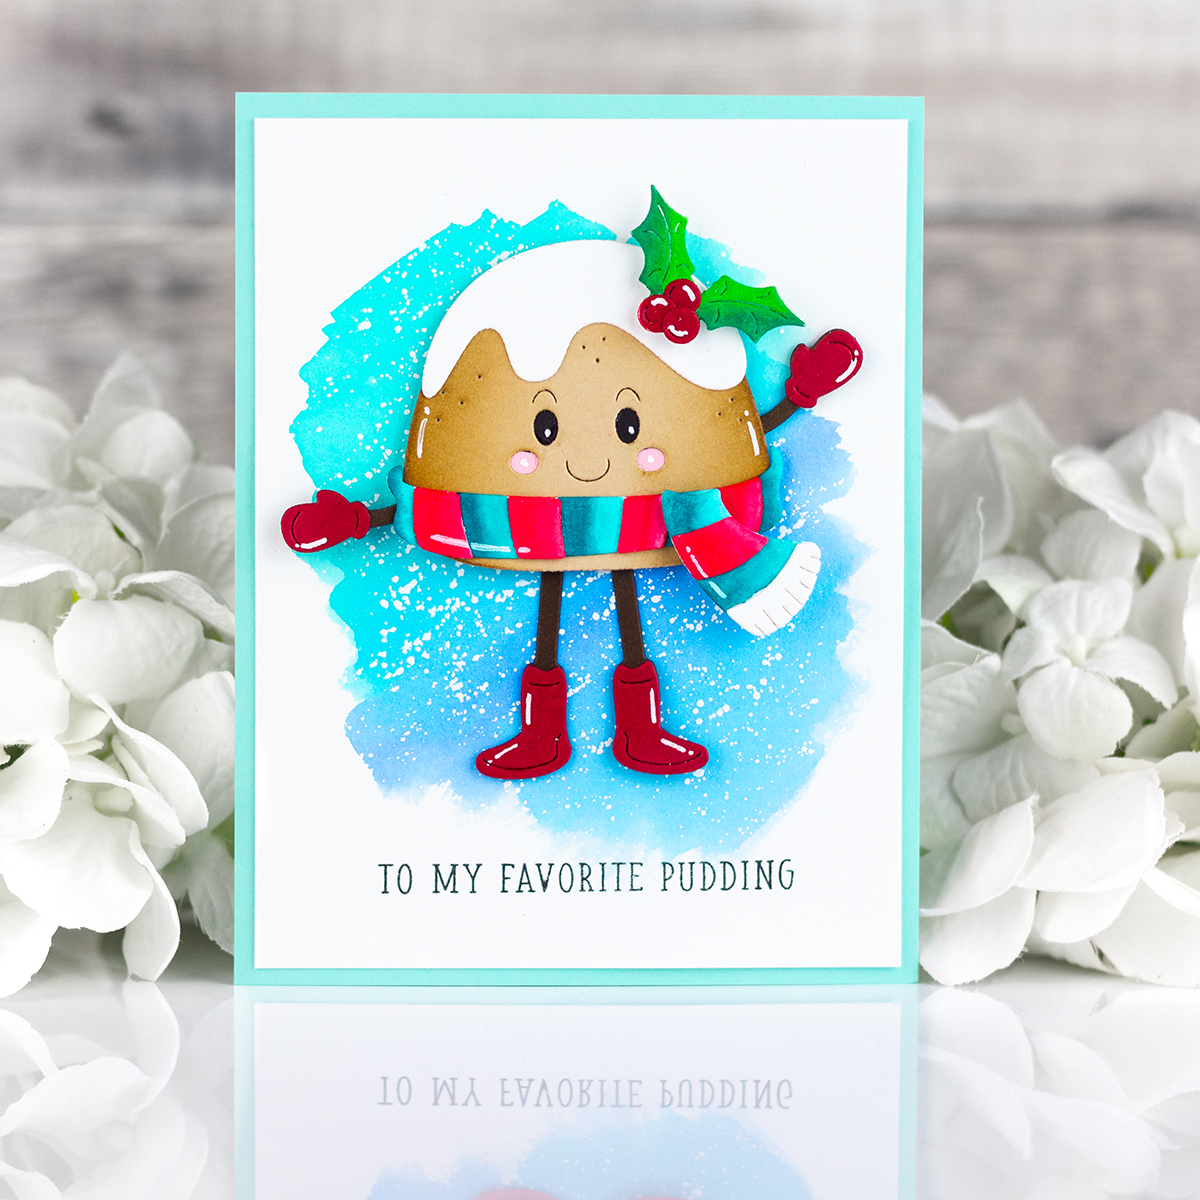
My card today features the Karin Brushmaker Pro 12 Piece Basic Color Set along with the adorable Dancin’ Figgy Pudding Etched Dies Set.
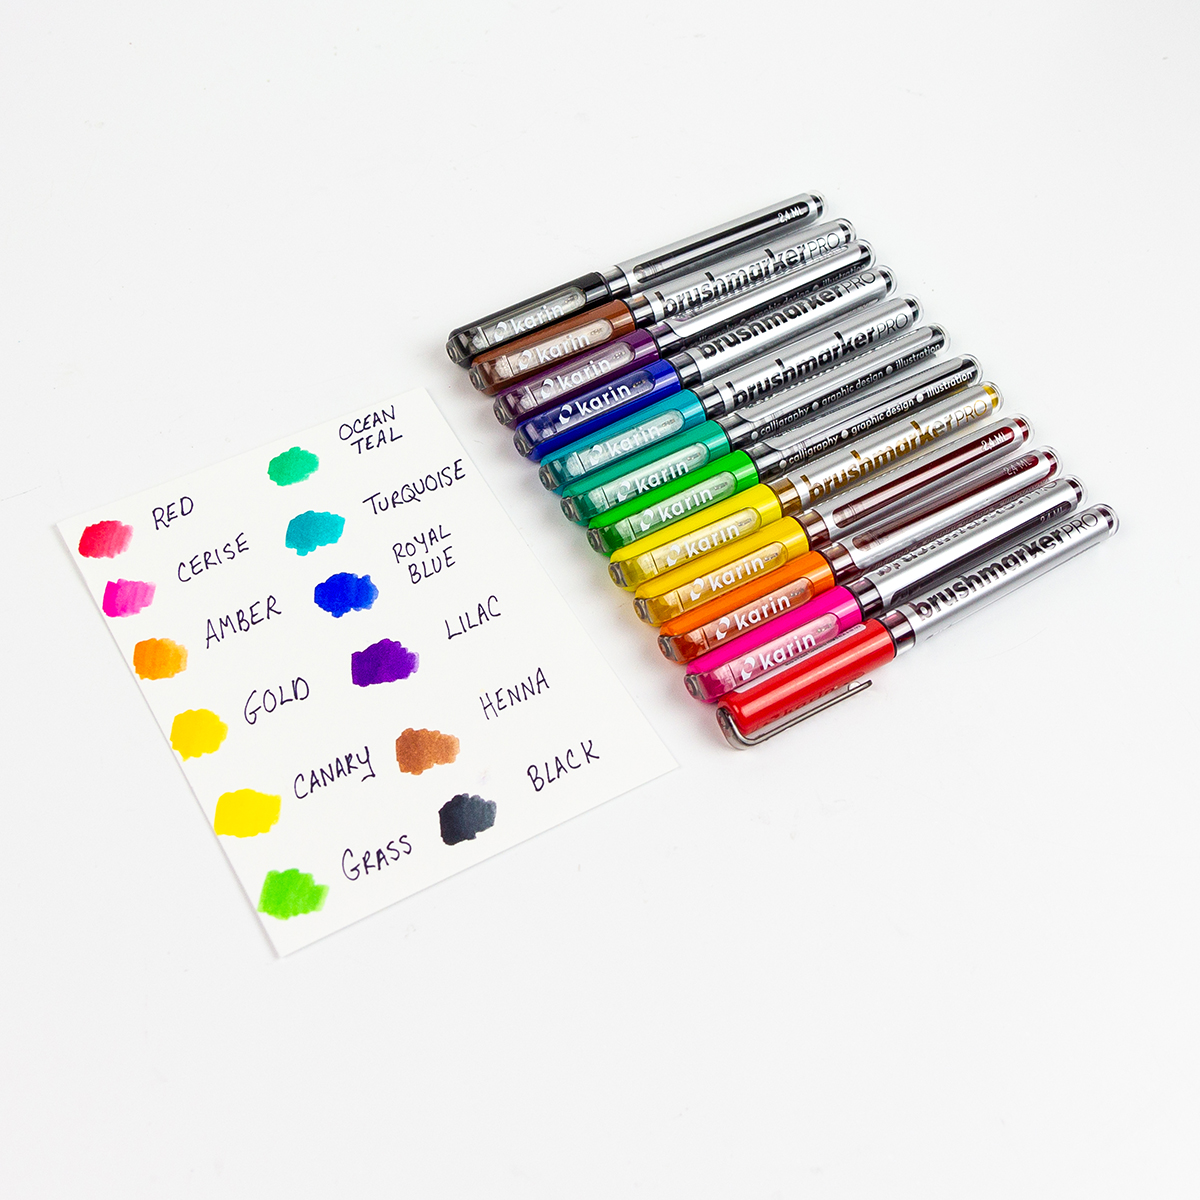
If you’ve never tried using these markers before, I highly recommend them because they’re fairly simple to use. They are water-based markers with a brush-like tip, making them easy to control where you want your color (ink) to go. They also blend very well, therefore making them possible to mix together to make a variety of colors. However, I wanted to keep my techniques simple and straightforward today for those of you who may have never tried them before.
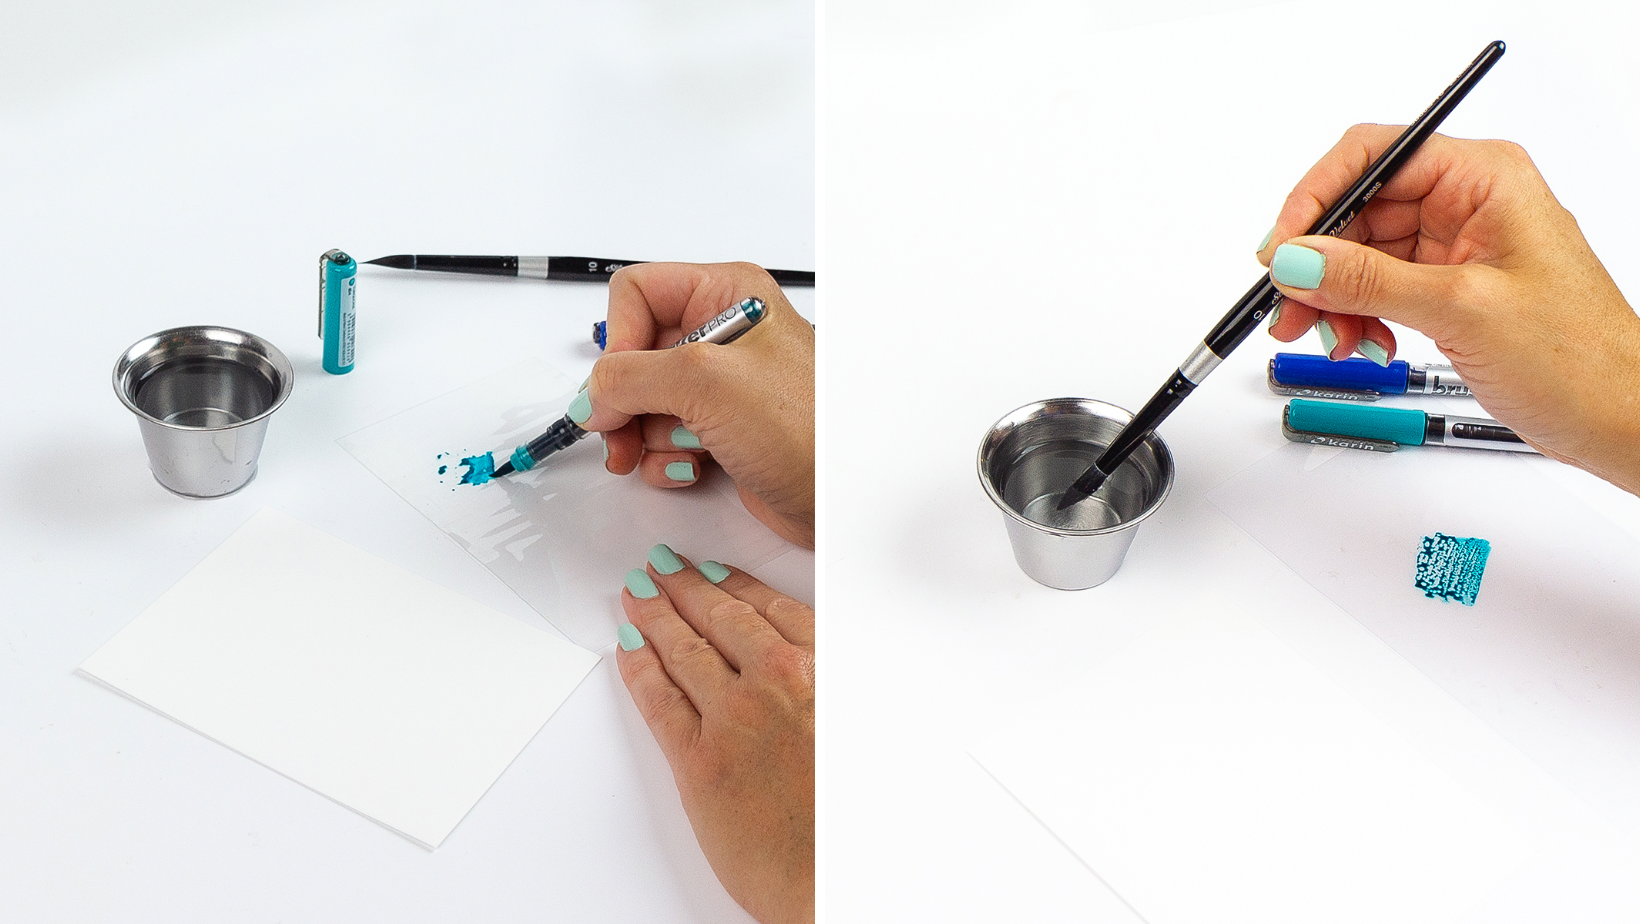
The first technique that I wanted to show you was how to use these pens to create a simple water-colored background. First, I simply scribbled some (Turquoise) ink onto a smooth surface (I used the plastic backing of a stamp set that I had on my craft desk at the time – it doesn’t have to be anything fancy). Next, I used a large round paintbrush and dipped it into some clean water.
I then mixed the water with my scribbled ink until my paint brush was covered and then lightly blended the watercolor in a back-and-forth motion (starting at the top left corner) on my cardstock. Because these are water-based pens, I made sure to use some watercolor card stock. For my card today, I used a 4.25” x 5.5” piece of the Spellbinders Porcelain BetterPress Cotton Card Panels.
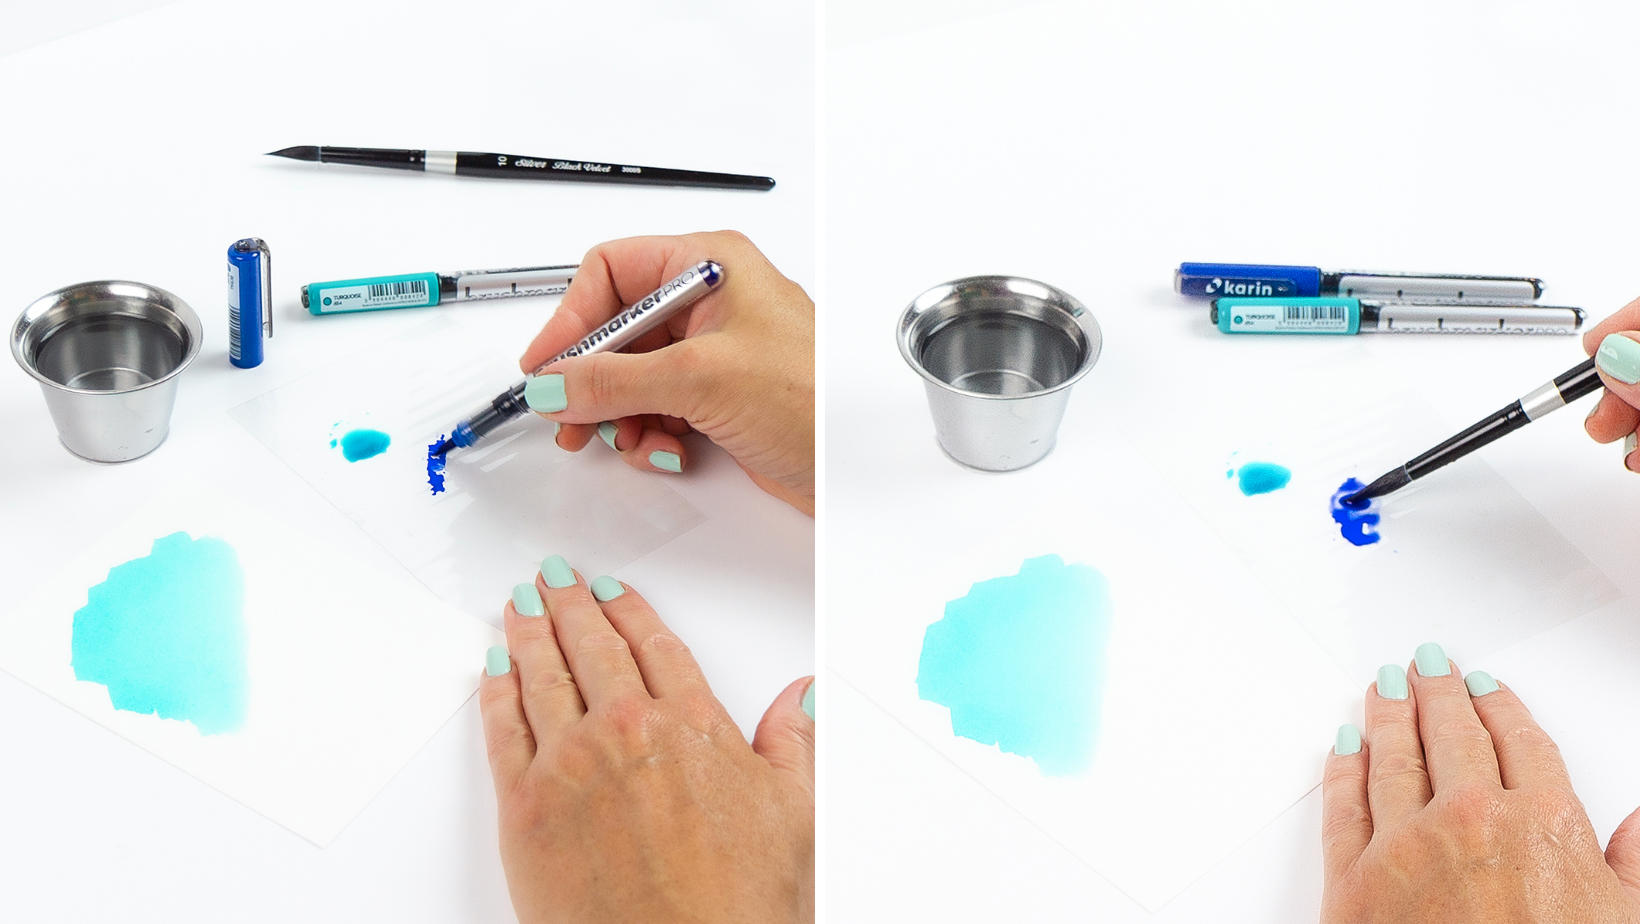
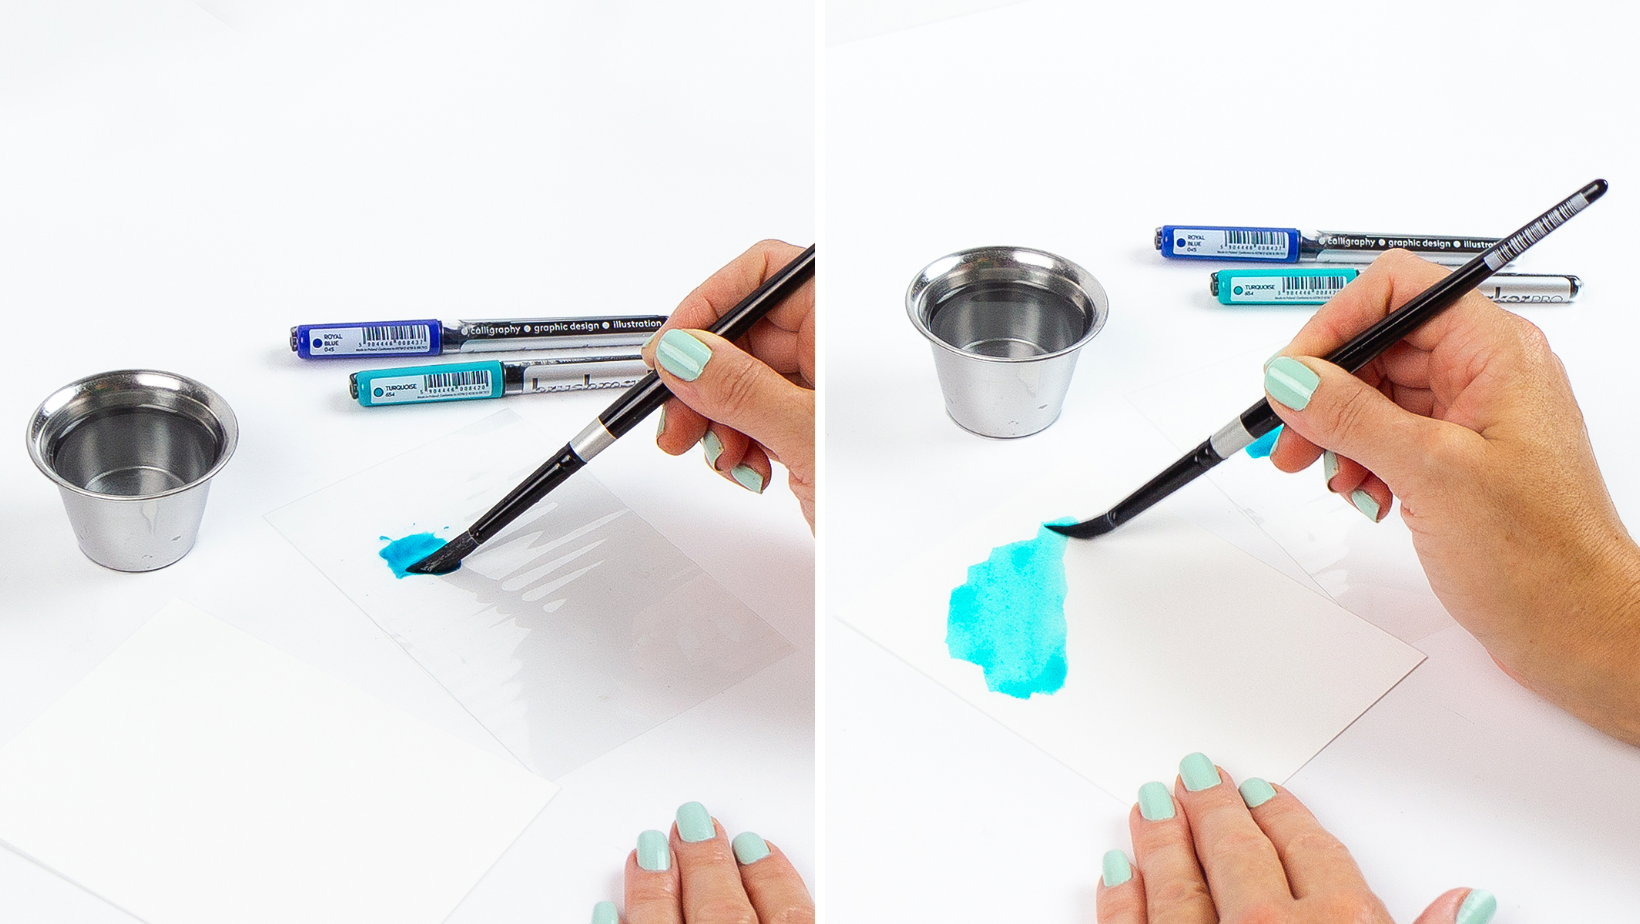
I repeated the process with my second color (Royal Blue) and then added this diluted color to my card stock in the same motion as I had done the Turquoise.
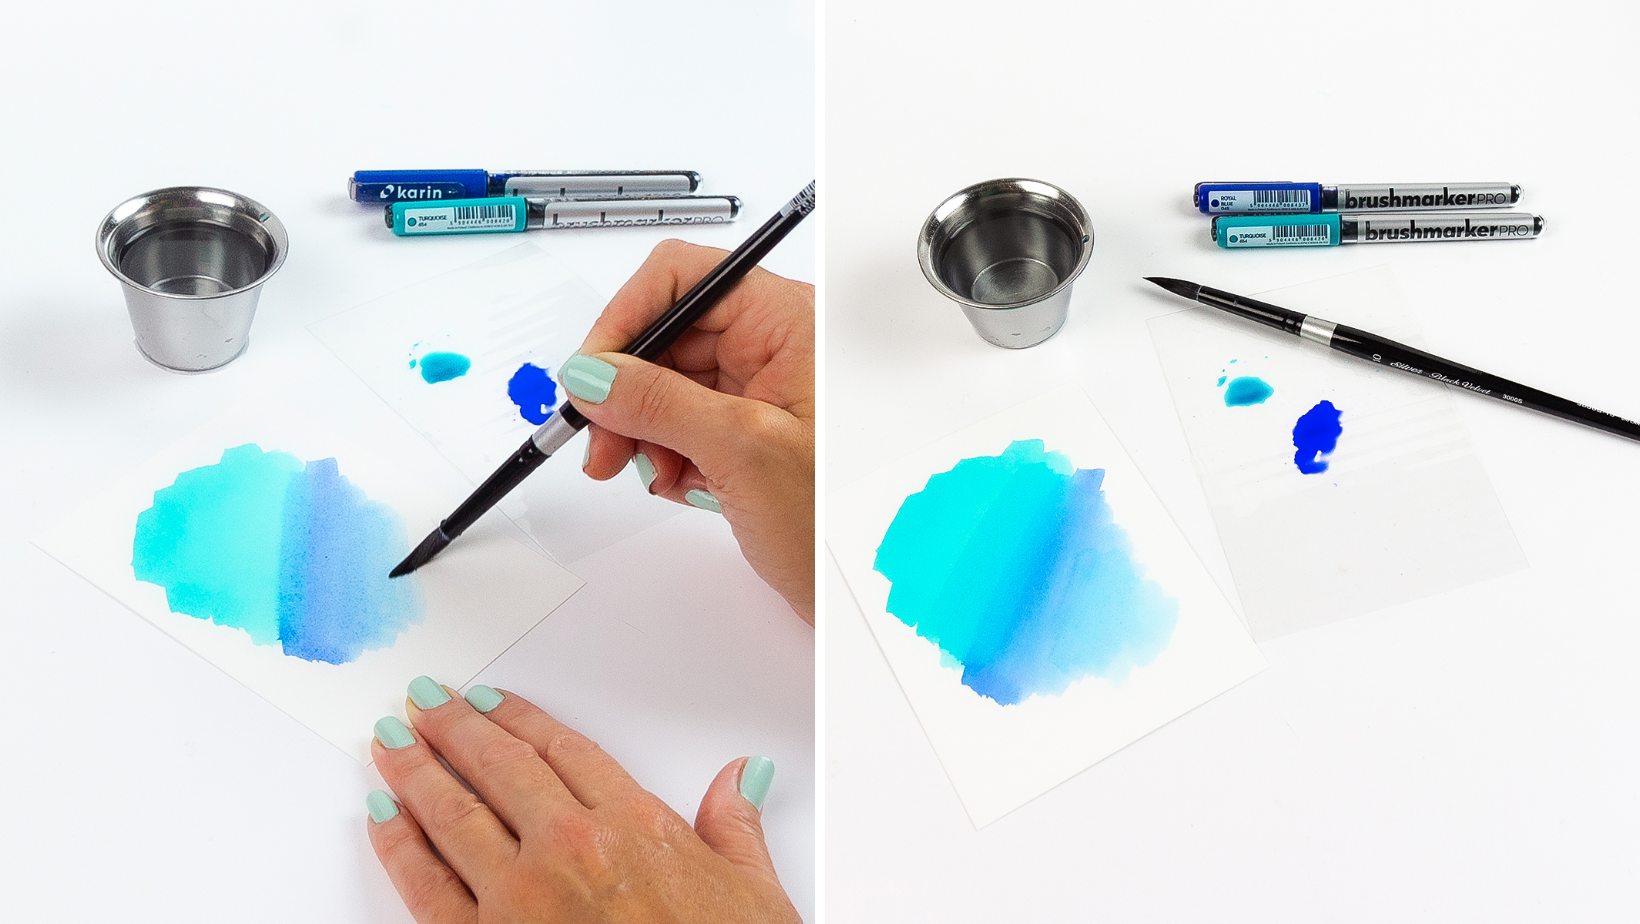
This background literally took me less than 1 minute to make. I absolutely love the rich (but not overpowering) color of my card background. Once it dried, I ended up adding a few spatters of diluted Copic Opaque White Paint to give the illusion of snow since my card is winter-themed.

I set my card background aside and went to work on my cute little figgy pudding. All the pieces in white were die cut from the same Porcelain BetterPress Cotton Card Panels and colored with the brushmarkers. The rest of my pieces were cut from colored card stock.
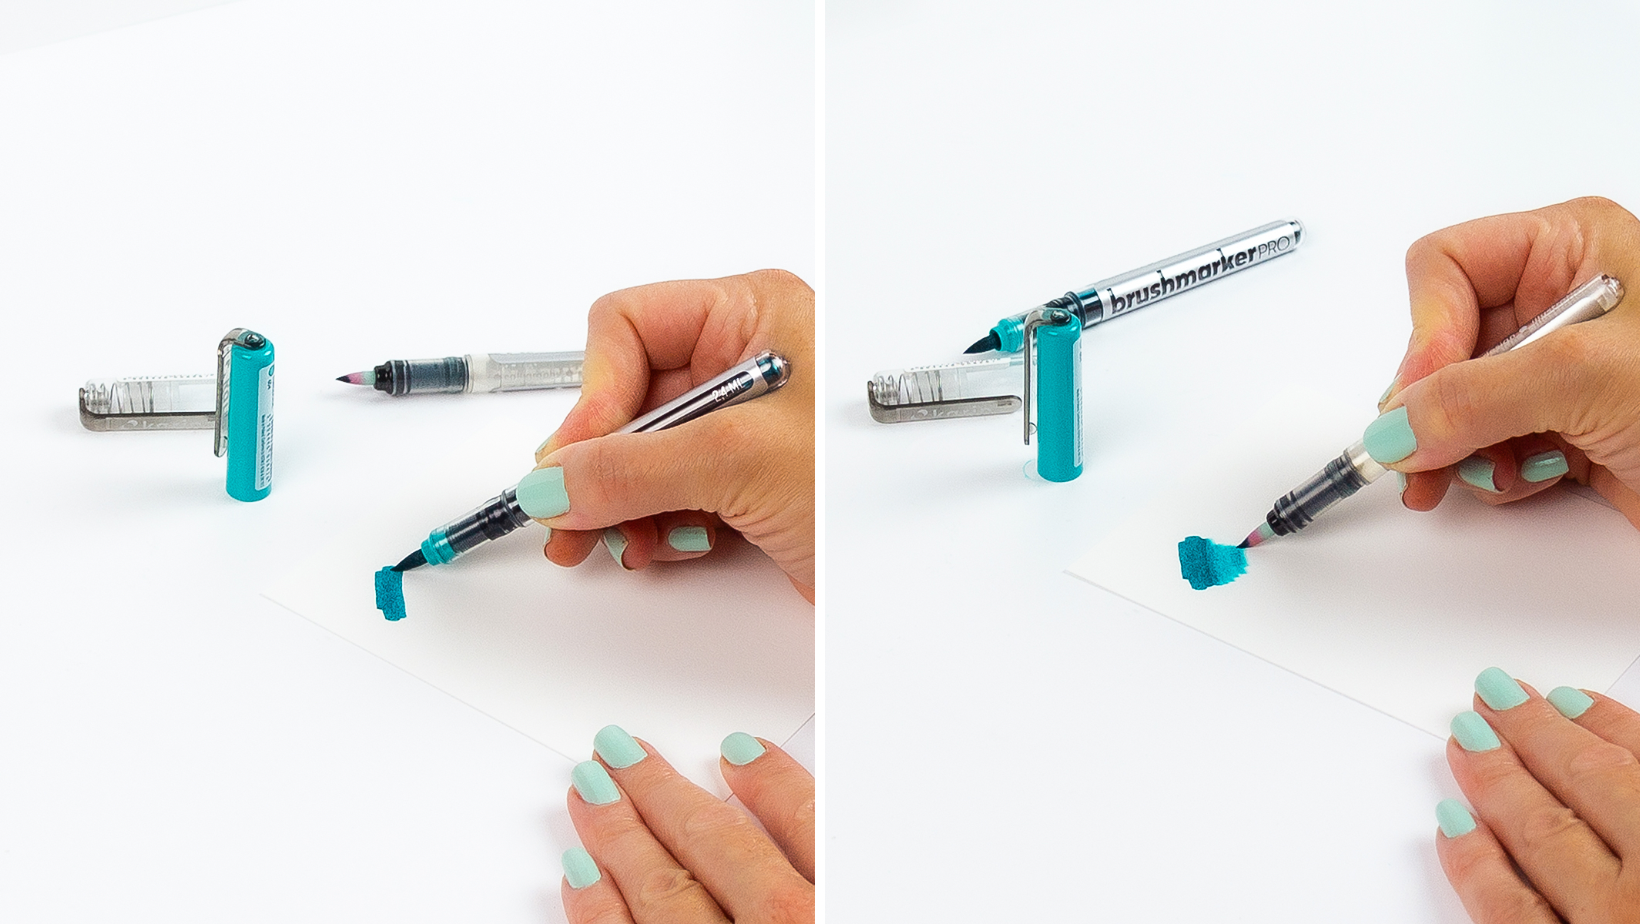
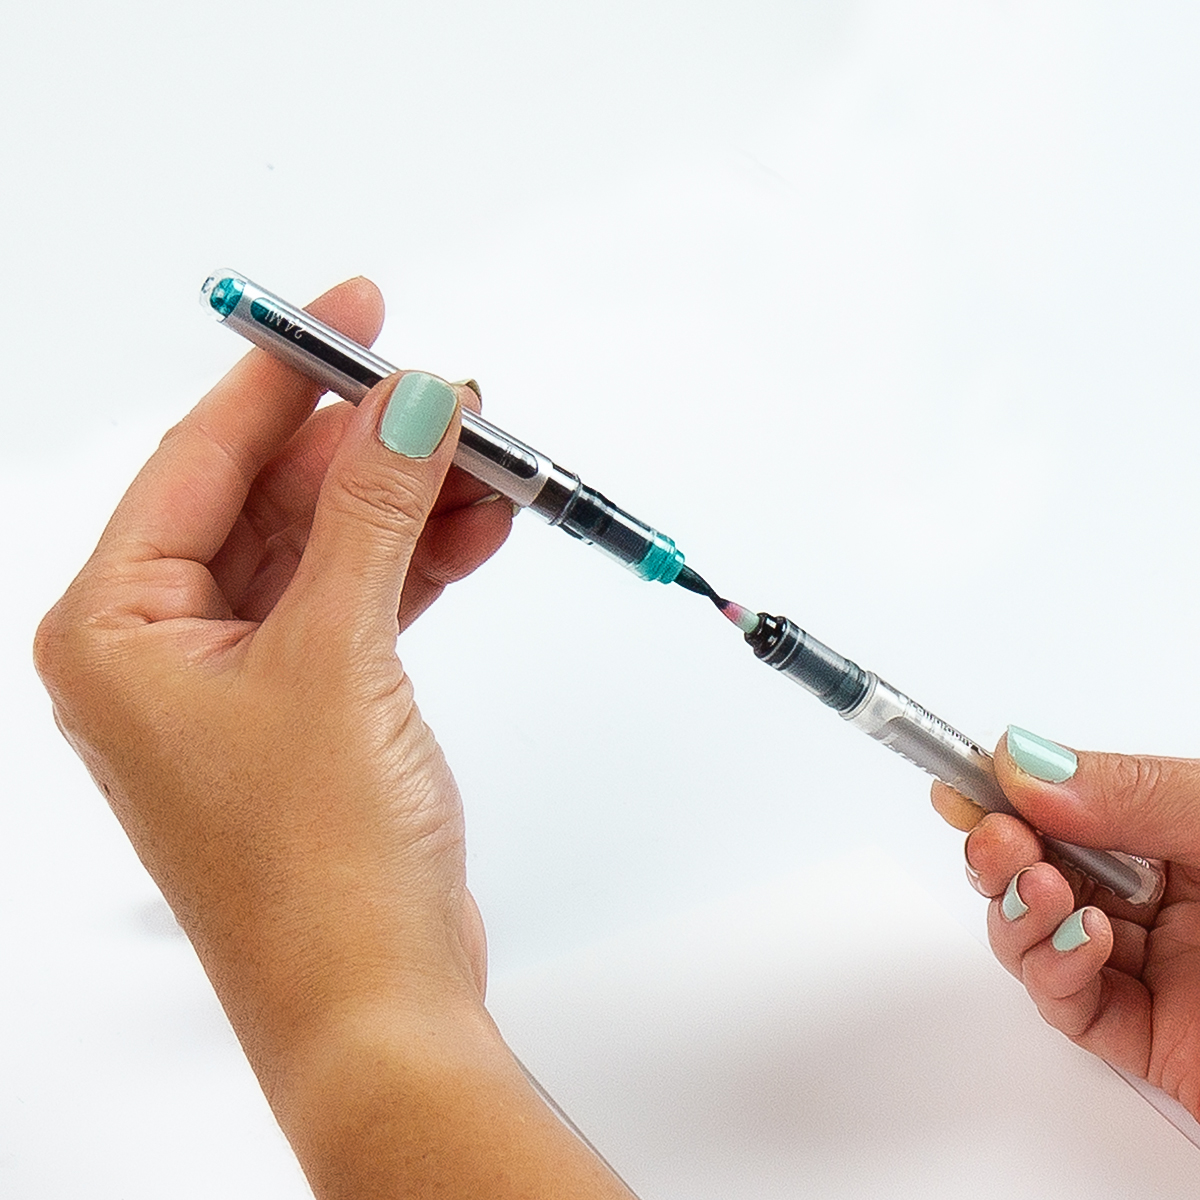
The second technique that I want to share with you today is how to blend a marker with the colorless blender to get a smooth gradient of dark to light color (similar to what you might achieve with Copics). In the picture above, I first colored my section of watercolor card stock with my Turquoise brush marker. Next, I touched the tips of my Turquoise brush marker to the tip of my colorless blender (see image below) so that some of the ink from my turquoise marker would bleed into the tip of my colorless blender. I held them together (with my colored marker on top) for about 10 seconds before I then used the colorless blender to mix the two colors together on my card stock.
I used this method to color both the red and turquoise sections on my figgy pudding’s scarf (as shown below).
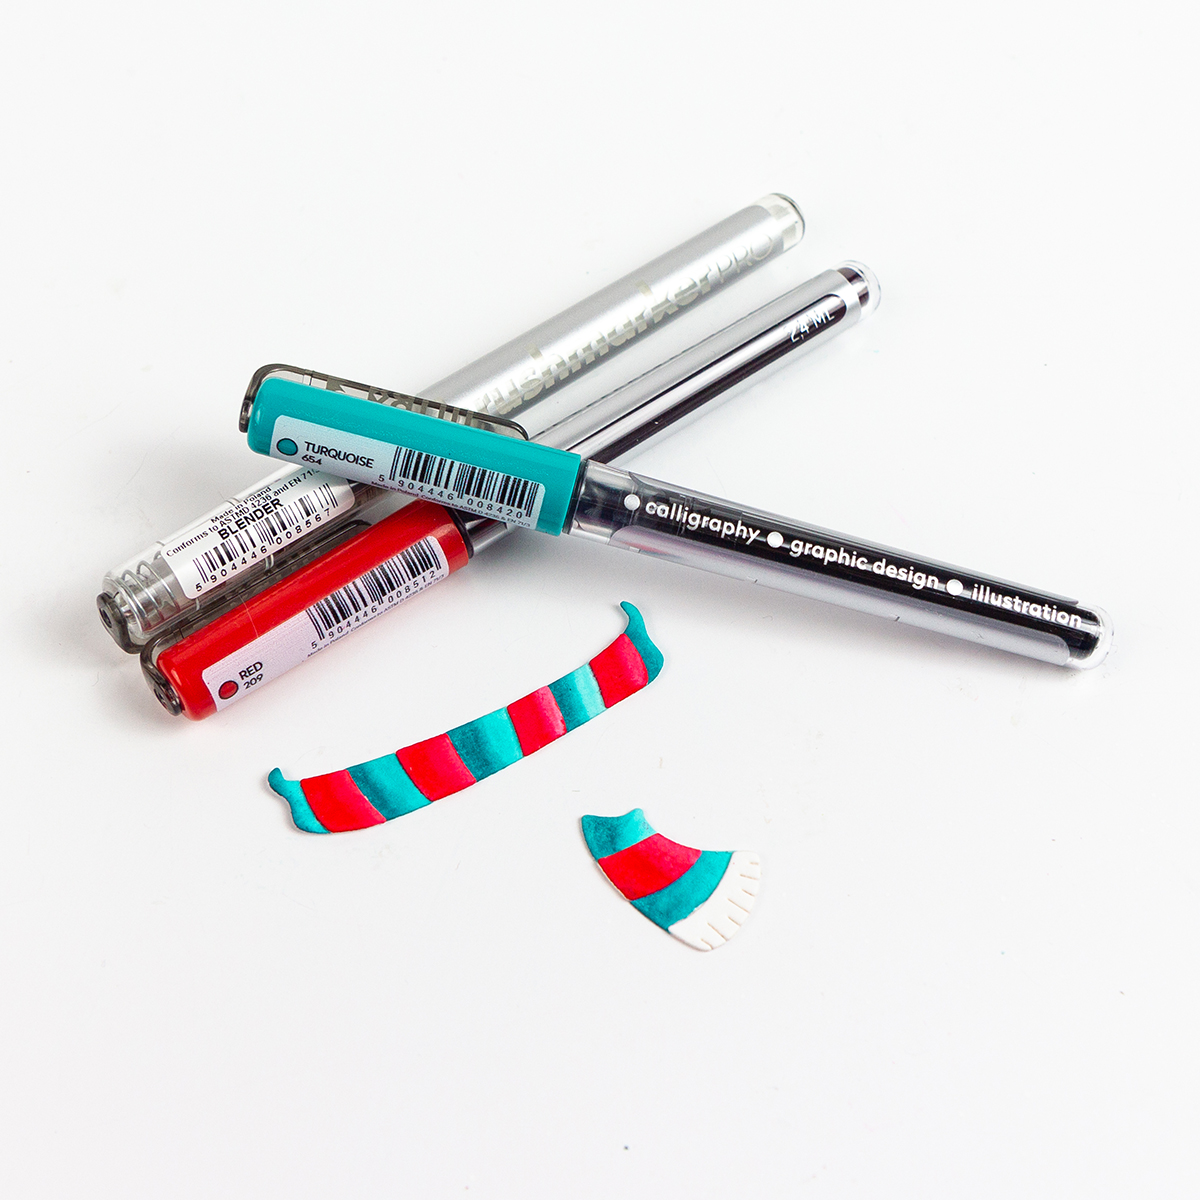
The nice thing about these markers is that you can vary the depth of your colors by either adding less ink to the colorless blender or by adding water to your blends. I preferred to keep my colors on the vibrant side and only used my colorless blender sparingly on each section of the scarf.
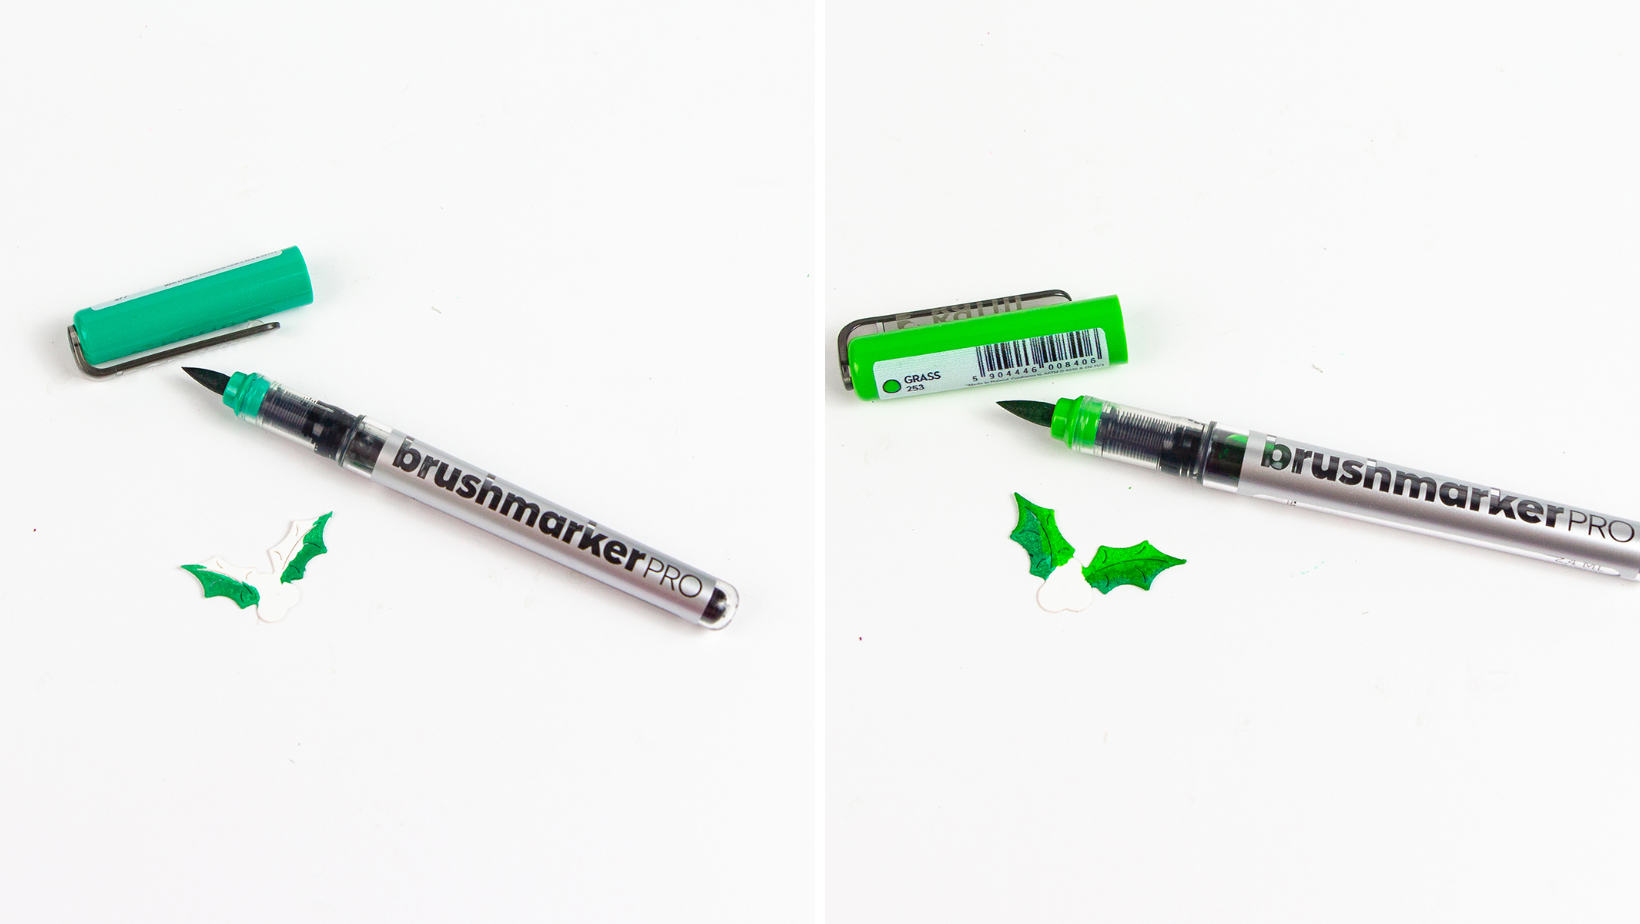
The last technique that I used was the one most similar to the technique used when coloring with Copic Markers. To color my holly, I first quickly colored a section of my leaves with my darker green (Ocean Teal) ink and then added my lighter green ink (Grass) to the other section and blended the colors together. I was left with a subtle variant of dark to light green.
TIP: If you are going to use this last method to color, make sure that you don’t press too hard onto your card stock while coloring or add too much ink. Too much liquid or color can cause your card stock to pill and/or tear.
Lastly, I assembled all of my pieces together, stamped my sentiment from the Dancin’ Christmas Sentiments Clear Stamps Set with Memento Tuxedo Black Ink, and adhered my little dancing pudding to the front of my card while allowing his legs to swing freely.
Thanks so much for taking the time to stop by today! If you liked this card and want some more inspiration, feel free to check out my INSTAGRAM page.
Rachel
Spellbinders Supplies:

Other Supplies
Memento Tuxedo Black Ink.

One Comment
Connie R.
Great tips for using the water-based brush markers! Your ‘figgy pudding’ design is jusyadorable!