Noteworthy Scrapbooking Page Ideas: Framed Layout and Hyper Detailed Layout
Hey friends! It’s Angela Tombari here and today I would like to share with you two layout ideas I created with the brand new Noteworthy paper collection by Simple Stories and some of the Spellbinders products. Noteworthy is the perfect collection for paper crafters to document our daily life and much-loved hobby and it perfectly pares with Spellbinders items.
I am a huge fan of 12-inch scrapbooking pages. I think square is the format where I can achieve more balance so, this is the size I went for my two layouts.
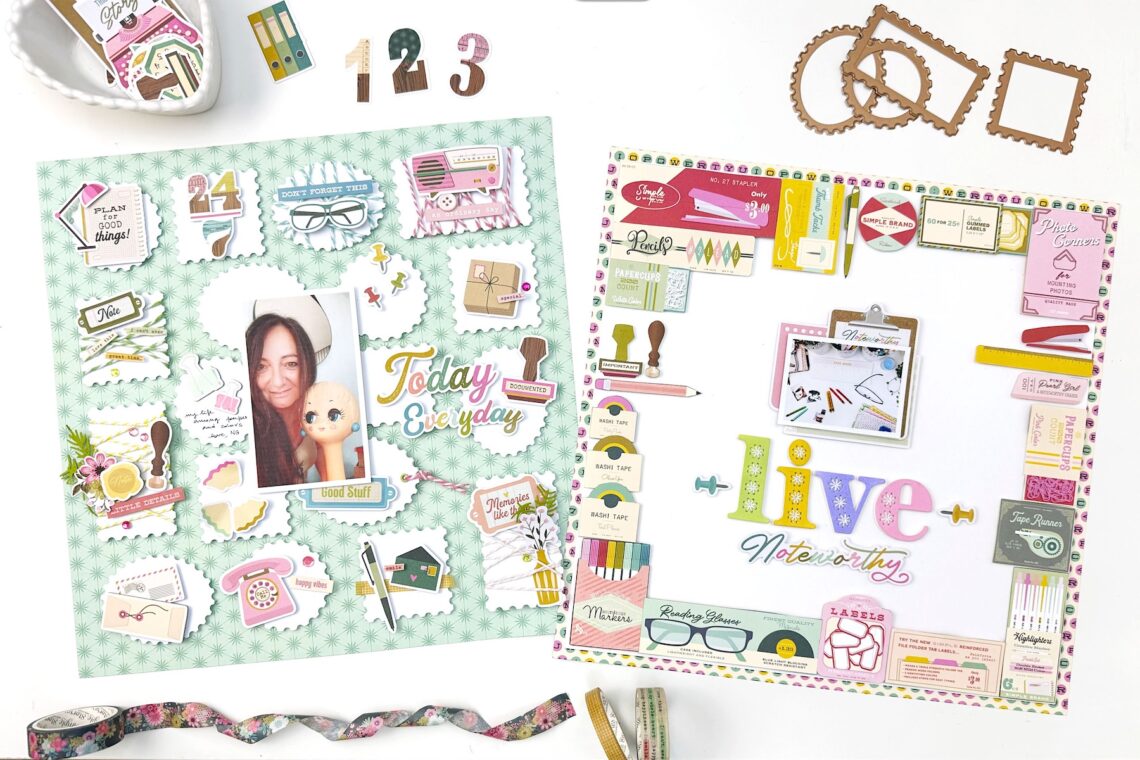
The first page I am showing you is a Framed layout.
The name comes from all the pieces glued along the edges of the page that create a sort of frame. For the base of the layout I used a 12-inch white card stock and all the pieces I used to compose the frame were fussy cut from paper January.
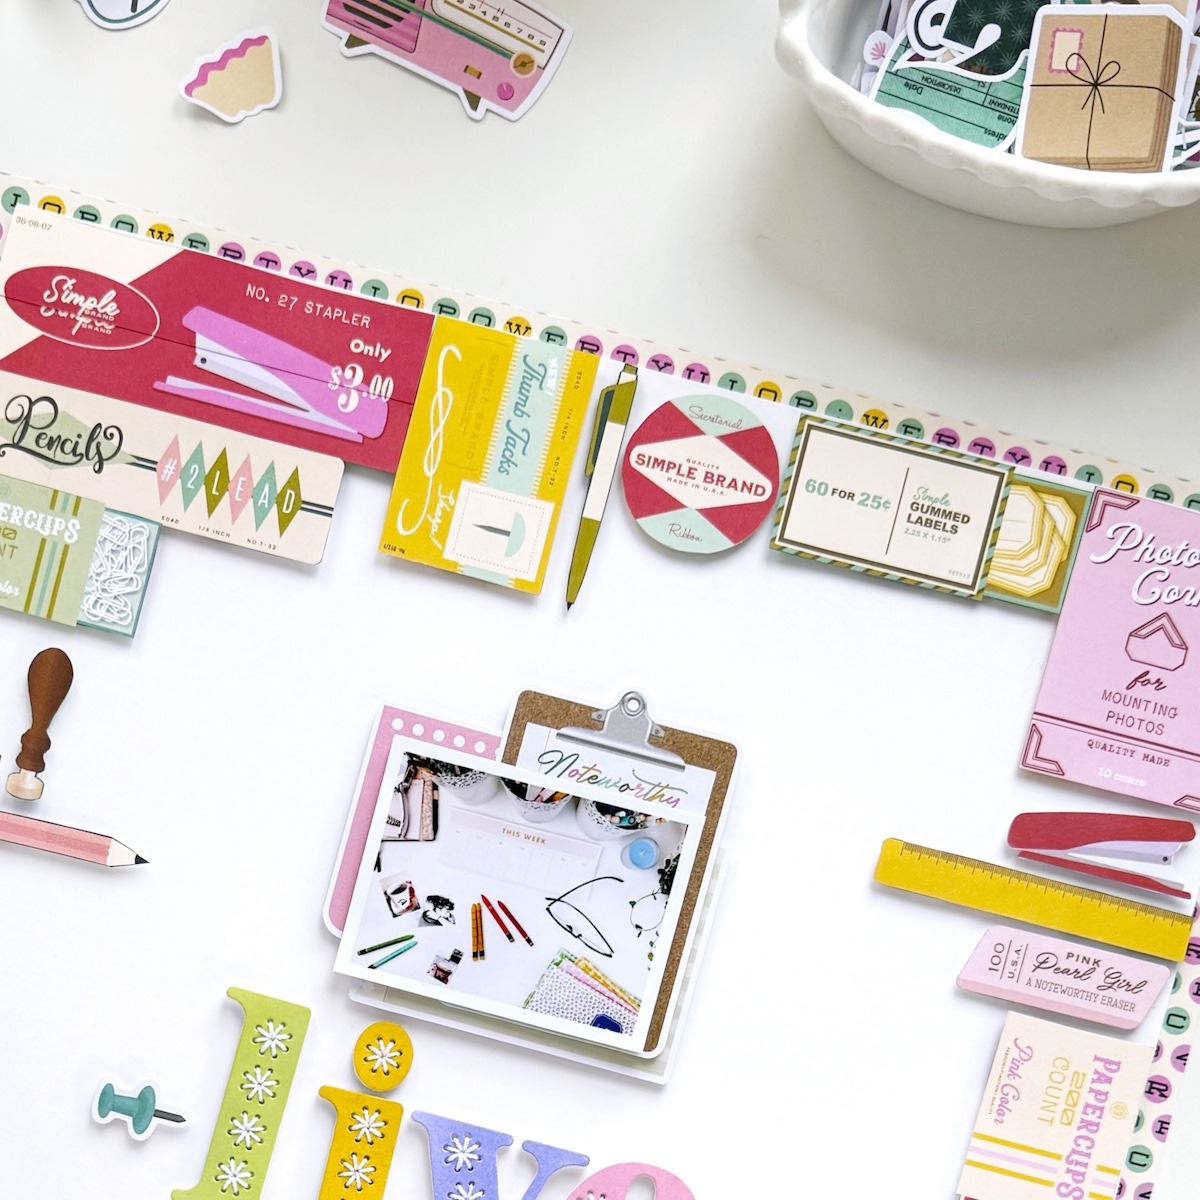
Now, I have to say that Noteworthy collection has a lot of die cuts to choose from for creating a framed layout. You don’t need to fussy cut an entire paper if this doesn’t suit you, but! I adore fussy cutting, it relaxes me and that’s why very often I do it in my projects.

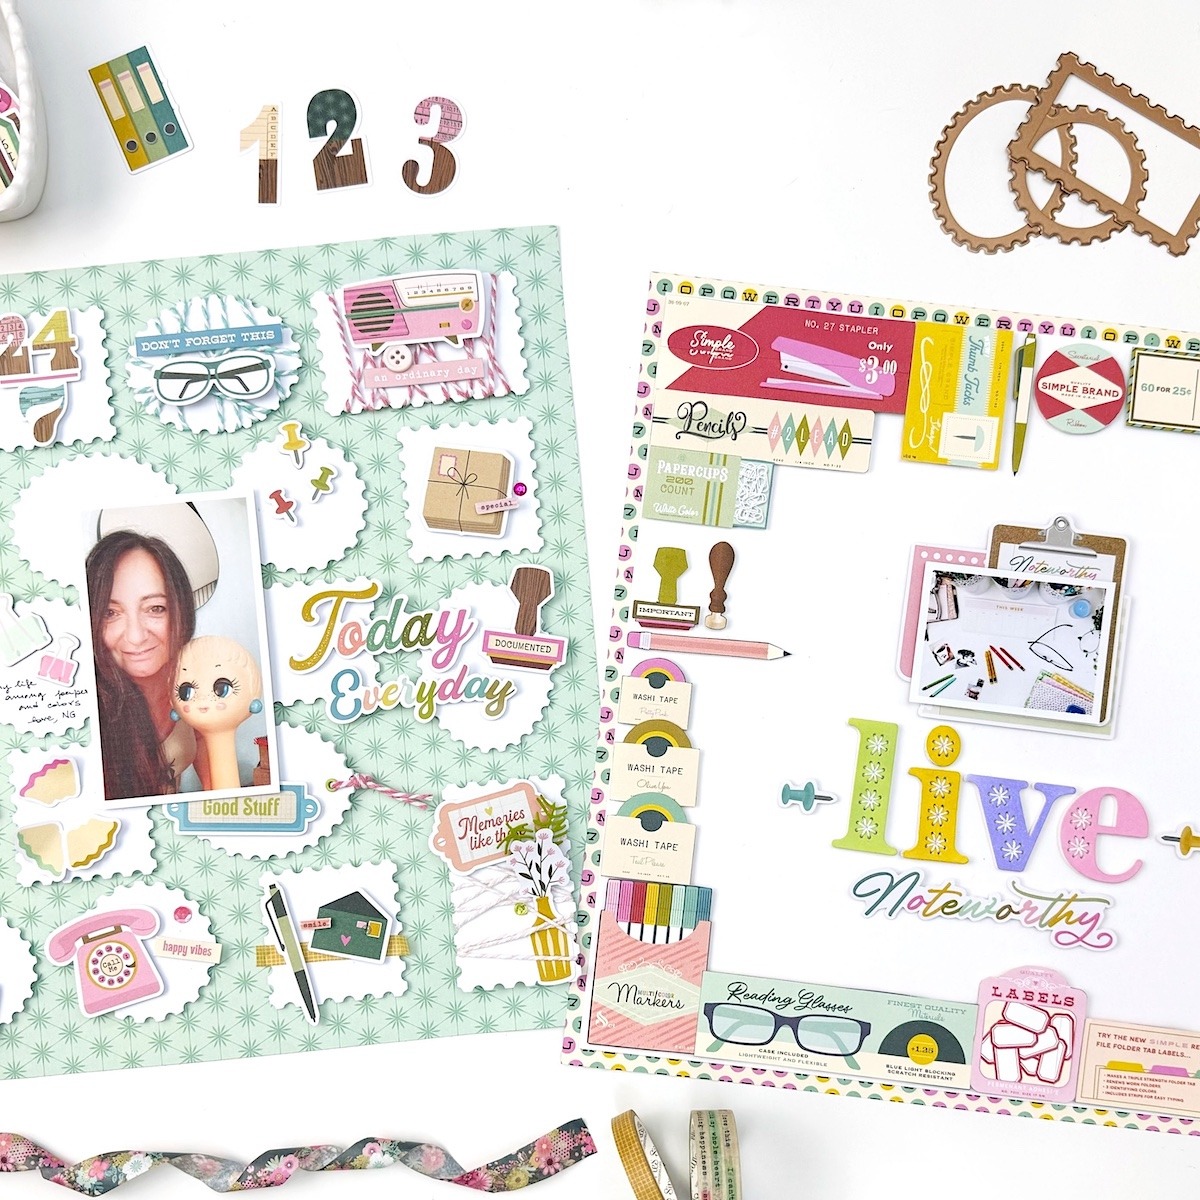
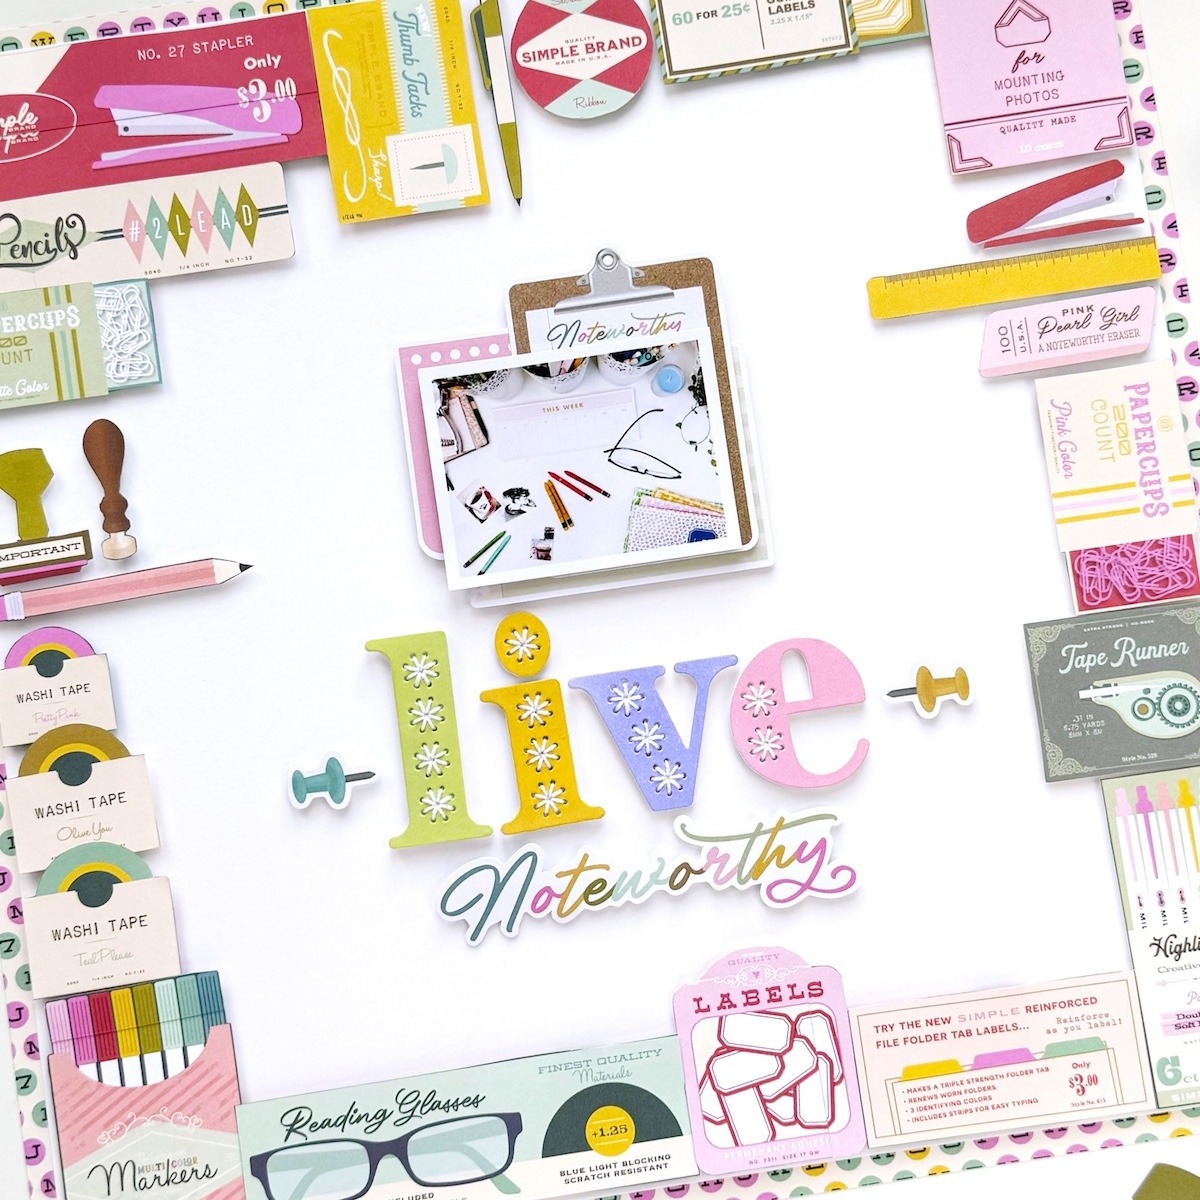
In the center of the page I placed the photo and underneath the title, created using the Spellbinders Stitched Alphabet and a long die cut from the collection, the word Noteworthy.
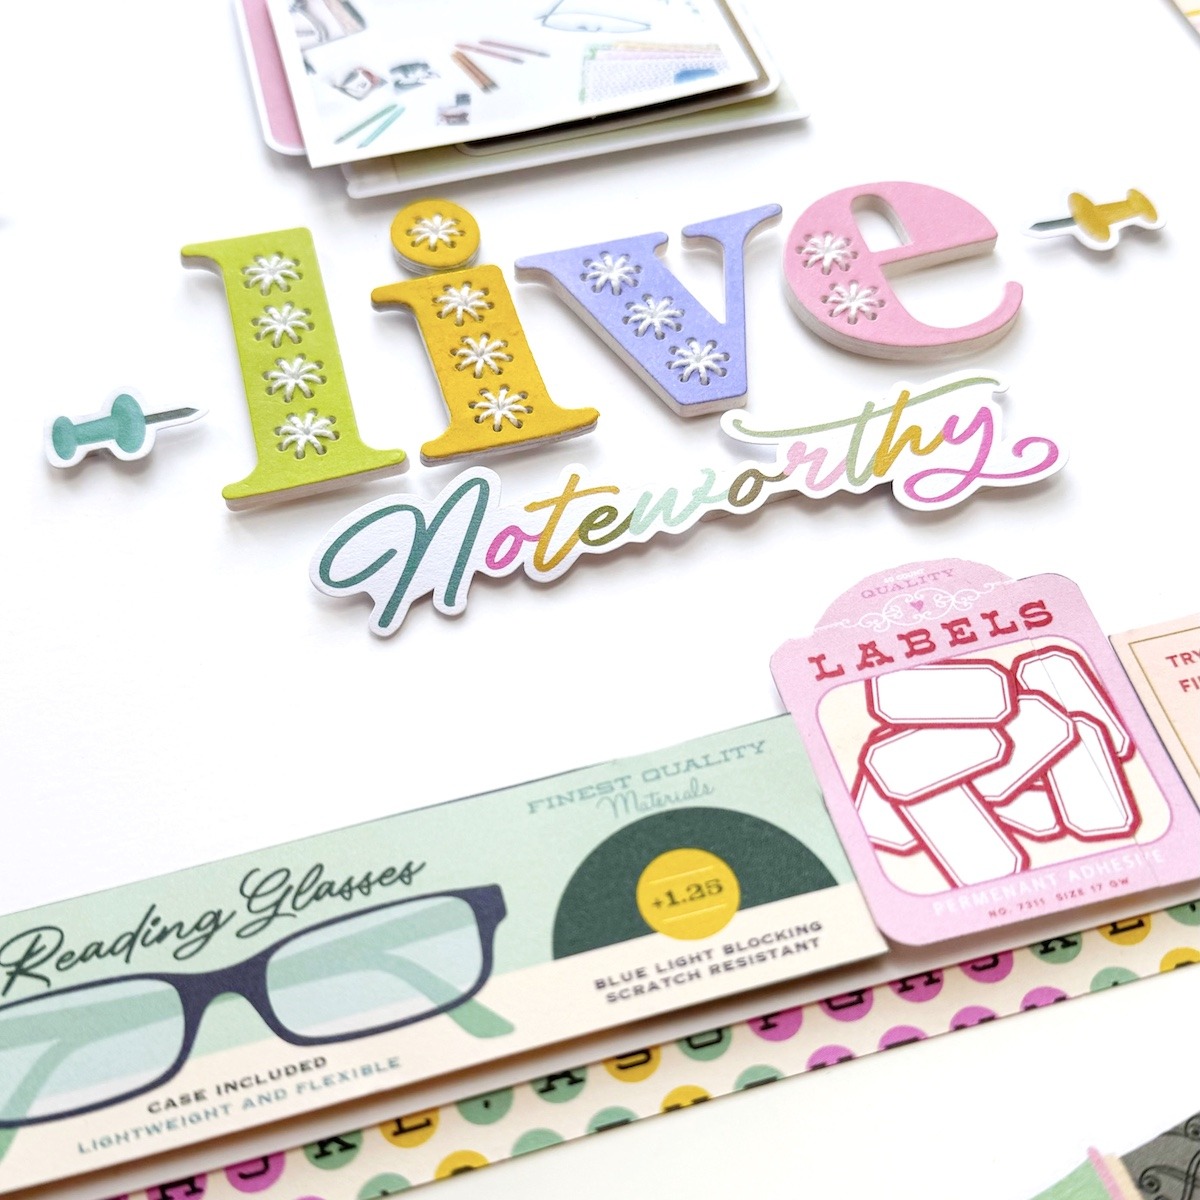
To give dimension to the title and make it pop, I cut each letter 8 times and the last piece, the eighth is the colored one. I glued the pieces together and then I stitched them with white thread.
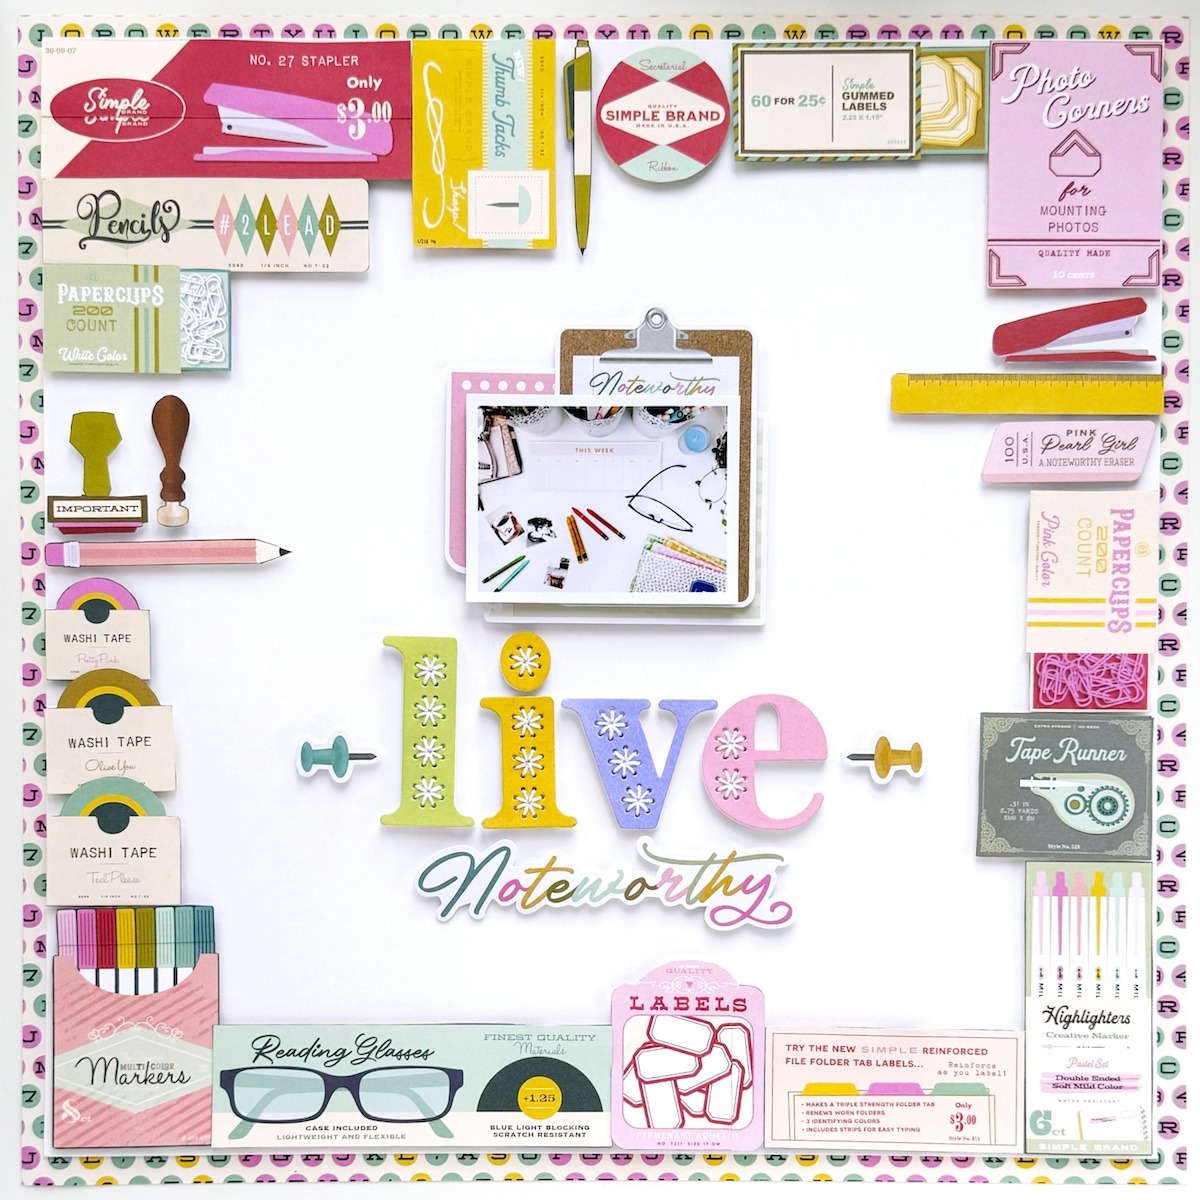
Last, I created a second frame to the layout adding another colorful paper from Noteworthy collection. I cut 1/4 inch from each side of the layout and glued the August paper underneath.
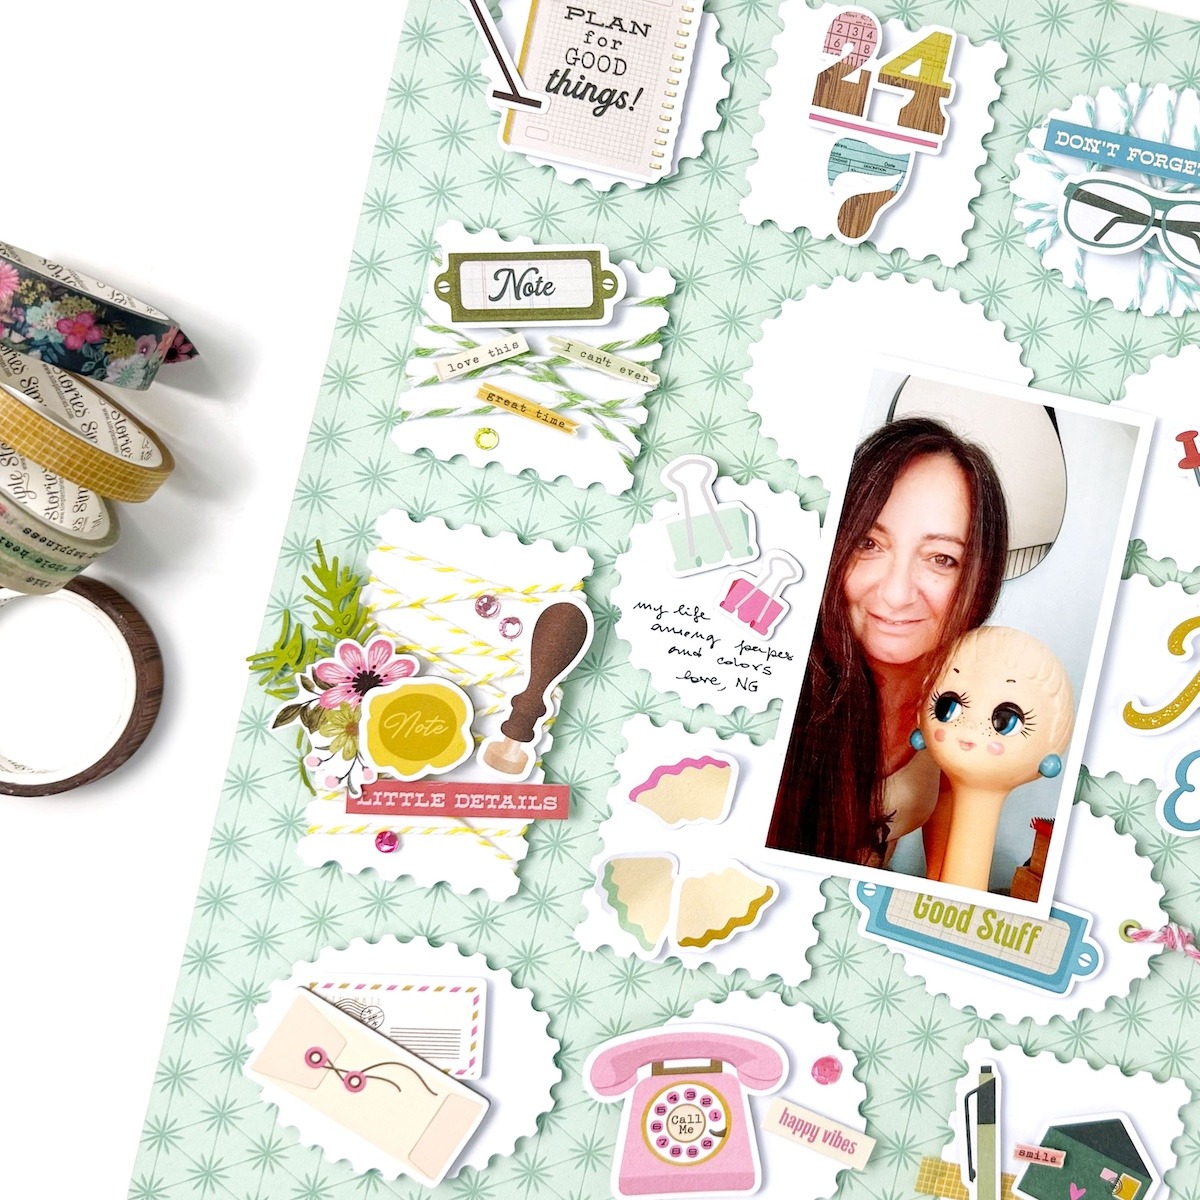
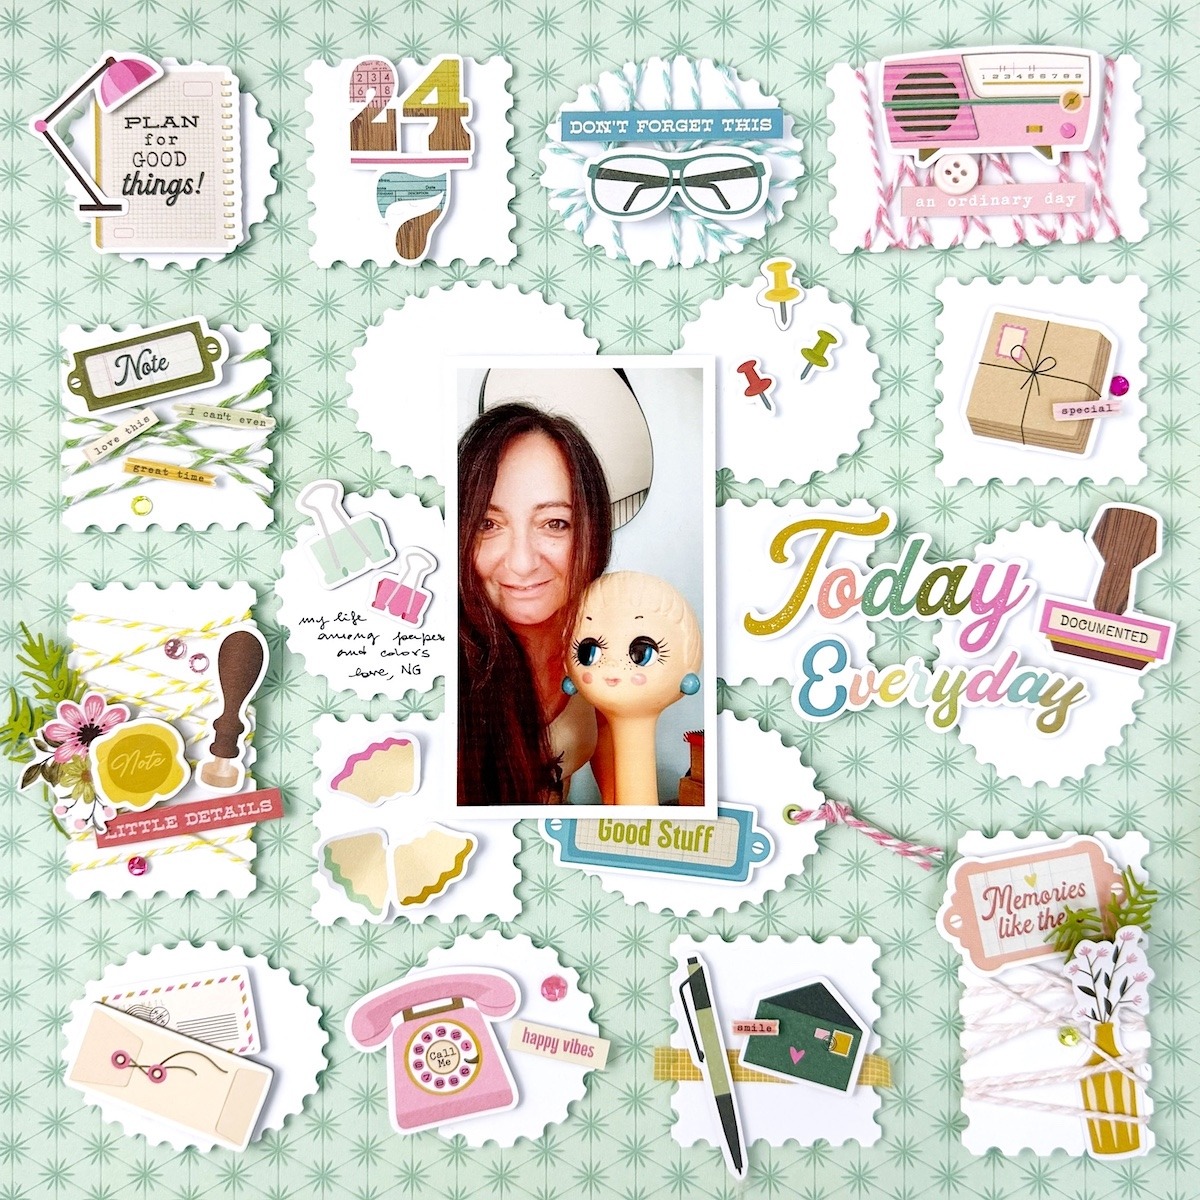
Next is the hyper-detailed layout. I call it like this because there are plenty of tiny details all over the page.
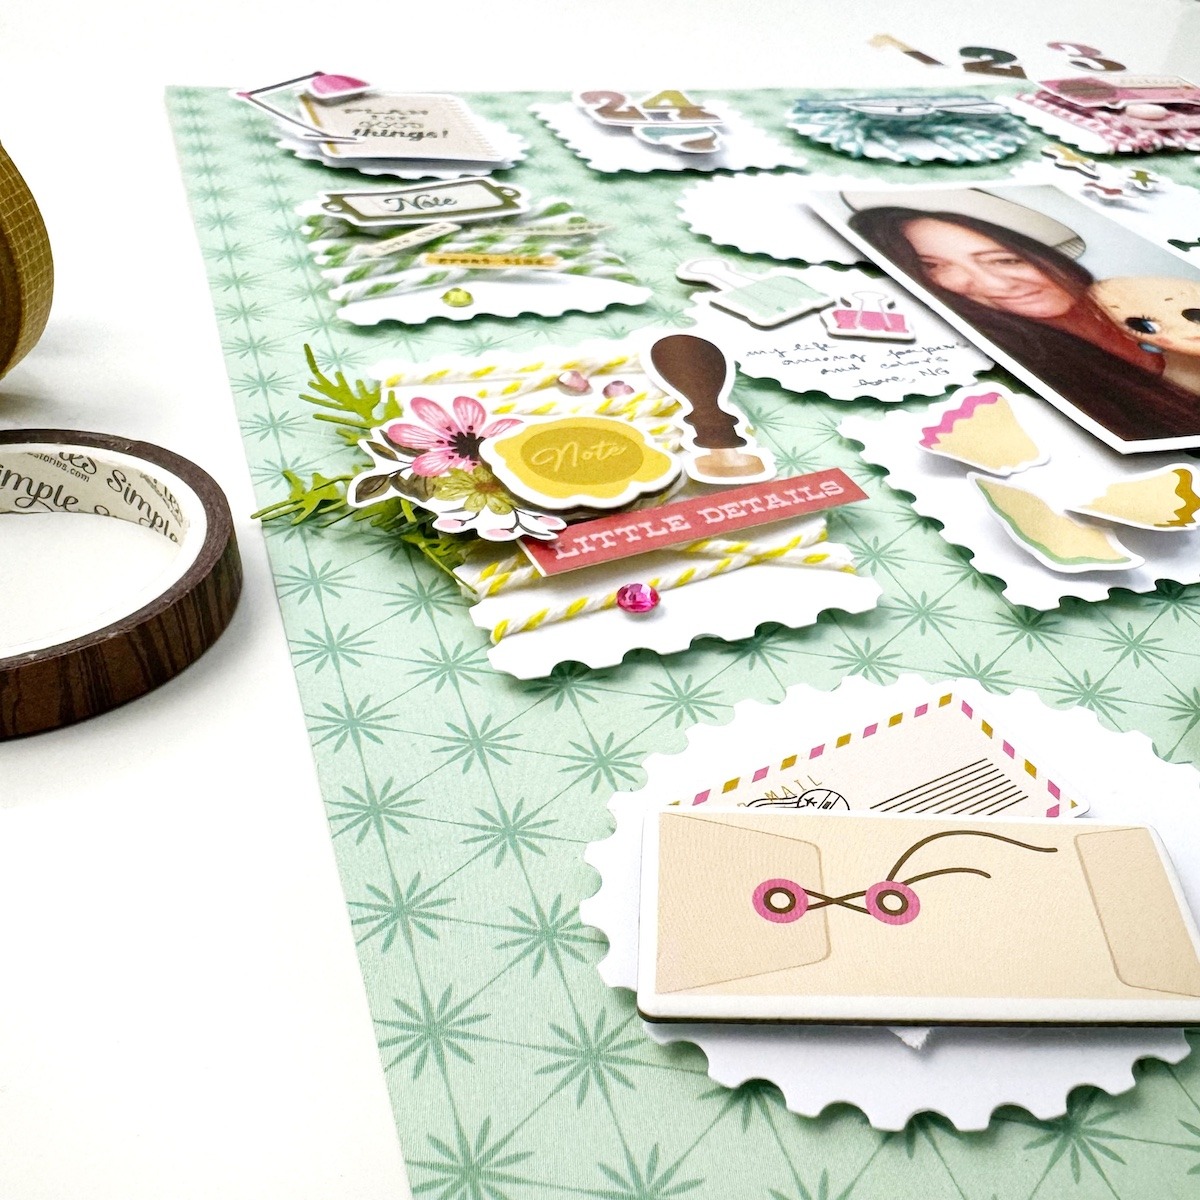
It is also a pretty dimensional layout. There are layers of die cuts, stickers, chipboards, twines, jewels, sequins and so on.
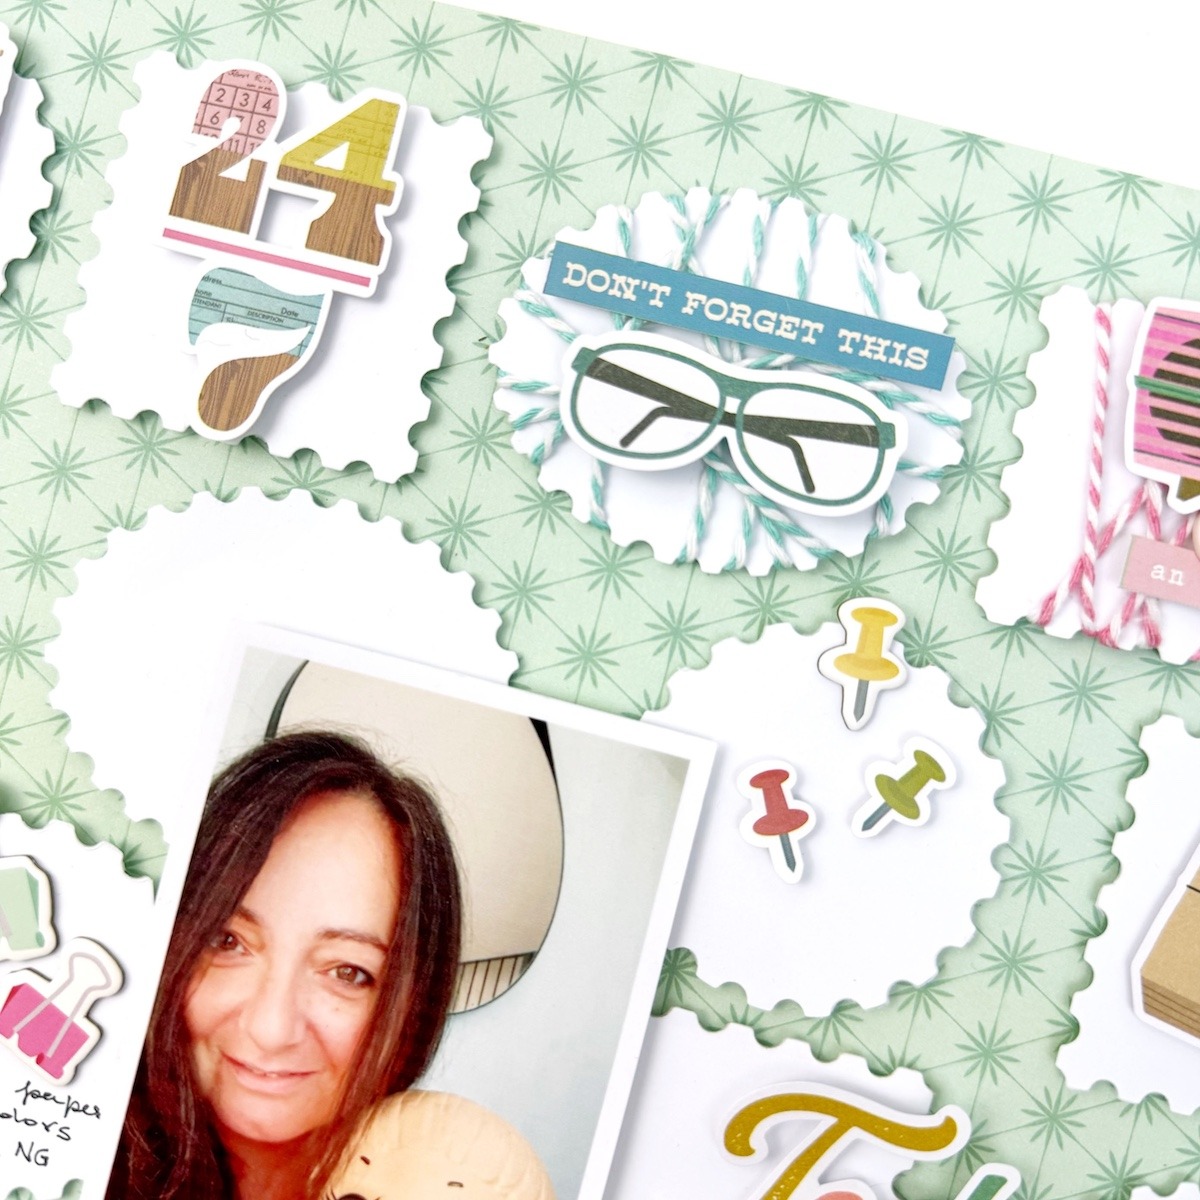
Here, for the background I used April paper. Then, as a support to my detail clusters, I cut some Postage Edge shapes. I used squares, rectangles, circles, and ovals cut from white card stock.
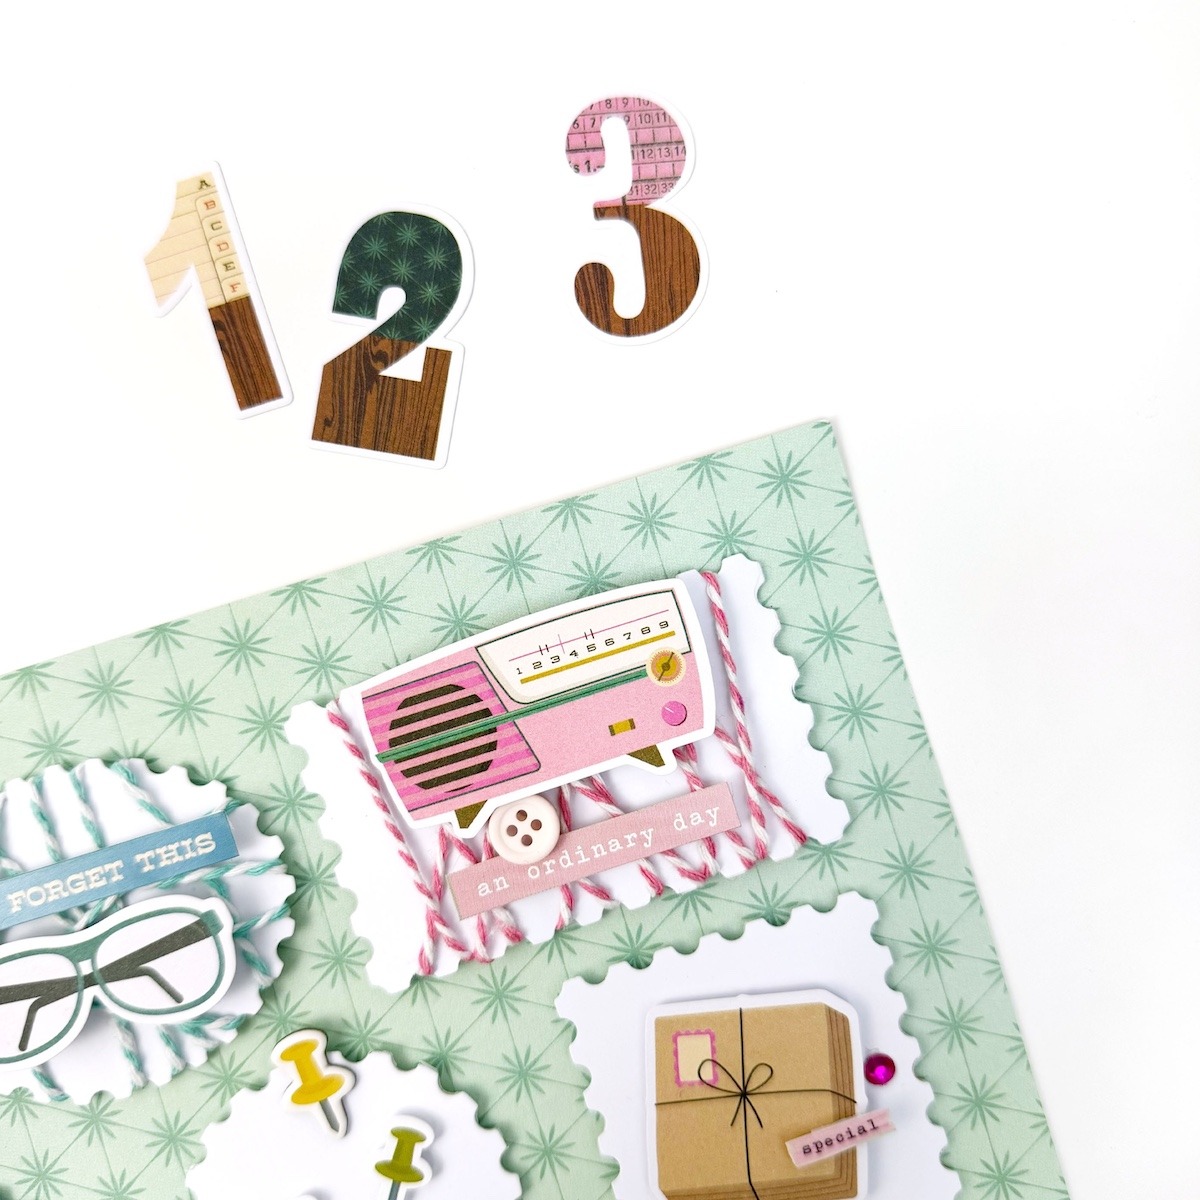
I think this is a super fun layout to create. You can add whatever you like, sky is the limit. I even added a button that was sitting on my desk for ages! Of course, the elements must be small size pieces. For example, I cut the small phrases from one of the washi tapes of the collection and they are really small and so cute.
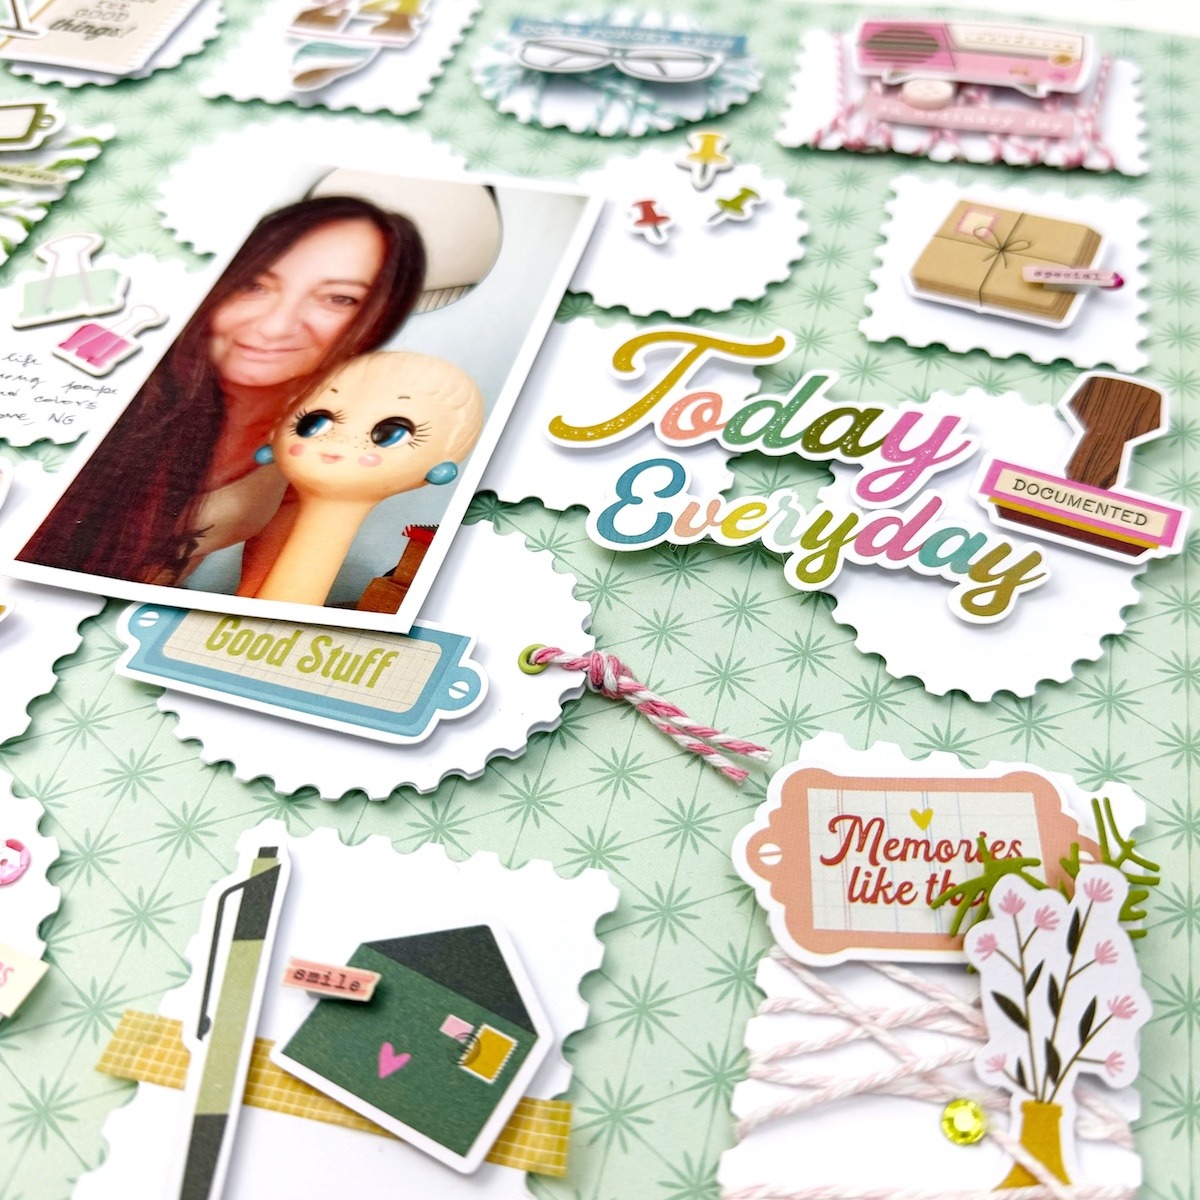
The photo is almost in the center of the page. The journaling is handwritten and it is placed at the left of the photo. The title is at the right of the photo and it’s the combination of a die cut and a sticker.
That’s all for today, dear friends. Thanks so much for stopping by the blog. I really hope you like the layouts and hopefully, you give them a try. If so, please tag me I’d be love to see your interpretation. Noteworthy combined with Spellbinders dies and products is guaranteed great fun!
Love NG
Spellbinders Supplies:

Other supplies
Paper trimmer, 12” white card stock, distress oxide pink, yellow, green, purple, scissors, foam tape, liquid glue, twine pink, green, blue, button, sequins, jewels.
3 Autumn Themed Flower Cards for All Occasions + Bonus Scrapbook Layout
Christmas Cascade Collection – A Mini Photo Flipbook and Card with Annie Williams