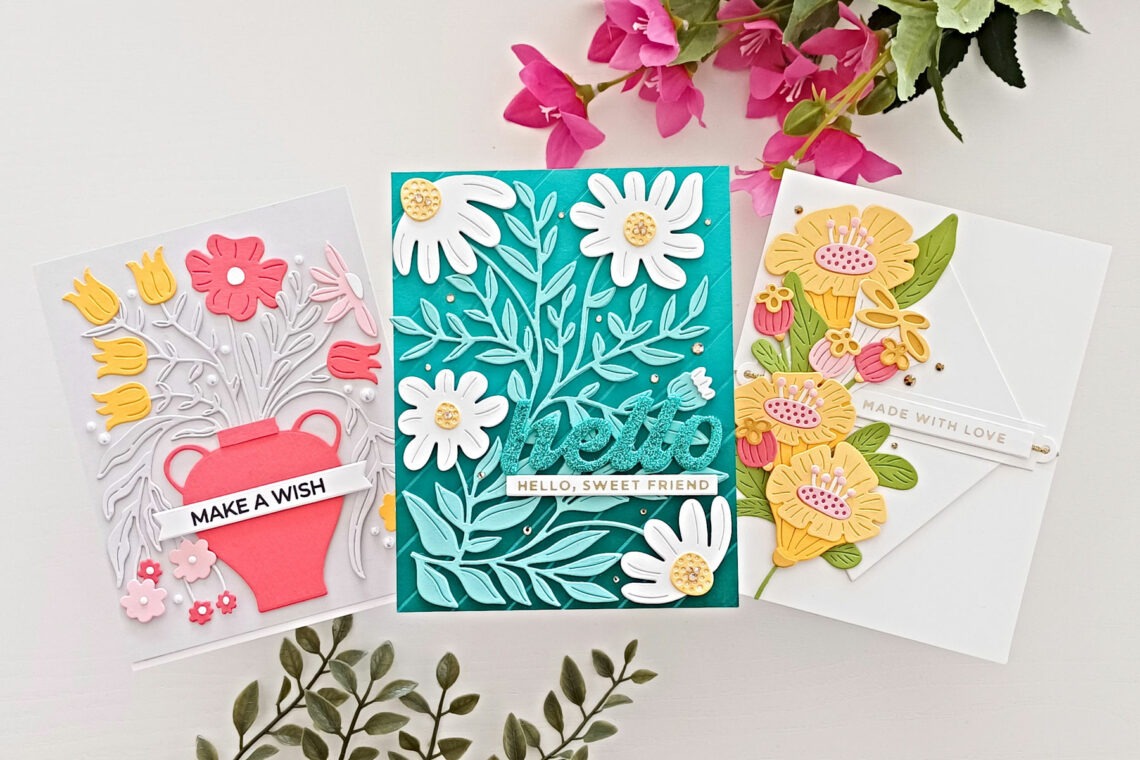
Brighten Up Your Day and Create Three Simple Floral Cards
Hello there Spellbinders friends! Lisa Tilson here from My Card Trip and I am excited to be back here with you on the Spellbinders blog. Today I have some cards to share using the More Fresh Picked Collection. I really loved the first Fresh Picked Collection so I was delighted to be asked to make some more cards for you using the latest release. There are three new floral sets and they are all super pretty. I think they are very simple to use and they definitely come together pretty quickly if you follow the intended design. The new sets have the same style as the first collection – big, bold flowers and leaf sprays that huddle cosily together, all in a design that fits a standard A2-sized card.
So, let’s get started with my three cards.
Made With Love
My first card uses Fresh Picked Angel Trumpets Etched Dies. I didn’t use them in their intended design but instead created a different arrangement placed off to the left side of my card.
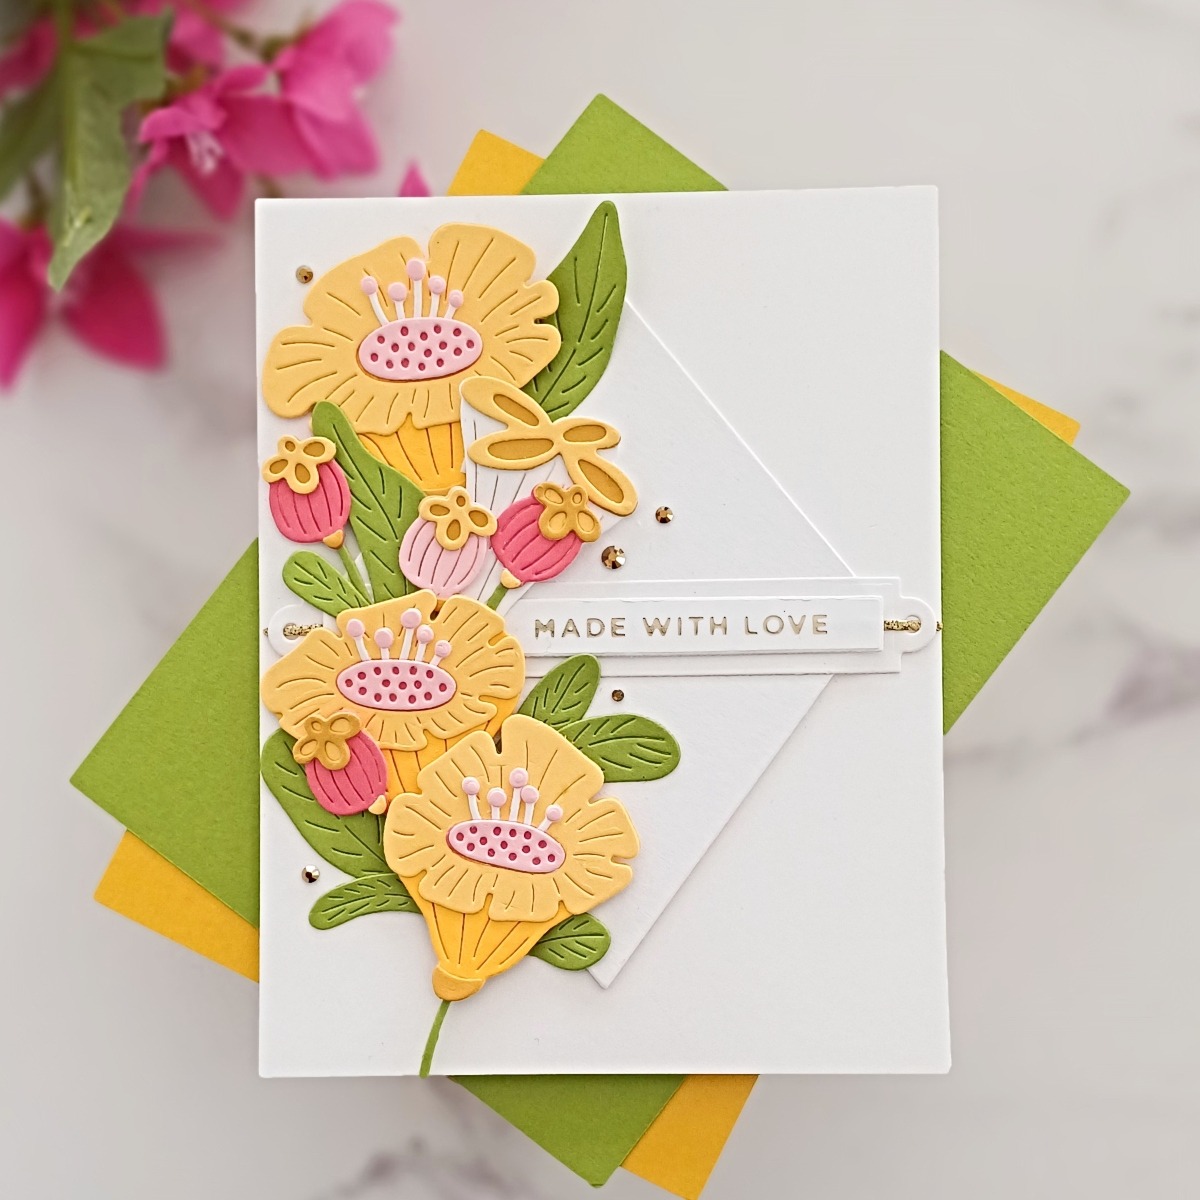
I began by taking the Fresh Picked Angel Trumpets Etched Dies and die cutting them from white card along with Pink Sand, Dahlia, Saffron, Beeswax, Tuscan, and Rainforest Color Essentials Cardstock. I adhered the pieces together with Bearly Art Glue and set them all to one side.
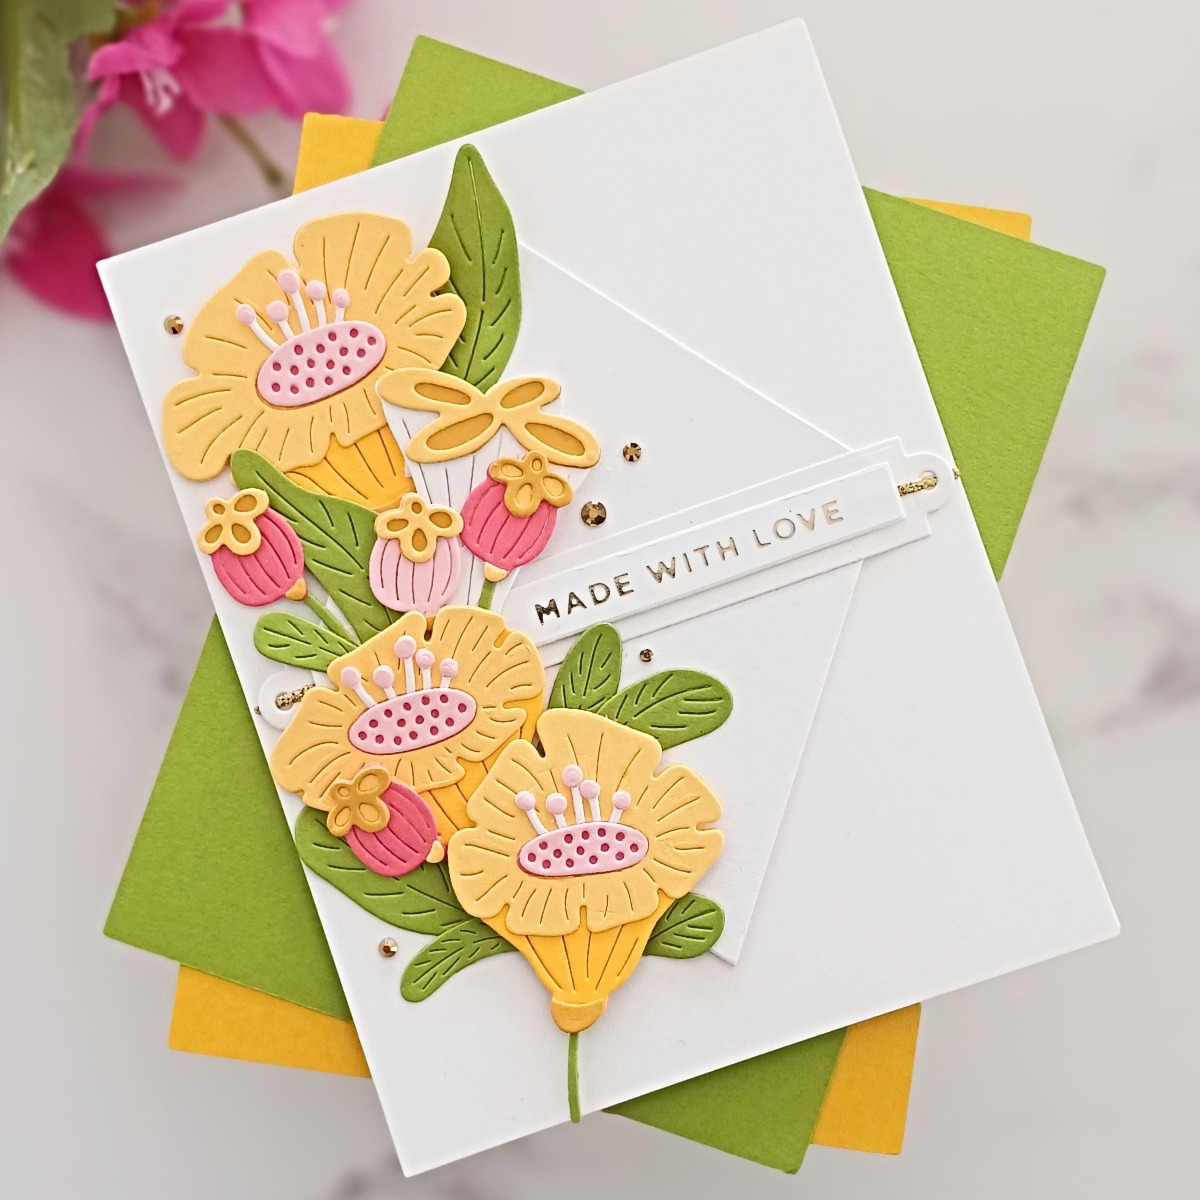
To give the flowers more of an interesting background I die-cut one of the diamonds from Essential Diamonds Etched Dies twice from white card. I adhered them together and then added them to an 80lb white A2 panel. Adding a shape behind flowers is always a neat trick to help draw the eye towards them and even if it’s a white shape, it helps to break up all the white space!
The sentiment was created by foiling the “Made With Love” sentiment from Mini Everyday Sentiments Glimmer Hot Foil Plate and Die Set using Champagne Glimmer Hot Foil and the Glimmer Hot Foil System onto white card. I trimmed it out with the sentiment banner from Sentiment Labels Etched Dies and also cut the larger strip which has the holes at either end for you to push your “thread” through. My thread was die-cut from a gold glitter card and threaded through the holes. I could then adhere my sentiment on top. The label was then added across the center of the diamond using wet adhesive.
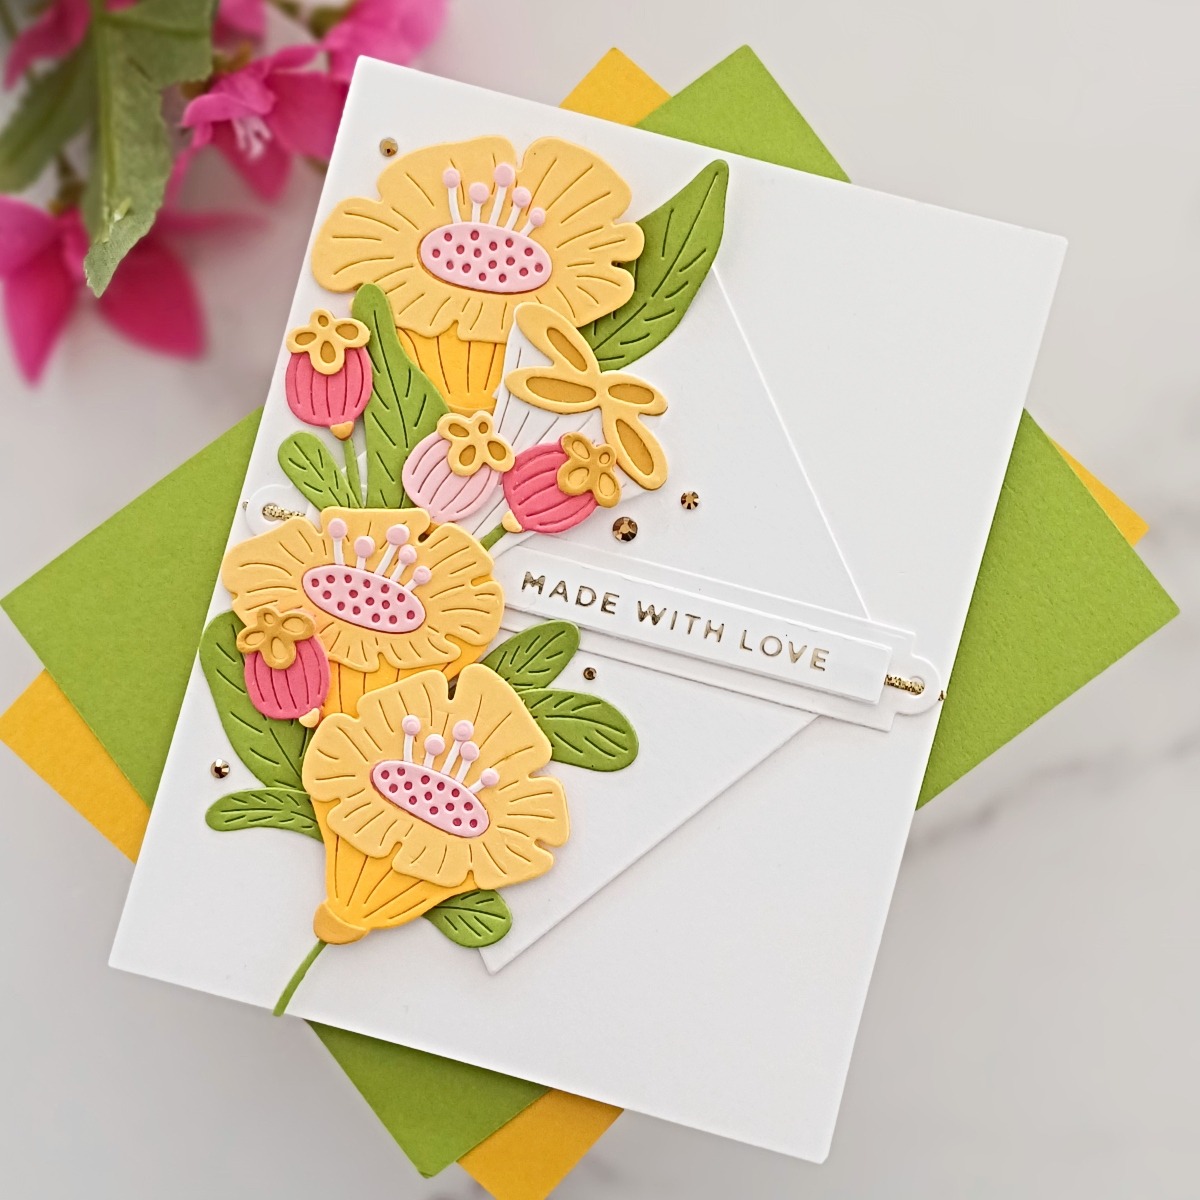
Next, I started to make my floral arrangement and for this I needed to trim out all of the individual leaves from the die cut aswell as a few of the stems. I then adhered all the leaves and flowers using a mix of thin foam tape and Bearly Art Glue.
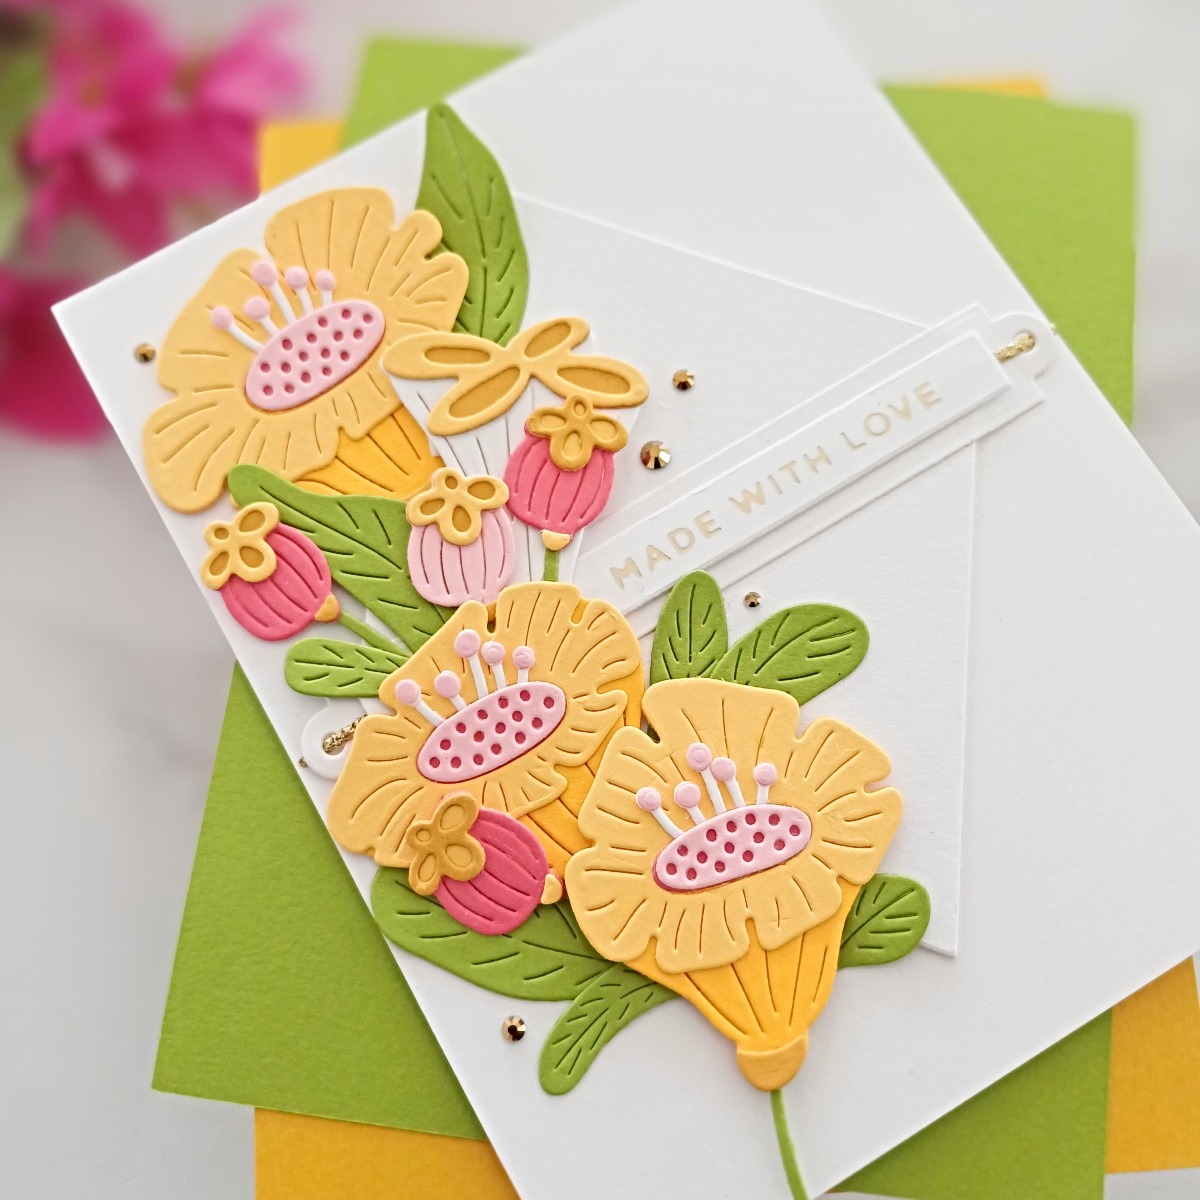
To finish the card, I added some Gold Mix Color Essentials Gems around the flowers and then I adhered the whole panel to a top folding A2 notecard. I really love the summery color palette on this card and really must create yellow flowers more often!
Hello Sweet Friend
For my next card, I have gone for bold colors and I am using the Fresh Picked Daisies Etched Dies. I have used them in their intended format which covers the whole of an A2 panel (4.25” x 5”). I love all of the Fresh Picked floral sets – I adore the graphic contemporary style of them. They are designed to cover a whole panel and they really pack a punch but I do sometimes like to break up the flowers and create other arrangements with them. You can definitely achieve different looks with them and who doesn’t want to stretch their supplies?!
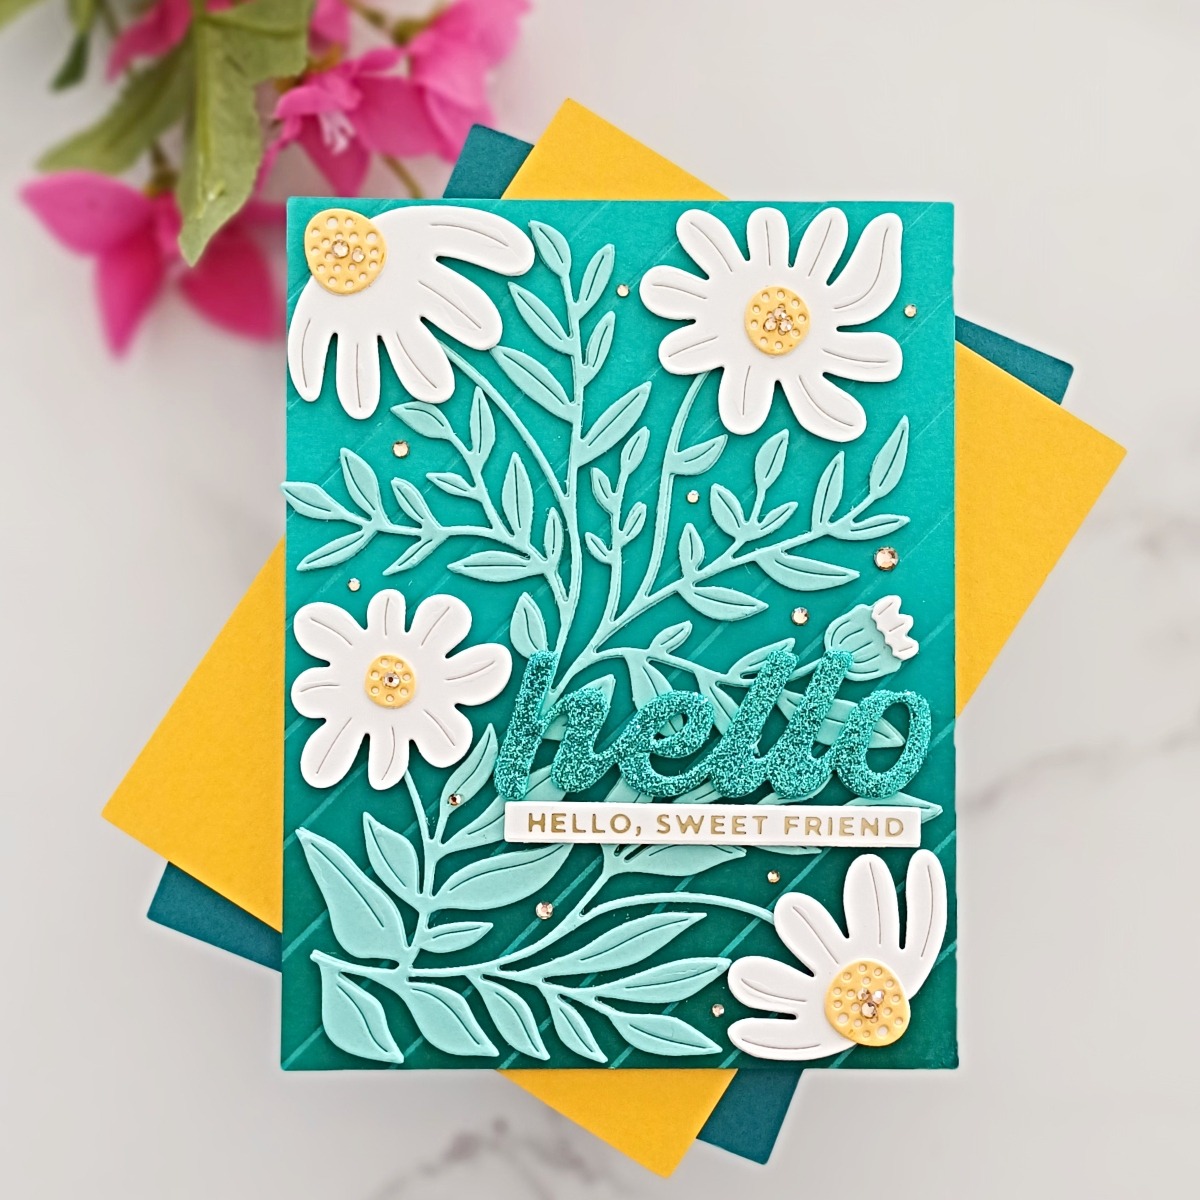
So, I began by die-cutting all the different pieces from Fresh Picked Daisies Etched Dies. I cut them from white card as well as Waterfall and Beeswax Color Essentials Cardstock. The leaves were die-cut twice from Waterfall so that I could adhere them together and they would then provide some added dimension to the finished card. I set them all to one side to work on my background.

I grabbed a piece of Teal Topaz Color Essentials Cardstock and I foiled it with some Opal Glimmer Hot Foil and the Diagonal Glimmer Stripes Glimmer Hot Foil Plate. I absolutely LOVE Opal foil! I use it so often to create tone-on-tone foiling. Next to a couple of golds, it’s by far my most used foil!
To add some more interest and depth to the background I added some ink blending on top of the foiled panel. Using blending brushes, I applied Peacock Feathers Distress Ink from the bottom to about halfway up the card. I then went in with some Pine Needles Distress Ink, again from the bottom but only to about a third of the way up. So, the finished card has a lovely ombre blend.
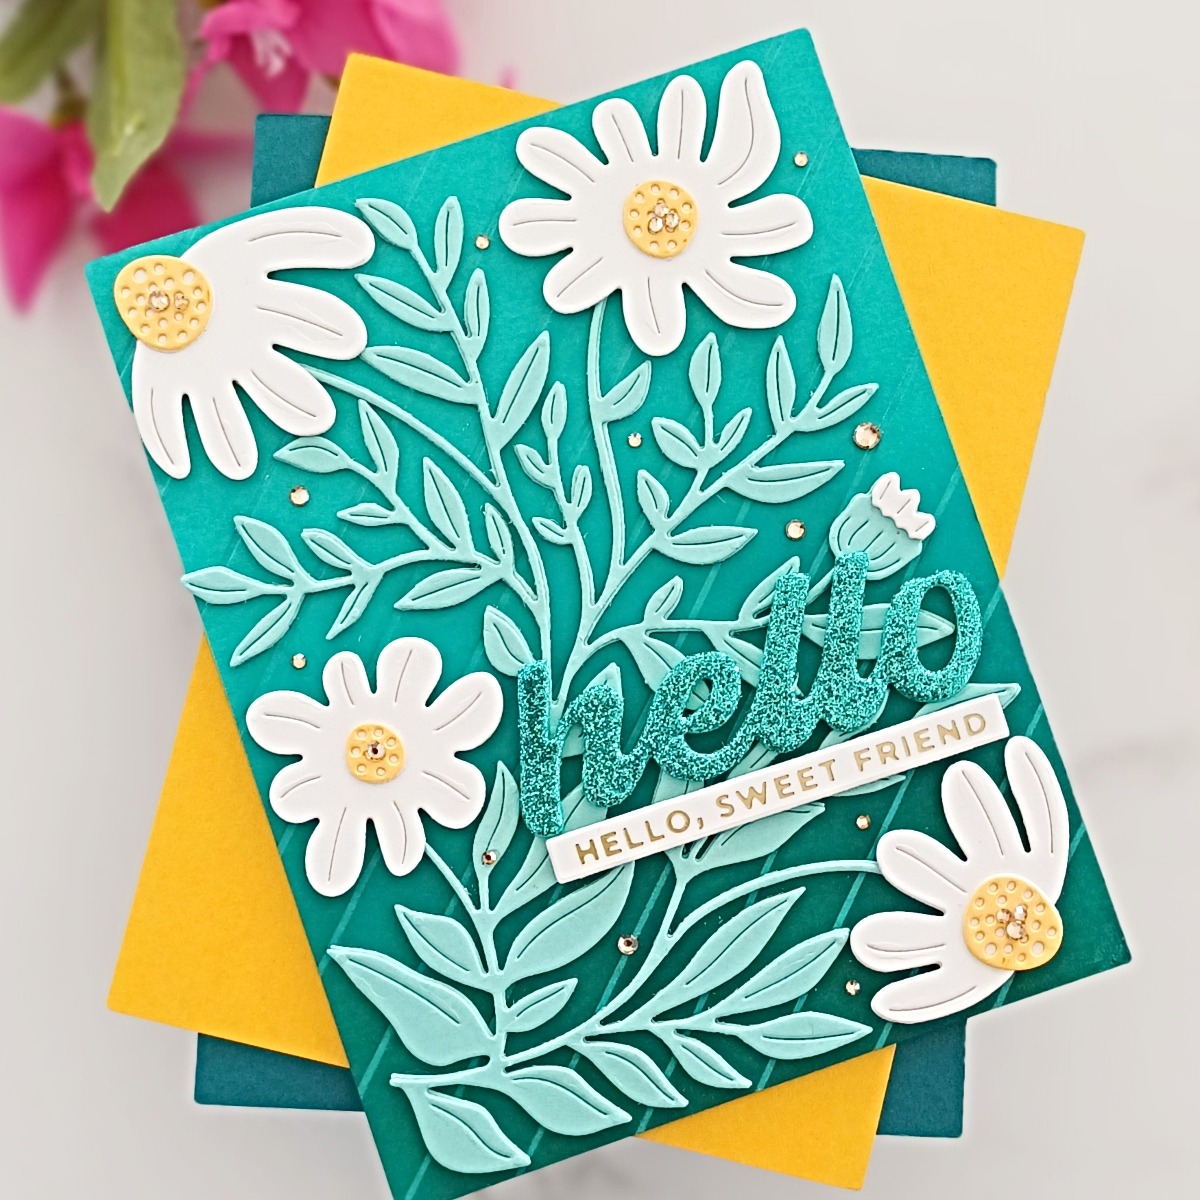
The flowers were then added on top using a mix of thin foam tape and wet adhesive. I followed the intended design and I love how they all nestle together!
For my greeting, I took the Fresh Picked Sentiments Etched Dies and cut “Hello” from Shimmering Tropics Pop Up Foam Sheets. I also foiled a sentiment from Mini Everyday Sentiments Glimmer Hot Foil Plate and Die Set onto white card using Matte Gold Glimmer Hot Foil. It was trimmed down with the sentiment banner die from the set and I added it to my panel using some thin foam tape. The “Hello” was just adhered directly onto the panel.
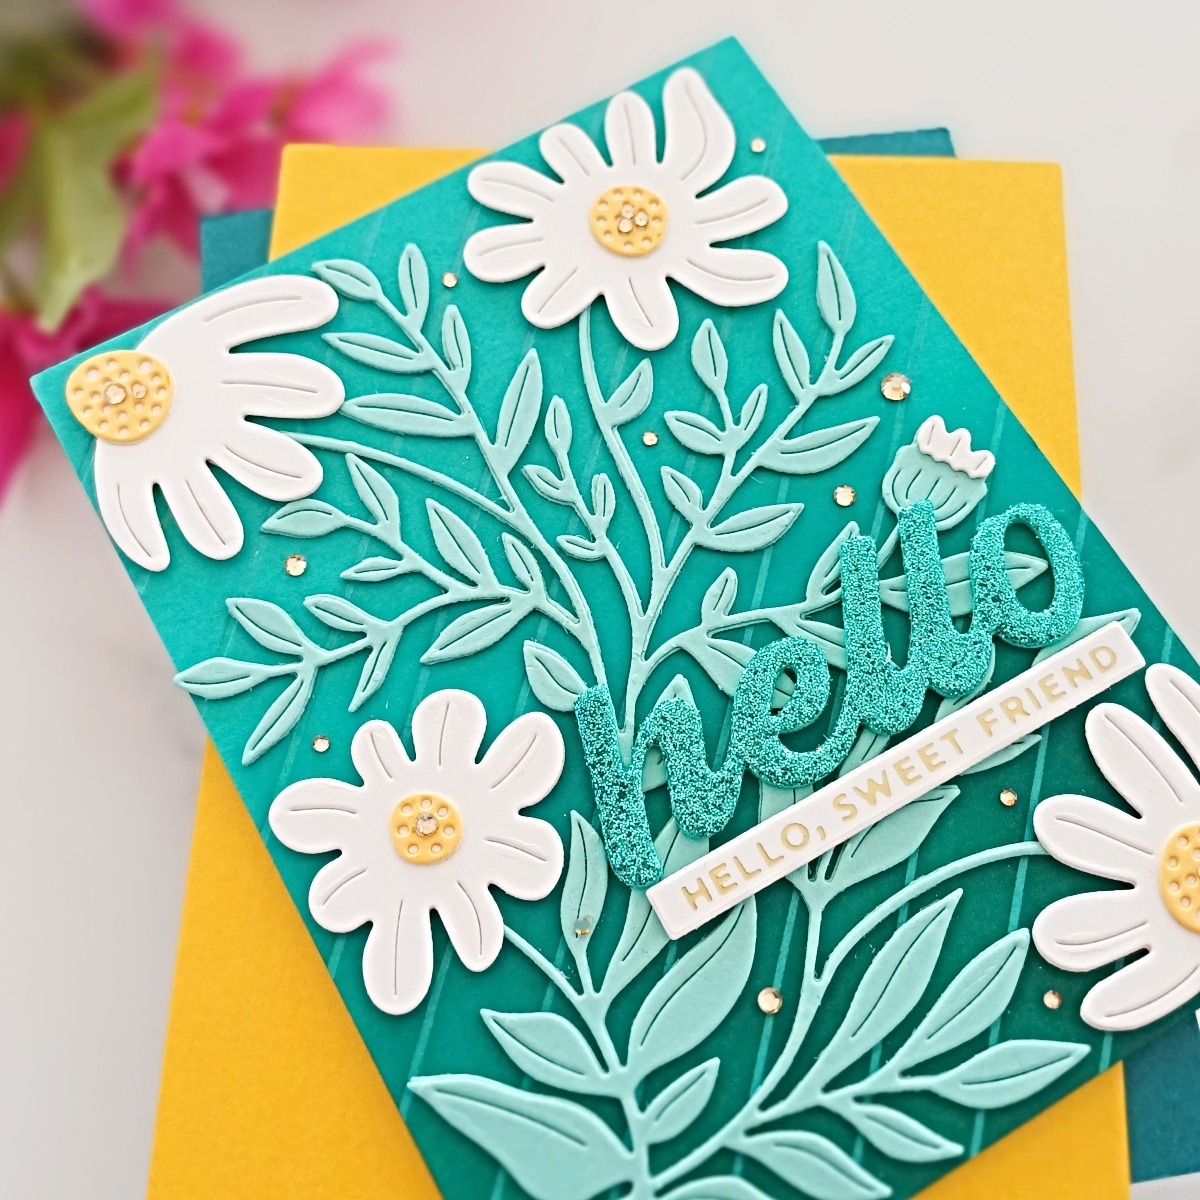
To finish the card, I added lots of sparkly Gold Mix Color Essential Gems into the gaps and also onto the flower centers.
Make A Wish
My final card has been created with the Fresh Picked Vase Bouquet Etched Dies. This is a stunning set – maybe my favorite of all three sets from this release as it’s fun to add a vase into the mix and I love how the flowers and leaves encase the vase. It’s very stylish and such a fun design!
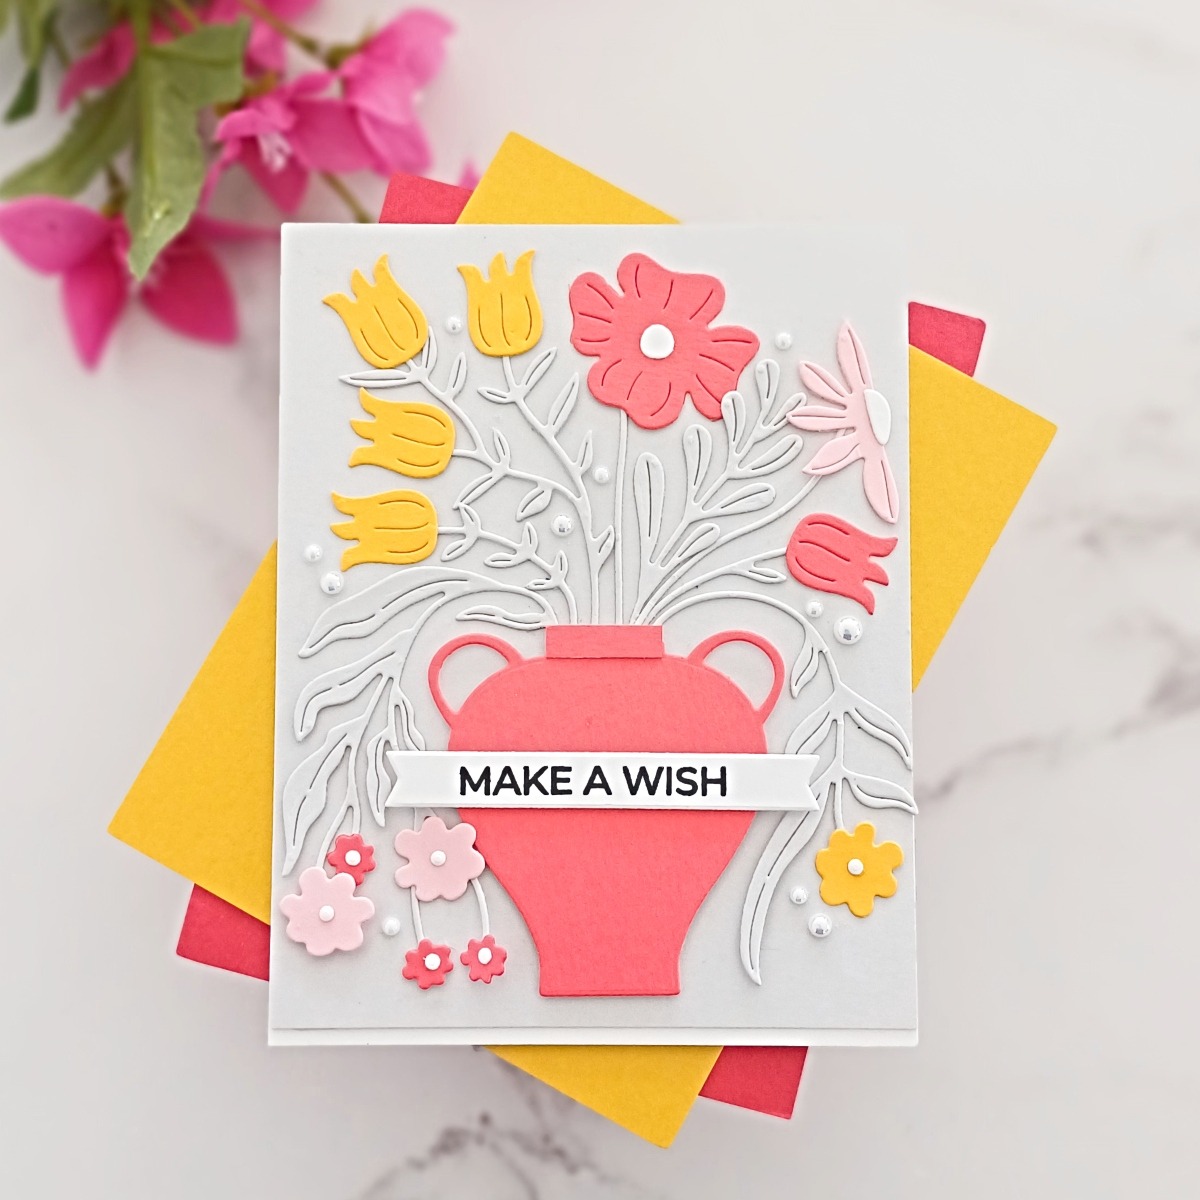
This card is definitely the quickest to make. All you need to do is pick pretty colors! I went with a coral card from my stash for the vase and a few of the flowers. The rest were cut from Saffron, Pink Sand, and Fog Color Essentials Cardstock. I used a little bit of white card for the flower centers.
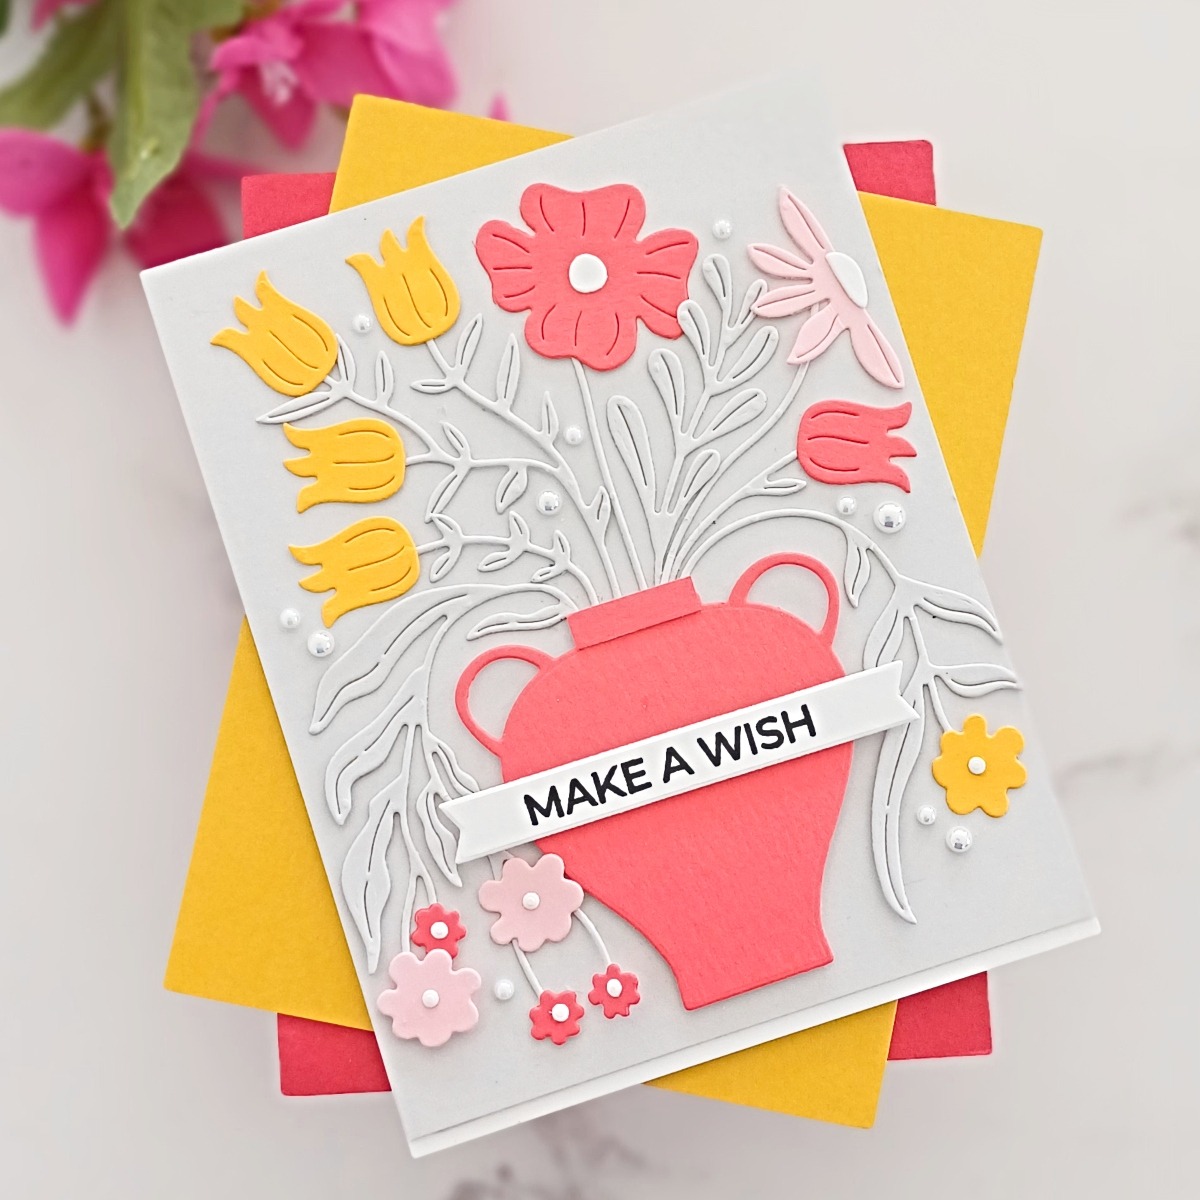
I trimmed a small strip off the bottom of an A2 piece of Fog card and then added my vase on top using foam tape. The leaves and flowers were then adhered with Bearly Art Glue. I left some flowers and parts of the leaves free of adhesive so that the card has more movement and interest.
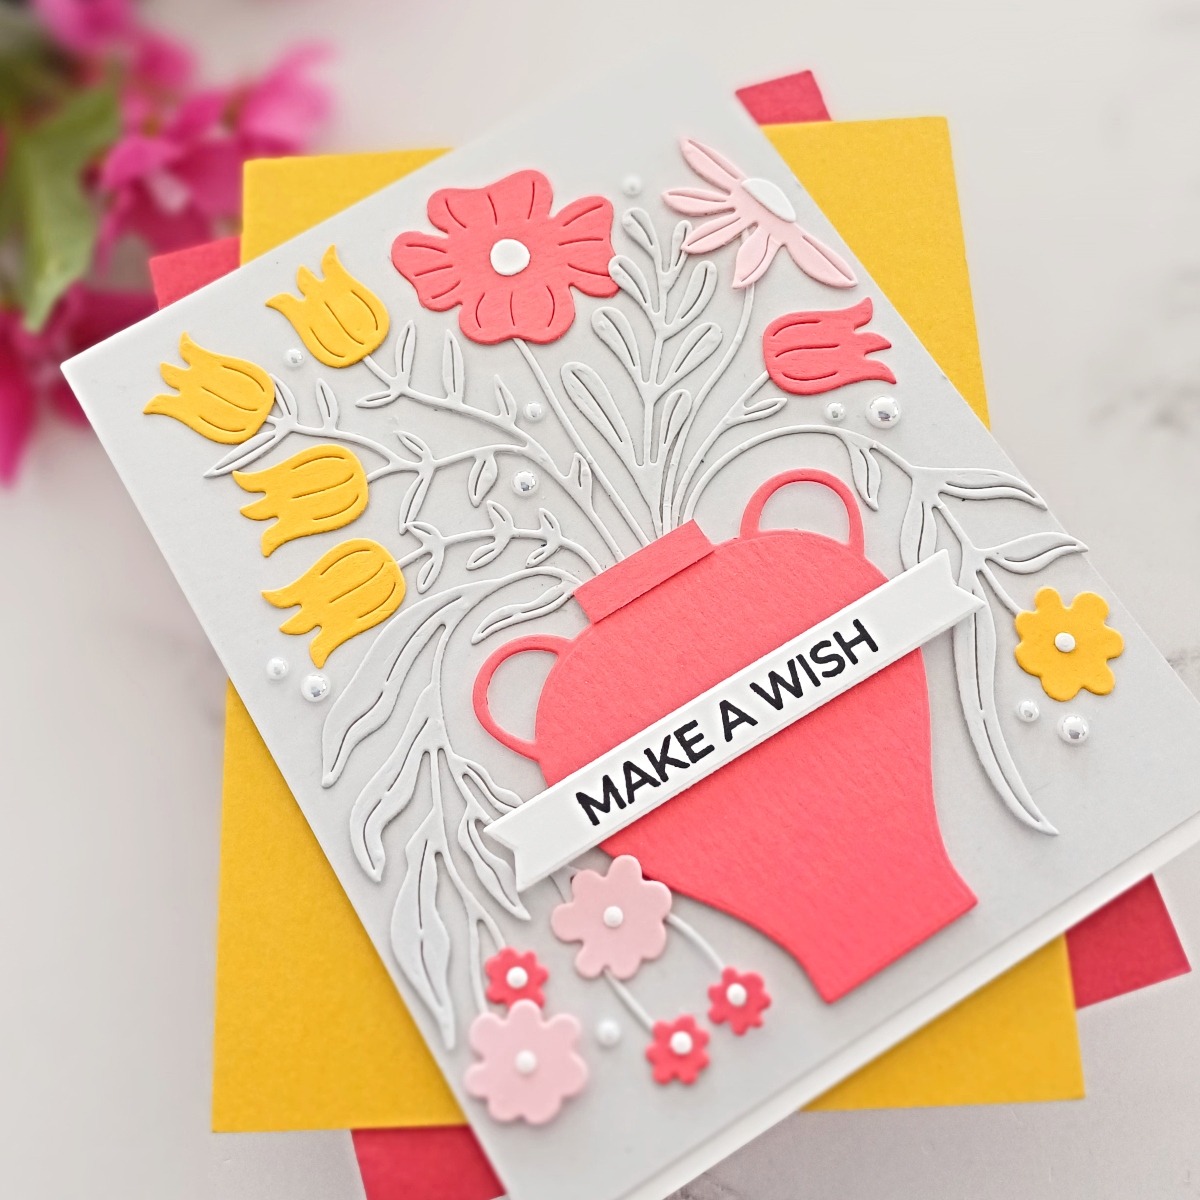
The sentiment is from Kaleidoscope Arch Sentiments Clear Stamp Set and it was stamped using Versafine Onyx Black Ink onto white card before being cut out with the banner die from Stitched Kaleidoscope Arch Etched Dies. This was added across the vase with foam tape.
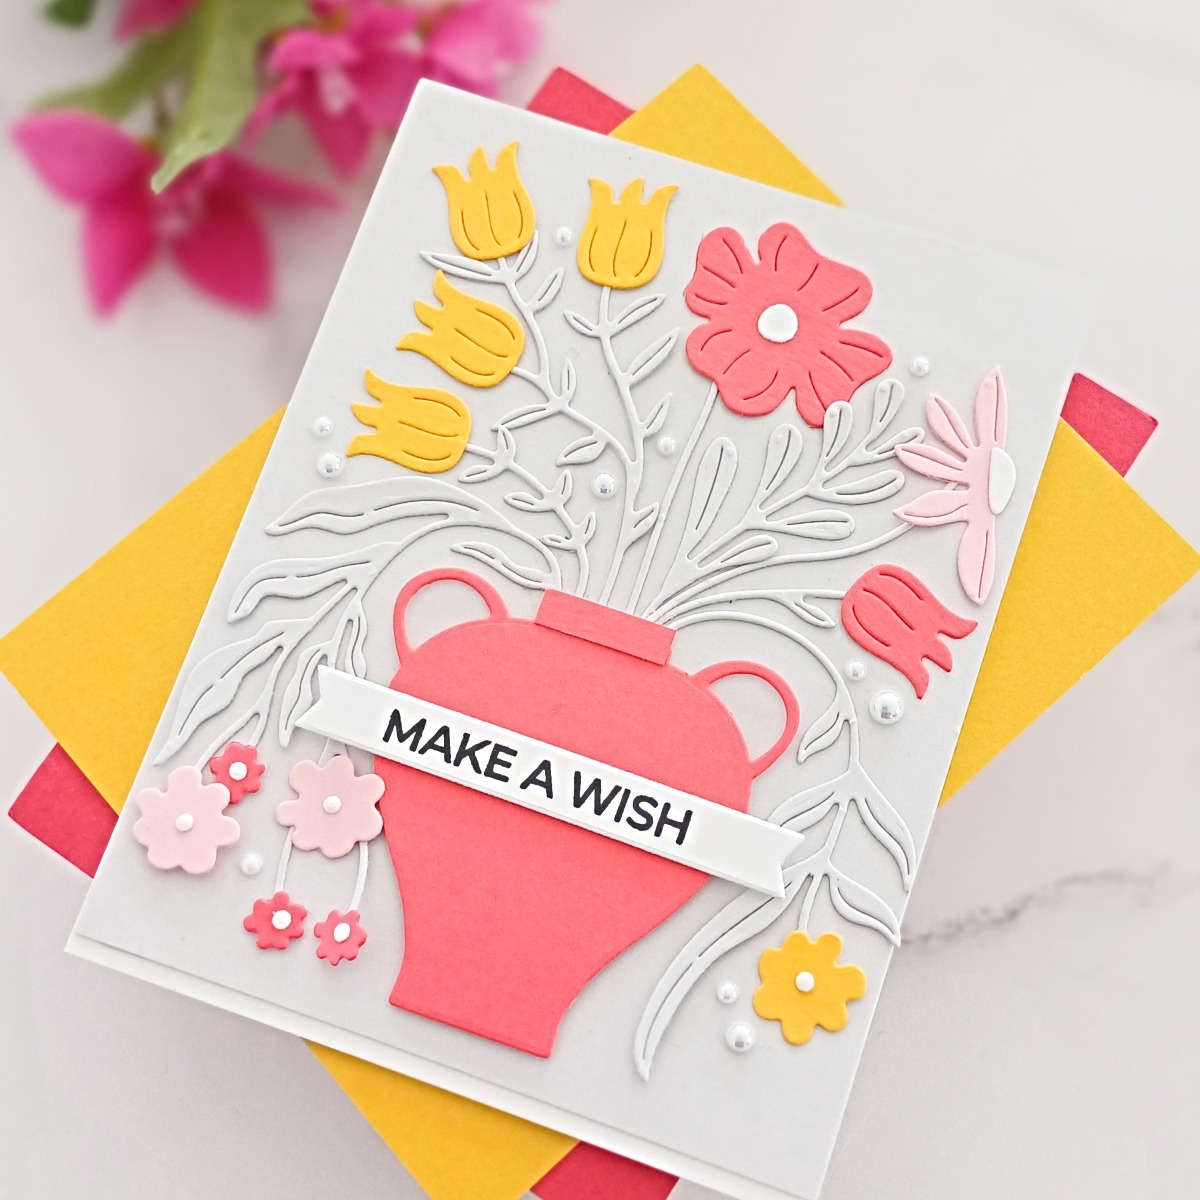
To finish the card, I added some white glossy pearls around the flowers and adhered the whole panel onto a top folding white 110lb A2 notecard.
I hope that you like the cards and that they give you some inspiration for creating with this beautiful release. If you would like to see more of my cards, I would love to have you join me over on my blog, Instagram, Facebook, or YouTube. In the meantime, thank you so much for joining me here on the blog today. I hope that you have a wonderful day!
Spellbinders Supplies:

Other Supplies
Neenah Solar White Classic Crest 80lb and 110lb, Hero Arts Coral Cardstock, Embellishment Wand, Hero Arts Tweezers, Hero Arts Glitter Paper Holiday Sparkle, Thin Foam Tape, Hero Arts Blending Brushes, Peacock Feathers Distress Ink, Pine Needles Distress Ink, MISTI, Lucy’s Cards Glossy Porcelain Mix, Versafine Onyx Black Ink.

Sparkling Christmas Collection – Cardmaking Inspiration with Karin Åkesdotter
Cards for Kindness