Wax Seal Collection on Handmade Cards with Jung AhSang
Hello crafty friends! It’s Jung here, and I am back with another guest post on the Spellbinders blog. For my projects today, I’m working with some products from the new Wax Seal collection. This was such a fun collection to work with!
There are a couple methods to work with the wax seals. You can pour the wax, and seal them directly on your project. You can also make the wax seals on the silicone mat that comes with the wax seal kit, and then adhere them to your project. I am a bit of a perfectionist, so I made my wax seals on the silicone mat. That way, I wouldn’t mess up my cards if I made a mistake. I could also make several wax seals, and choose the one that I liked best. I started off by just experimenting and getting used to the products, like the wax, seals, and metallic markers. To adhere the wax seals to my projects, I used strong double-sided tape, and it worked well.

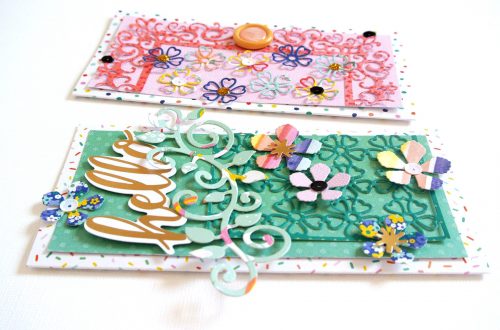
For my first card, I used the Thanks Mandala wax seal stamp.
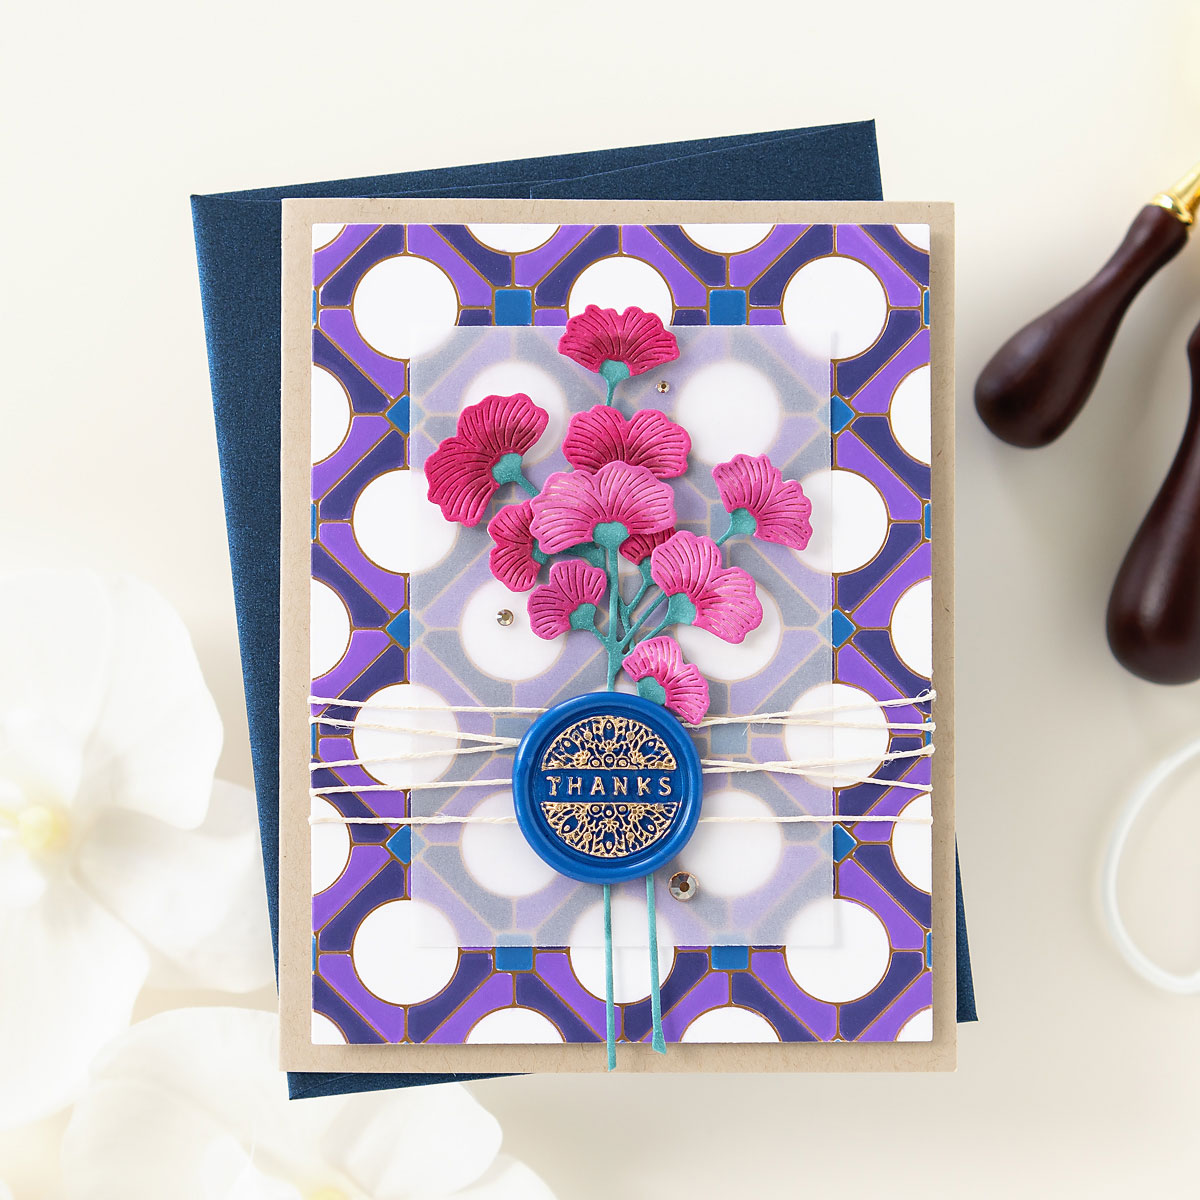
To start, I foiled the Geometric Optical background plate on smooth white cardstock with polished brass foil. Then, I used the coordinating layered stencils and Distress Oxide inks, to ink the background. I really like how the circles looked white, so I skipped that layered stencil. I used one of my Precision A2 layering basics dies to trim the stenciled panel.
Next, I die-cut the pieces from the Sealed Gingko dies from white cardstock, and then colored them with Copic markers.
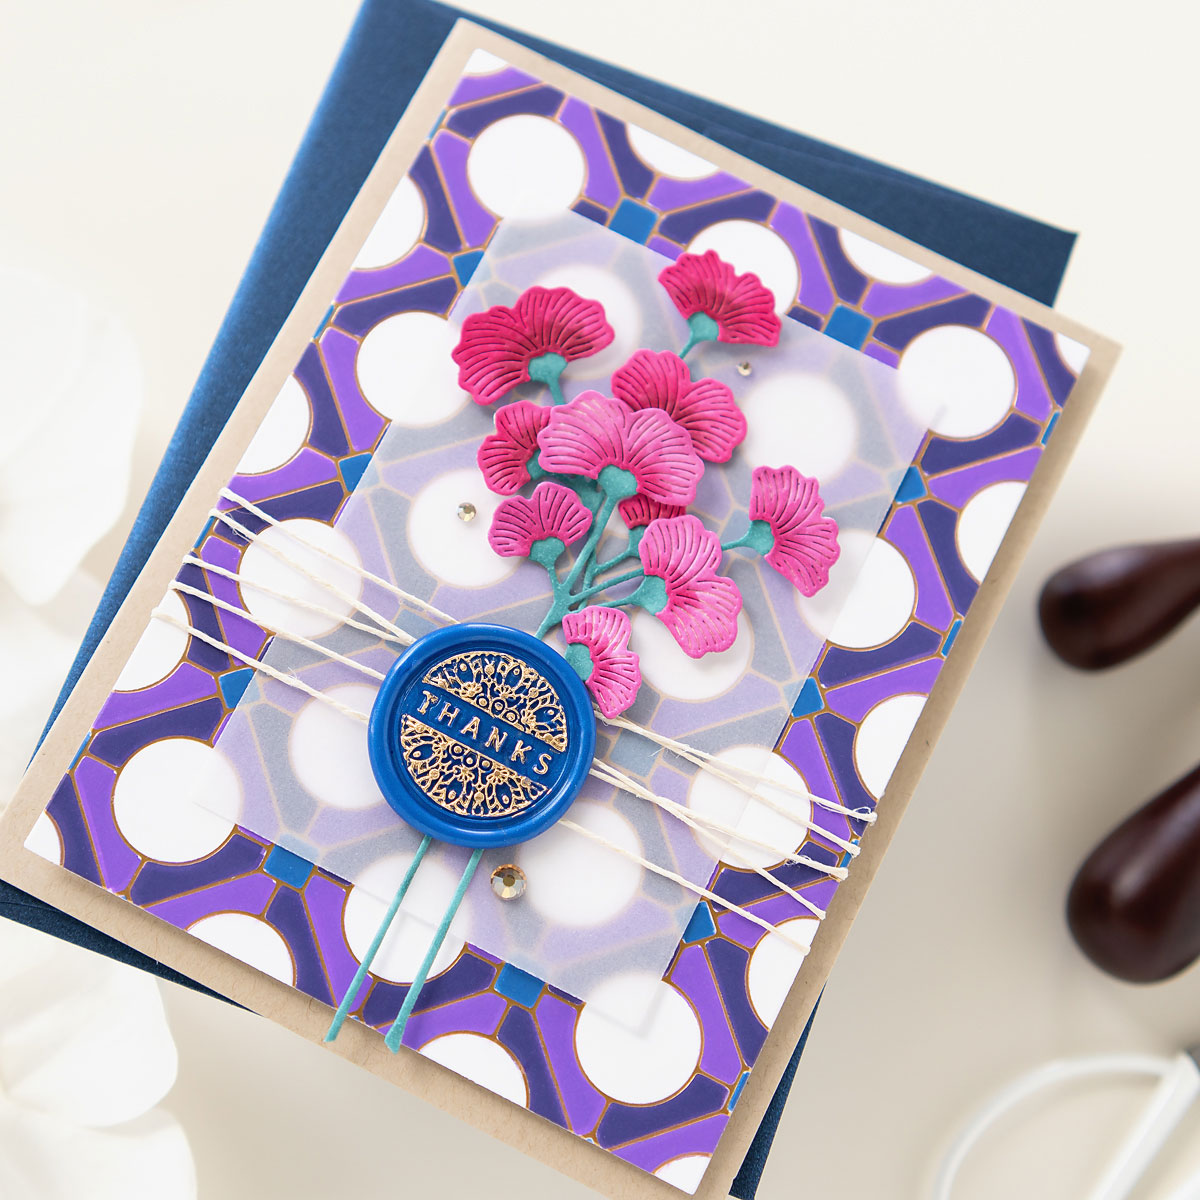
When assembling my card, I added a piece of vellum that I trimmed using another Precision A2 layering basics dies to the stenciled background since the background was little busy. I adhered 2 of the Gingko sprigs on top of the vellum and then added some twine. I adhered to the project to a side fold A2 kraft card base. To finish off the card, I adhered to a royal blue wax seal that I made using the Thanks mandala seal and gold metallic marker and a few gold gems.
For my second Wax Seal collection card, I used the Sending a Hello wax seal stamp.
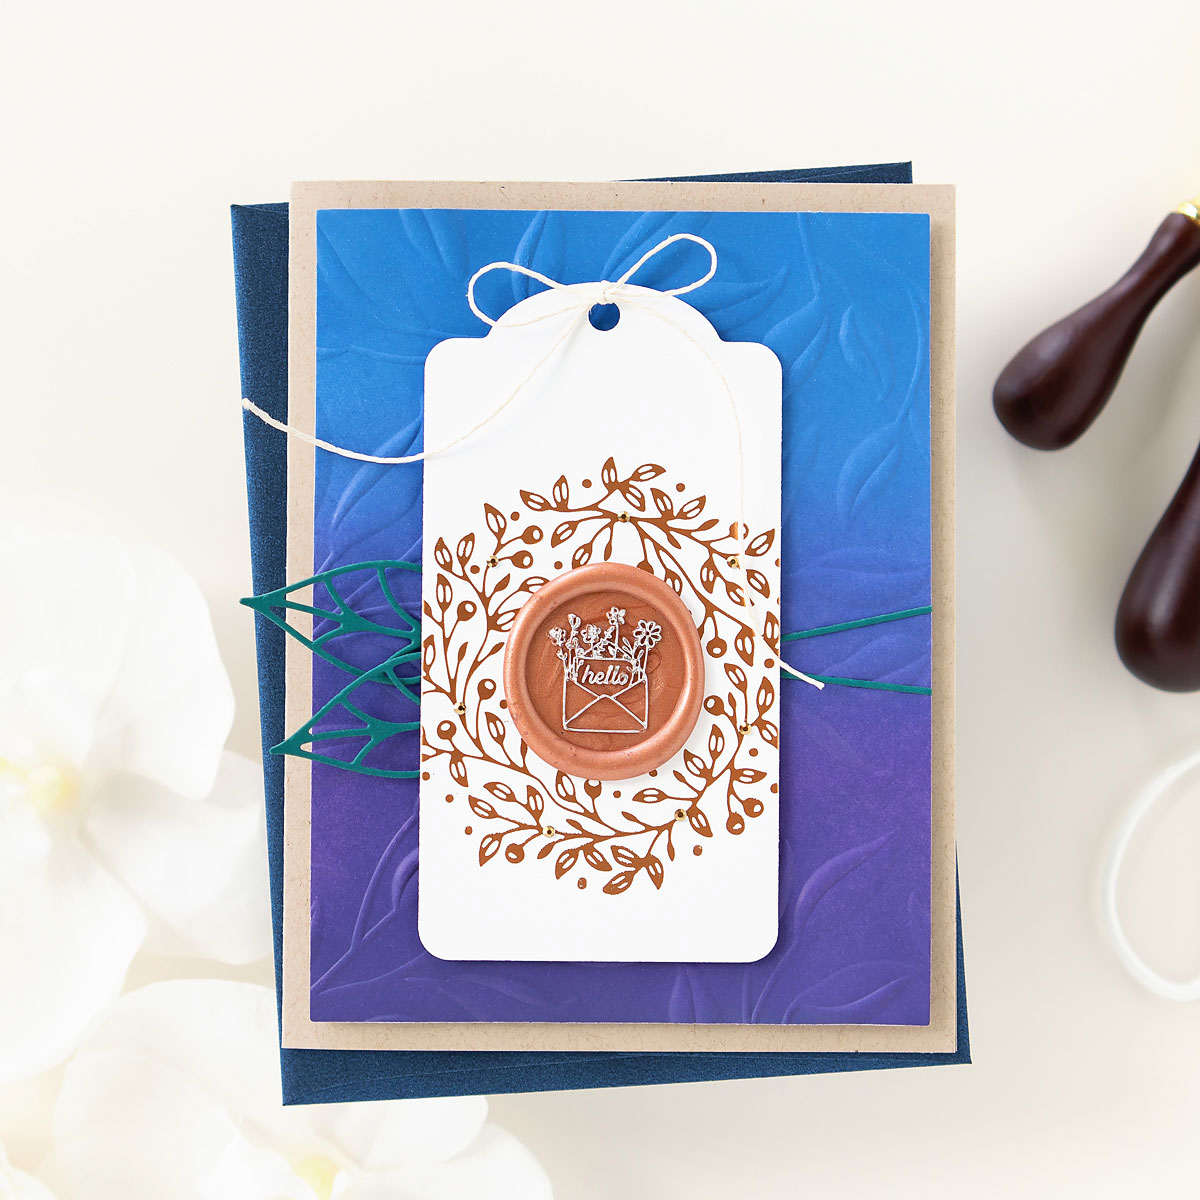
I began by foiling the Sealed Wreath on smooth white cardstock with satin rose gold foil. I die-cut the piece using a tag die and used twine to tie a bow. For the background panel, I used Distress Oxide inks, trimmed the panel with a Precision A2 layering die, and then used the Leafy embossing folder to create texture. I also diecut 2 Sealed Squiggles die (the leaf) for the card. I like how the leafy background, the leaf dies, and the wreath all coordinate together.
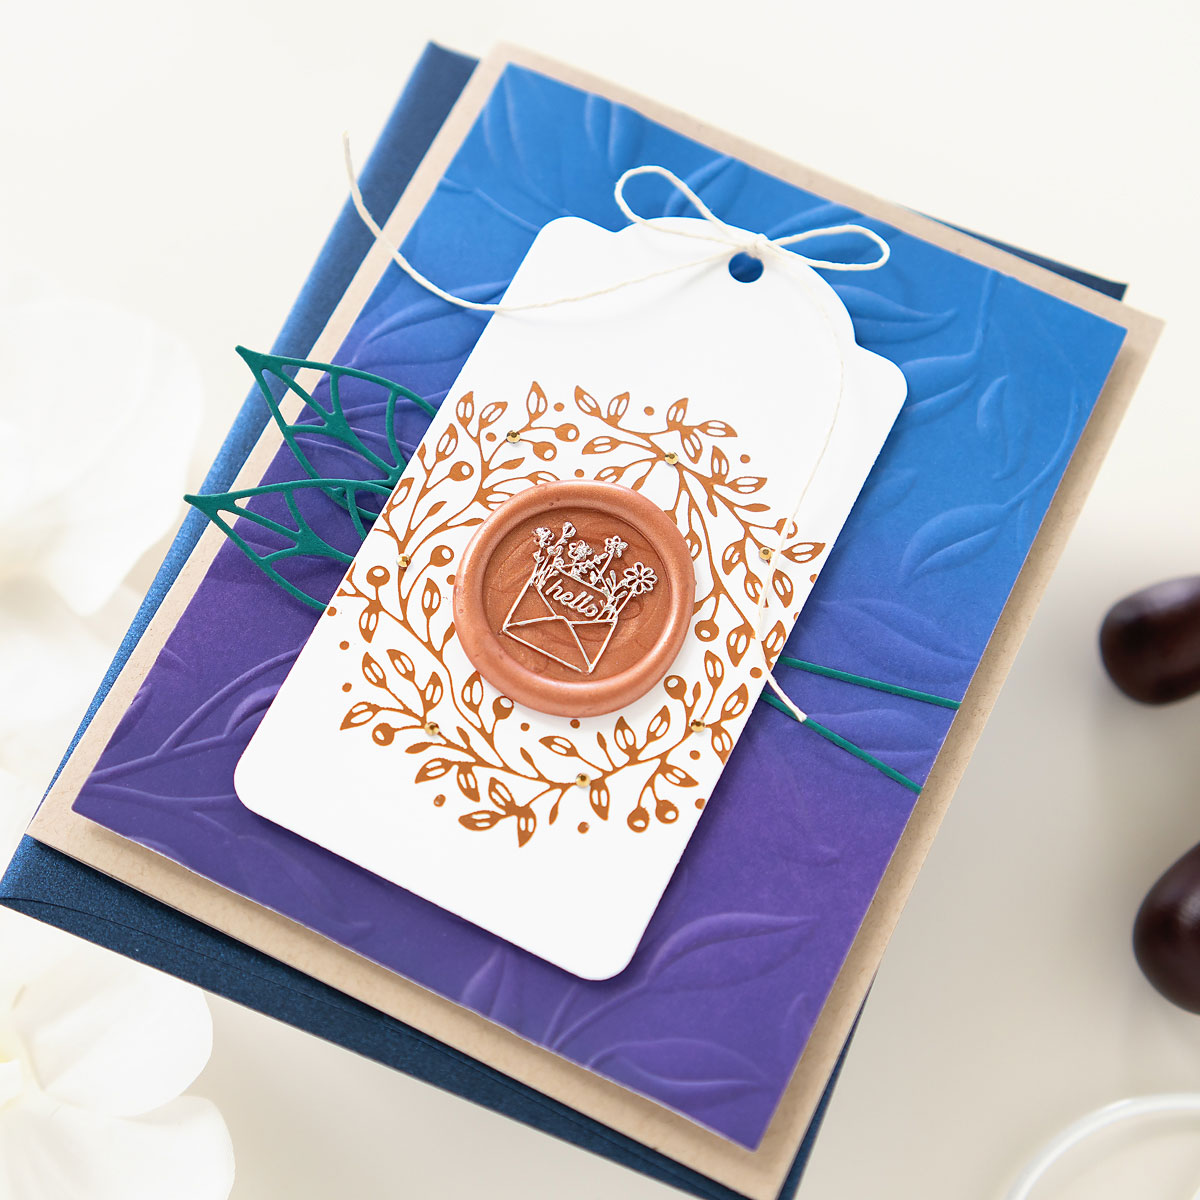
To put together the card, I adhered the background panel to a craft card base with foam tape. Next, I glued on the 2 leaf sprigs. I adhered the wreath tag on top with more foam tape. Then, I adhered the Copper wax seal that I made using the Sending a Hello seal and silver metallic marker to the center of the wreath. To finish off my card, I added some small gold gems to the wreath.
For my third project, I made a card but added the wax seal to the envelope.
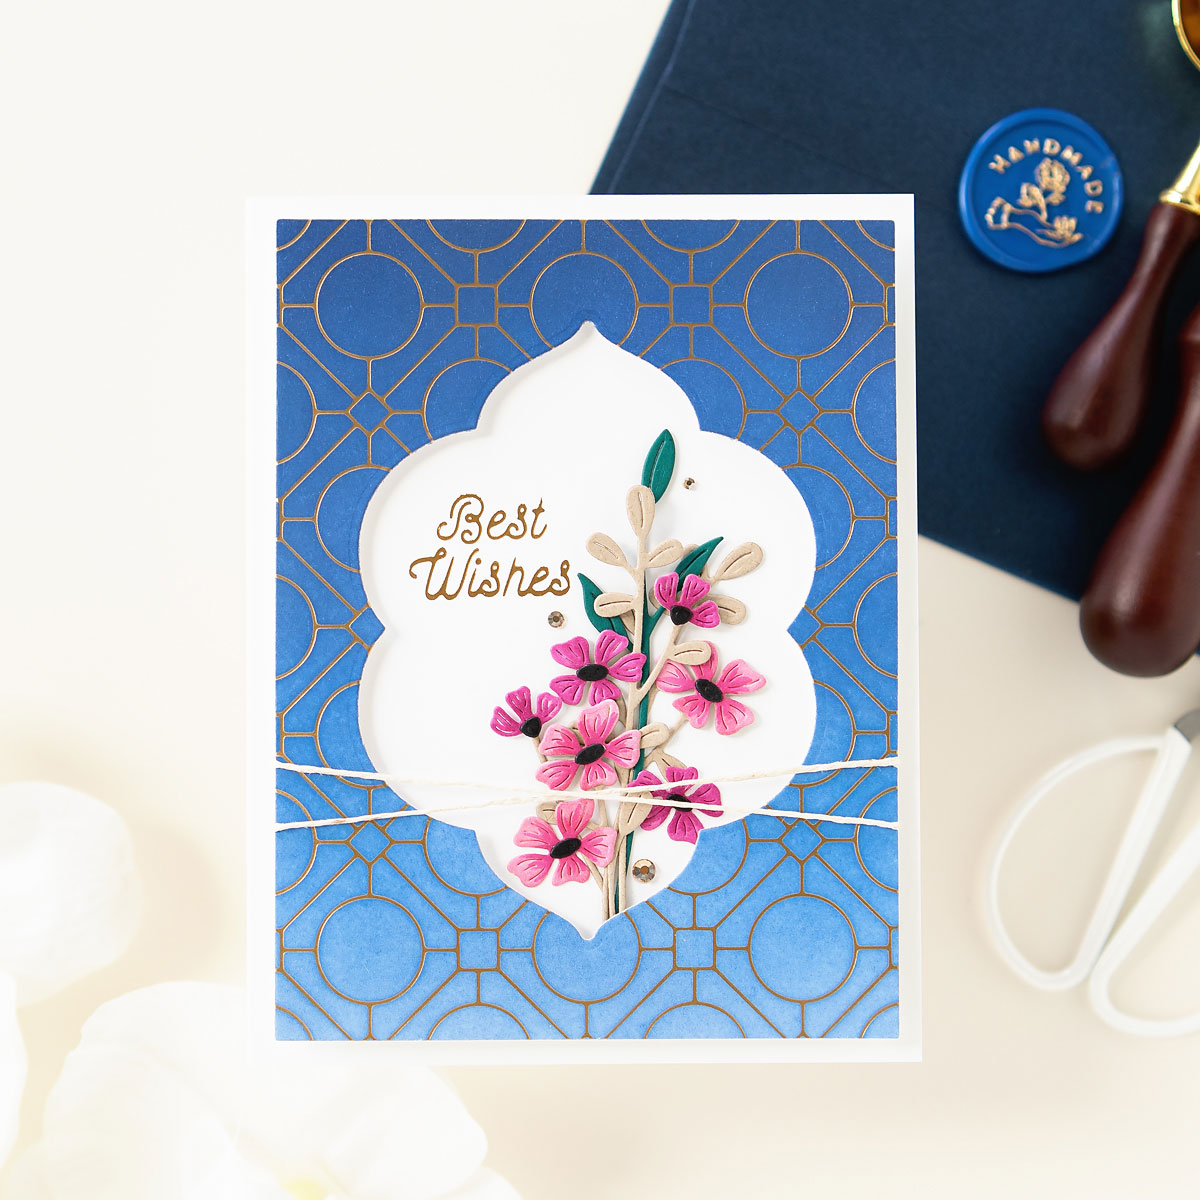
Again, I started by foiling the Geometric Optical background plate on smooth white cardstock with polished brass foil. I used Distress oxide inks to ink blend a subtle blue ombre to the panel, making sure to use a dry cloth to wipe off the excess ink from the foil. Next, I used one of the Precision A2 layering dies to trim the panel, and one of the Essential Floral Reflection dies to die-cut the shape from the center of the background panel. I also foiled the “Best Wishes” sentiment from the Sealed Berry Wreath hot foil set on a piece of white cardstock.
Afterwards, I die-cut my floral pieces. I die-cut the Sealed Blooms from white and craft cardstock. Then, I die-cut the flowers from white cardstock and colored them with Copic markers. Finally, I diecut a Sealed Leaf sprig from green cardstock as well.
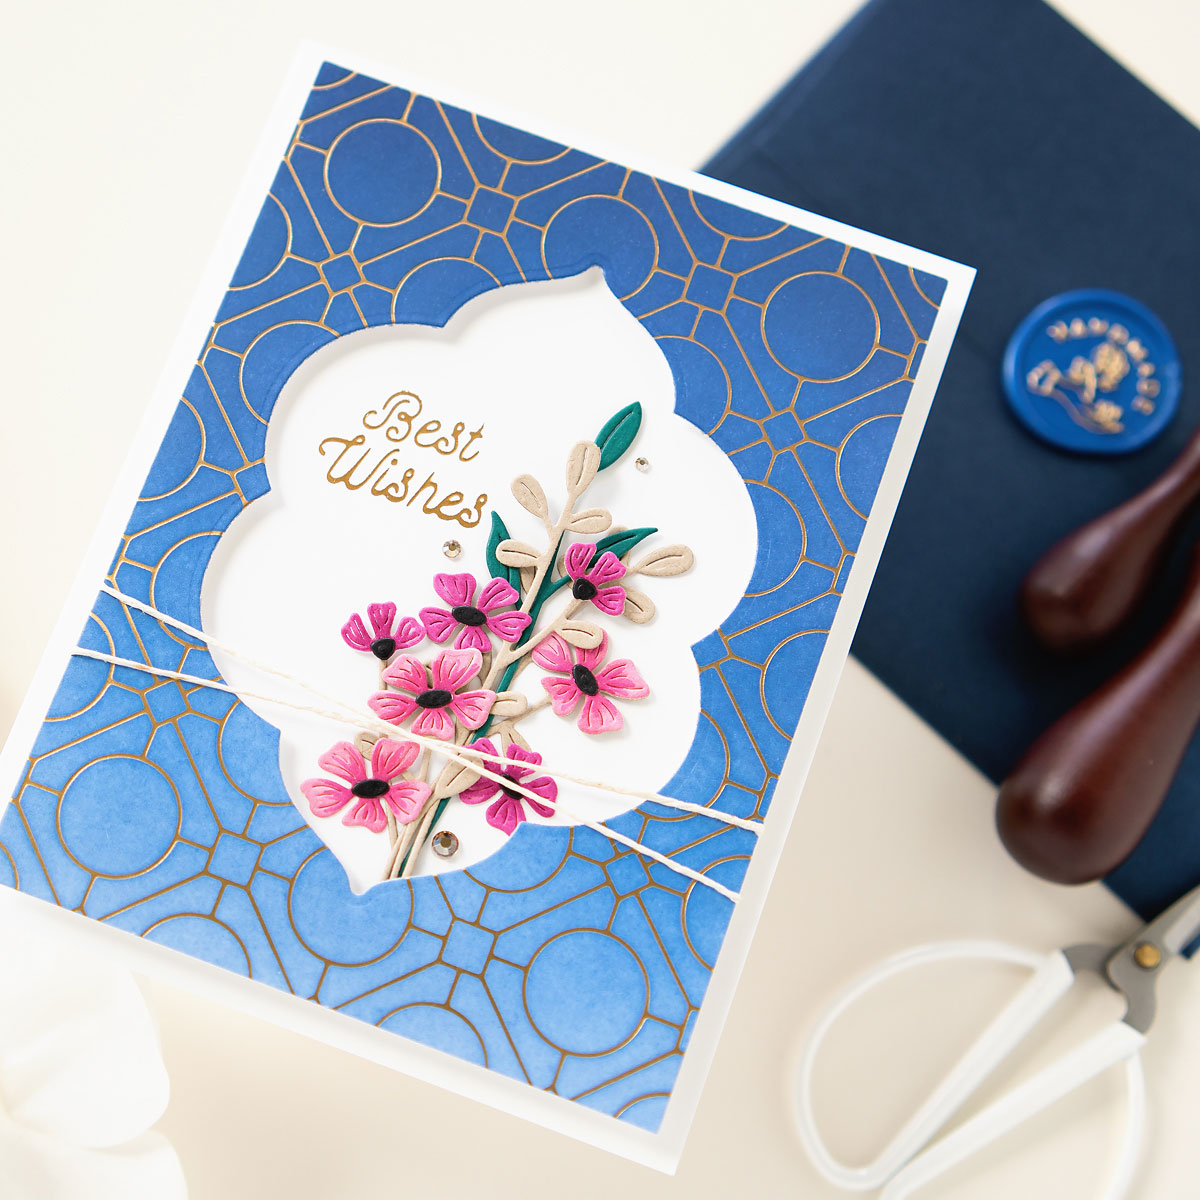
To assemble the card, I adhered the background panel on top of the Sentiment panel with foam tape. I trimmed off the excess of the sentiment panel. Then, I tucked in the floral pieces, glued them to the sentiment panel, and trimmed off the excess stems. I added some twine and adhered it to a white A2 card base with foam tape. To finish off the card, I added a few gold gems. For the envelope, I adhered a royal blue wax seal that I made using the Handmade wax seal and gold metallic marker.
I loved working with the Wax Seal collection! It was so fun working with a new medium, and I felt so fancy adding them to my projects. I hope you got some ideas for your projects, and I hope you give wax seals a try. Thanks so much for stopping by, and have a great day!
Spellbinders Supplies:

Other Supplies
Distress Oxide inks, twine, Copic markers
One Comment
tehachap
I’ve been purchasing Pillsbury’s cinnamon rolls with the icing cups the cups come with a lightweight aluminum lid that when cleaned up from the frosting tub it covers, can be used as a base for making round discs with imprints, placing them on cards.
Carol W. (aka Tehachap)