
Floral Reflection Collection Easel Cards with Jen Kotas
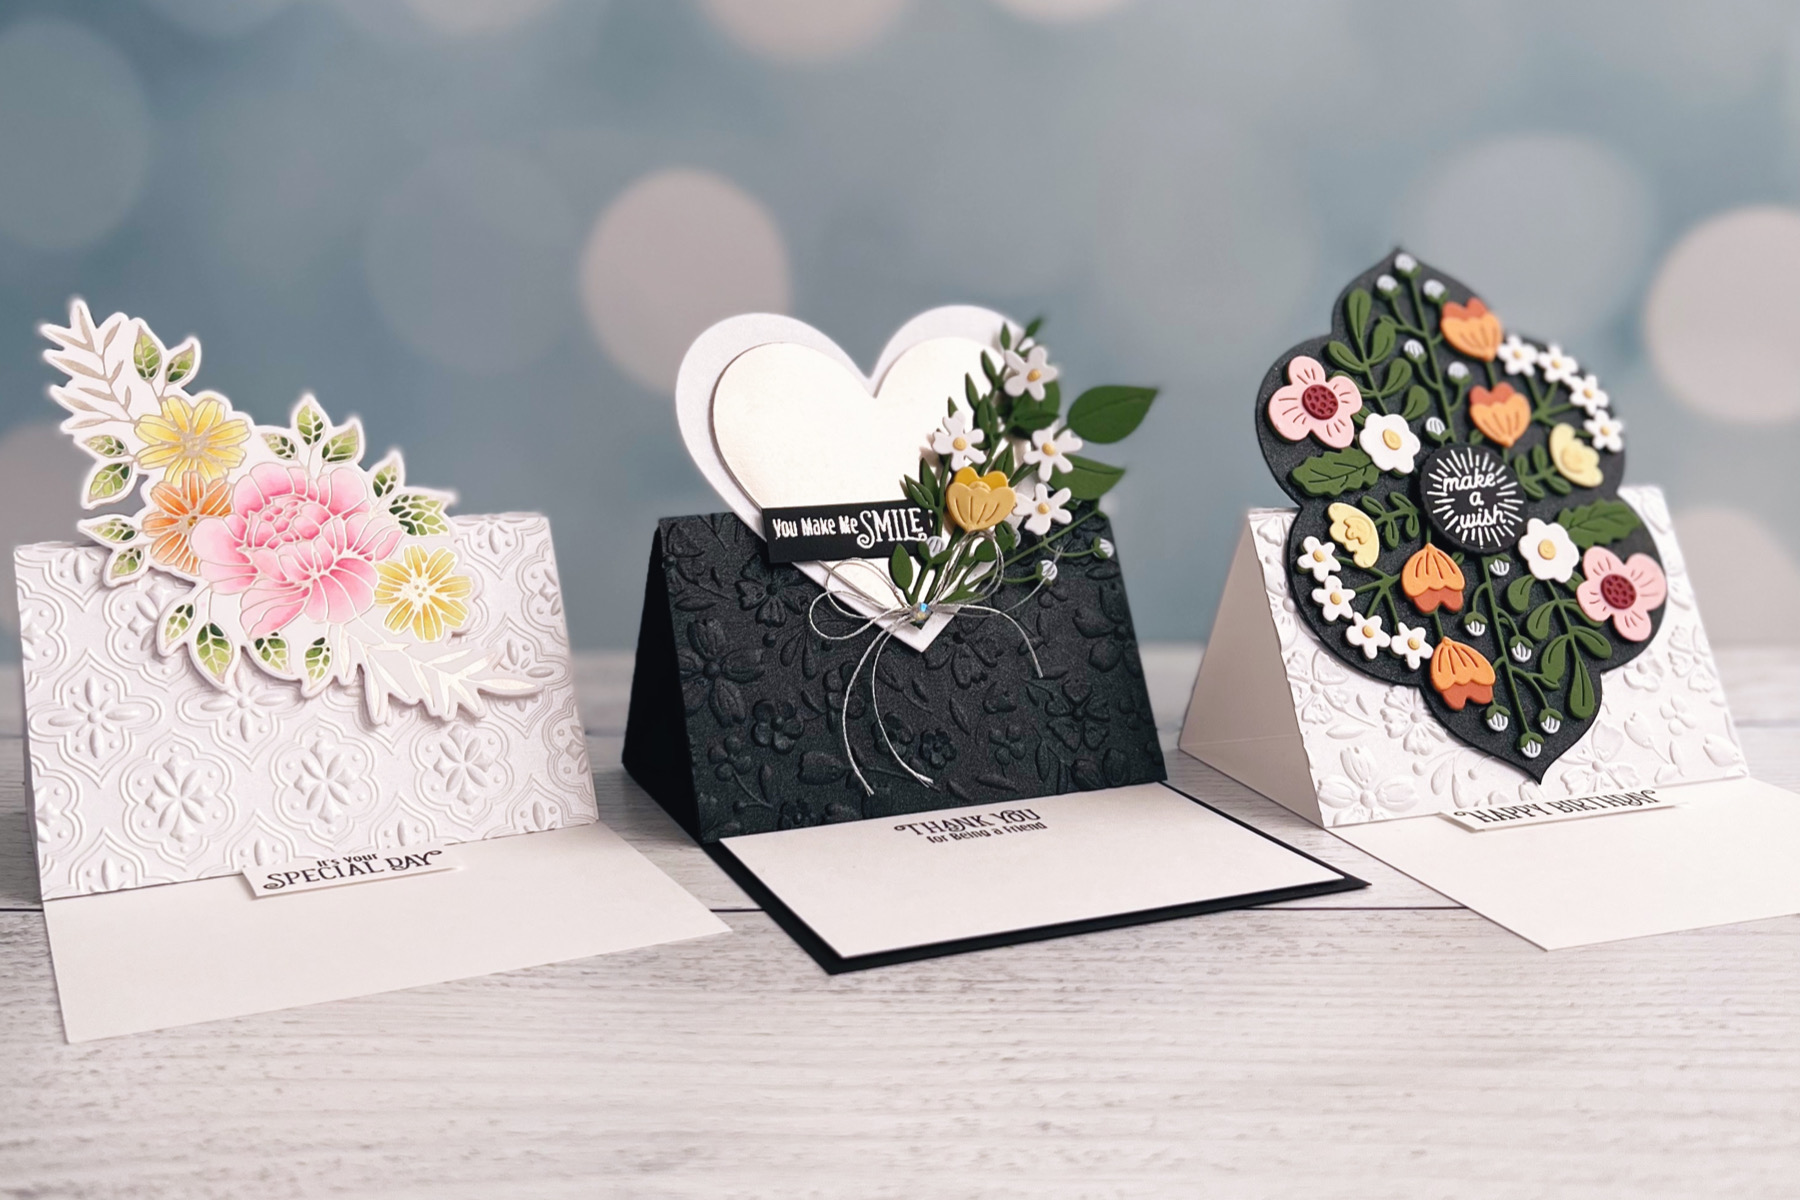
Hello! I’m Jen Kotas from whostolemyglitter.com and I’m happy to be here today to share three Floral Reflection Collection easel cards. Easel cards are simple to make and the size of the dies and glimmer plate meant not much else would be needed.
To create the easel card base, cut a piece of cardstock 4 ¼” x 11”. Score at 2 ¾” and again at 5” then fold on score lines. Cut the 4 ¼” x 5 ½” embossed cardstock in half at 2 ¾”. Adhere the pieces above and below the 2 ¾” score line on the card base. Anything you wish to pop up when open can only be adhered to the bottom panel. To keep the card open, adhere three pieces of cardstock together and adhere them inside of the card.
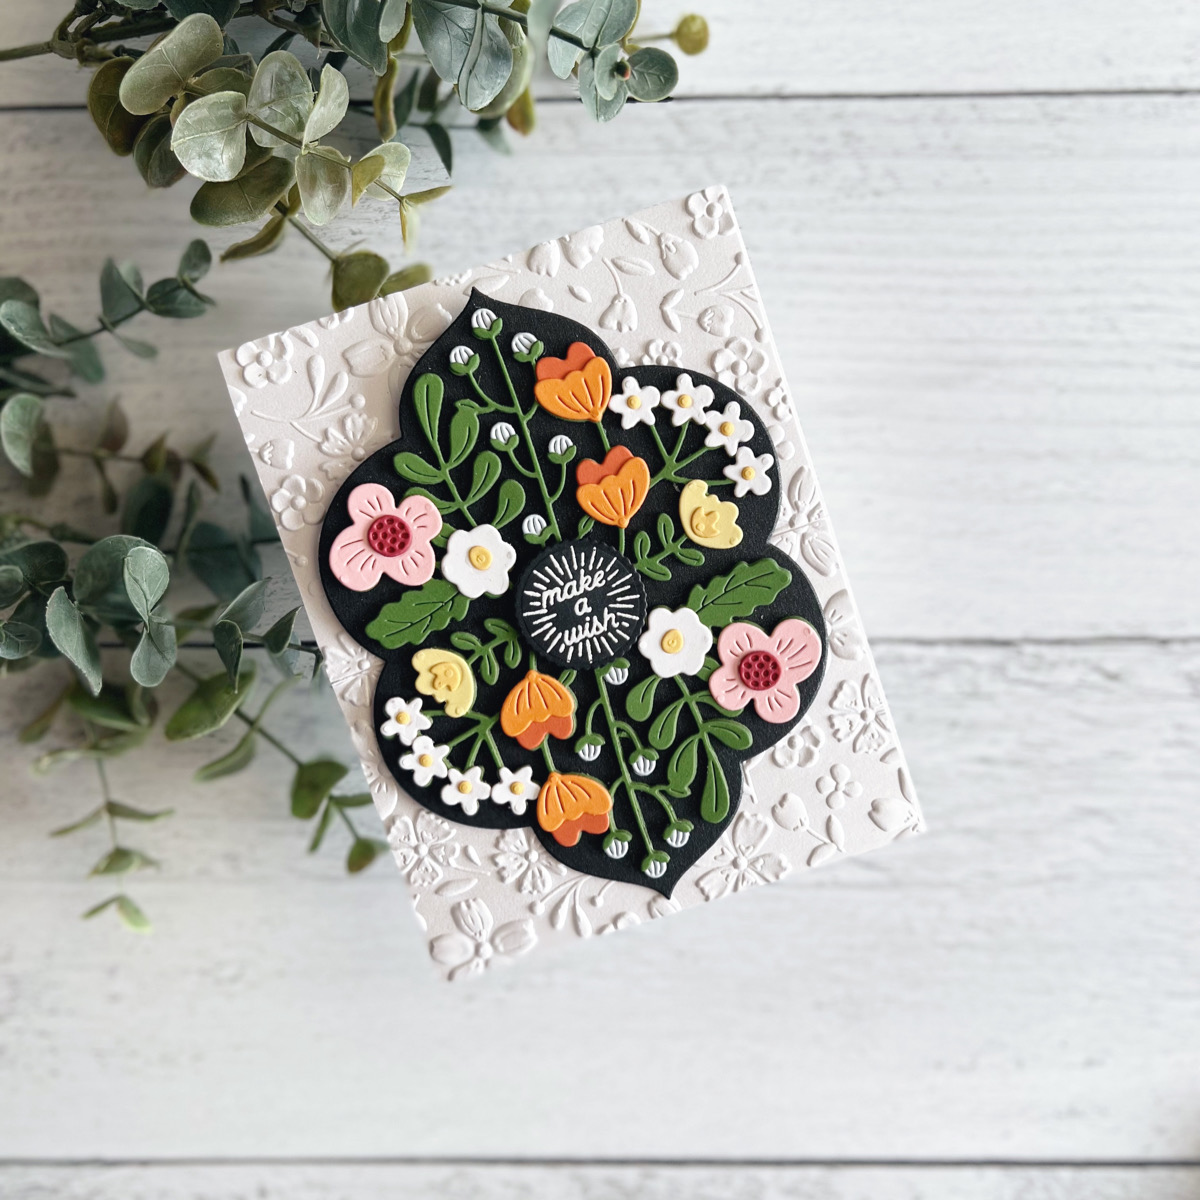
Make a Wish Easel Card
The first of the Floral Reflection Collection easel cards is a lovely black background featuring floral embossing and more flowering patterns.
- Emboss a 4 ¼” x 5 ½” piece of Brushed White Cardstock with the Flower Frenzy 3D Embossing Folder. Follow the directions at the top for placing on the card.
- Die cut the largest Essential Floral Reflection Etched Die from Brushed Black Cardstock.
- Die cut the Floral Reflection Etched Dies from Chamomile, Glacier, Fern, Persimmon, Terra Cotta, Beeswax, Pink Sand, Wild Berry Essentials Cardstock.
- Adhere die cut pieces together and then to the Essential Floral Reflection die cut with liquid glue.
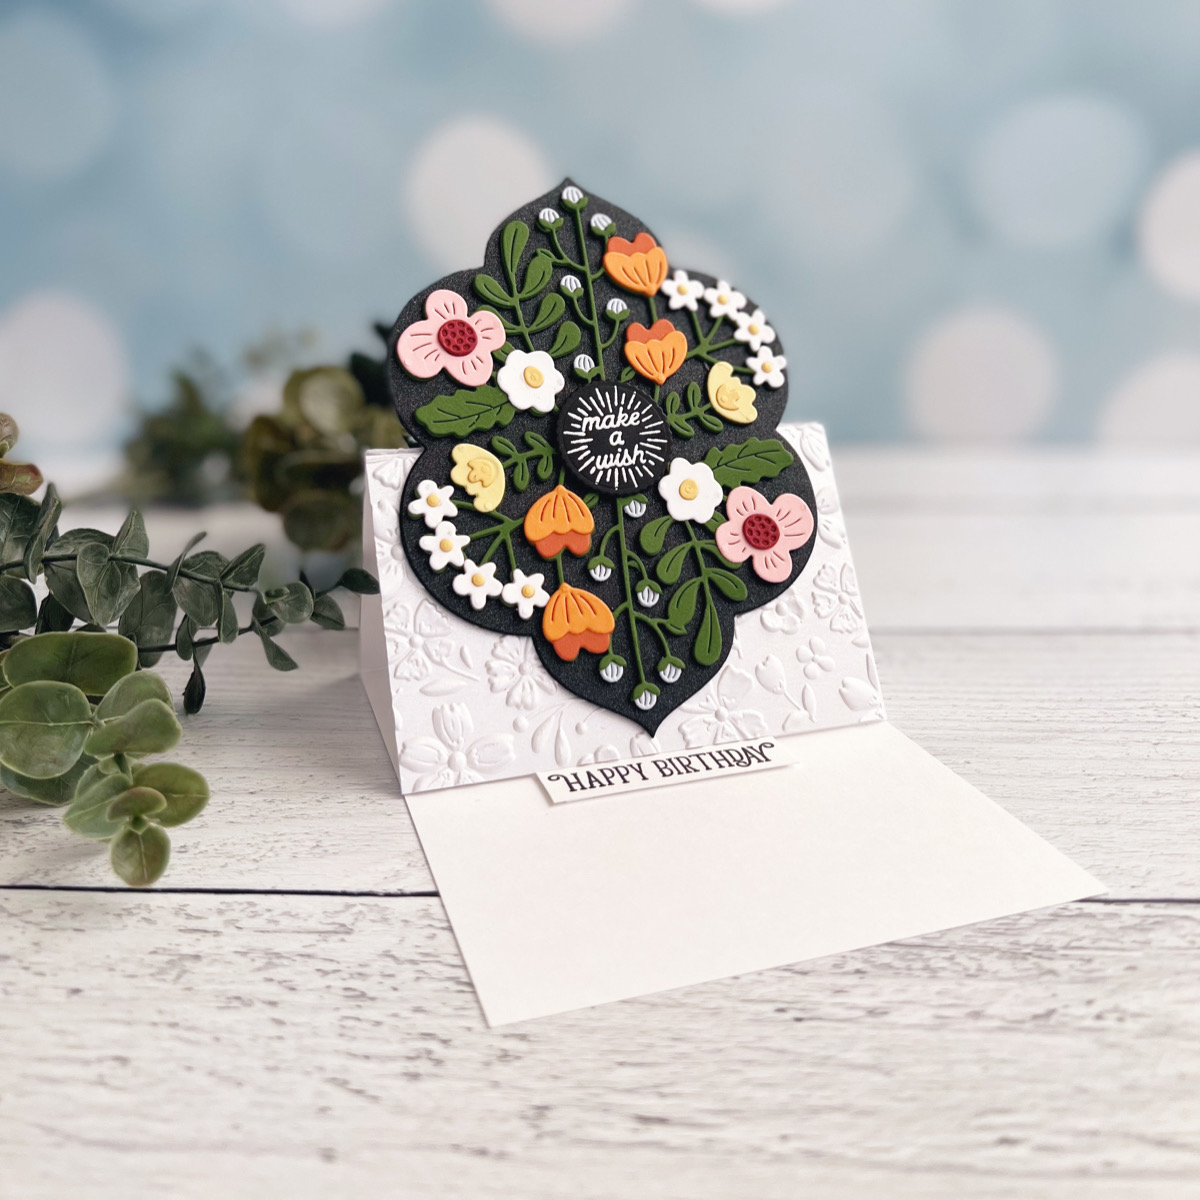
- Adhere the assembled piece from step 4 to the bottom half of the card base only.
- Stamp “Happy Birthday” from the Floral Reflections Sentiments Clear Stamp Set on a strip of white cardstock with black ink. Adhere two slightly smaller cardstock strips behind the sentiment. Place the strip inside the card.
- Heat emboss “Make a Wish” from the Floral Reflections Sentiments Clear Stamp Set on a strip of Black Cardstock with embossing ink and white embossing powder. Die cut with the circle die from the Floral Reflection Etched Dies and place on the card with a thin foam square.
You Make Me Smile Easel Card
The second card features simple hearts and a beautiful flower bouquet to add extra detail.
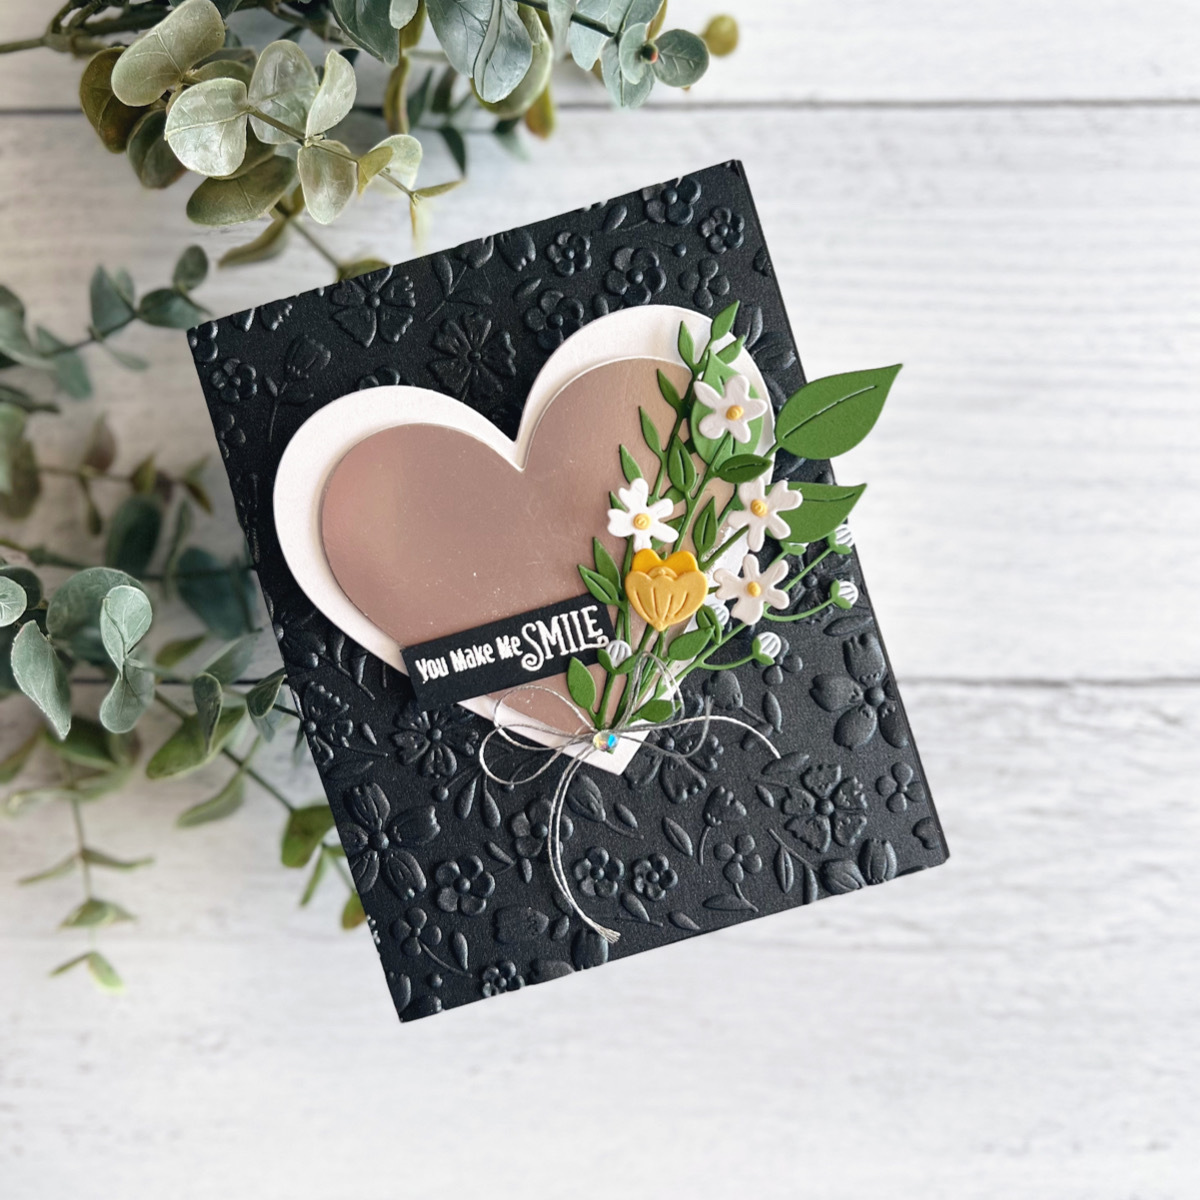
- Emboss a 4 ¼” x 5 ½” piece of Brushed Black Cardstock with the Flower Frenzy 3D Embossing Folder. Follow the directions at the top for placing on the card.
- Hot foil the Glimmer Essential Solid Heart Glimmer Hot Foil Plate using the Satin Pewter Hot Foil Roll included in the Satin Metallics Variety Pack.
- Cut out the heart with Essential Heart Etched Dies. Cut a second slightly larger heart from Brushed White Cardstock. Adhere together with thin foam squares then to the bottom of the card base only.
- Die cut the Floral Reflection Etched Dies from Chamomile, Glacier, Fern and Beeswax Essentials Cardstock.
- Assemble die cuts and adhere to the heart with liquid glue.

- Heat emboss “You Make Me Smile” from the Floral Reflections Sentiments Clear Stamp Set on a strip of Black Cardstock with embossing ink and white embossing powder. Add strip to heart with thin foam squares.
- Tie two pieces of silver thread into a bow. Adhere bow and a clear iridescent jewel at bottom of heart with liquid glue.
- Stamp “Thank You” and “For Being A Friend” from the Floral Reflections Sentiments Clear Stamp Set on a piece of white cardstock with black ink. Cut to fit inside the card with enough space for a personal note. Adhere two slightly smaller cardstock pieces behind the sentiment. Place inside the card.
With Love Easel Card
My final card in the trio of Floral Reflection Collection easel cards is this glimmer floral lay against an elegant tile background.
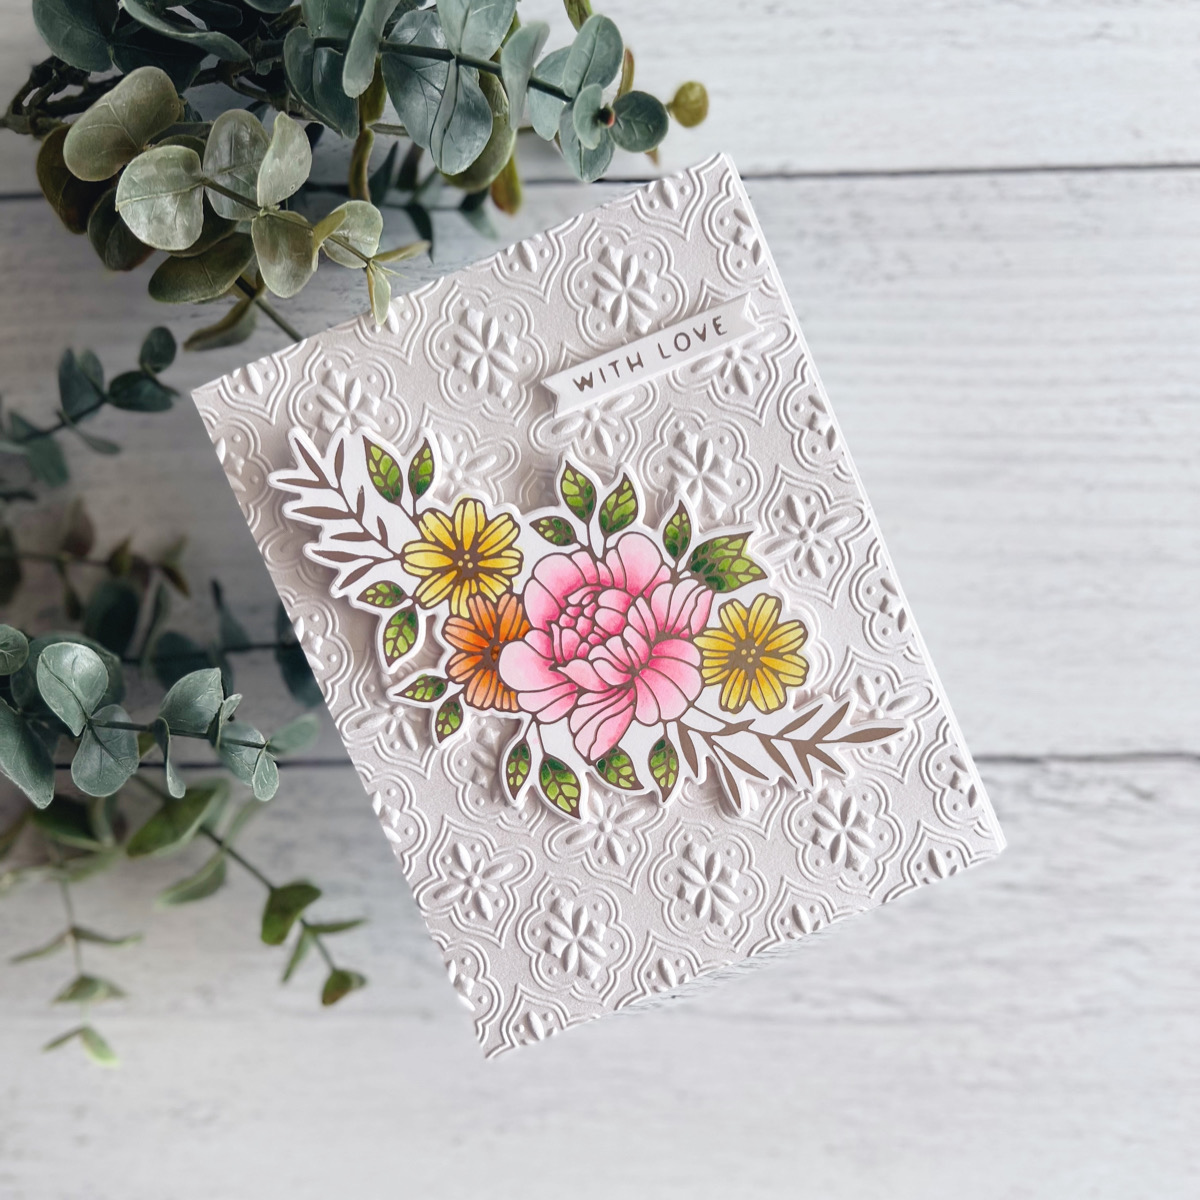
- Emboss a 4 ¼” x 5 ½” piece of Brushed White Cardstock with the Tile Reflection 3D Embossing Folder. Follow the directions at the top for placing on the card.
- Hot foil the Glimmering Just For You Glimmer Hot Foil Plate and Die Set with Satin Pewter Hot Foil Roll included in the Satin Metallics Variety Pack.
- Color the image then die-cut it. Die cut two more times from plain white cardstock. Adhere together to make the cardstock sturdier when sticking up.
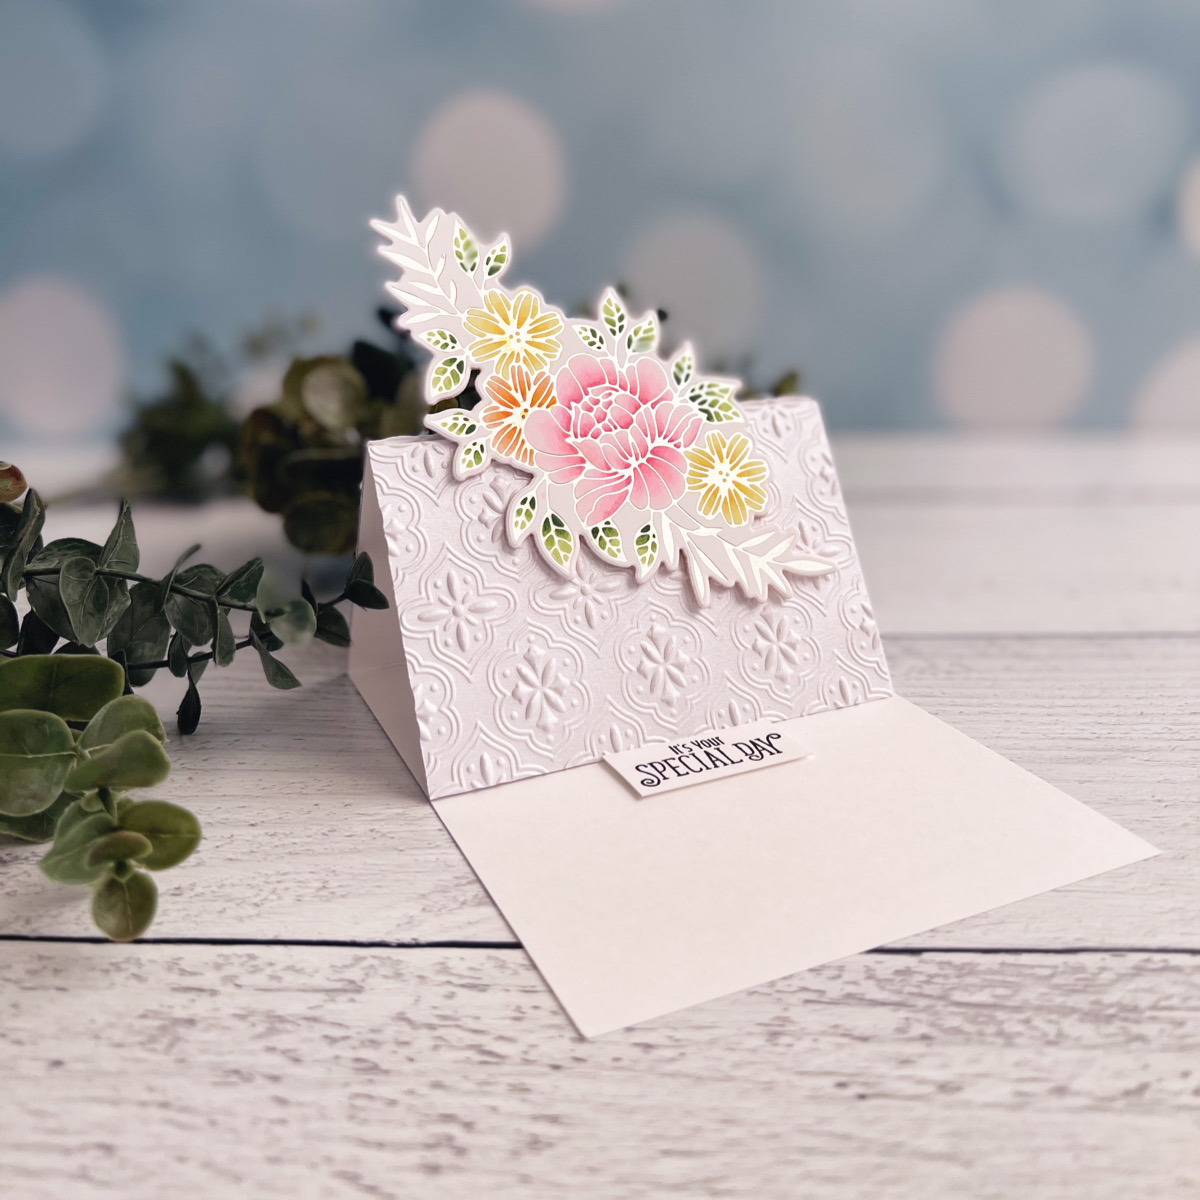
- Adhere the hot foiled image to the bottom of the card. The sentiment is adhered with thin foam squares.
- Stamp “It’s Your Special Day” from the Floral Reflections Sentiments Clear Stamp Set on a strip of white cardstock with black ink. Adhere two slightly smaller cardstock strips behind the sentiment. Place the strip inside the card.
Spellbinders Supplies:

Other Supplies
Hero Arts Intens-ified Black Ink, Neenah Solar White Cardstock, Hammermill Cardstock, Bearly Arts Precision Glue, Copic Markers, Double Sided Adhesive Tape, Thin Foam Squares, Silver Thread, White Detail Embossing Powder, Embossing Ink, Clear Iridescent Jewel.
You can see more card-making tutorials on my blog, Who Stole My Glitter or visit my Instagram page for more inspiration. Thanks for visiting!

2 Comments
1dahliagirl
These are so cool! I love these!
Samee B
I love these! Going to make some for sure – Thanks for the inspiration!