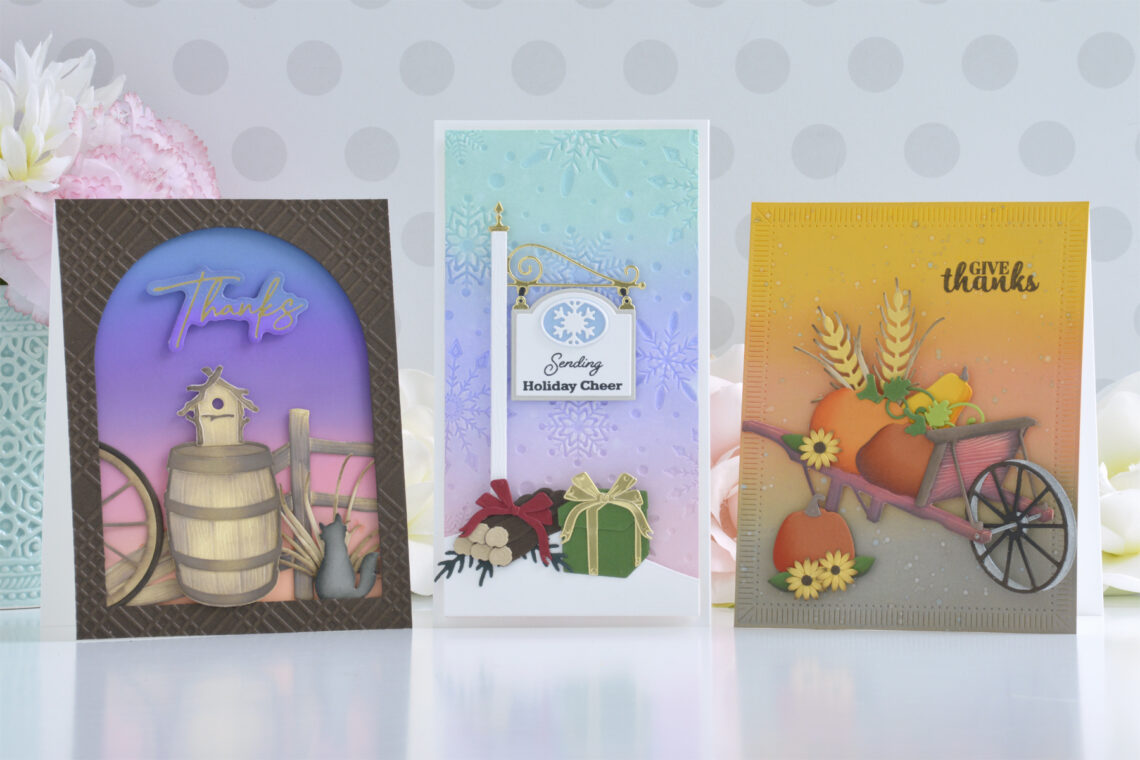
Using Distress Oxide Inks To Add Tons of Color to Die Cut Scenes
Hi there, this is Annie Williams and I’m thrilled to be back on the blog today to share some fun ways to use Distress Oxide Inks to enhance your die-cut scenes. Ink-blended backgrounds can add tons of color to your cards while coloring die-cuts with inks can really add dimension and realistic details. Here I used Distress Oxide Inks along with the Country Road Collection to create three colorful cards for different seasons.
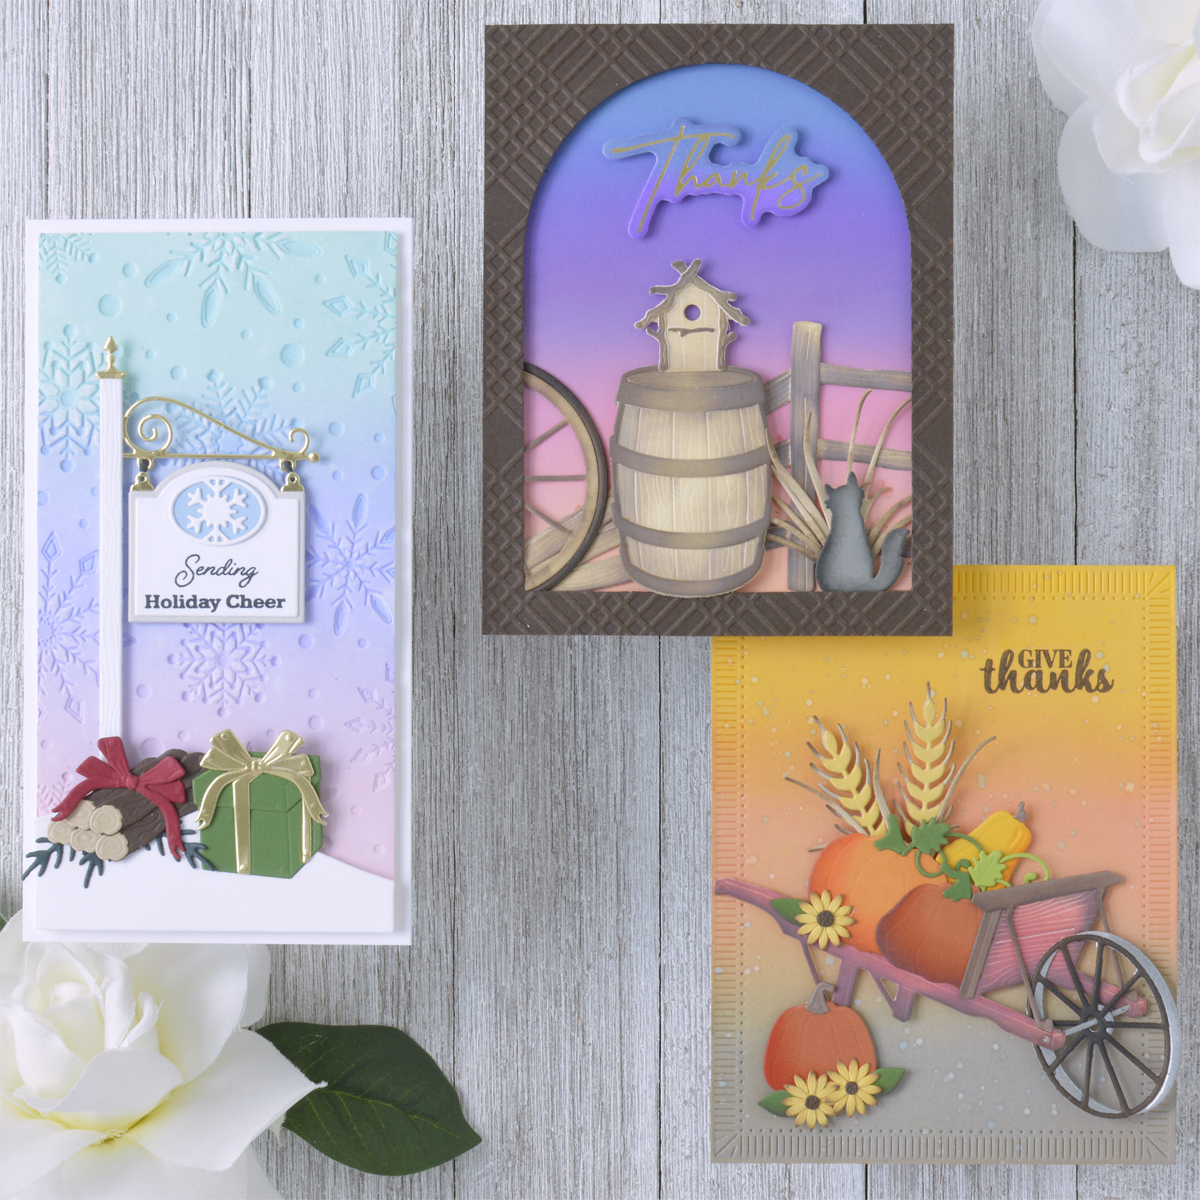
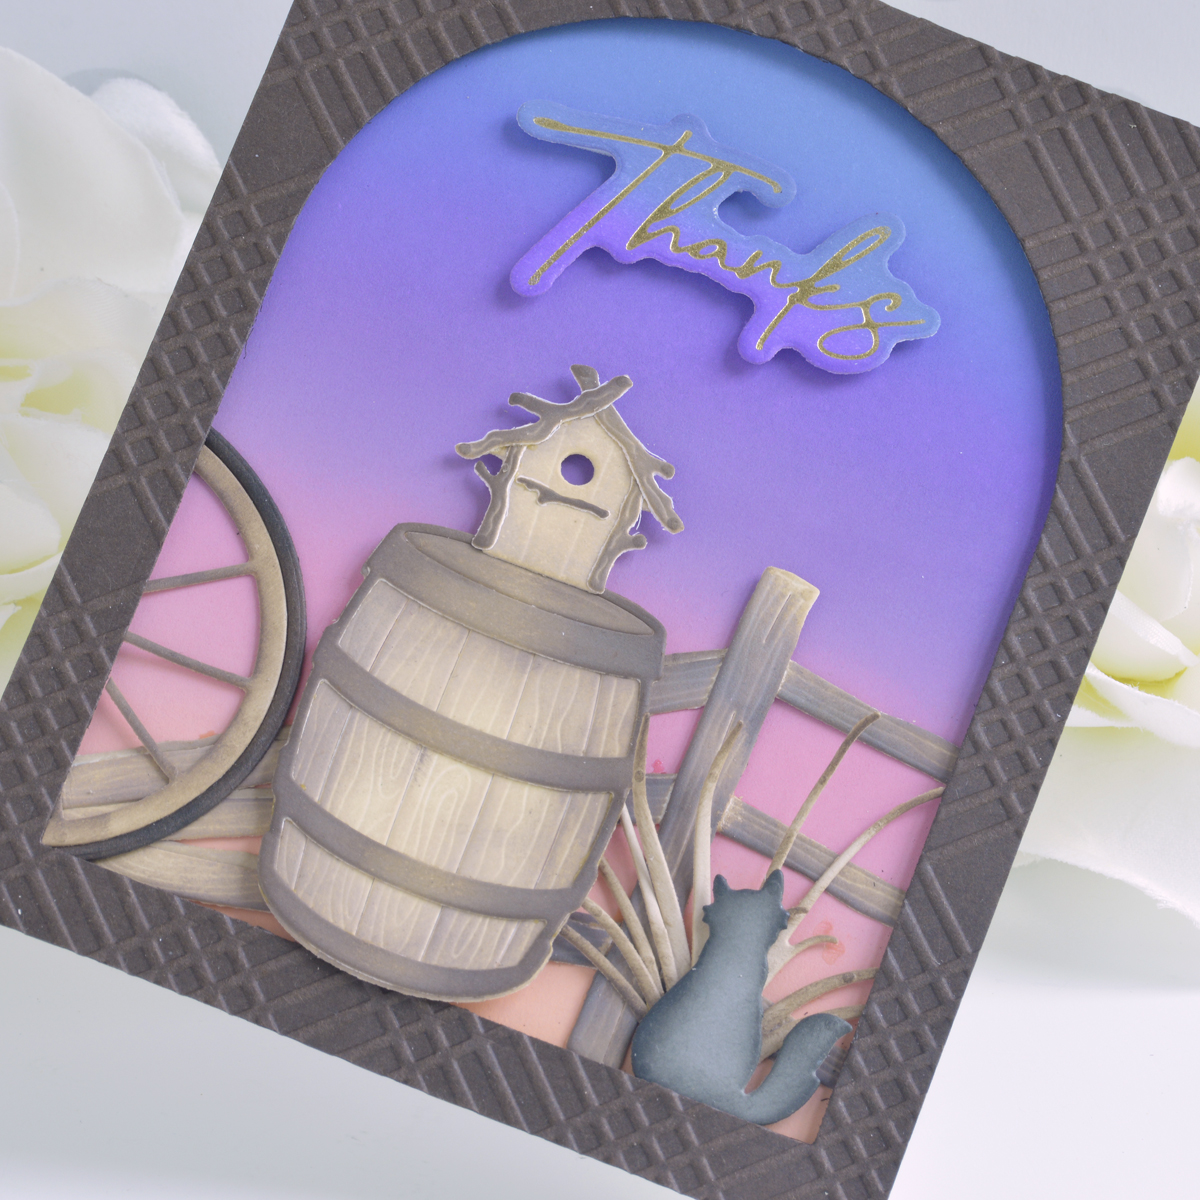
Sunset Scene Thank You Card
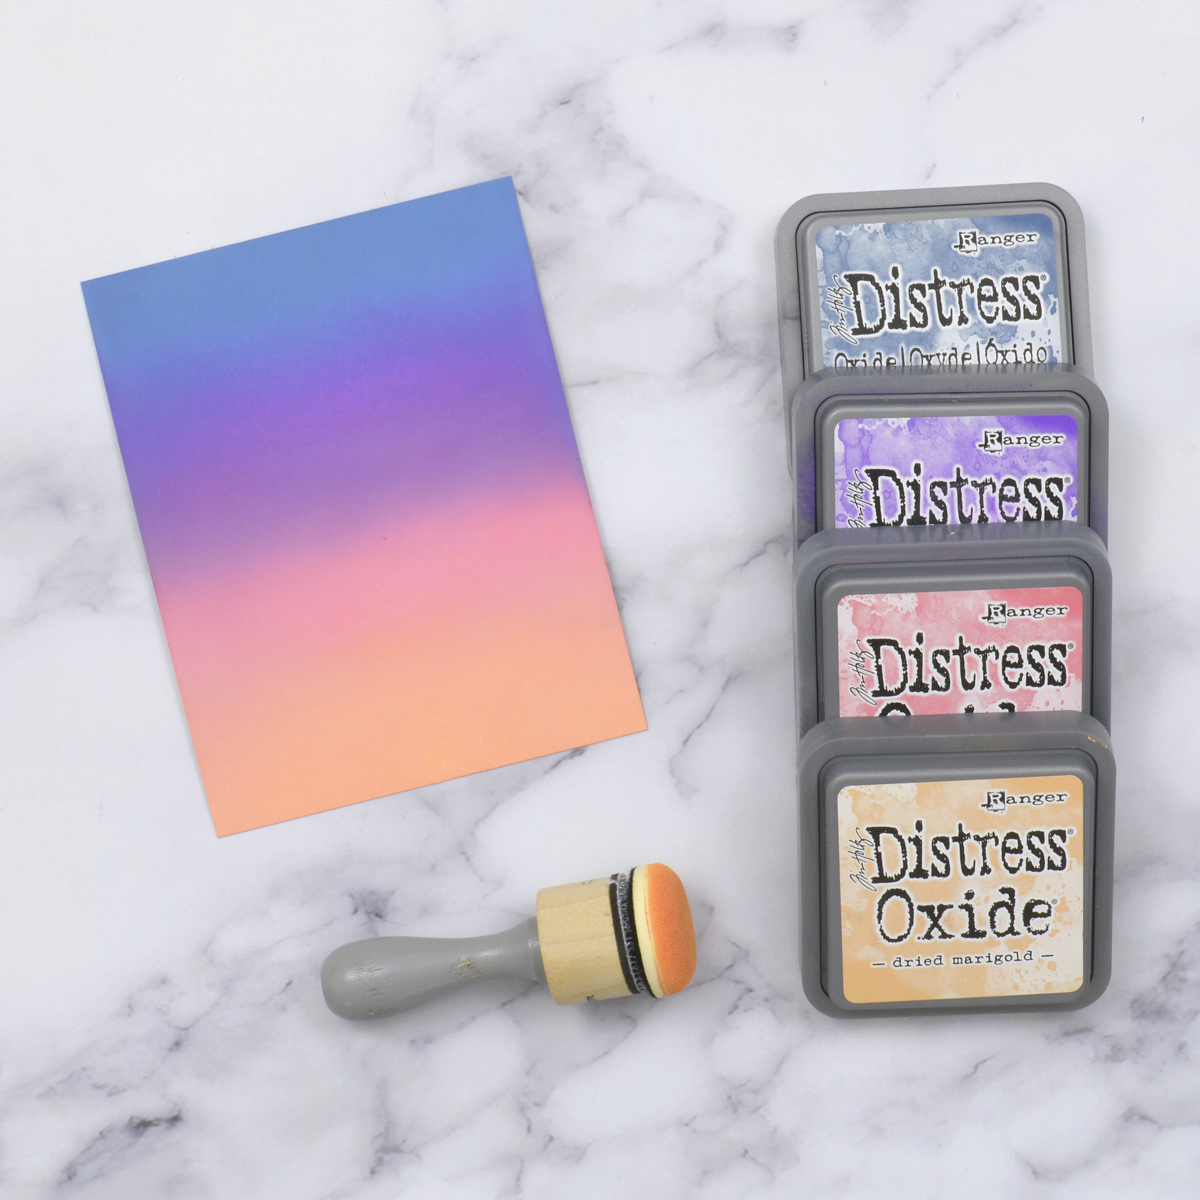
Distress Oxide Inks are perfect for creating easy ink-blended backgrounds even between colors you might not normally try to mix. I thought a bright sunset-inspired sky would be beautifully paired with a more muted die-cut scene using elements from the Rustic Garden Die Set.
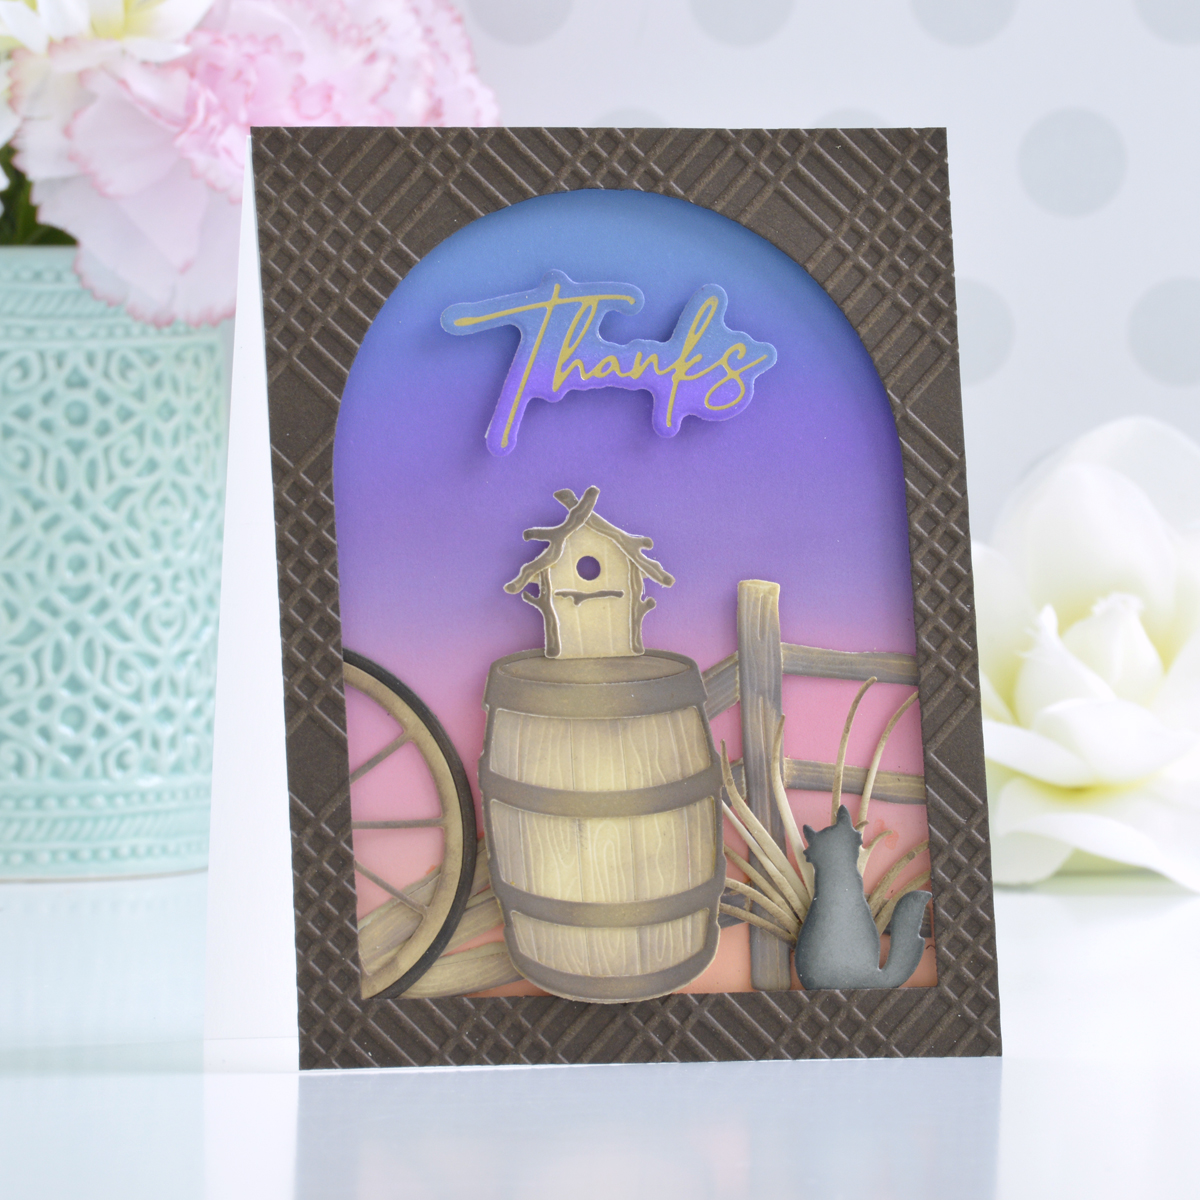
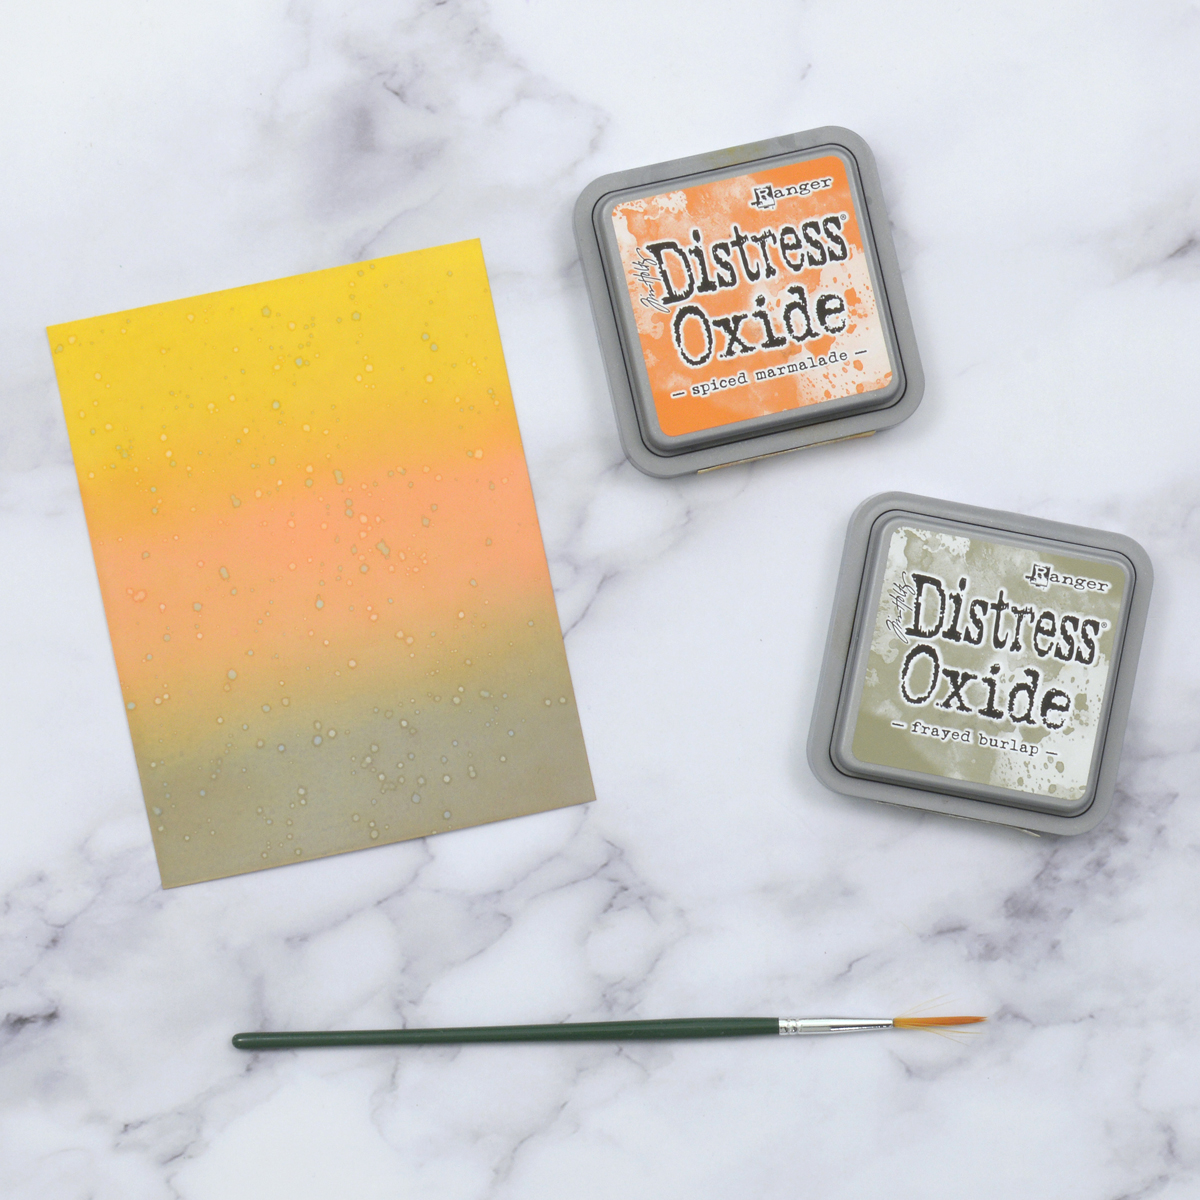
To begin, I trimmed a piece of white cardstock to 4.25” x 5.5” and blended Faded Jeans, Wilted Violet, Worn Lipstick, and Dried Marigold Distress Oxide Ink down the panel with a foam blending tool.
Then I cut the split-rail fence, barrel, and birdhouse from the Rustic Garden Die Set out of white cardstock and blended Antique Linen, Frayed Burlap, and Ground Espresso Distress Oxide Inks over the die-cuts to add color, shading, and even a little distressing. The dies for all three of these elements emboss a fine wood grain detail into the paper when cut, so lightly blending ink over top of these details really brings them out because the ink will not sink all the way down into the crevices. Other die-cut elements like the cat, wagon wheel, and grass were cut out of colored cardstock and just shaded a bit with Ground Espresso and Black Soot Distress Oxide Inks.
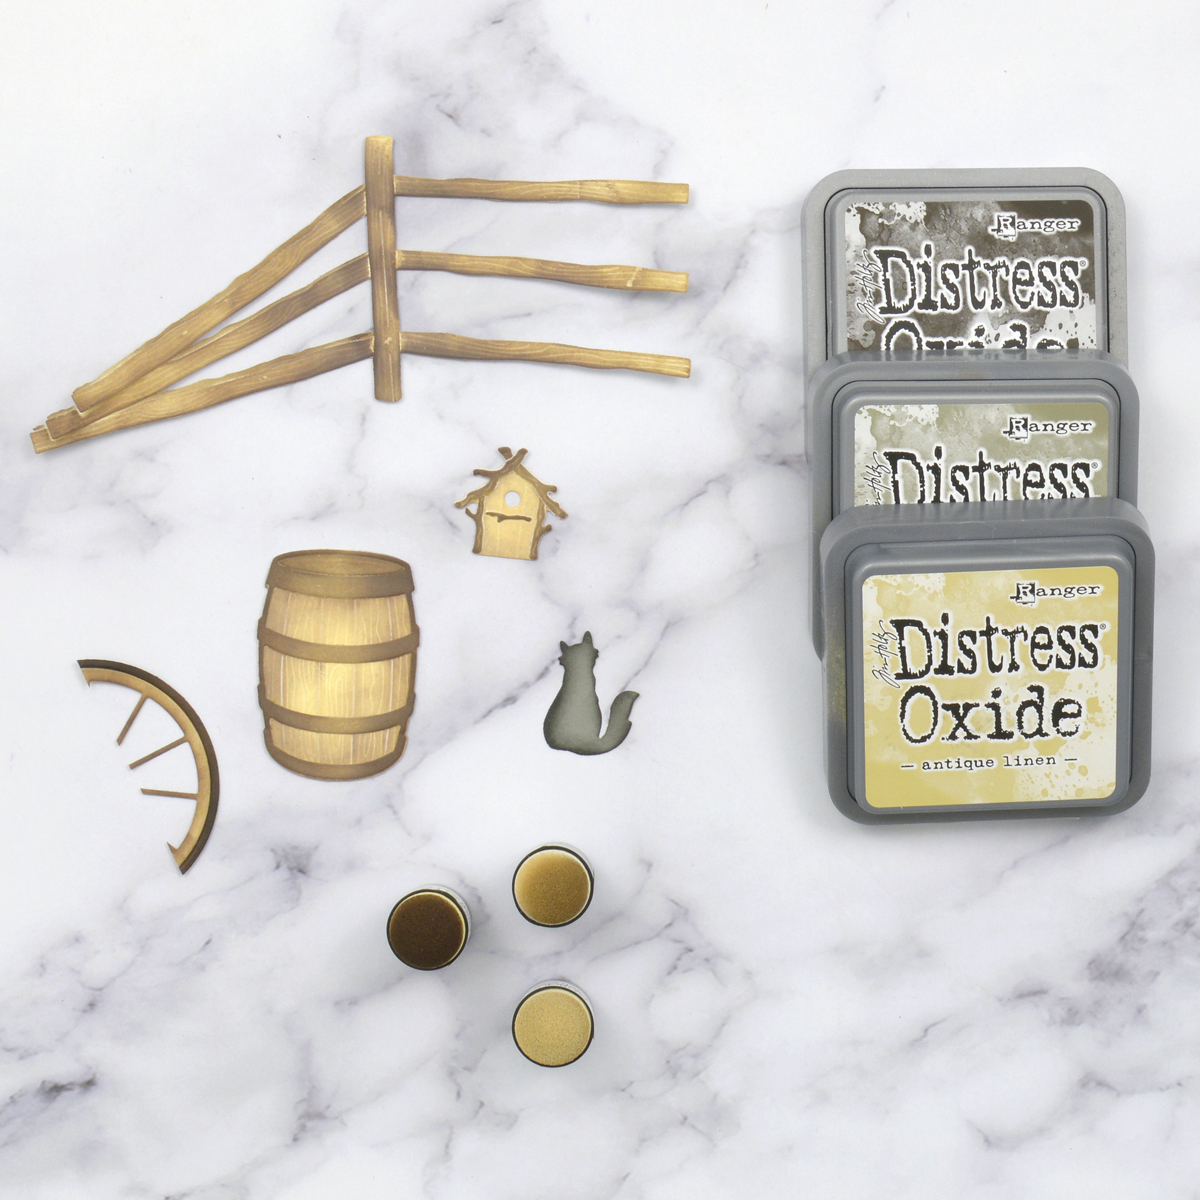
To assemble, I adhered the ink-blended background to a top-folding A2-sized white card base. Then I trimmed a piece of Timber Cardstock to 4.25” x 5.5”, die cut the center out using one of the dies from the Essential Arches Die Set, and embossed it using the Diamond Plaid Embossing Folder. After adhering the frame to the front of the card with foam adhesive, I added the die-cut elements to the opening. To finish the card off, I foiled a greeting from the Seahorse Floral Glimmer Plate Set in gold onto white cardstock, cut it out with the coordinating die, and blended Faded Jeans and Wilted Violet Distress Oxide Ink over top to match the background behind it.
Colorful Autumn Thanks Card
There’s no more colorful season than autumn in my opinion, so I wanted to create a vivid and rustic Thanksgiving card next.
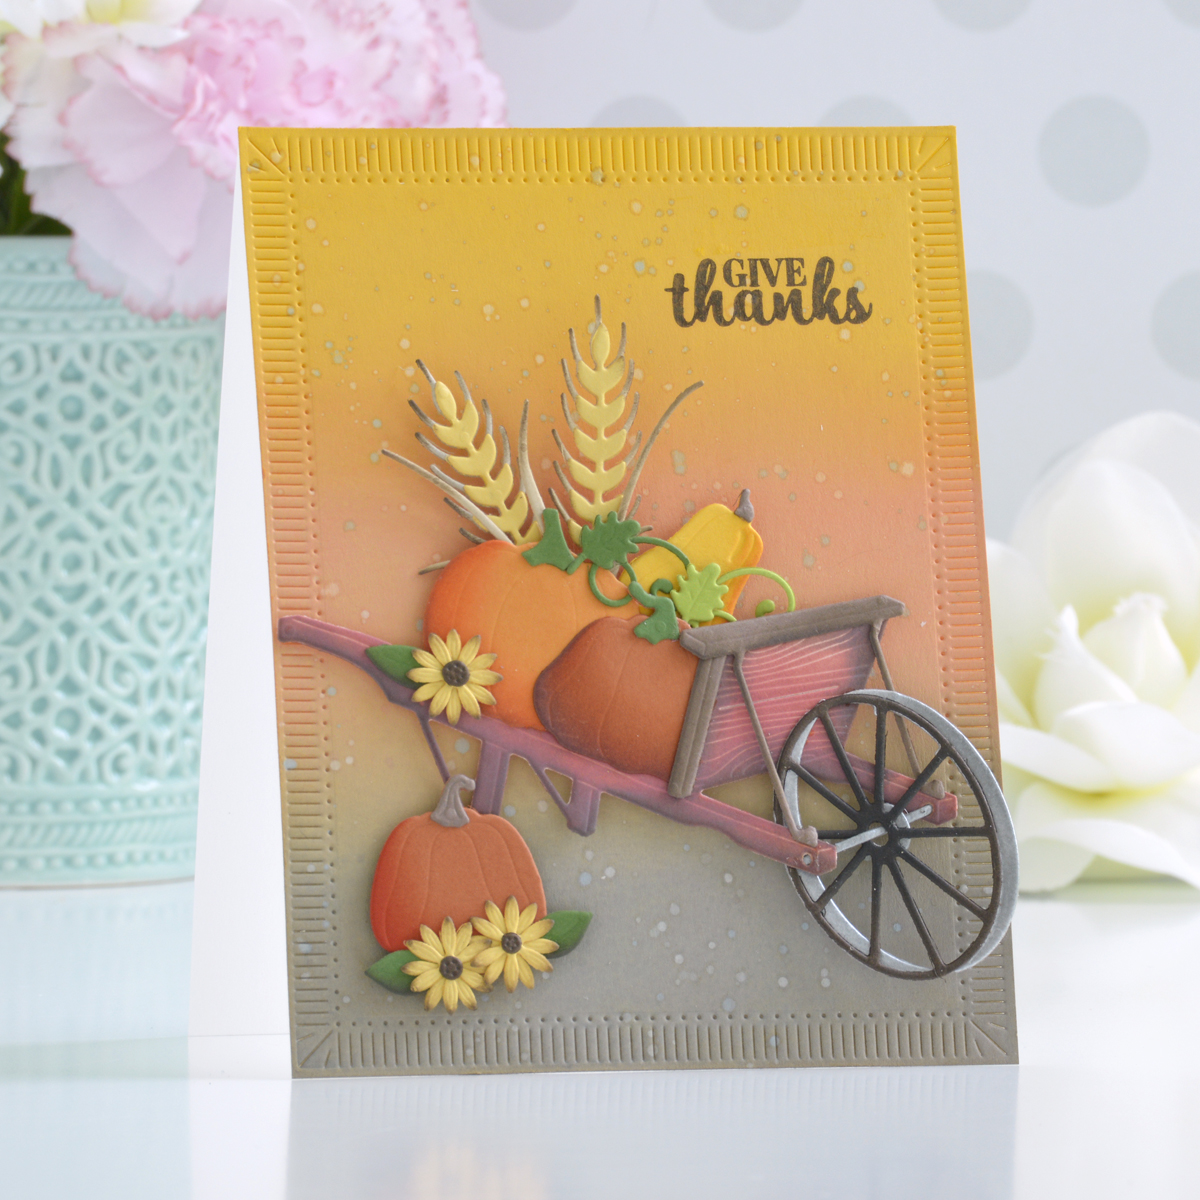
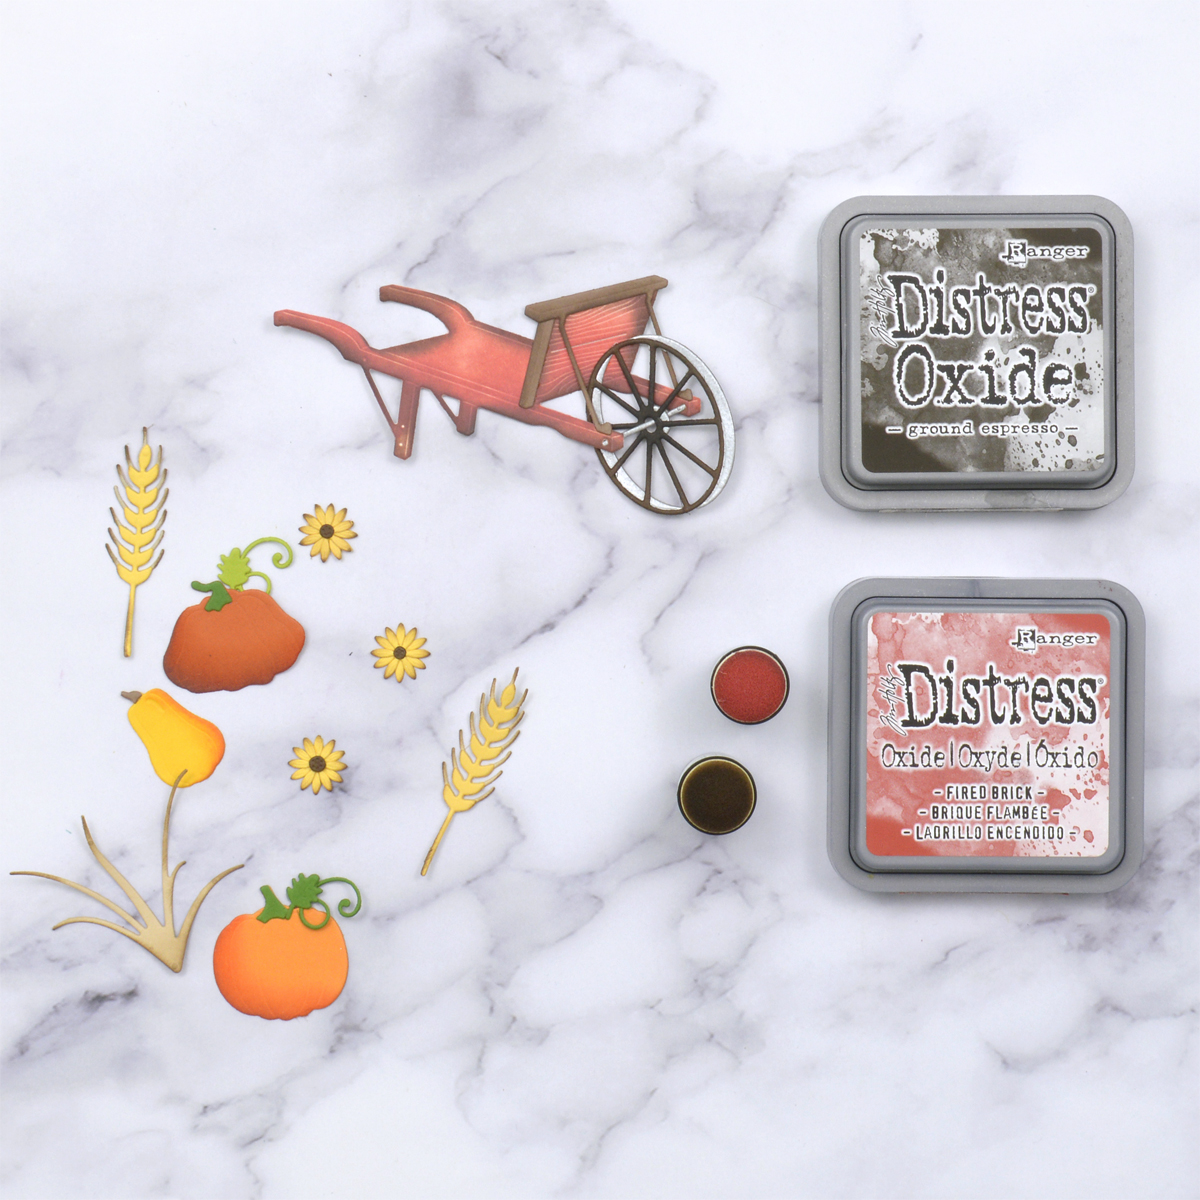
I started by applying Mustard Seed, Spiced Marmalade, and Frayed Burlap Distress Oxide Inks over a piece of white cardstock measuring 4.25” x 5.5” with a foam blending tool.
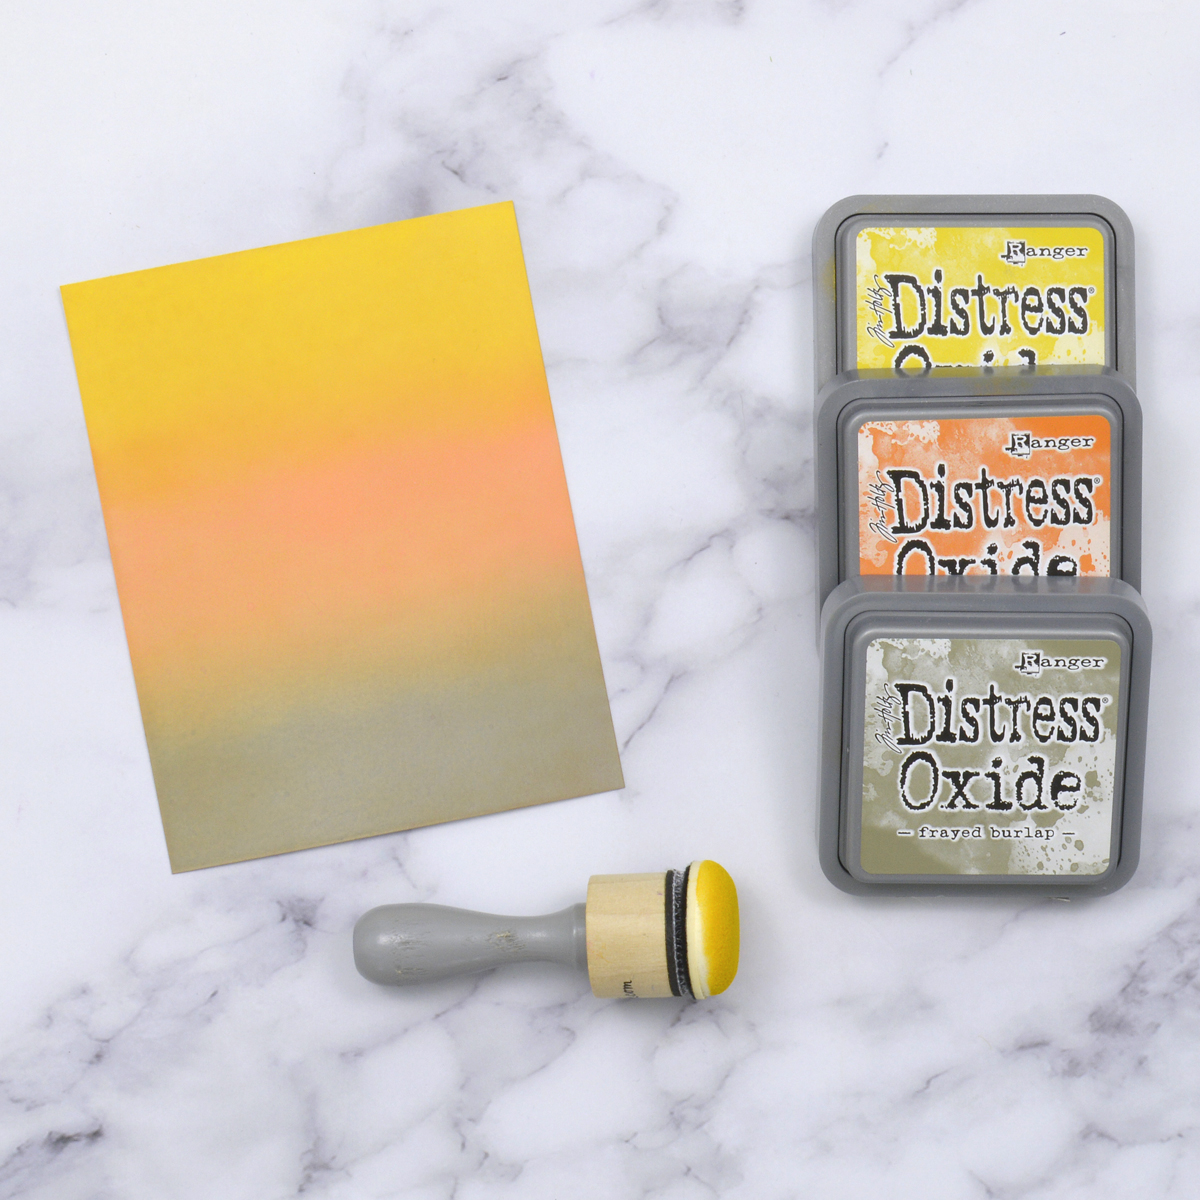
For a little texture, I then watered down Spiced Marmalade and Frayed Burlap Distress Oxide Inks and splattered them onto my ink-blended panel with a brush. I like to load up an old size 1 liner paint brush with ink and tap it from about 4-6 inches above to create fine splatters on my projects.
I cut the flowers and wheat for my scene out of colored cardstock using the Garden Builder Die Set and inked just the edges with Ground Espresso Distress Oxide Ink. Similarly, the pumpkins from the Seasonal Décor Die Set were shaded with Spiced Marmalade and Ground Espresso. However, the body of the wheelbarrow from the Country Wheelbarrow Die Set has tons of those tiny embossed details again, so I cut that out of white cardstock and colored it by inking first with Fired Brick and then Ground Espresso for a rustic and realistic look.
To assemble, I first stamped a greeting from the Welcome Sign & Sentiments Stamp & Die Set onto the ink-blended background using brown ink and then added a decorative edge to the panel using the large rectangular insert from the Fluted Classics Rectangles Die Set. Then I simply filled the wheelbarrow up with my autumn goodies and added it to the card front with foam adhesive.

Sending Holiday Cheer Card
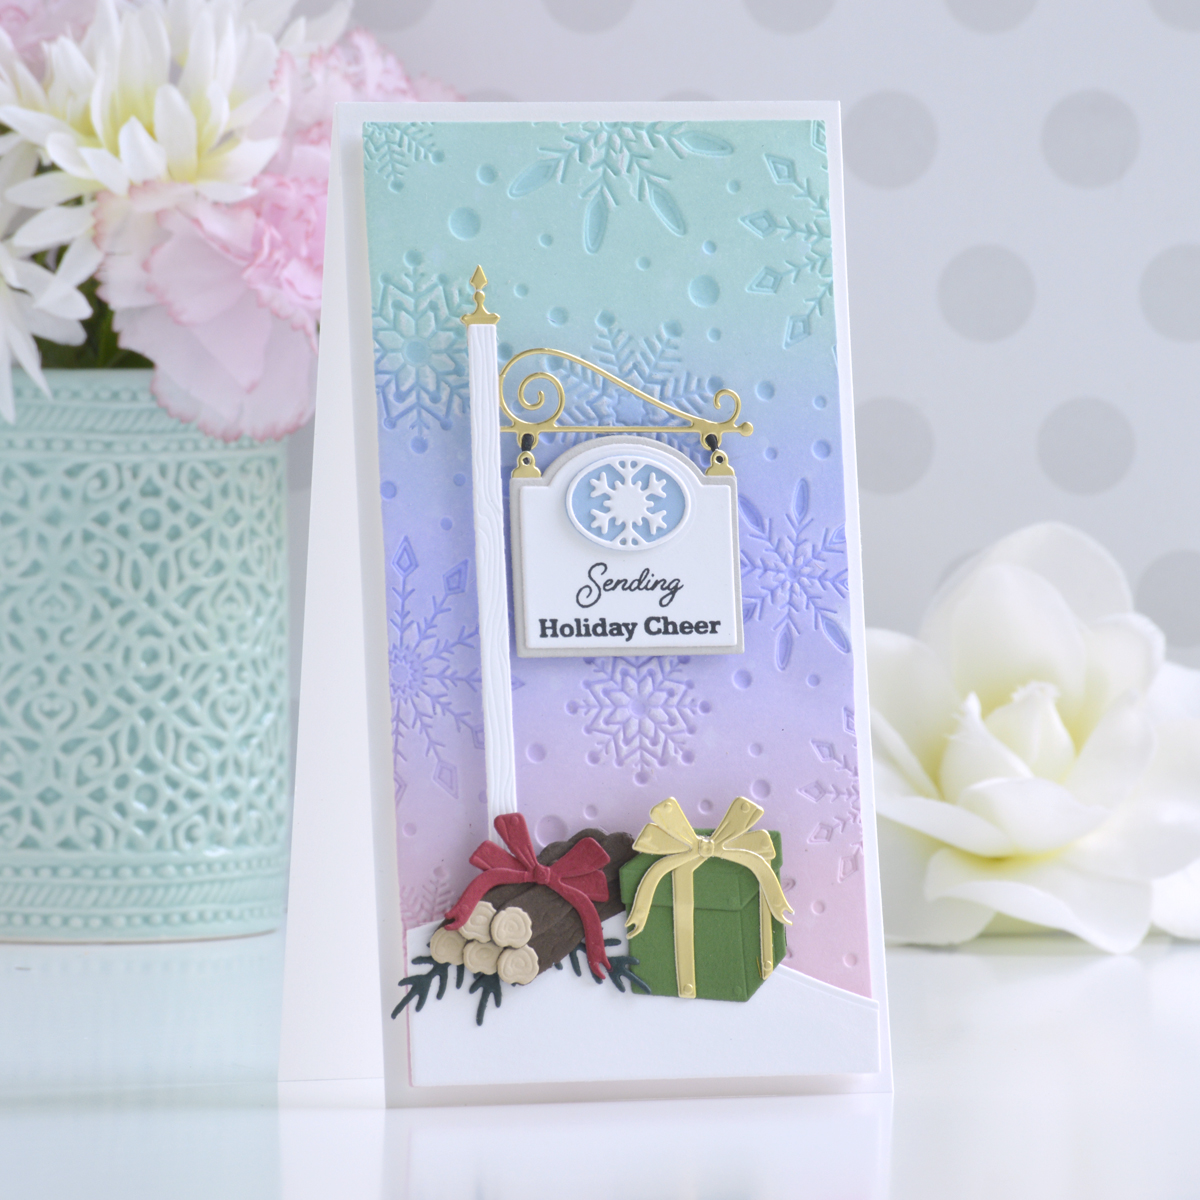
Lastly, I wanted to create a soft and pretty ink-blended background for this mini slimline winter card, but with a fun textured twist.
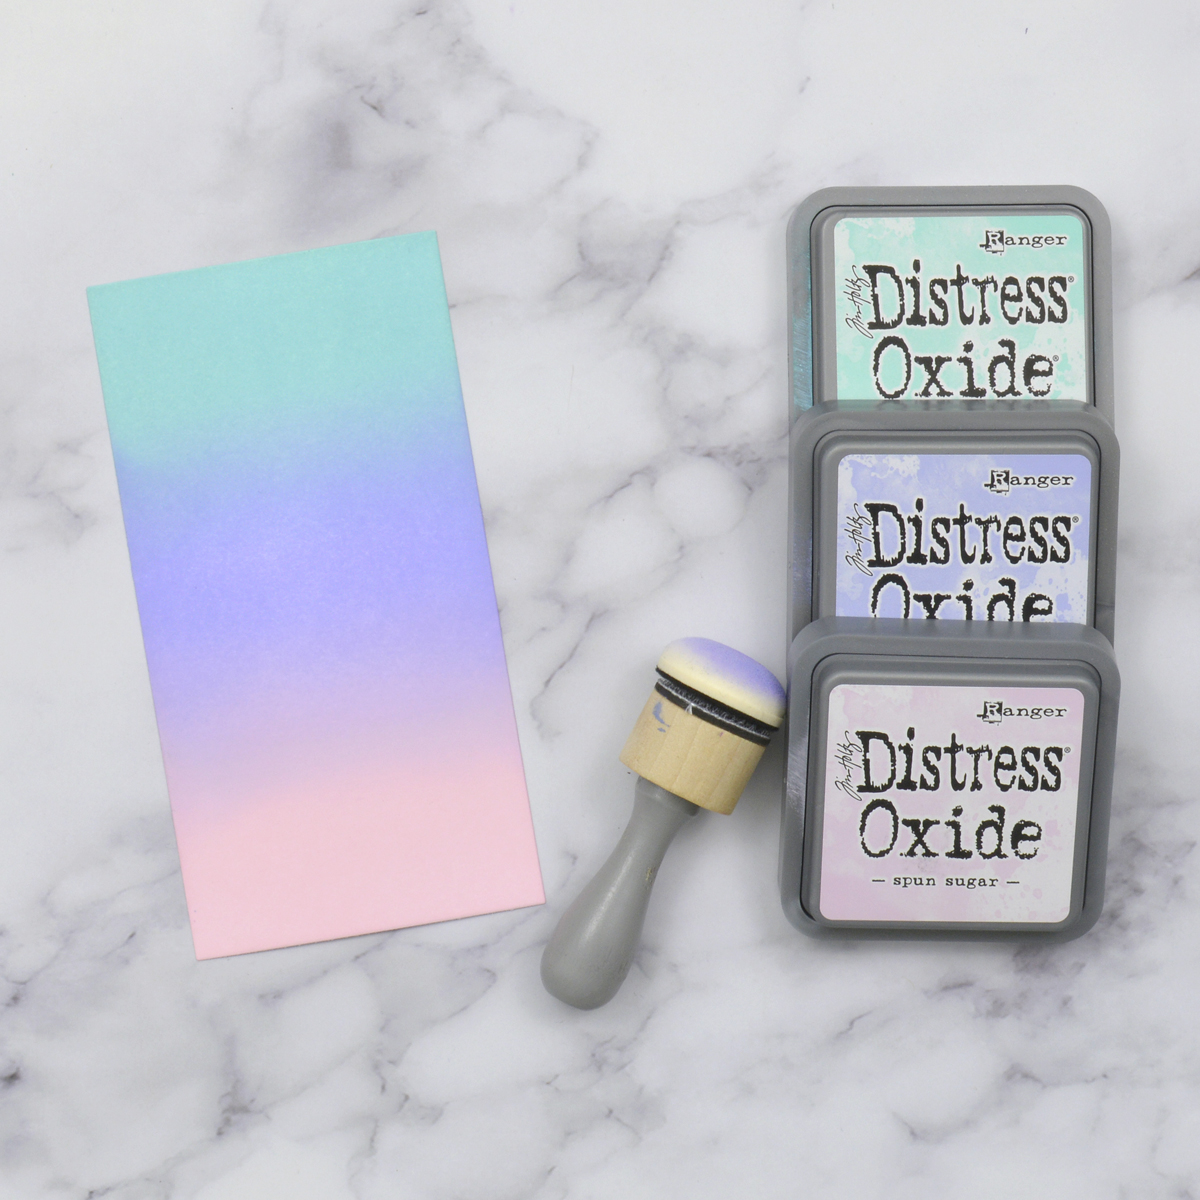
I started by cutting a piece of white cardstock using the largest die from the Precision Layering Mini Slimline A Die Set. Then I applied Salvaged Patina, Shaded Lilac, and Spun Sugar Distress Oxide Inks down the panel with a foam blending tool.
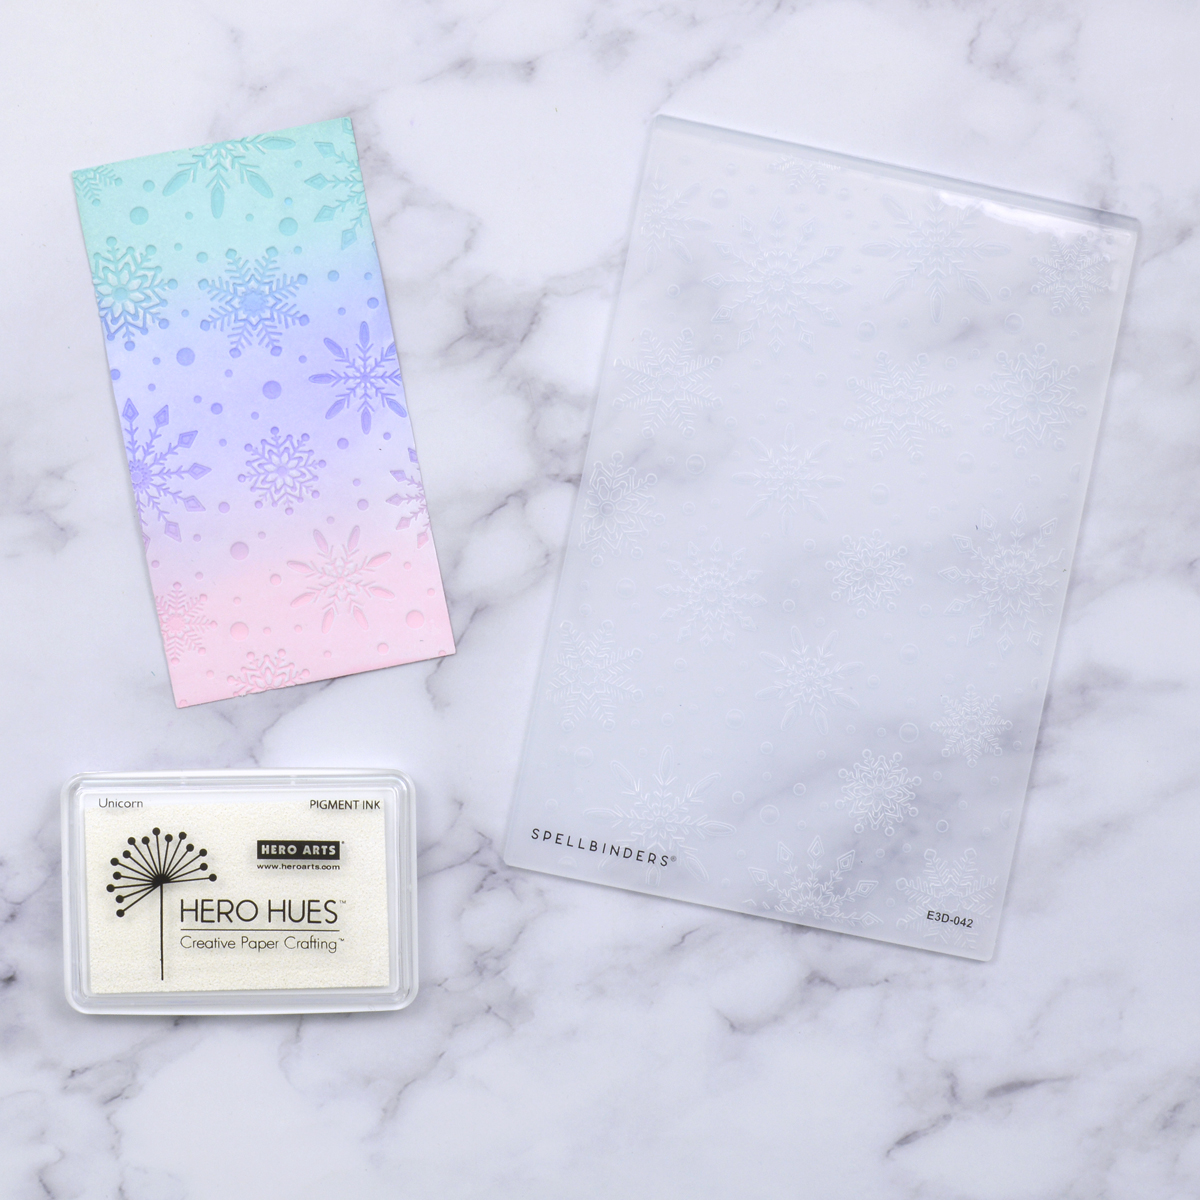
Next, I debossed the panel using the Flurry of Snowflakes 3D Embossing Folder. (I spritzed a little water on the back side of the ink-blended piece and placed it in the folder so that the design would be pressed down into the inked side.) Once debossed, I rubbed a white pigment ink pad over the colored surface of the panel. This will lighten the “background” while leaving the snowflakes darker. (You can emboss the panel instead and follow the same steps for the opposite look!)
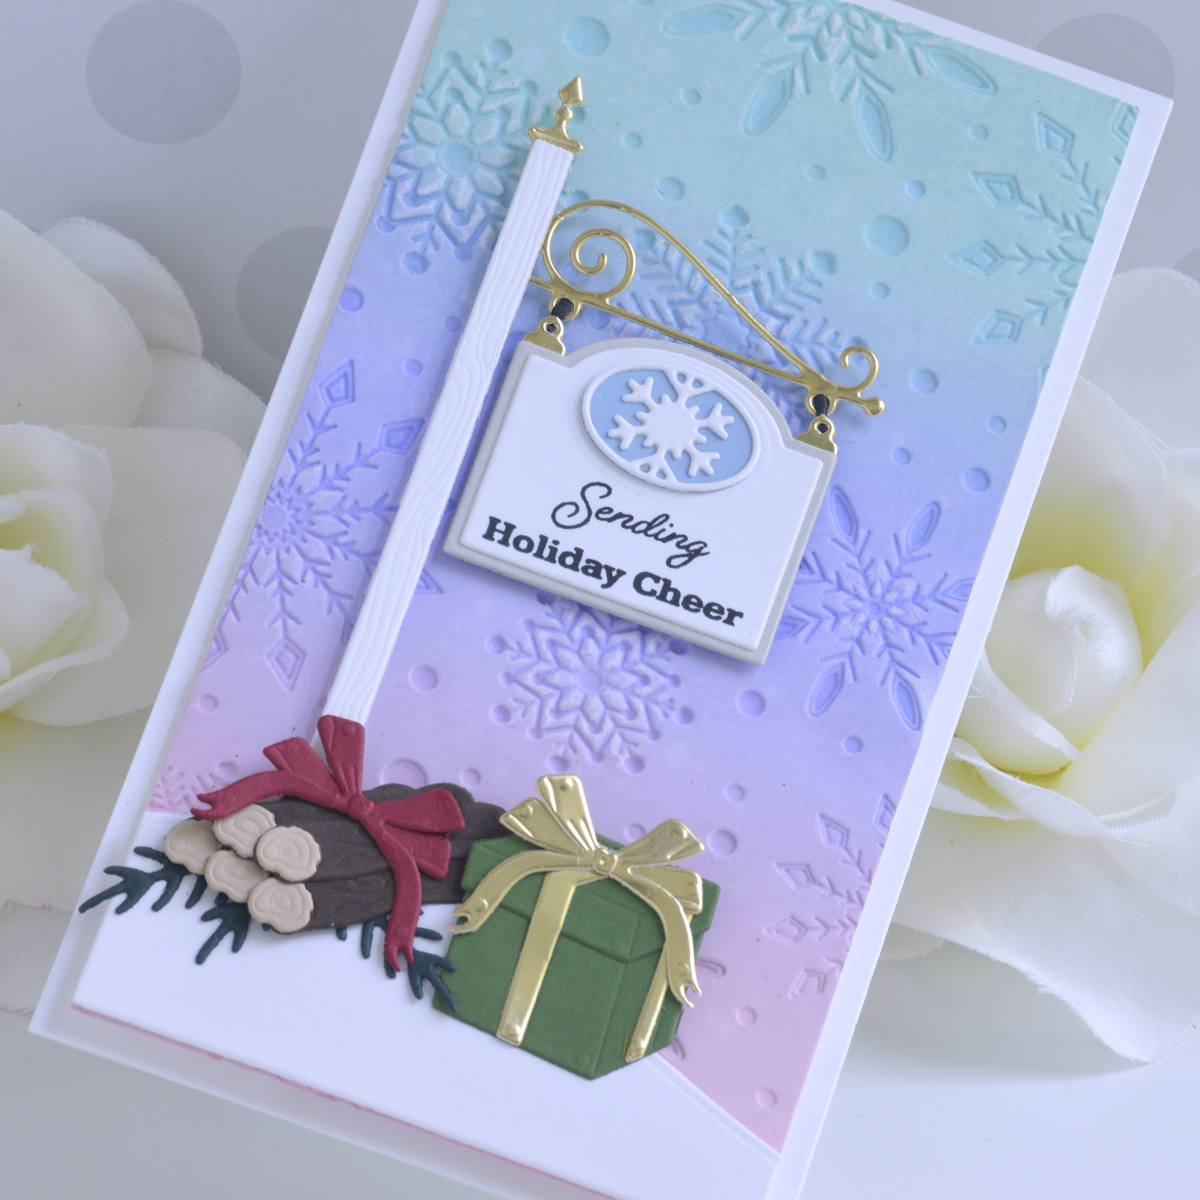
To assemble the card, I adhered the background panel to a top-folding white card base measuring 3.5” x 6.5” using foam adhesive. Then I cut a small hill using the Color Block Scenic Scape Die Set and popped it up on the bottom of the card with more foam adhesive. The welcome sign was cut out of white, Silver Fox and Mirror Gold Cardstock using the Welcome Sign & Sentiments Stamp & Die Set and stamped with a holiday greeting before assembling it with liquid glue. Then I cut the logs, gift, and pine sprigs out of colored cardstock using the Seasonal Décor and Garden Builder Die Sets to embellish the base of the sign.
Spellbinders Supplies:

Other supplies
White heavyweight cardstock, foam blending tools, size 1 liner brush, tape runner, sponge daubers, white pigment ink, foam adhesive.
I hope you enjoyed these fun ways to add tons of color to your die-cut scenes with Distress Oxide Inks and that you give them a try! Thanks so much for stopping by today…you can find more inspiration over at my blog AnnieBWills.com.
6 Comments
SherylH
Gorgeous cards all around but I really like your use of the embossing folder on your holiday cheer card! Your choice of blended inks is perfect — I am making note of them to try.
Annie Williams
Thank you Sheryl!
Jan Hunnicutt
Your cards are lovely, I want to learn how to use the inks like this.
Annie Williams
Thanks so much Jan!
Karen J
These are all gorgeous cards!
Annie Williams
Thank you Karen!