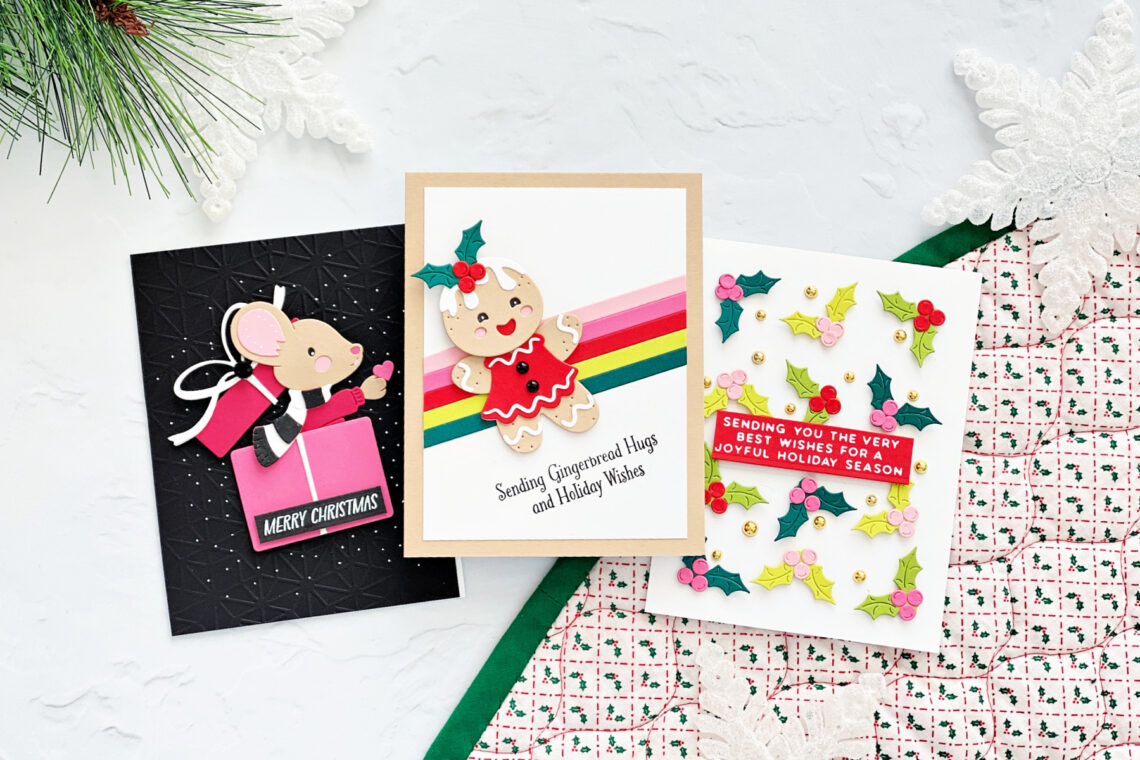
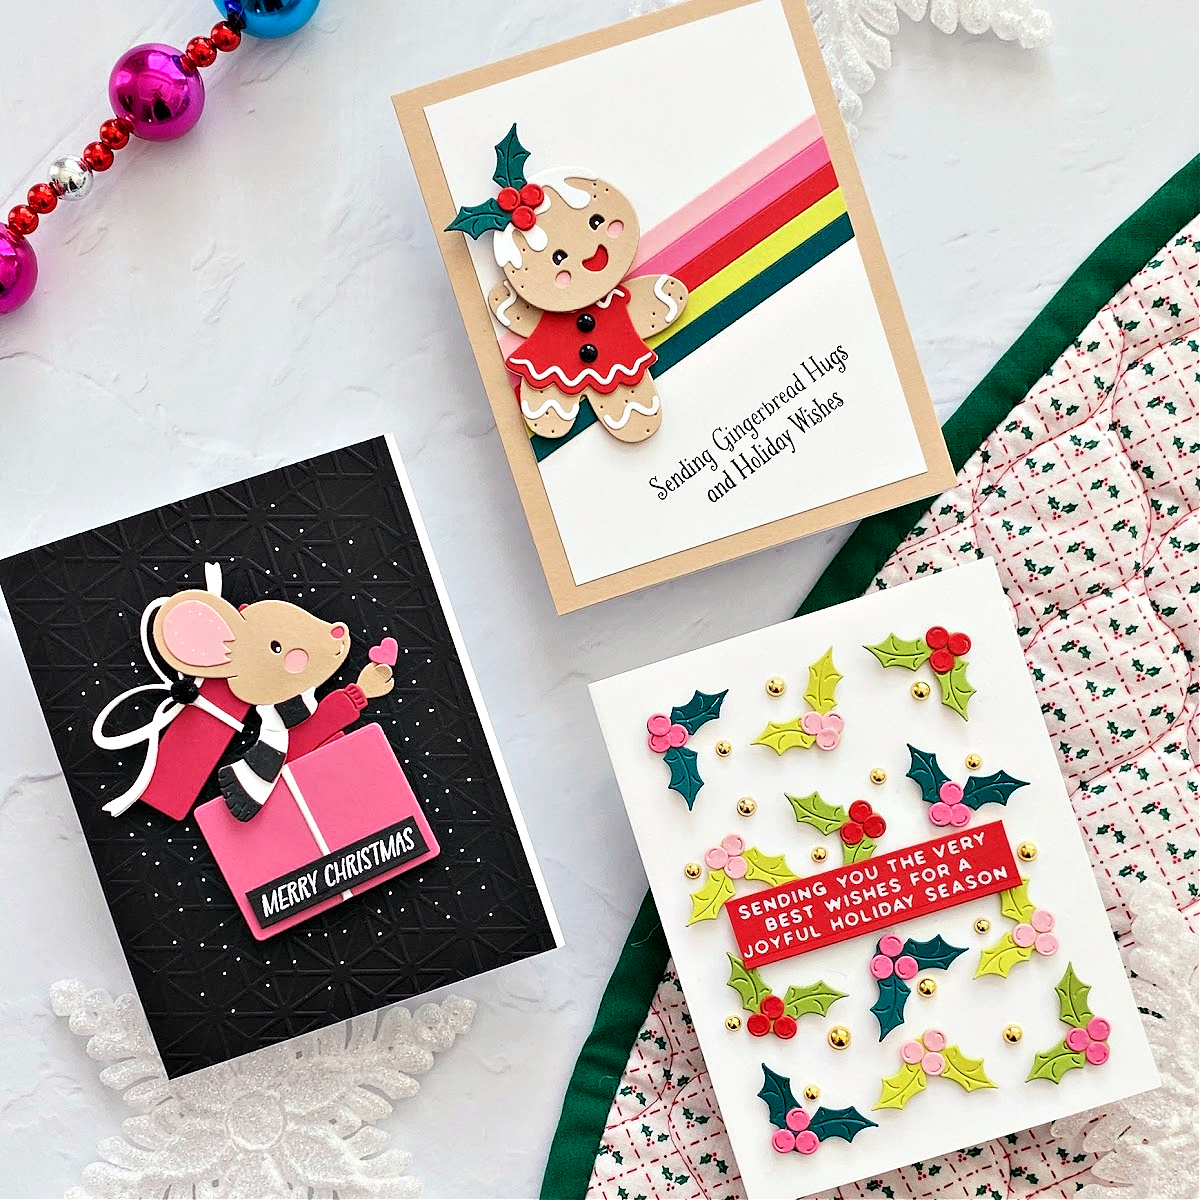
3 Ways to Create Movement in Your Cards Using the Dancin’ Christmas Collection
Hello crafters! Joan Bardee here and I’m happy to be back on the Spellbinders blog sharing different ways to create movement using the Dancin’ Christmas collection.
This collection is designed to easily make cute cards that have elements that literally move. No special materials are required. However, in design, “movement” can mean other things, including leading the viewer’s eye in a particular direction. Here, I’m showing 3 different ways to create movement.
THE CUTEST DANCIN’ GINGERBREAD – LITERAL AND FIGURATIVE MOVEMENT
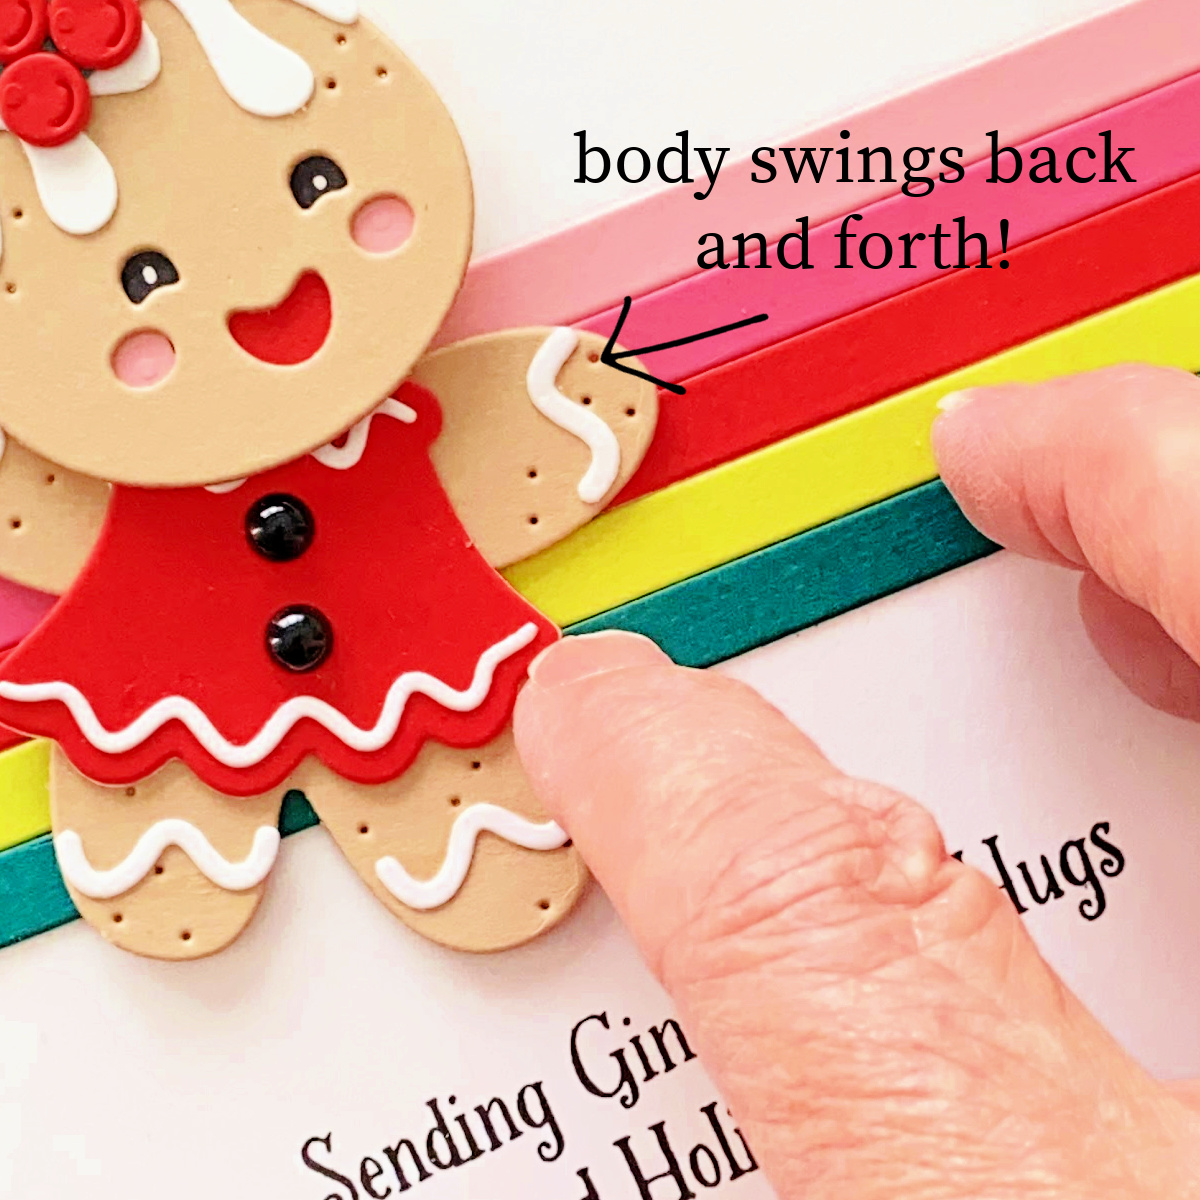
This card has literal movement – the body of that adorable gingerbread girl moves back and forth. It also has figurative movement – your eye follows the gingerbread girl and the striped background and then goes to the sentiment.
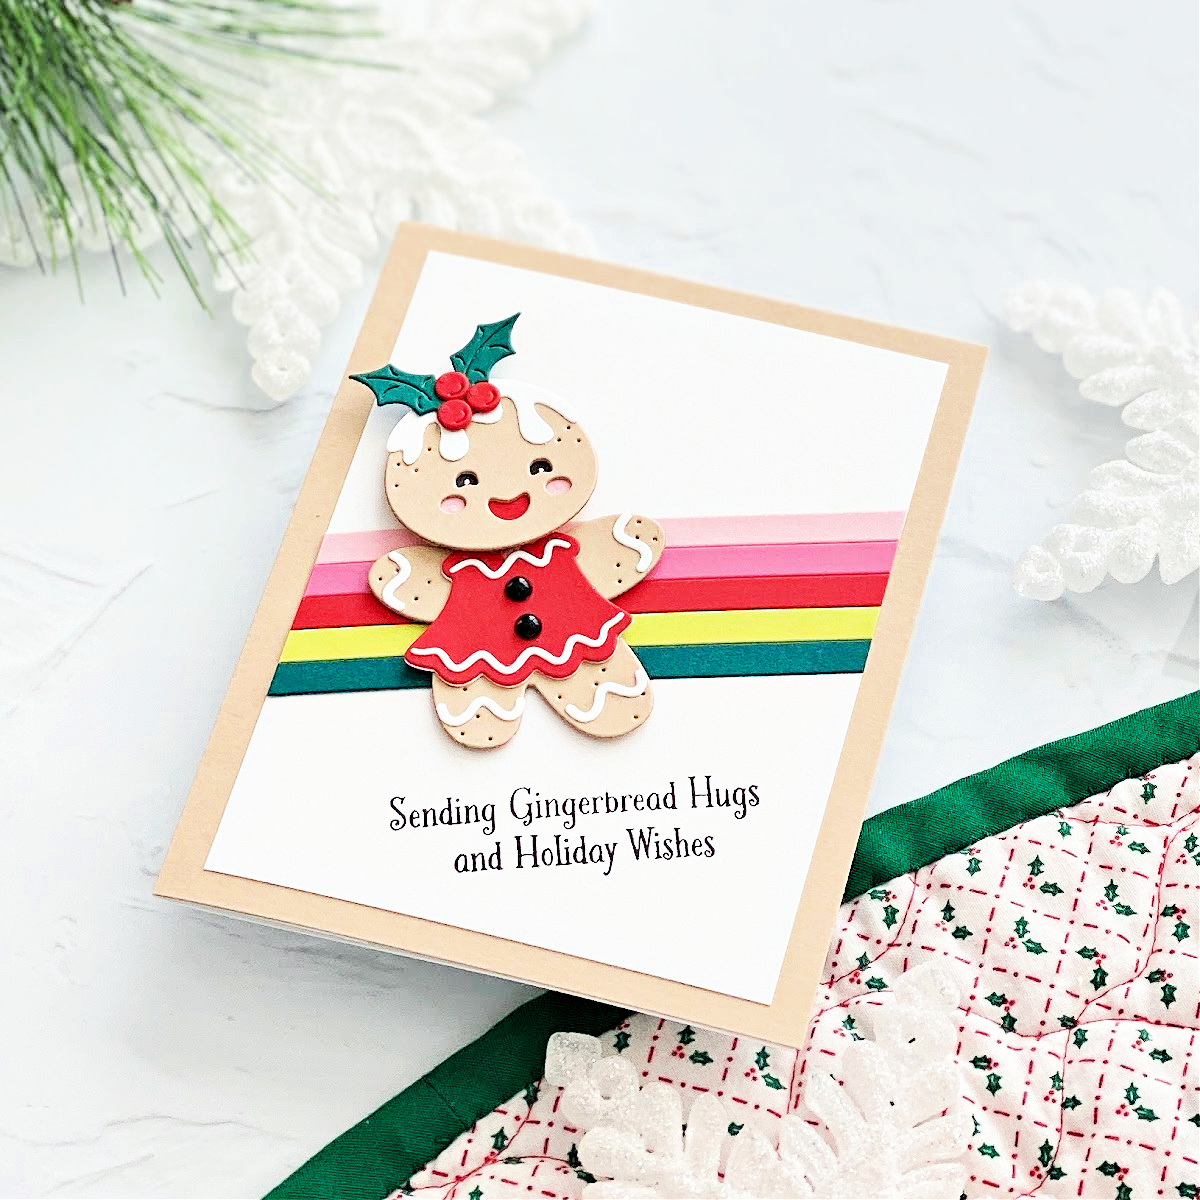
Tip: Placing the striped cardstock at the same angle as the sentiment helps the eye move in the same direction.
Added a few die-cut stripes from the Gift Bag Etched Dies to form a place for the Gingerbread to “rest,” holly from Dancin’ Figgy Pudding, and a sentiment from Dancin’ Christmas Sentiments Clear Stamp Set.
Tip: Use a white gel pen to add a dot to each eye. It makes the entire face come alive.
If you want to see how to make the gingerbread body move (it’s easy – you add a piece of foam in a space formed by the die cut), check out this video by Yana Smakula. It features a different collection, but the movement mechanism works the same.
IS THAT MOUSE “FLYING?”
The Dancin’ and Giftin’ Mouse die set is designed for the mouse to carry the gift box and for it to swing back and forth. However, just for fun, I put the mouse inside the gift box.

One way to suggest literal movement without any moving pieces is to make it look like your focal point is moving – walking, driving, flying, etc. Tilting the gift box, and adding white dots to a black background, makes it appear that the mouse is flying in a starry night sky to deliver a bit of love. The last thing the eye sees is the little heart – emphasizing sending love.
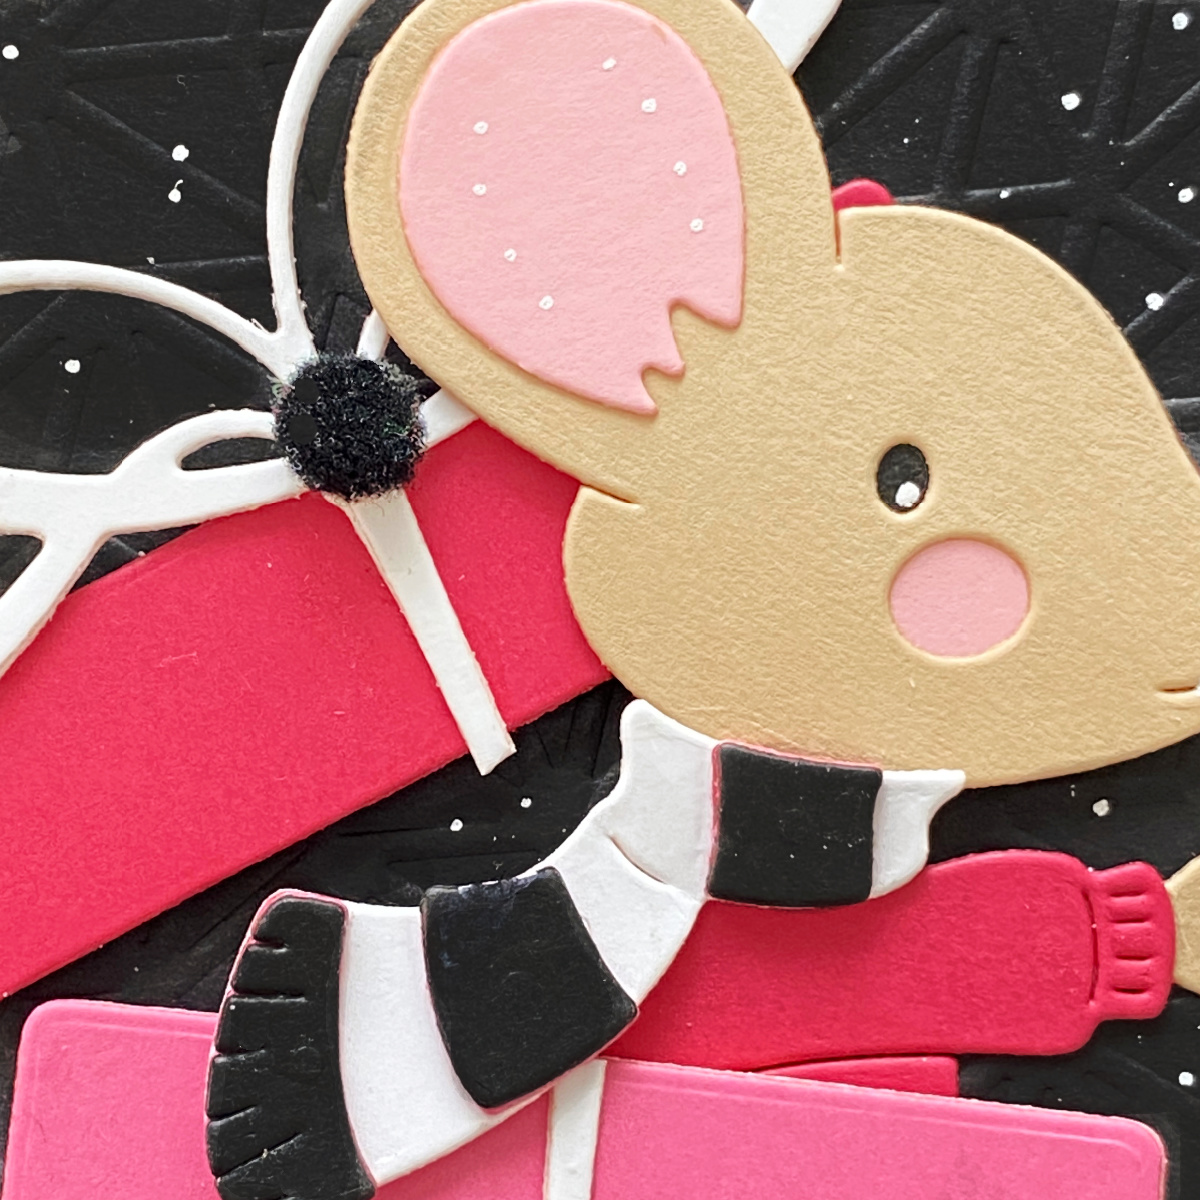
The heart is from Nordic Ornaments. Used the Monoline Embossing Folder to add some texture to the black card base and added white dots with a gel pen. Found a black pompom in my stash and it was the perfect touch to the bow. The sentiment is from Dancin’ Christmas Sentiments Clear Stamp Set.
REPETITION TO CREATE MOVEMENT
Holly is fun and festive and just evokes Christmas. I cannot help it – if a set includes Holly, I will use it to cover a card. And I will make a grid design. That is exactly what I did with the holly die in Dancin’ Figgy Pudding. I like this die because the leaves and base of the holly is one piece.

Alternating the direction of each holly cluster adds to the sense of movement. To avoid a chaotic look, I die cut the leaves and berries with 3 different shades of green and pink/red and paired them consistently – for example, all the Peridot Green cardstock holly leaves have Pink Sand cardstock berries. Plus, I placed a cluster in each corner to mimic a frame.

Hot foiled a sentiment from A Merry Little Christmas Sentiments with opaque white glimmer hot foil onto Poppy Field cardstock and added a few gold embellishments.
Tips: Using colorful cardstock for a sentiment adds an unexpected and unique touch. And, if you don’t have a die that will cut out the sentiment perfectly, use a square or rectangle die. Cut the top first and then the bottom. Perfection!
Thanks so much for checking out this post and thank you to Spellbinders! I would love to see anything you make with this collection, so feel free to tag me on my Instagram account. I’m Dear Paperlicious if you are looking for me.
Spellbinders Supplies:

Other Supplies
Paper trimmer; cardstocks; pompom; Versafine Onyx ink; gold embellishments.
Make A Scene by Becca Feeken | Card Inspiration with Annie Williams

August 2020 Card Kit of the Month is Here – Around The World
