Better Press Christmas – Letter Press and Hot Foil Card Ideas with BetterPress Plates
Hi friends! Emily Midgett from Sixth Street Sundries here with you today on the Spellbinders blog, and today I have some inspiration to share using a few products from the BetterPress Christmas Collection! One of my favorite things about the new BetterPress Letterpress plates is how beautifully they work with both your BetterPress letterpress machine and the Glimmer Hot Foil machine! The amount of detail that you can achieve with either machine using the super intricate images in the BetterPress lineup is truly impressive. I have created a quartet of projects to share with you today using several products from the BetterPress Christmas collection, so let’s get started with the details!
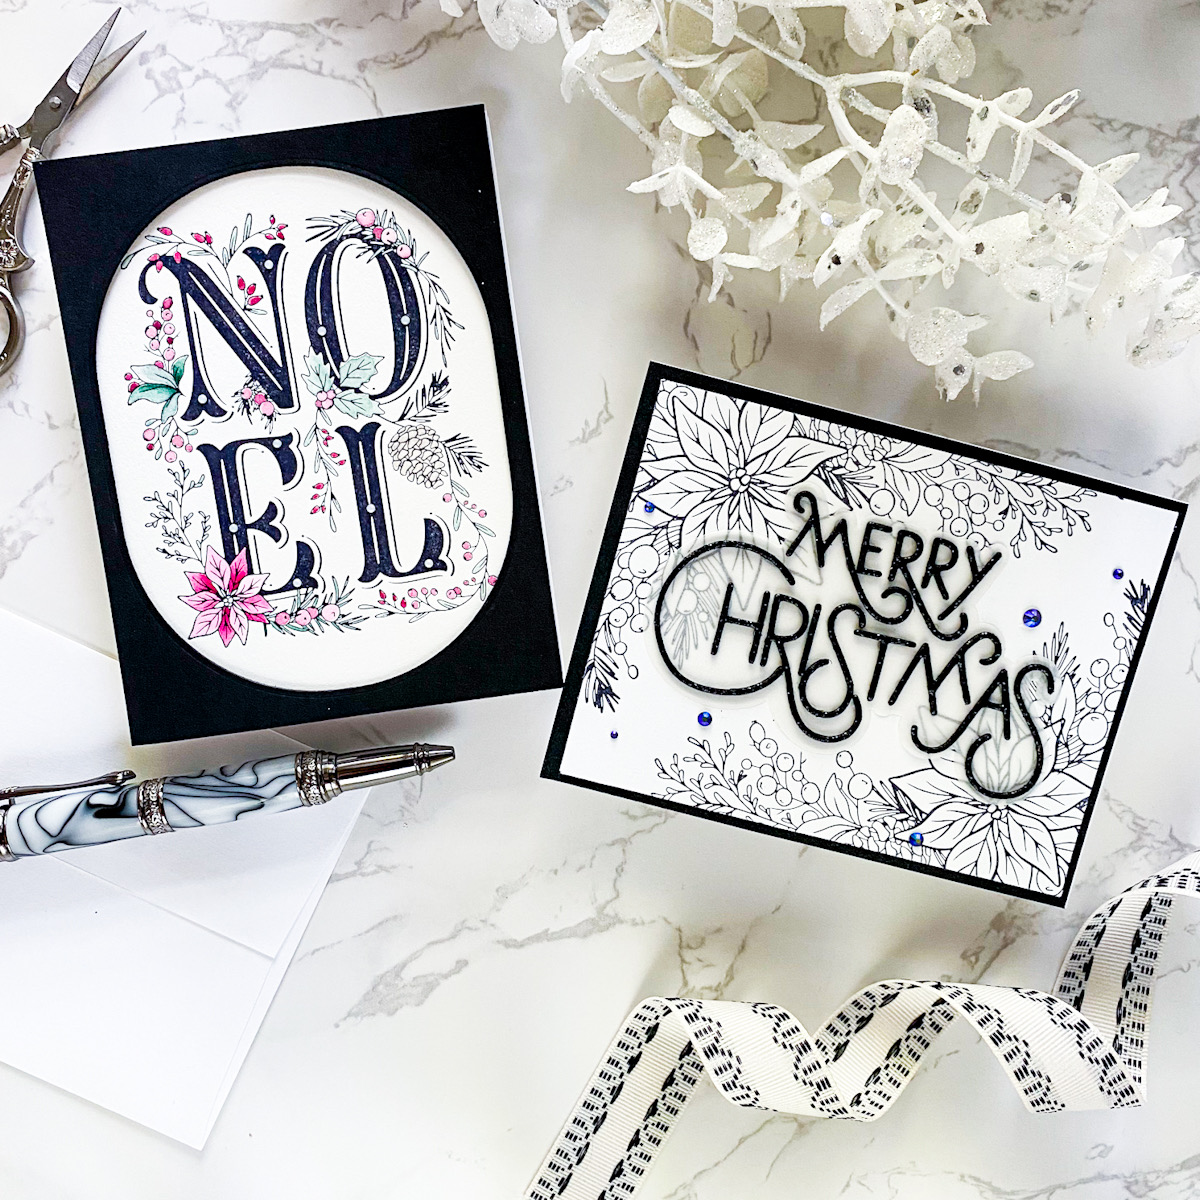
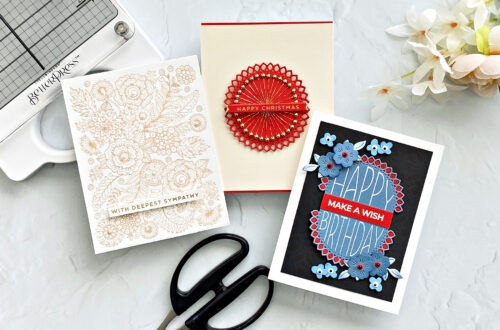
My first project pair uses the BetterPress plates as letterpress plates, pairing the Festive Noel Press Plate and Poinsettia Corner Press Plate + Die with the Better Press machine. I cannot overstate how user-friendly the BetterPress system is; I literally was able to use the very first panel that I created with the machine, which happened to be this panel created with the Festive Noel Press Plate.
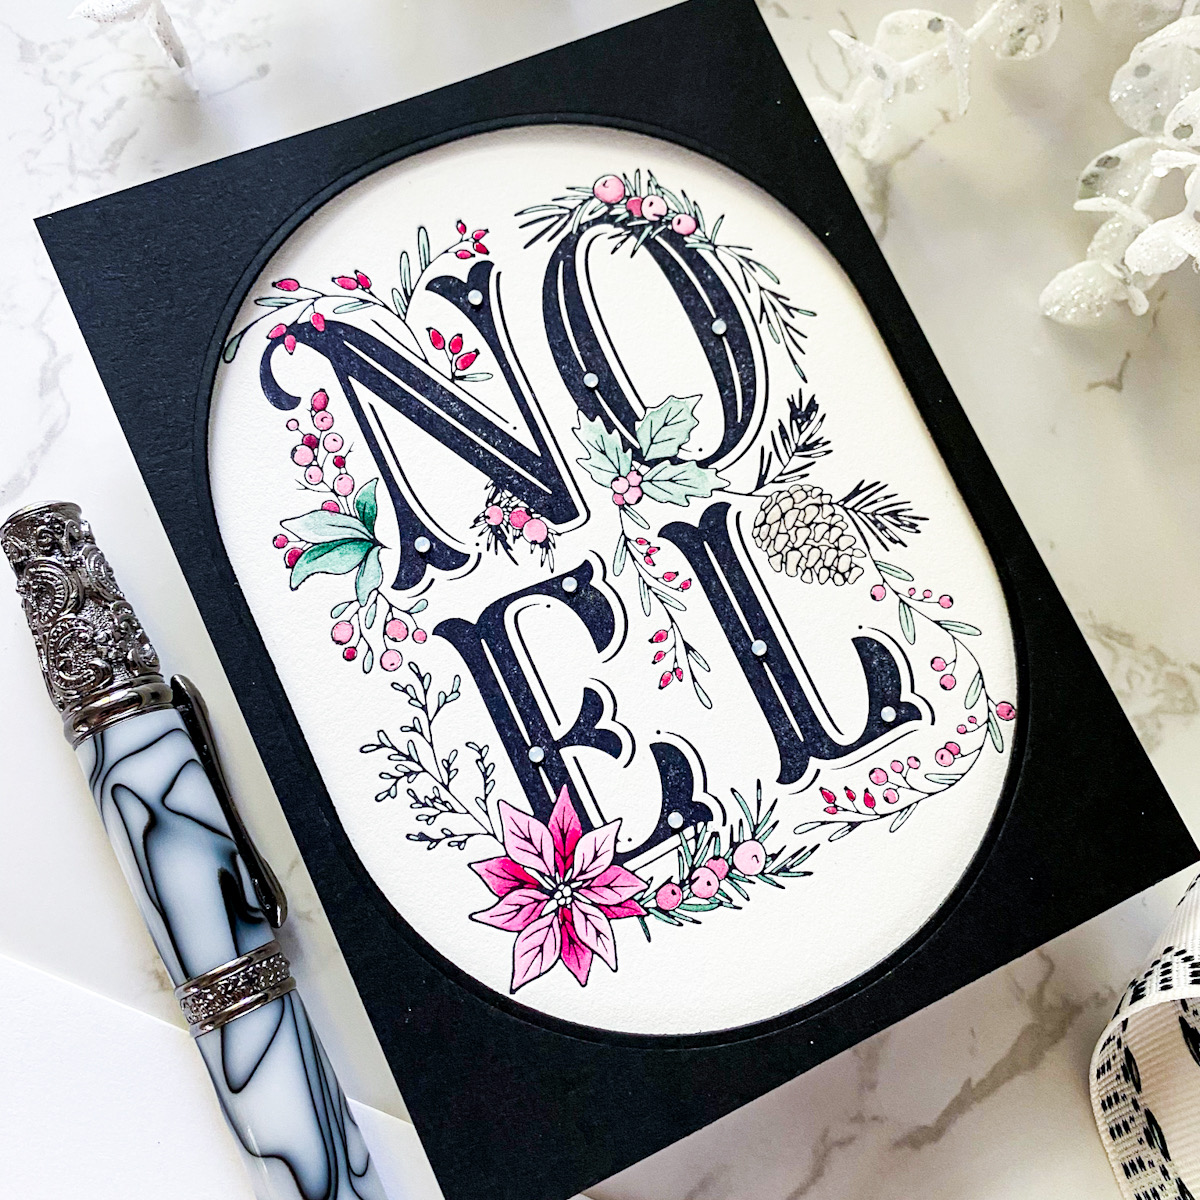
- First, press a panel of A2 Porcelain BetterPress Letterpress Paper using the Festive Noel Press Plate and the black ink that is included with your BetterPress machine. The super thick cotton cardstock works beautifully to pick up all of the ink added to the Festive Noel Press Plate!
- Next, use watercolors to add subtle washes of color to the letterpress images.
- To accent the crisp black letterpress lines, trim down a panel of black cardstock to A2 size, then die cut the center using the Essentials Stylish Ovals collection, creating a dramatic black frame. (This frame could easily be made into a shaker card, but the goal was to make a card that was easy to mail!)
- To add a little sparkle and extra textural interest to this project, I accented the letters on the NOEL with some Spectrum AB Gems from Spellbinders, resulting in a relatively simple holiday card that would be fairly quick to mass-produce, assembly-line style!

For my second project, I created a simple but elegant black and white project using the beautiful, brand-new Poinsettia Corner Press Plate + Die.
- To start, use the magnetic feature on the chase piece on the Better Press machine to your advantage by creating a mirror image in each corner of your A2 Porcelain BetterPress Letterpress Paper. Simply run the Poinsettia Corner Press Plate through your machine using a piece of A2 Porcelain BetterPress Letterpress Paper, then rotate the paper 180* and repeat the process on the opposite corner. Such a stunningly detailed background!
- For the greeting, die cut the detail layer of the Stylish Merry Christmas die from Black Glitter Foam, then adhere it to the outline layer cut from some heavyweight vellum.
- Finally, add a few Onyx Gems for some sparkle!

My second pair of cards use The Magic of Christmas and Poinsettia Corner Press Plate + Die with the Glimmer Hot Foil Machine. When I first saw the introductory plates for the BetterPress system, I was entranced at how detailed the images were; I had no idea how stupendous the images could look in hot foil, as well! The detail that the foil picks up is breathtaking and creates such a unique look. For both of these cards, I paired these lovely holiday images with my OLO markers to create some unique and shiny blue, white, and gold holiday cards.

- First, hot foil The Magic of Christmas on a panel of plain white cardstock using the Satin Gold foil from the Satin Metallics Variety Pack, centering the image and the sentiment as close to the center of your white A2 card panel as possible.
- Next, use OLO markers to add some simple and vibrant green and warm gray to the foiled images.
- After coloring, trim down the white foiled panel slightly and mat it with a full A2 panel of Cosmic Sky cardstock.
The low profile makes this project super easy to mail while still making a super festive and shiny holiday card!
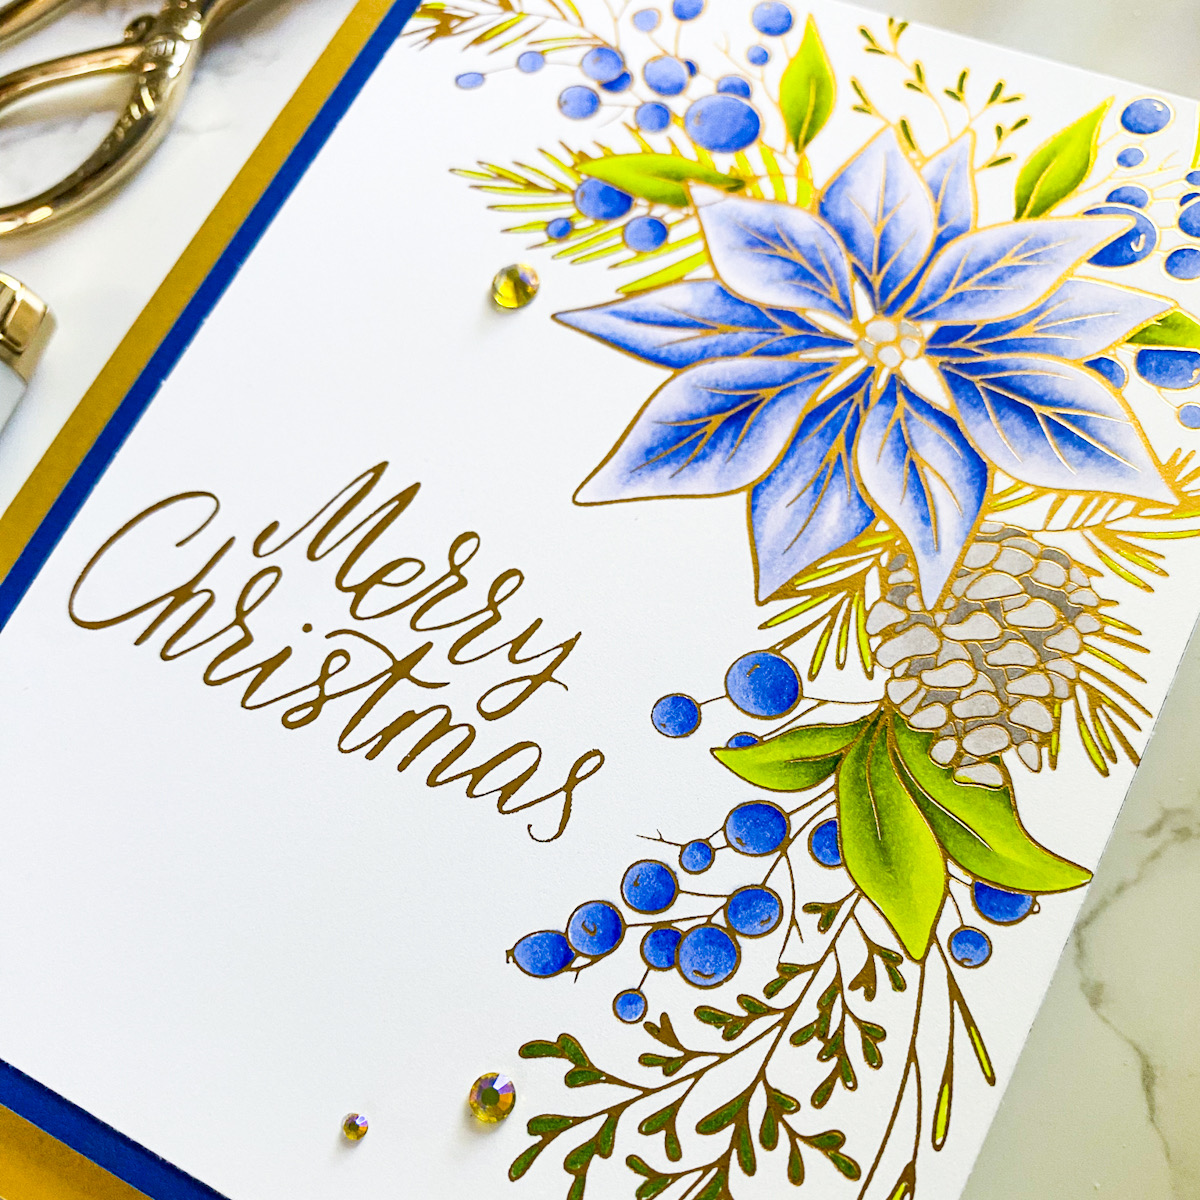
For my last project, I wanted to color that beautiful poinsettia image on the Poinsettia Corner Press Plate.
- Start by hot foiling the Poinsettia Corner Press Plate, with the included sentiment, again with Satin Gold foil from the Satin Metallics Variety Pack.
- After foiling, color the image using your favorite holiday color combo; I selected a unique combination of lime green, steel blue, and warm gray OLO markers.
- After coloring, trim down the foiled panel and mat it with a slightly larger panel of Cosmic Sky cardstock, butting the top right corner of the foiled panel into the top right corner of the blue cardstock. Mount these two panels on a piece of Spellbinders’s Brushed Gold cardstock, again butting them into the top right corner to create a framed look on the bottom left.
- Finally, add a few Aura AB gems for some sparkle!
Well, that’s all for today’s projects! The versatility and ease of working with the BetterPress plates make them winners in my book, and the new BetterPress Christmas collection is truly stunning in the variety of images available as well as the incredible detail included in those images! Thanks so much for reading, and thanks to Spellbinders for inviting me to post here! If you’d like to see more content from me, you can check out my blog at emilymidgett.com. Have a marvelous day!
Spellbinders Supplies:

Other supplies
Daniel Smith watercolors
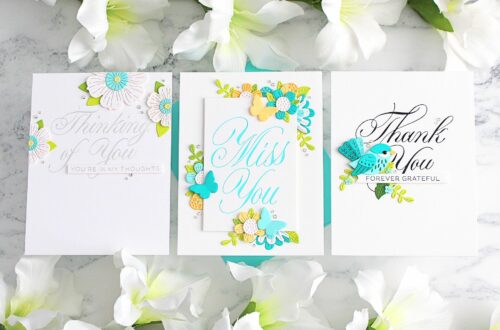
Make Sentiments the Star!
Kaleidoscope Arch – Versatile Products Rock!