4 Magical Snow Globe Die Cut Scenes for the Holidays
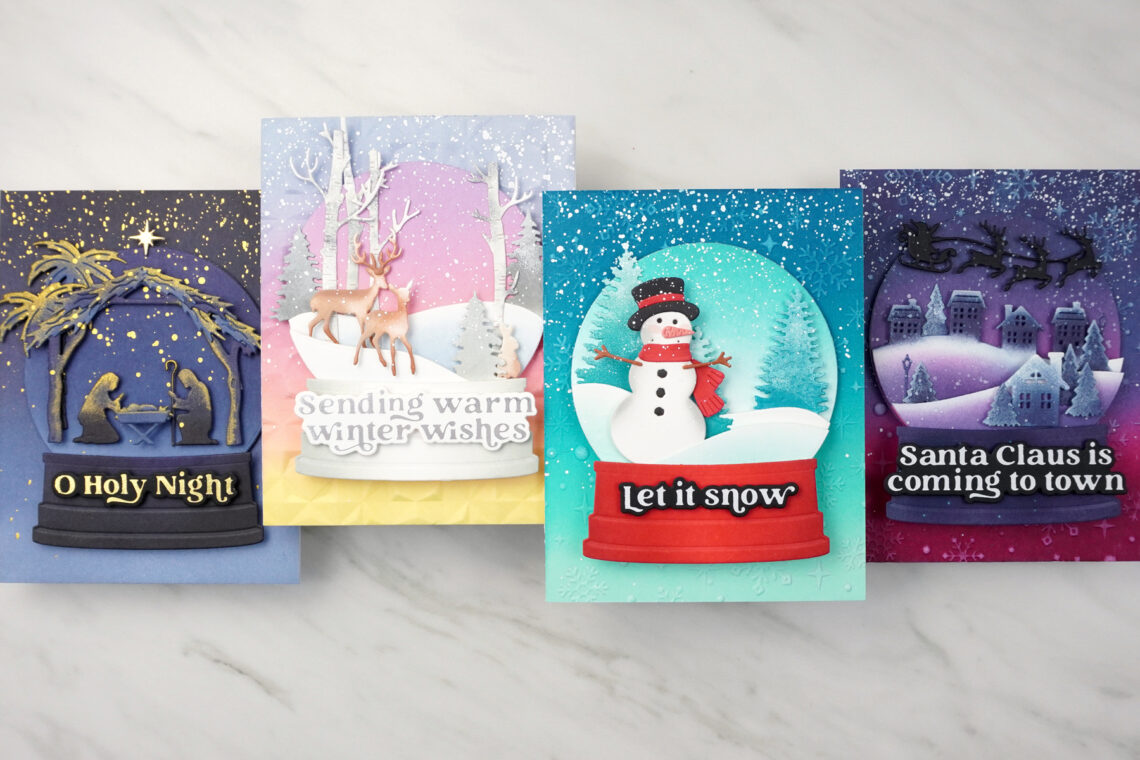
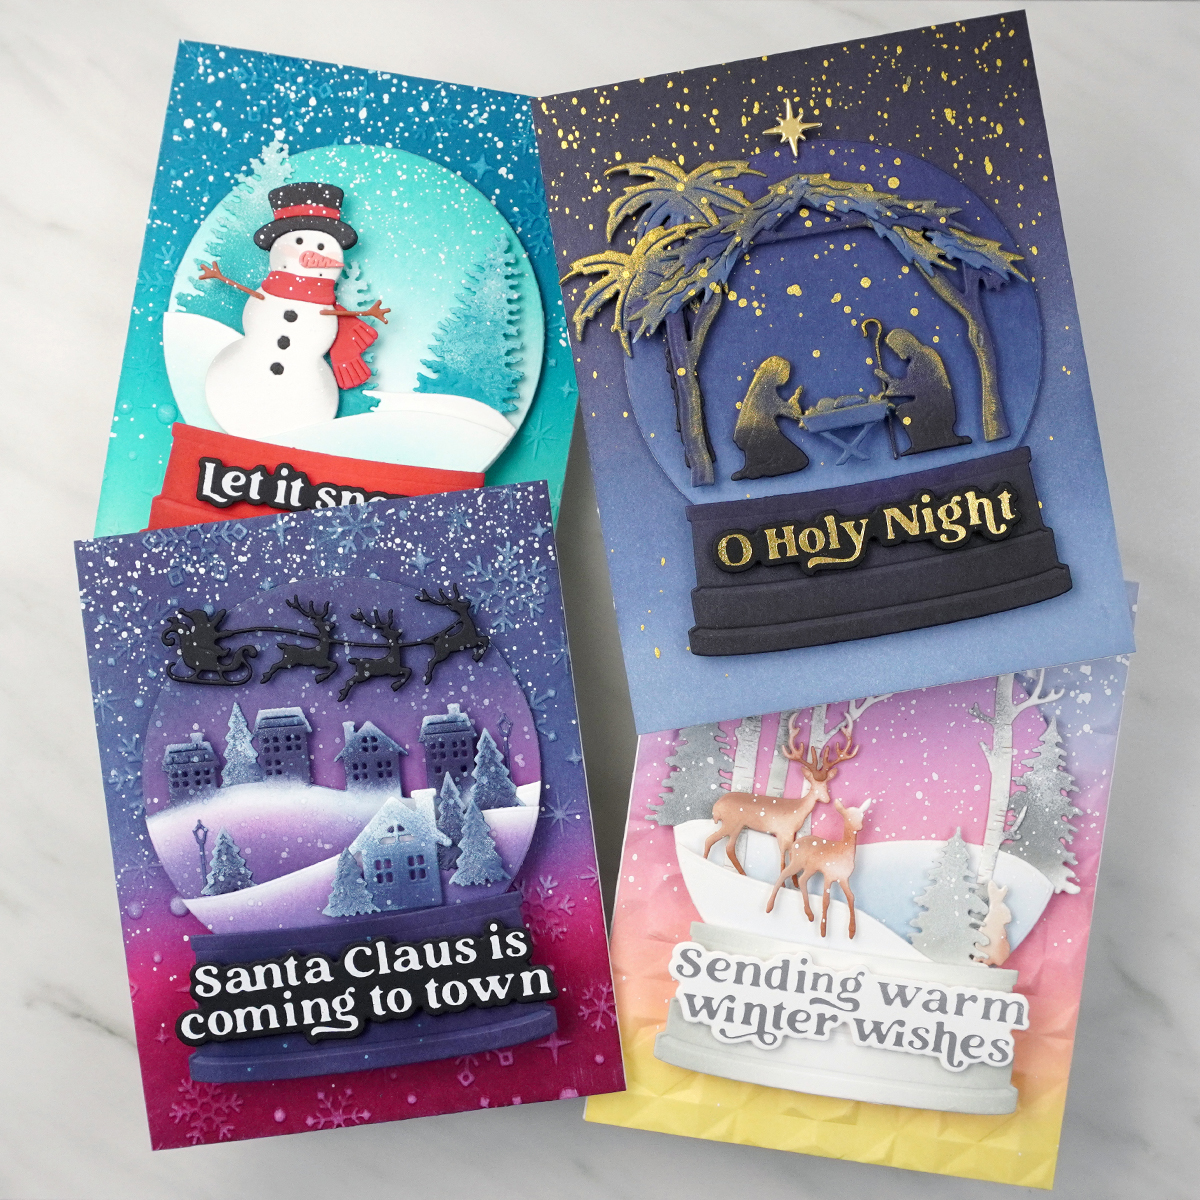
Hi there my Spellbinders’ friends, welcome back to the Spellbinders Blog! My name is Jaycee Gaspar and I’m so excited to share four die-cut snow globe cards featuring the Simon’s Snow Globes collection. This beautiful collection features embossing folders, a hot foil plate sentiment set, and a collection of snow globe scenes.
To create the following projects, you’ll need the ‘Simon’s Snow Globe‘ etched dies, which include the globe and base dies, as well as its own town scene, Santa, and sleigh. These dies provide endless versatility, allowing you to create a variety of snow globe scenes that are sure to be admired by your card recipient – just like a treasured glass snow globe on the mantelpiece.
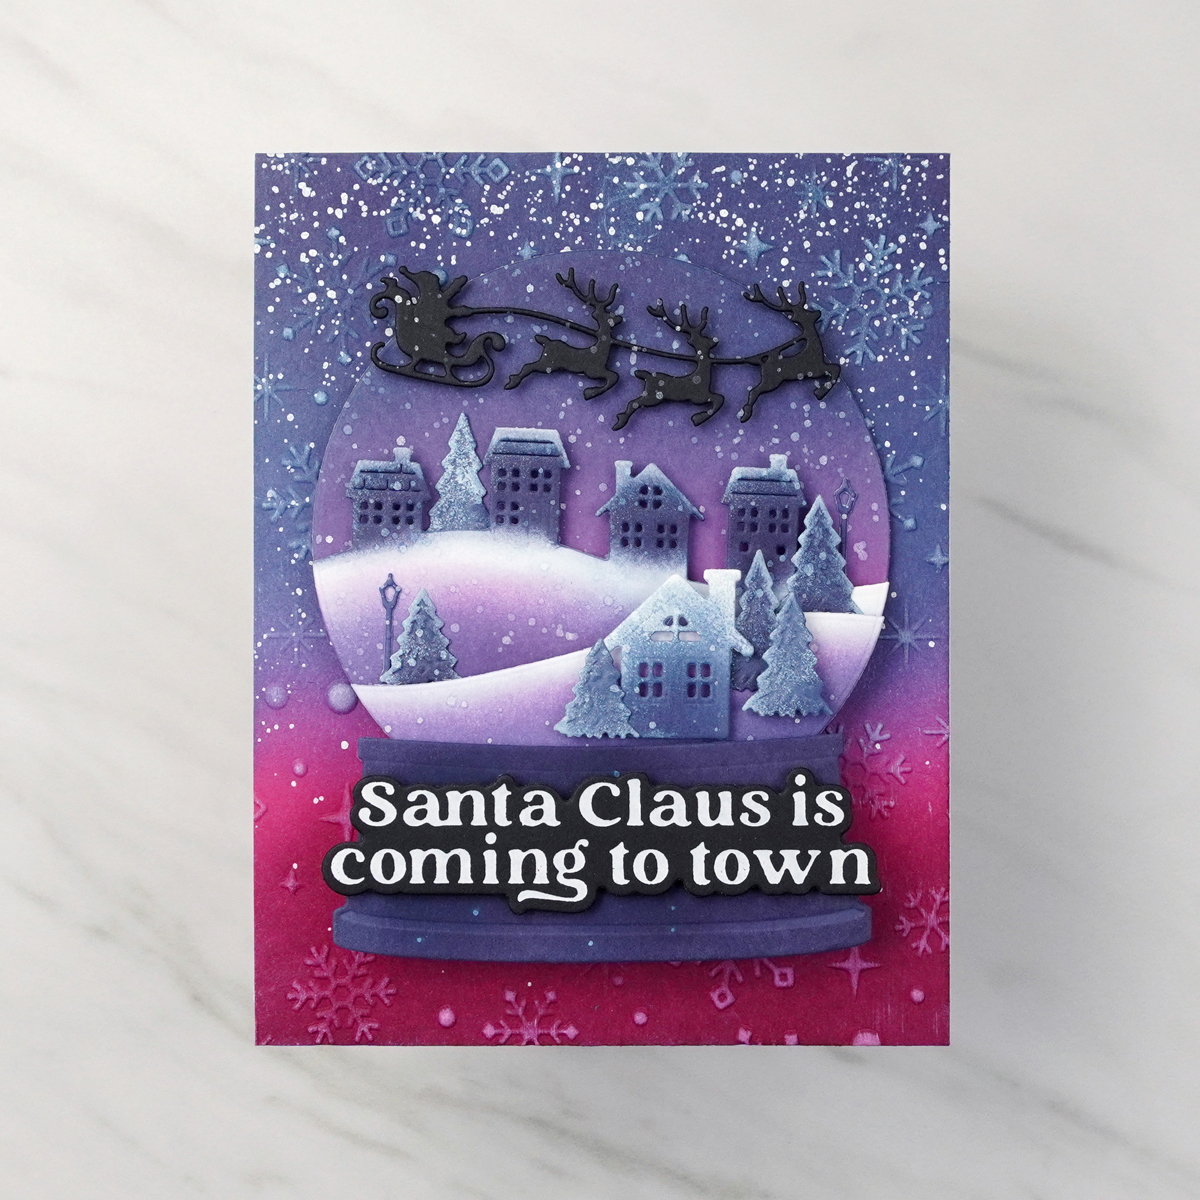
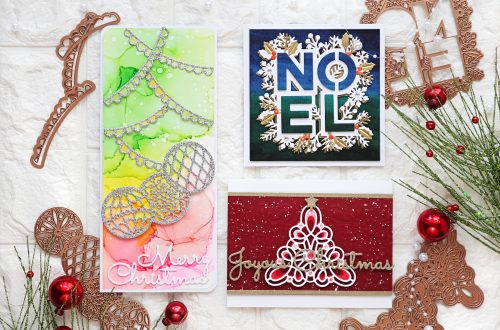
Here is that base snow globe set – Simon’s Snow Globe. This scene features a row of homes on a hill, additional houses, evergreens, and Santa soaring in the night sky. To make this scene I work from background to foreground. I started with the Sparkling Snow 3D Embossing Folder and created a deep navy to merlot gradient. I ran this gradient cardstock and the embossing folder through my die-cutting machine. Then I used a white pigment ink pad to catch the high points of the embossing folder. I did this by gently pressing the soft pigment ink pad to the embossed panel to highlight the embossed details. I die-cut all the pieces in the Simon’s Snow Globe die set in white cardstock except for Santa; I cut that image from black cardstock. I created navy gradients on all the pieces, leaving white highlights on the highest points of the scene, i.e. the roof of the houses and the tops of trees. I also pressed these die-cut pieces to the same white pigment ink pad to create soft snowy accents. assembled my scene with an array of foam squares and foam adhesives. I finished this card with a white opaque foil sentiment using the Wonderful Winter Sentiments hot foil plate and an excessive amount of white splatter.
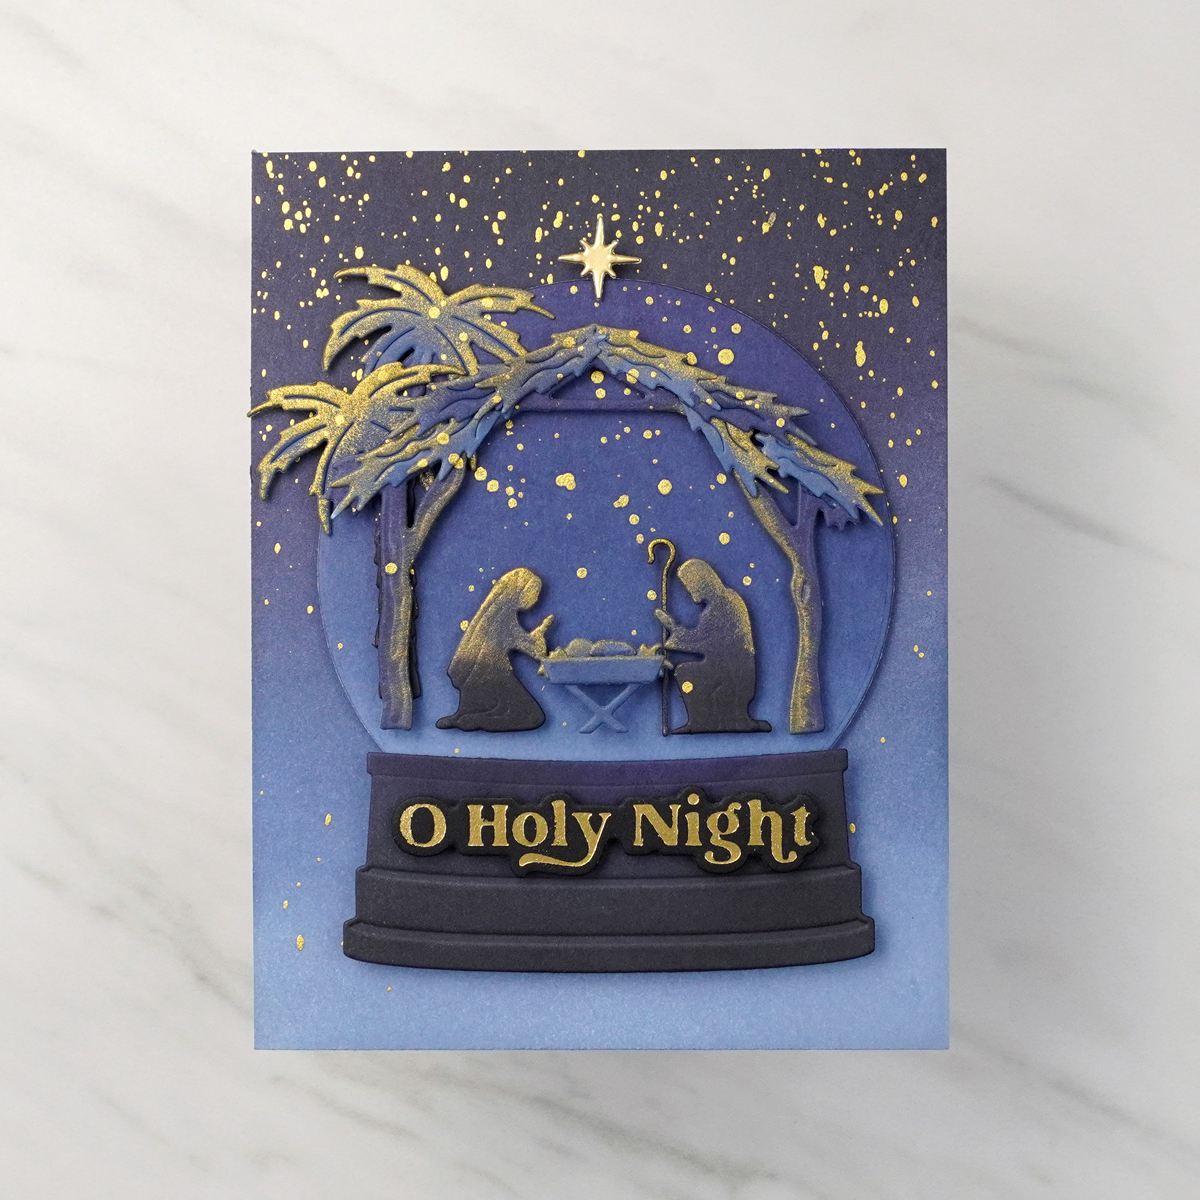
To make this glowing night card, I used the Nativity Scene die set. I started in a similar fashion to the previous card, creating an even deeper navy gradient on the globe and background to this card. I die cut all the pieces of the Nativity from white cardstock and colored them in a deep navy gradient. I strategically colored the high points of all the deep navy die cuts in a gold pigment ink. I either pressed the cardstock into the soft pigment ink pad or used a very small ink blending brush to ‘paint’ the scene. I assembled this scene again with foam squares and added gold metallic splatters to the whole card. I gold-foiled the Wonderful Winter Sentiments hot foil plate to coordinate with the Nativity. Finally, I finished this card with a gold mirror die-cut Star of Bethlehem.
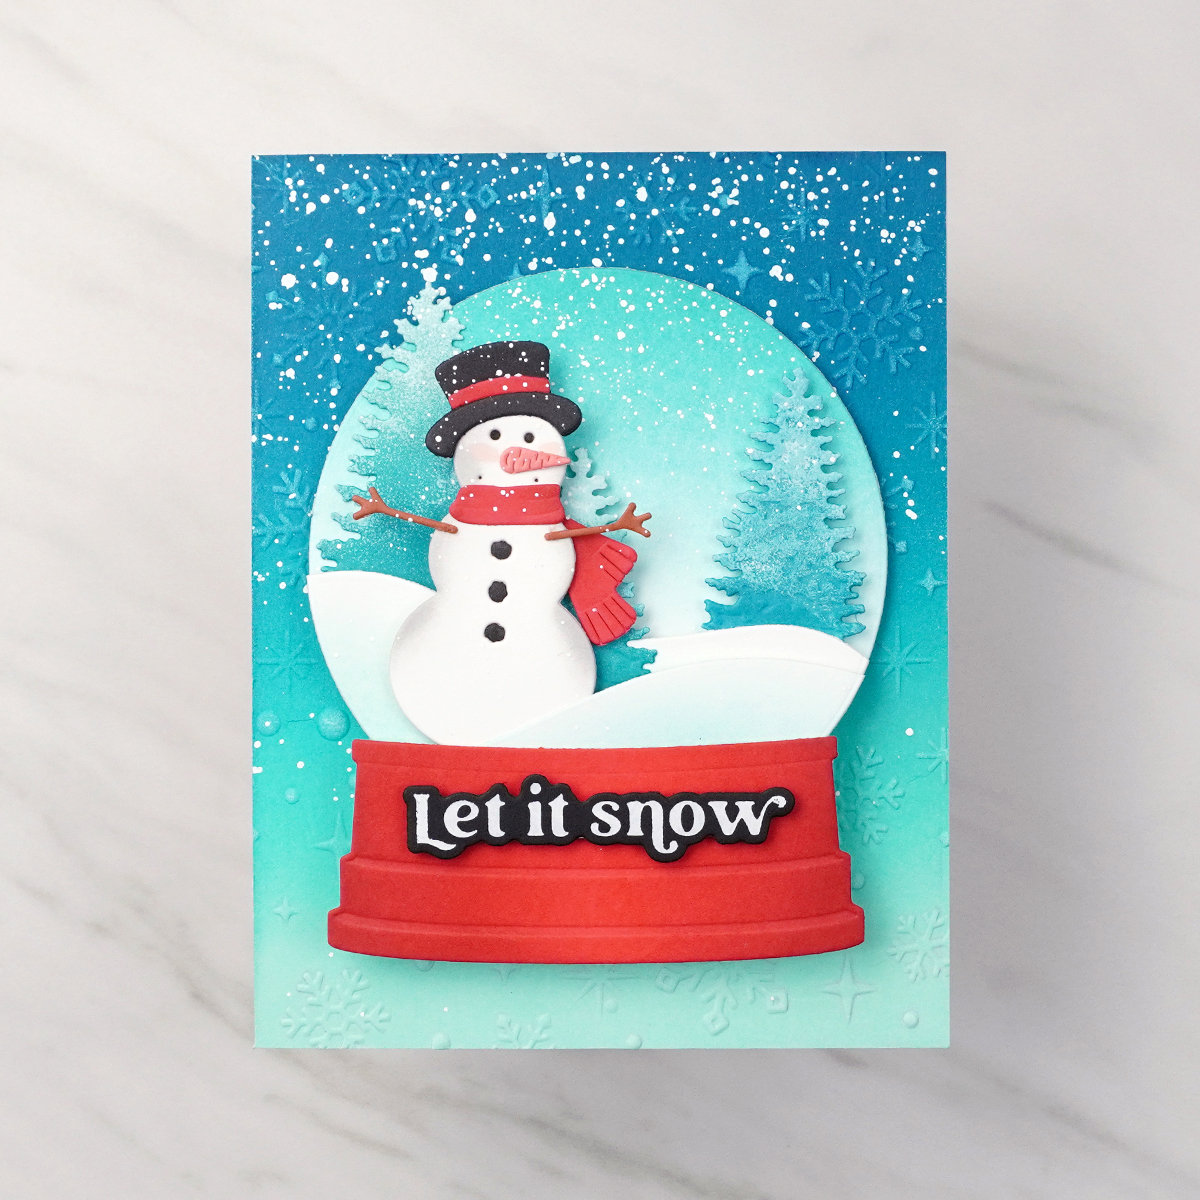
For these next two cards, I opted for brighter palettes and more daytime scenes. I love the traditional snowman snow globe in Snowman Scene etched die set. The background gradients in the globe and Sparkling Snow 3D embossed background are a blue-green gradient. I used this same set of inks to color the evergreens. Just like the Simon’s Snow Globe etched die set, I pressed the evergreen die cuts into a white pigment ink to give the impression of snow settling on the tree. After die-cutting and assembling the snowman, I used an array of foam squares to highlight the snowman scene. I added an excessive amount of white splatter and matched the Wonderful Winter sentiment to the Snowman Scene.
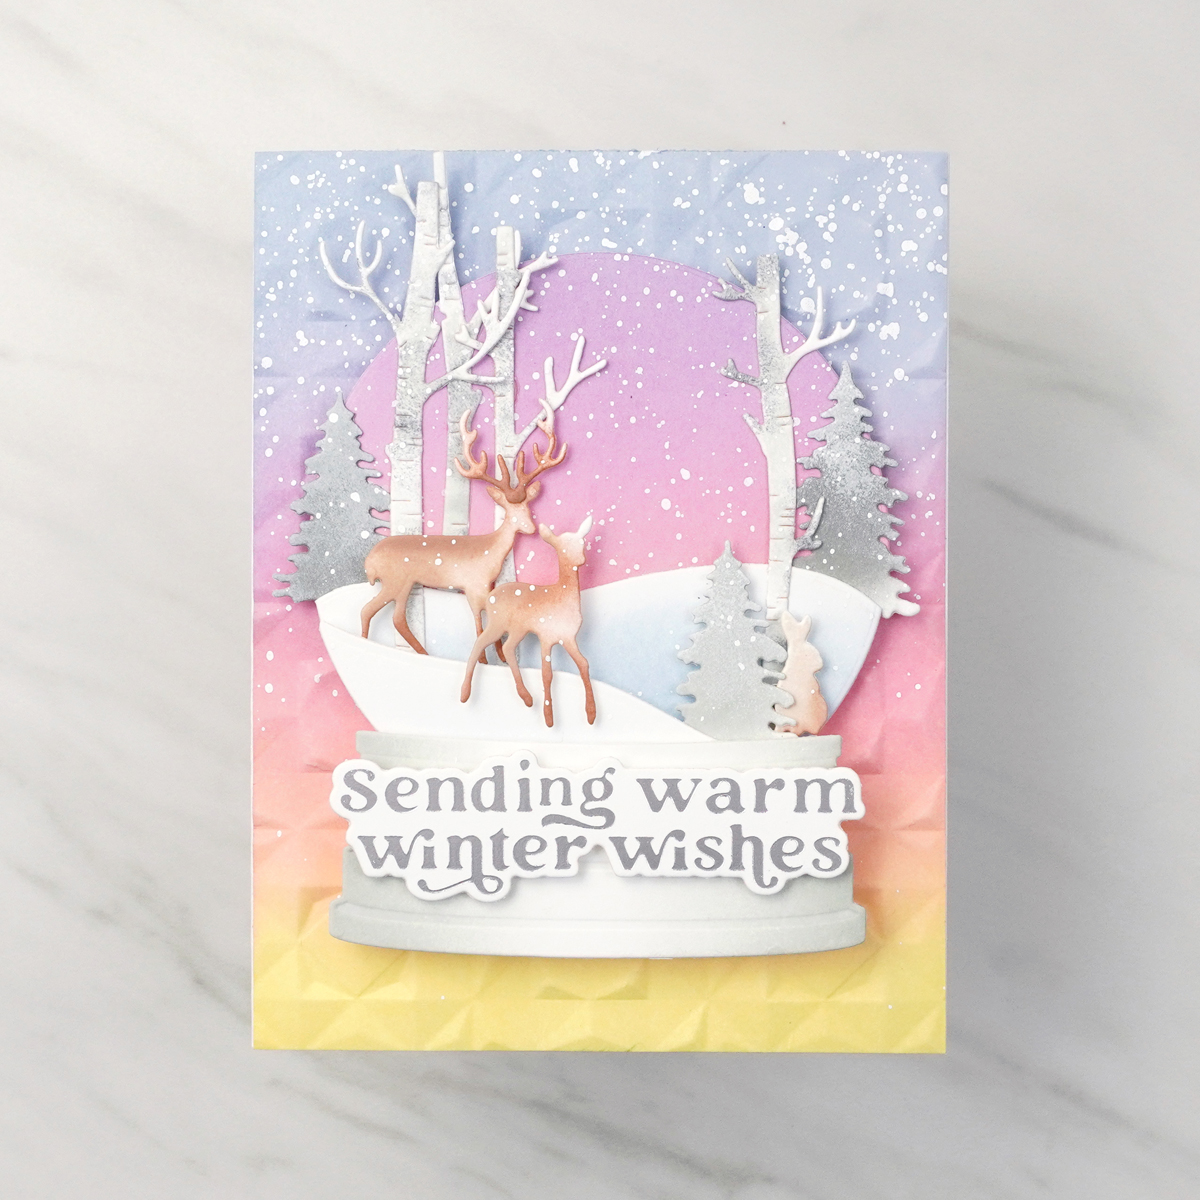
Finally, for the last card, I wanted a warmer mood and palette. I used the Woodland Scene etched dies to make this cotton candy-like palette. I started with gradients of periwinkle, rose, and yellow to make the daylight winter scene. For the evergreens and birch, I colored them with a grey ink. Just as before I pressed the trees to a white pigment ink pad. For the deer and rabbit, I used a light gradient of brown to color the Woodland Scene. I foam-mounted the scene to create depth and added white splatters. I thought a silver Wonderful Winter hot foil sentiment would complement this fantasy Woodland Scene.
Spellbinders Supplies:

Other Supplies
Altenew-Fresh Dye Inks, Altenew-Ink Blending Tools
Huge thanks to the Spellbinders team for letting me share these four snow globe-themed projects with you all! You can find more of my card projects over at YouTube, Instagram (@jaycee.gaspar), and at my blog. I hope to see you all again very soon!
2 Comments
Delia Wilkes
All your cards are just amazing. I’m so glad I bought the complete bundle and so appreciative of your inspirational post.
myrna
Beautiful designs!!!!