Creating Unique Backgrounds For Cards With Modeling Paste
Hi there, this is Annie Williams and I’m excited to be back on the blog today to share a couple of cards using white modeling paste as a fun background element. White modeling paste can be used as-is, with stencils, or mixed with a variety of other mediums for endless possibilities in your paper crafting projects.
Modeling Paste & Stencils
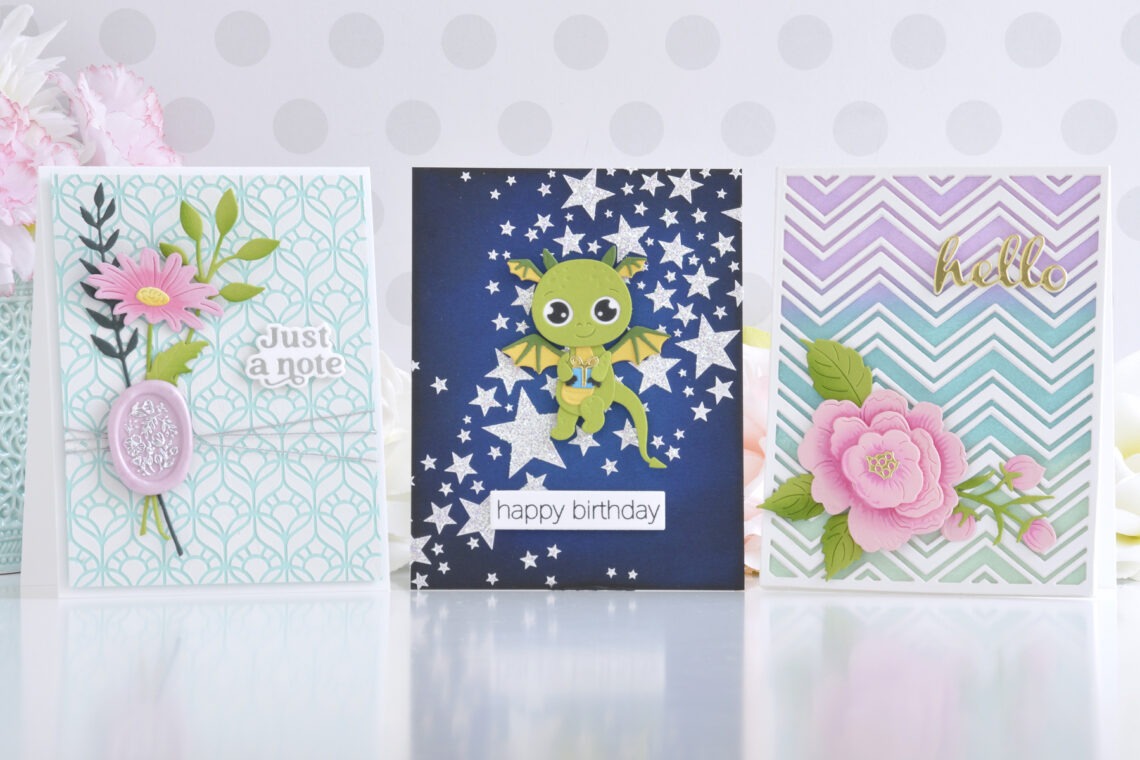
There are lots of ways to alter modeling paste to suit your project, but with a thick and creamy consistency, it also looks great applied through stencils right from the jar. Here I created a pretty textured background for this soft spring flowers card.
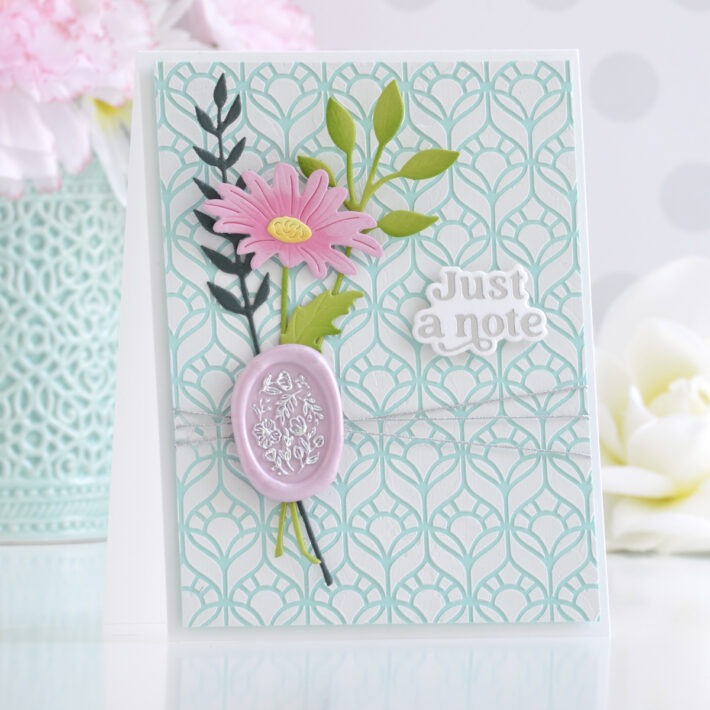
Apply white modeling paste through the Kaleidoscope Window Stencil onto Waterfall Cardstock. Promptly remove the stencil and once dry, trim the panel to 4” x 5.25”. Wrap Vivant Finn Silver Metallic Cord around the panel three times and adhere to a top-folding A2-sized white card base with foam adhesive. Melt Cotton Candy Wax Beads and press using the Oval Floral Wax Seal Stamp. Once cooled, trace over the design with a silver metallic marker.
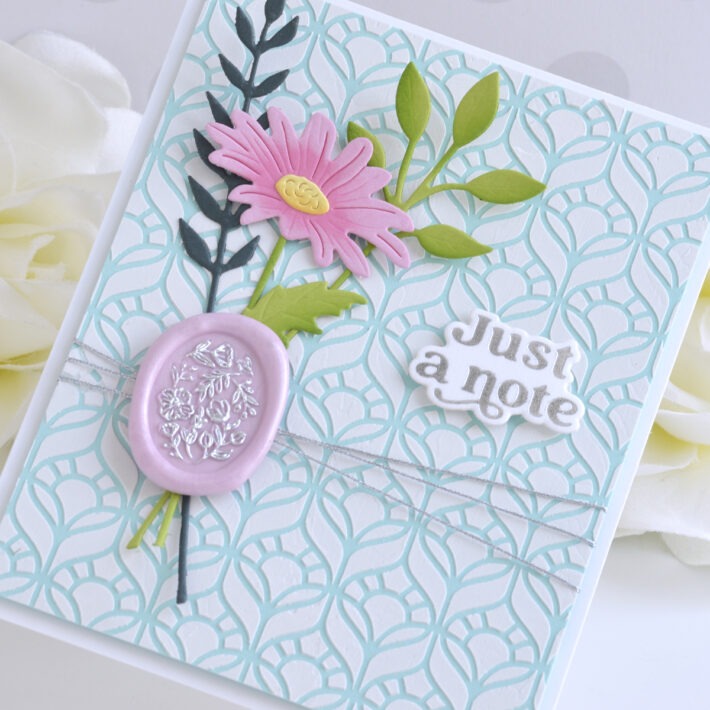
Die cut Rainforest, Fruit Punch, and Beeswax Cardstock using the Floral Stems Die Set and Forest Cardstock using the Sealed Wildflowers Die Set. Blend Mowed Lawn Distress Ink on the underside of the leaves and white pigment ink around the edges of the flower, then assemble the stems with liquid glue. Add the stems to the card front under the metallic twine and adhere the wax seal on top. To finish off the card, apply Silver Hot Foil to white cardstock using the Must-Have Sentiments Glimmer Plate Set, cut it out with the coordinating die, and add to the card front with foam adhesive.
Modeling Paste, Stencils & Glitter!
Since modeling paste remains wet and sticky for some time before setting, you have a chance to add glitter or powders for even more fun effects. Here I created a sparkly star background for this cute magical dragon birthday card.
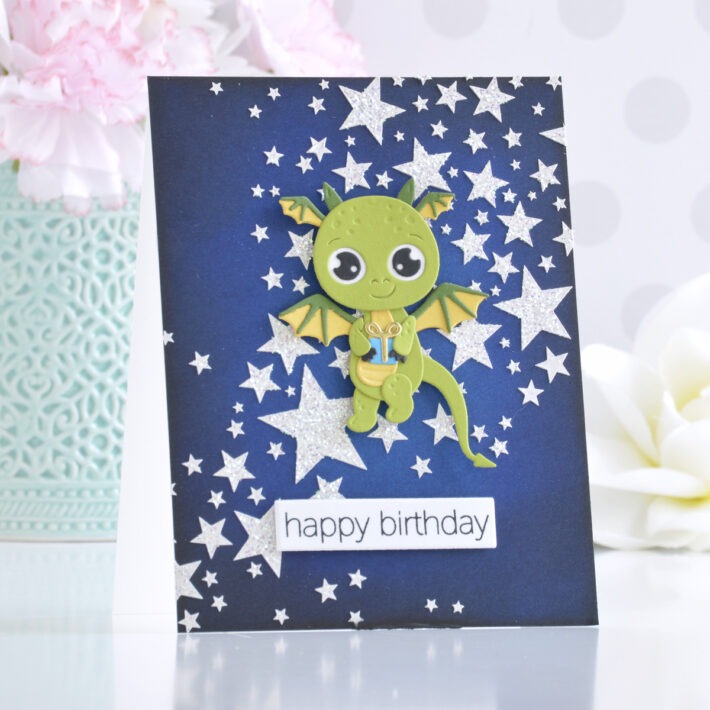
Trim a piece of Cosmic Sky Cardstock to 4.25” x 5.5” and blend Black Soot Distress Ink around the edges with a blending brush. Apply white modeling paste onto the panel through the Star Bright Stencil, remove the stencil, and quickly add Baby Baubs White Glitter over the wet paste, tapping off any excess. Once dry, adhere the panel to a top-folding A2-sized white card base with tape runner.
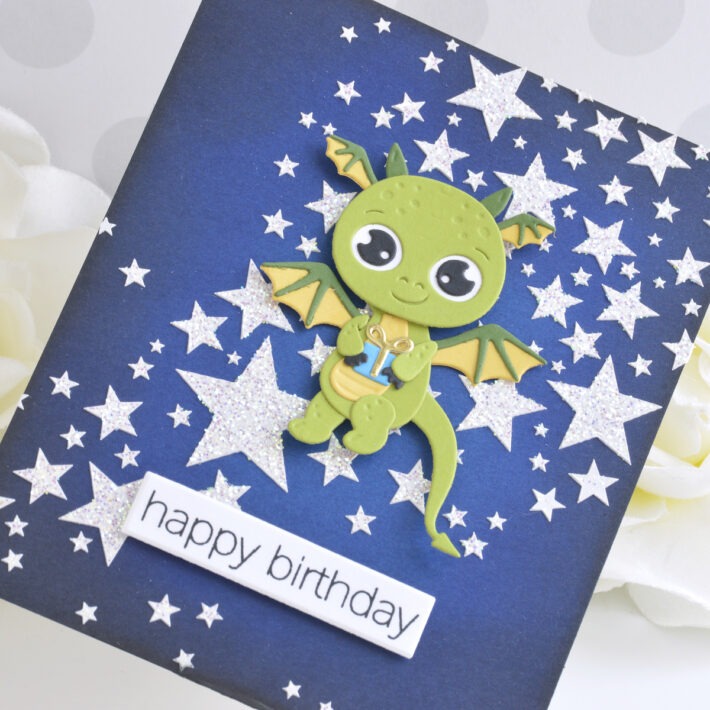
Die cut Rainforest, Fern, Beeswax, and Onyx Cardstock using the Dancing Birthday Dragon Die Set. Stamp a sentiment from the Monster Birthday Sentiments Stamp Set onto white cardstock with black ink and trim it out into a small strip. Adhere the dragon and sentiment to card front with foam adhesive.
Modeling Paste & Watercolor Powders
White modeling paste is also perfect for mixing with colored media to create colored pastes or sand and chunky glitter for textured pastes. I created a colorful textured background using watercolor powders for this pretty floral hello card.
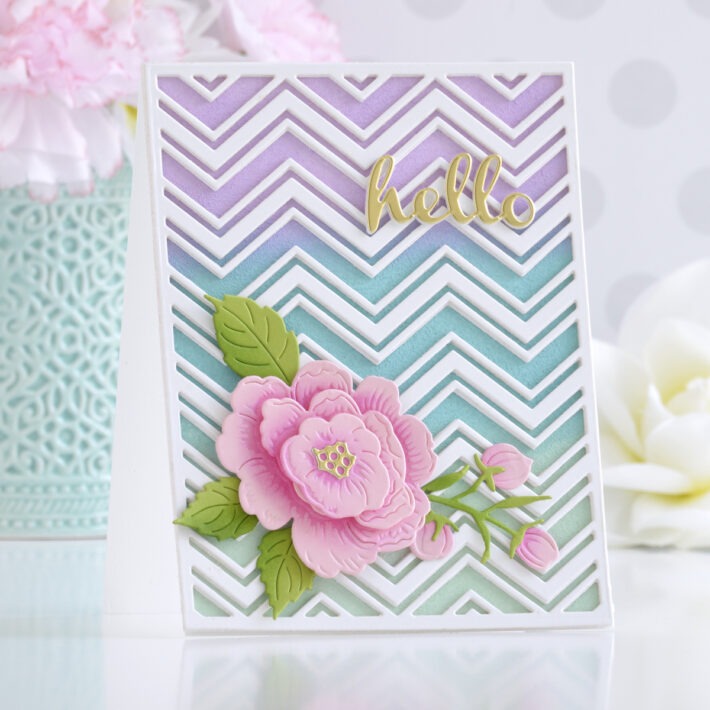
Mix a small amount of Terre Verte, Turquoise, and Wisteria ColorSparx into a dollop each of white modeling paste to create three pastel pastes. Apply the pastes to a piece of white cardstock using a foam blending tool and a pouncing motion for lots of texture.
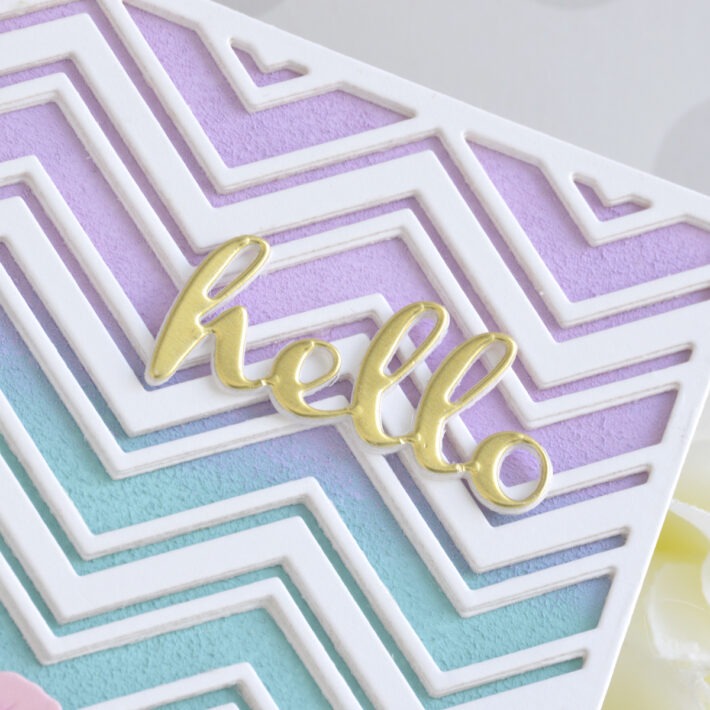
Overlap the colors slightly when applying to blend them. This close-up shows the stucco-like texture you can achieve using the pouncing motion, but try swiping, swirling, and splatting for other fun looks! Once dry, add the panel to a top-folding A2-sized white card base.
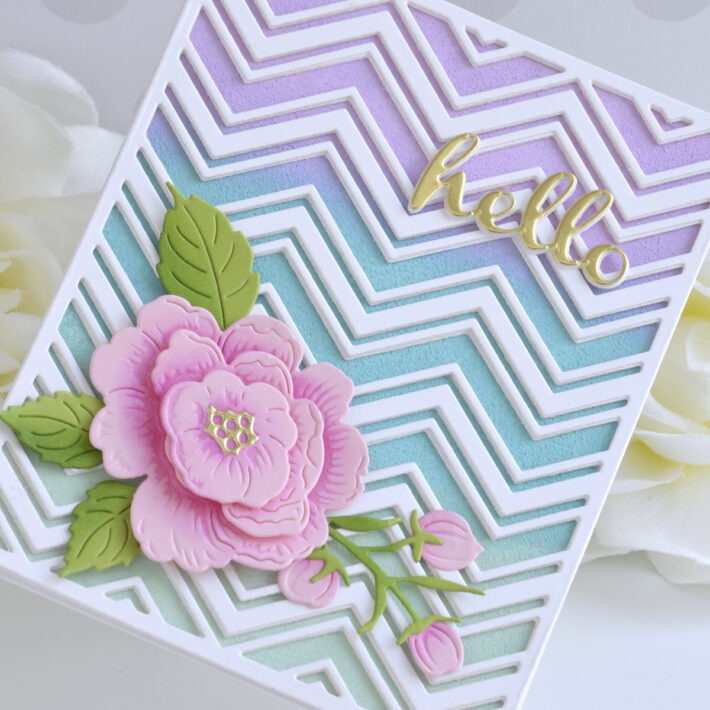
Die-cut white cardstock three times using the Zig Zag Chevron Die Set and stack the layers with liquid glue before adhering them on top of the card front with more liquid glue. (Place under a heavy book while drying to ensure a strong hold.) Die cut Fruit Punch, Mirror Gold, and Rainforest Cardstock using the flower, leaf, and sentiment dies from the Vintage Florals Die Set. Blend white pigment ink around the edges of the flower layers before adhering together with foam adhesive. Add the flower cluster and sentiment to the front of the card with liquid glue and foam adhesive.
Bonus Idea!
Lastly, after applying each color of paste to my cardstock for the card above, I swiped the remaining paste from my sponge applicator onto another panel of white cardstock and realized I was creating another pretty background. I only added a bold sentiment and a little butterfly to create this clean and simple thank you card.
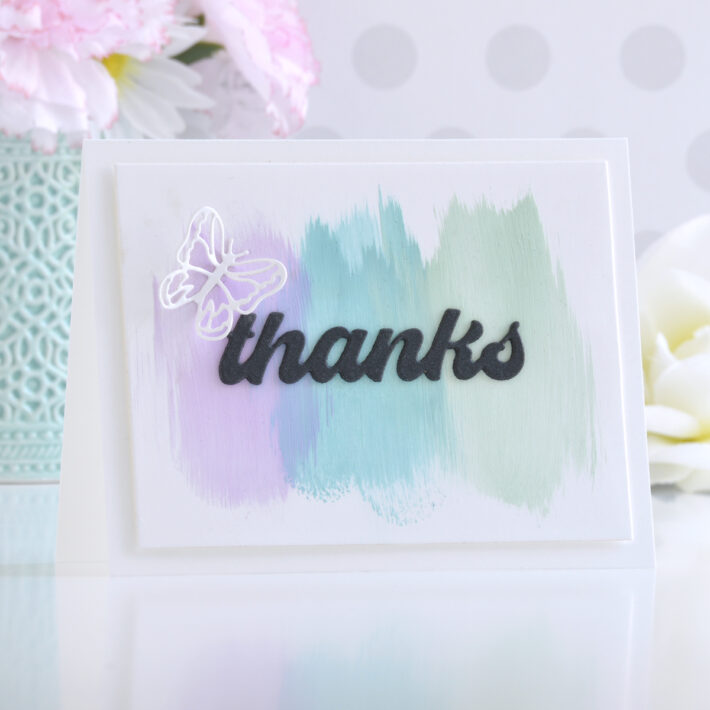
Mix a small amount of Terre Verte, Turquoise, and Wisteria ColorSparx into a dollop each of white modeling paste to create three pastel pastes. Apply the pastes to a piece of white cardstock using a foam blending tool and a swiping motion, overlapping the colors for a slightly blended look.
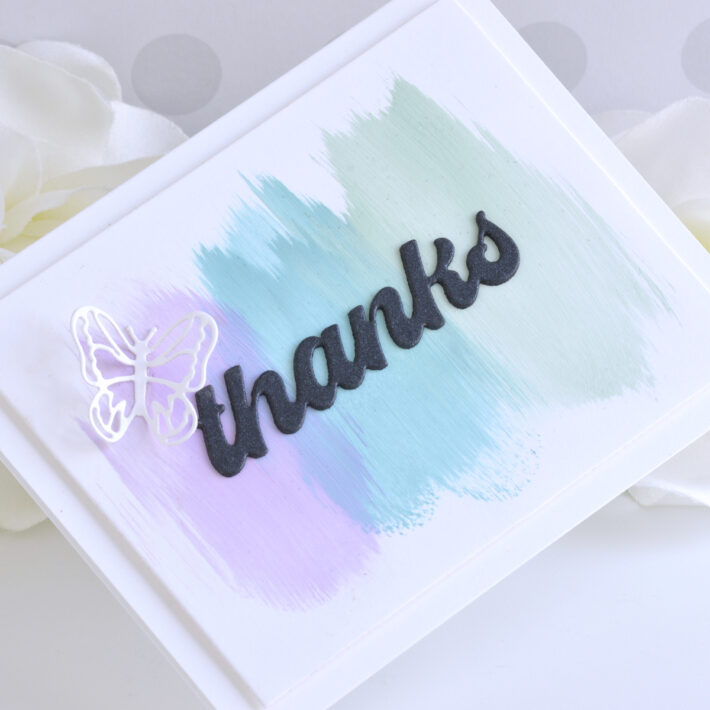
Trim the panel to 3.75” x 5” and add it to a top-folding A2-sized white card base with foam adhesive. Die cut Brushed Black Cardstock three times using one of the sentiments from the Fresh Picked Sentiments Die Set and stack them before adhering to the card front with liquid glue. Die cut white cardstock with the smallest butterfly from the Brilliant Butterflies Die Set and adhere next to the sentiment.
Spellbinders Supplies:

Other supplies
White heavyweight cardstock, Mowed Lawn and Black Soot Distress Ink, foam ink-blending tool, white pigment ink pad, Nocturne Versafine Clair Ink, tape runner, foam adhesive.
I hope you enjoyed these fun background techniques and thanks so much for stopping by today. You can find more inspiration over at my blog AnnieBWills.com or on Instagram.

Cardmaking Inspiration | Let’s Get Together Card Featuring Party Food with Yana
Send Hugs Through Cards with Leica Palma