New Let’s Celebrate Collection: Mother’s Day with Mauve and Gold
Hi friends! Emily Midgett here with you today on the Spellbinders blog, and I’m thrilled to be sharing some inspiration using the utterly luscious new collection from Yana Smakula called Let’s Celebrate.
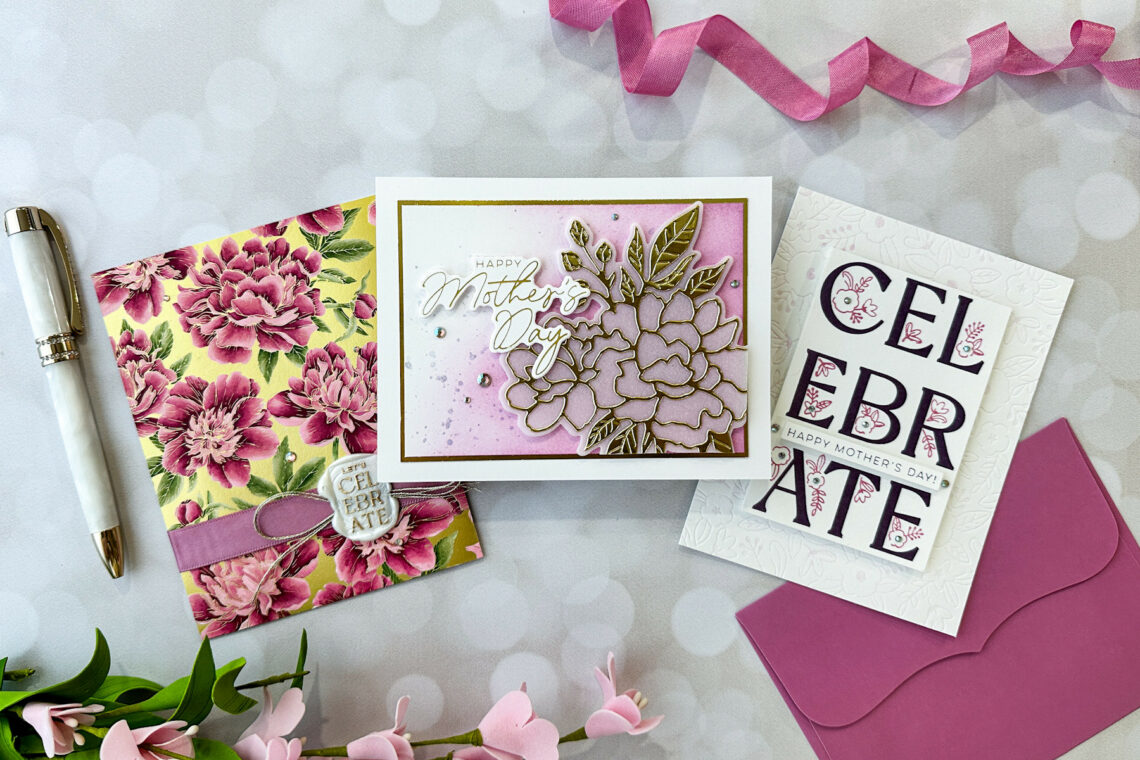
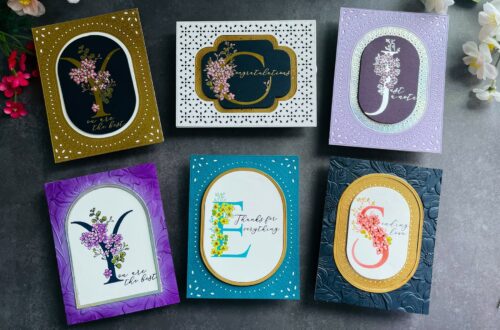
Yana’s signature style with elegant florals and beautiful calligraphic sentiments is laced throughout this collection, and it was a true pleasure to play with! The shining star of the collection, for me at least, is the divine Peony Better Press Plate. The Better Press Plates work beautifully with both the Better Press system and the Glimmer Hot Foil System, and both methods work incredibly well with this exquisitely detailed press plate. Whenever I am creating a card set, I like to first select my color combination and allow that to lead me creatively, and for today’s project suite, I decided to use mauve and gold as the jumping-off point for my trio of Mother’s Day projects. Mauve and gold are a perfect color palette for a Mother’s Day card, in my opinion!
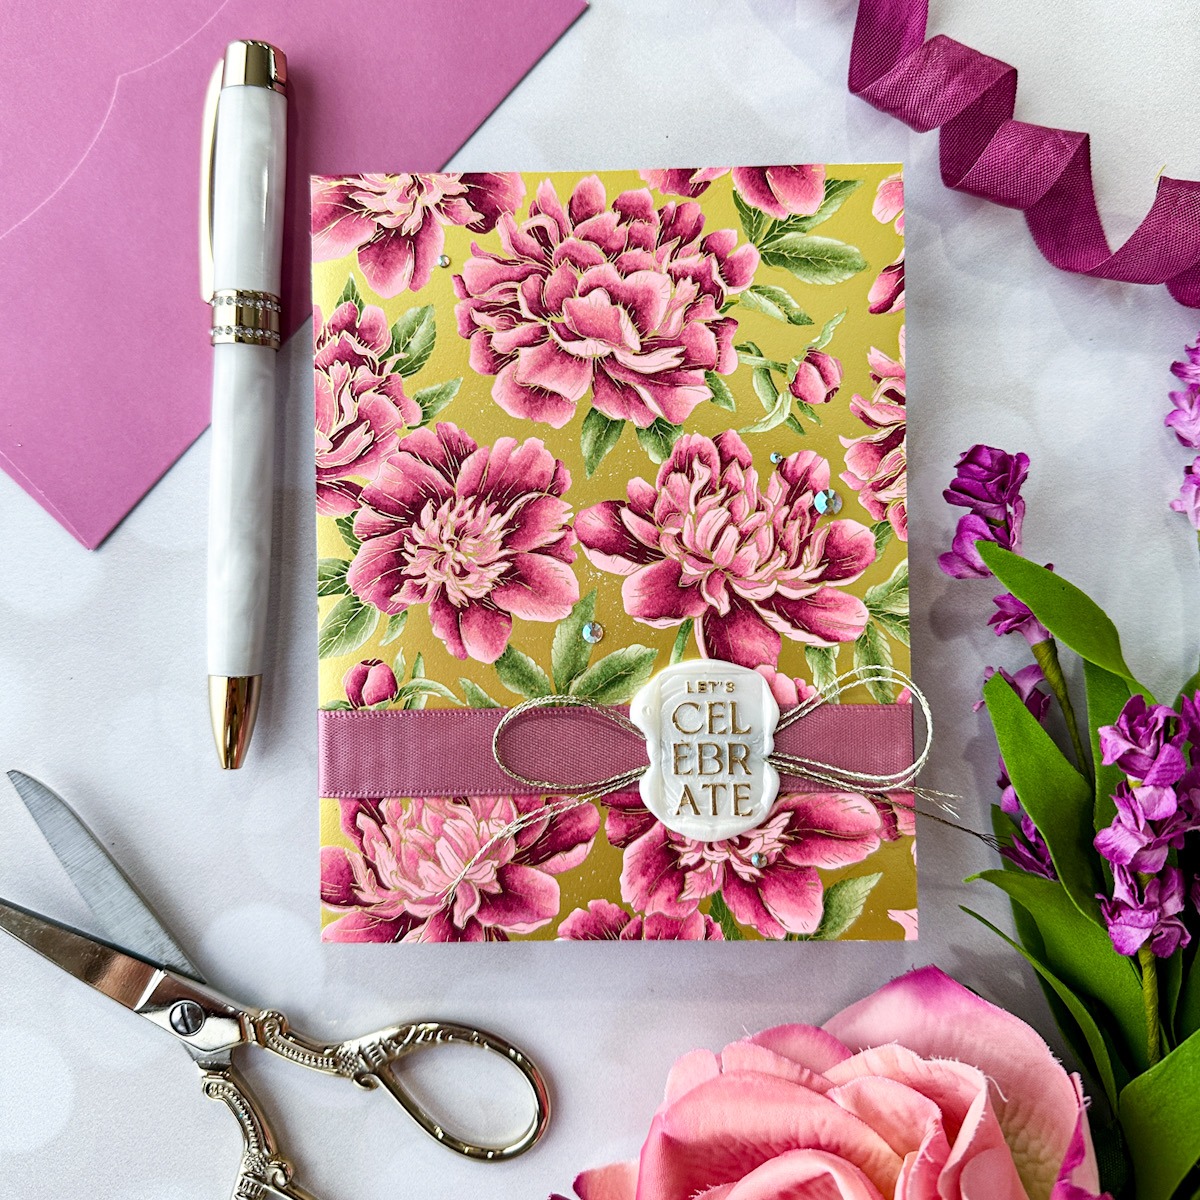
Whenever I am creating a card set, I like to first select my color combination and allow that to lead me creatively, and for today’s project suite, I decided to use mauve and gold as the jumping-off point for my trio of Mother’s Day projects. Mauve and gold are a perfect color palette for a Mother’s Day card, in my opinion! I pulled out the Mulberry and Garnet inks from the Better Press Ink line, Old Rose Satin Ribbon, Gold Metallic Cord, and some Mirror Gold cardstock to set my color palette firmly in my mind’s eye.
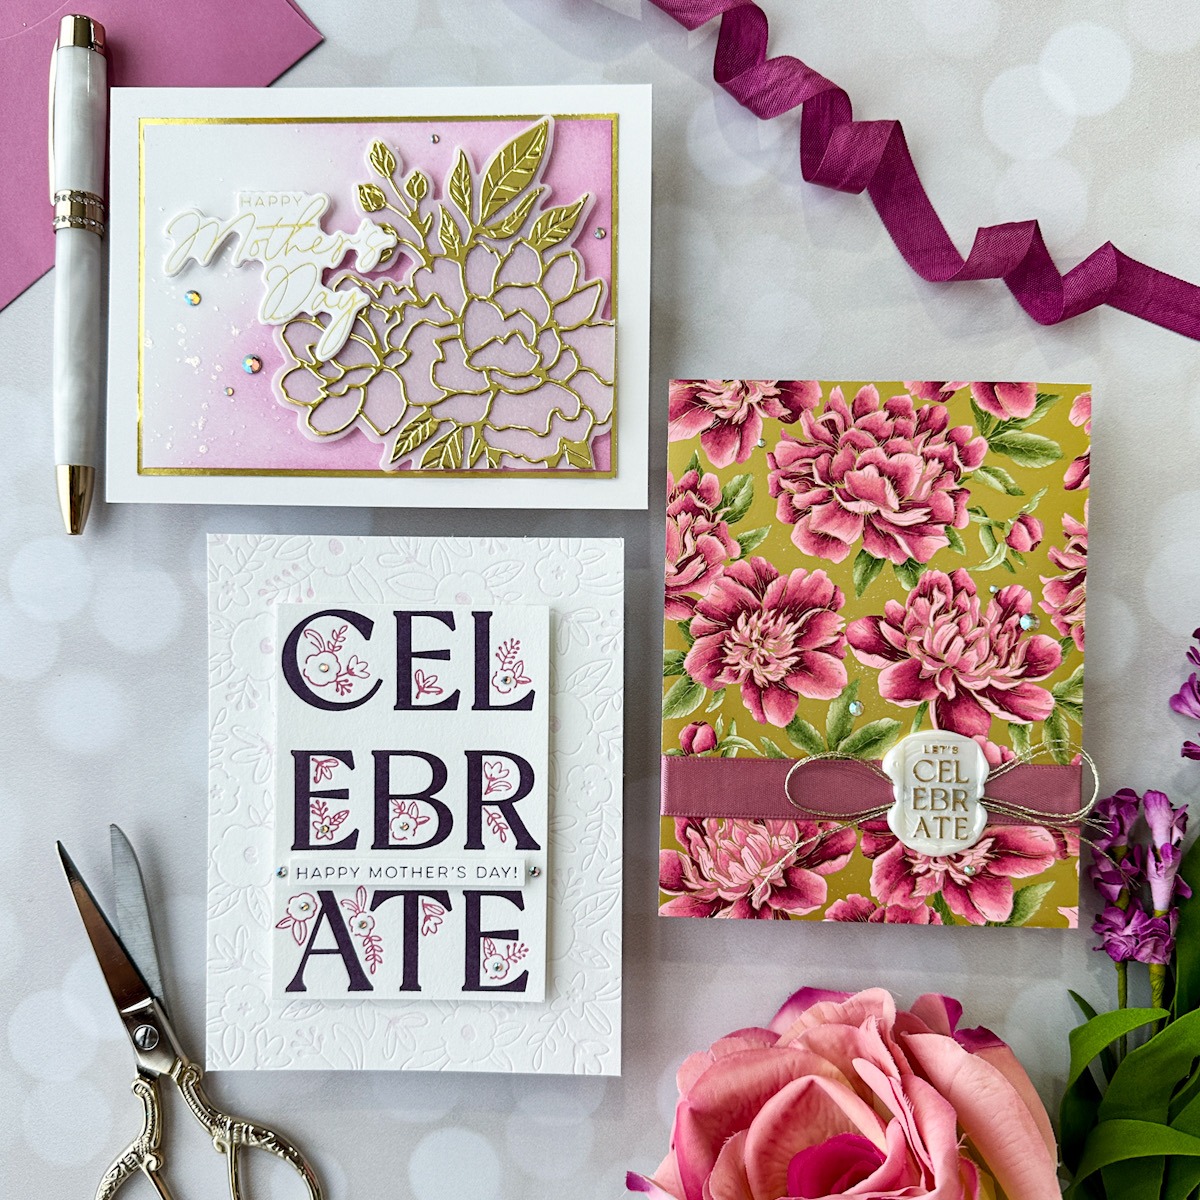
For my first project, I allowed the details on the Peony Better Press plate to quite literally shine by pairing it with some Matte Gold Glimmer Foil.
- Hot foil the Peony Better Press Plate onto some alcohol marker-friendly white cardstock using your choice of hot foil.
- Use alcohol markers such as OLO Markers to add color and detail to the floral images.
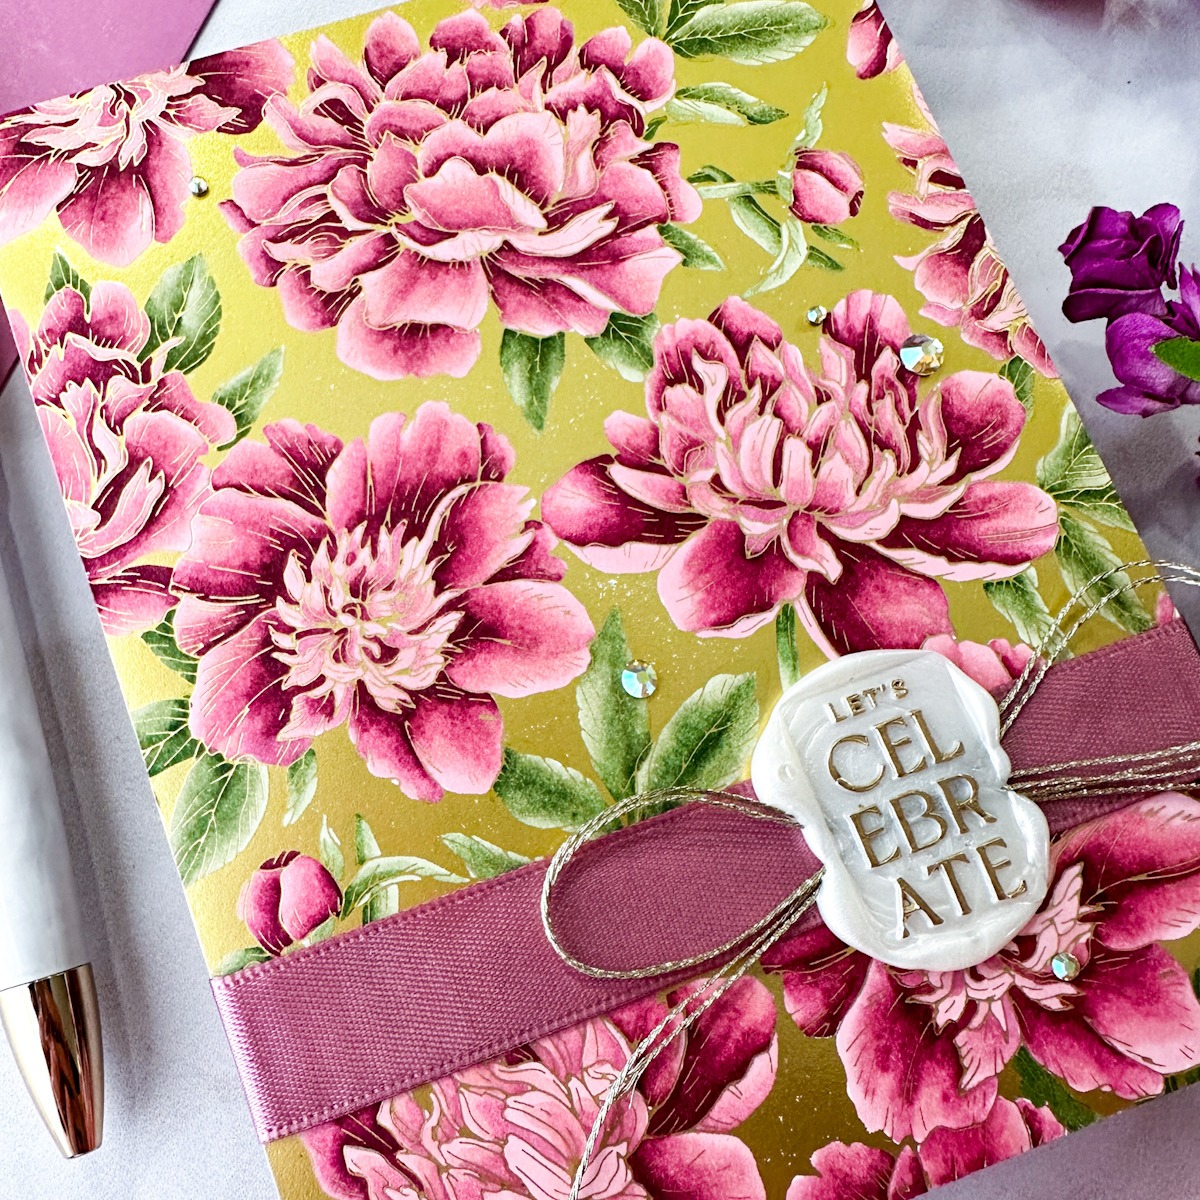
- To create the wax seal, first tie a wide bow with two strands of gold cord, placing the finished bow on your silicone mat.
- Melt white pearl wax beads, pouring them in an oblong on your silicone mat directly over the center of the gold bow.
- Place the Let’s Celebrate Wax Seal over the melted wax and allow it to cool.
- Lightly brush a gold paint marker over the raised letters on the cooled wax seal to make them stand out and coordinate with the gold foiled background.
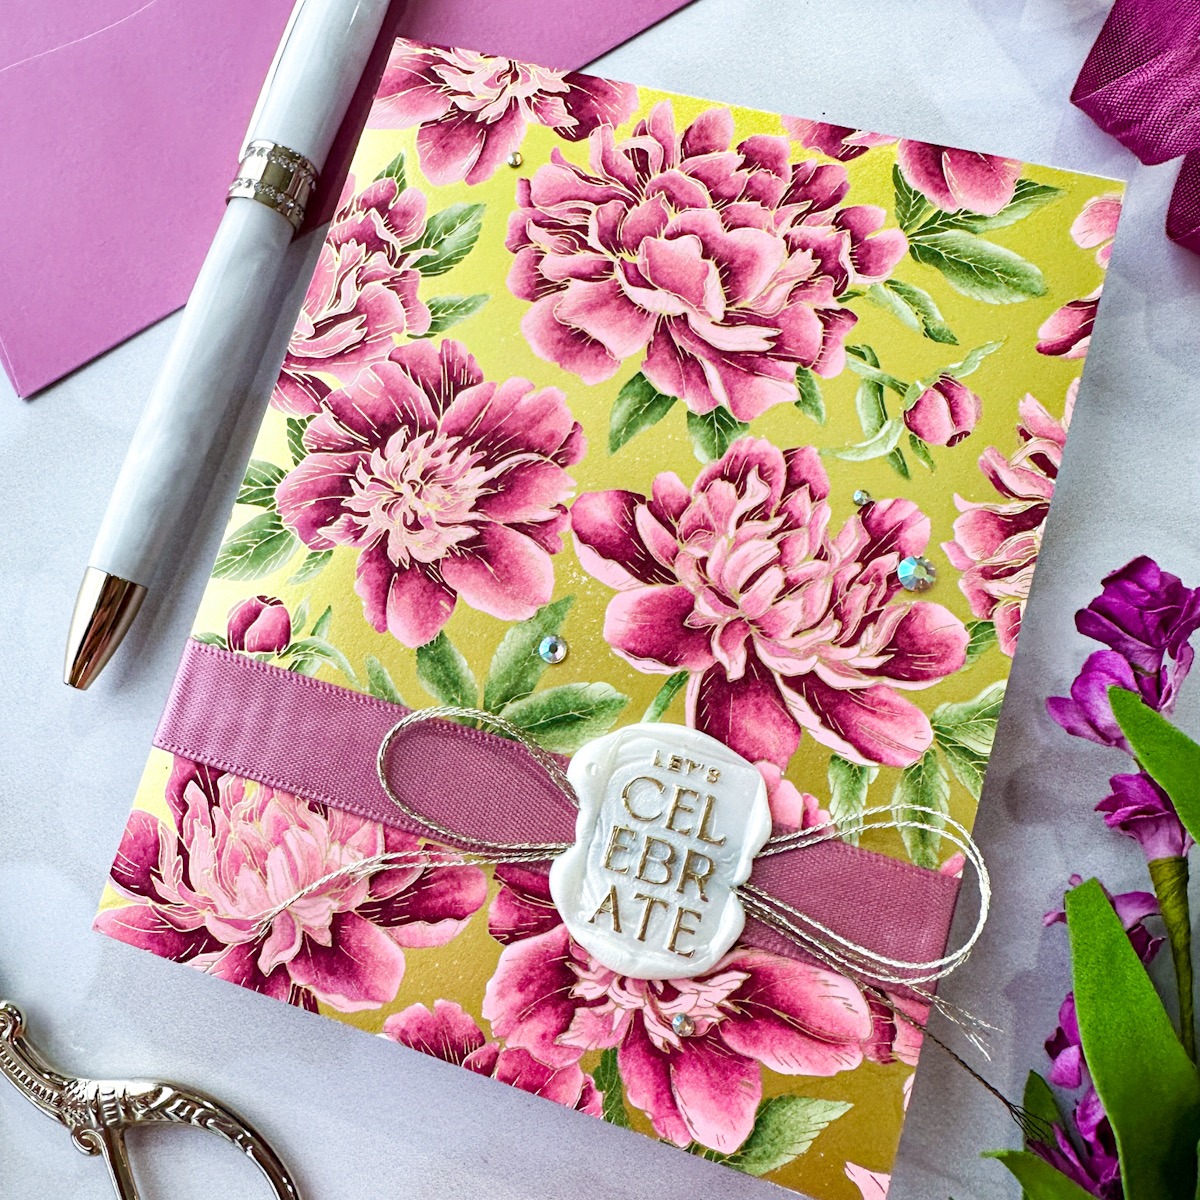
- Wrap a length of ribbon around your colored card front, adhering it on the back with strong double-sided adhesive.
- Use a Wax Seal Adhesive to add the completed wax seal and gold cord directly over the ribbon, offsetting it to one side.
- Finish the card with some sparkling Aura AB gems!
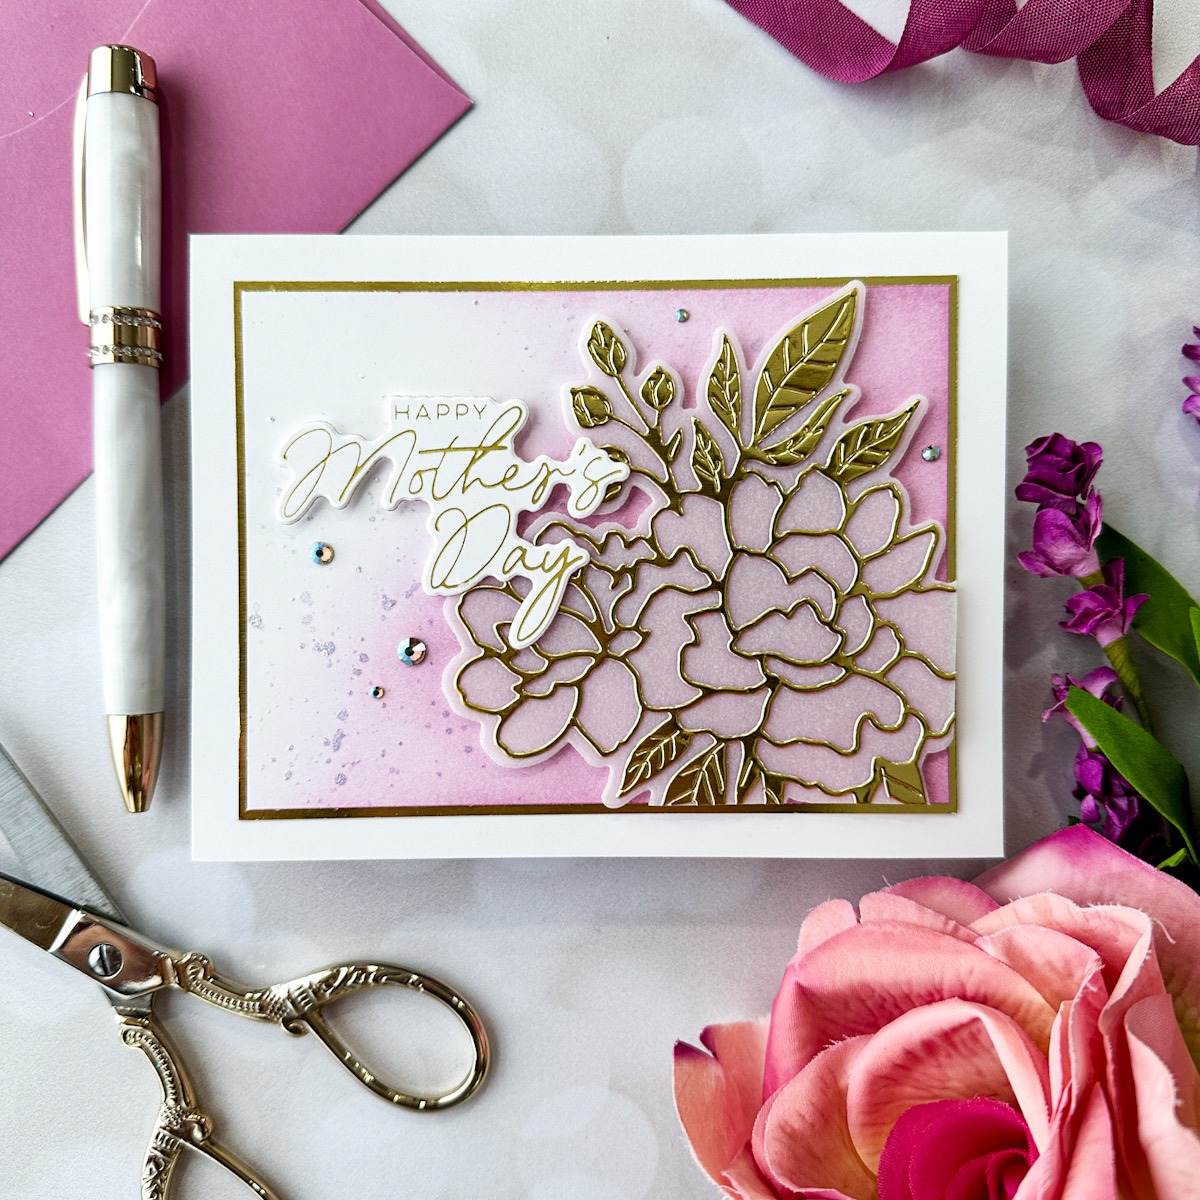
For my second card, I created a simple and elegant card with lots of shine and sparkle using the spectacularly detailed Peony Celebration die. This die is very intricate, and I wanted to let those details be the star of the show with Gold Mirror cardstock, which also cuts like an absolute dream.
- Start by die-cutting the detail layer of the Peony Celebration die with Spellbinders Mirror Gold cardstock.
- Back the detailed layer with the shadow layer cut from heavyweight vellum.
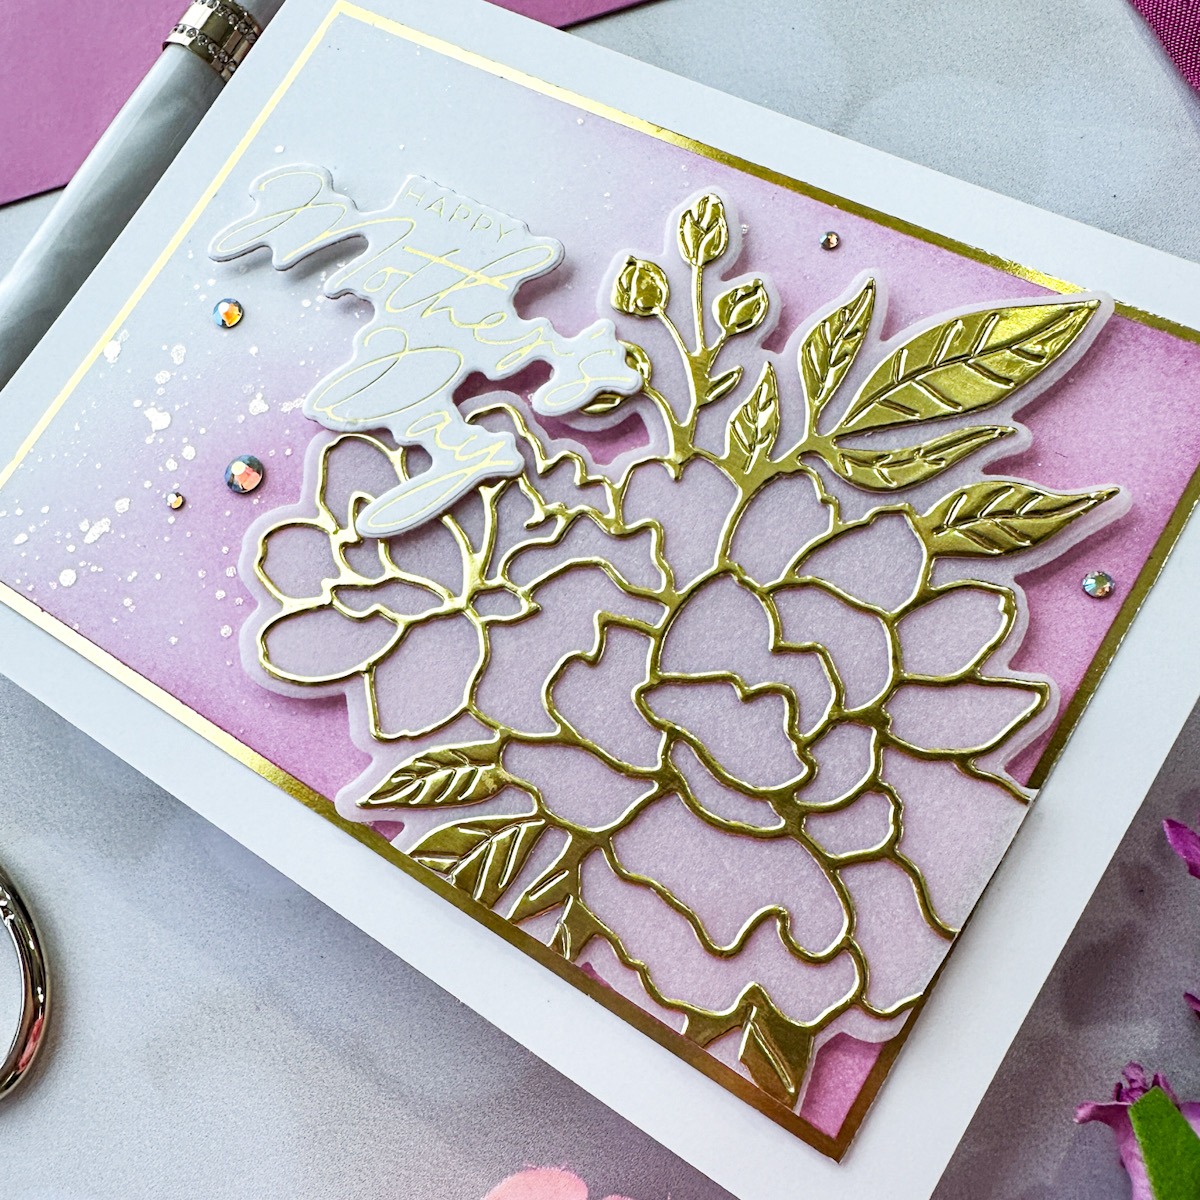
- To add color behind the simple die cut, I blended some mauve ink on the corner of a panel of white cardstock using a blending brush.
- Splatter some sparkling glitter watercolor with a paintbrush on the blended area.
- Use foam squares to pop up the peony die cut in the corner of the blended panel, trimming off any excess from the edges.
- Mat the blended panel with a slightly larger piece of Gold Mirror cardstock.
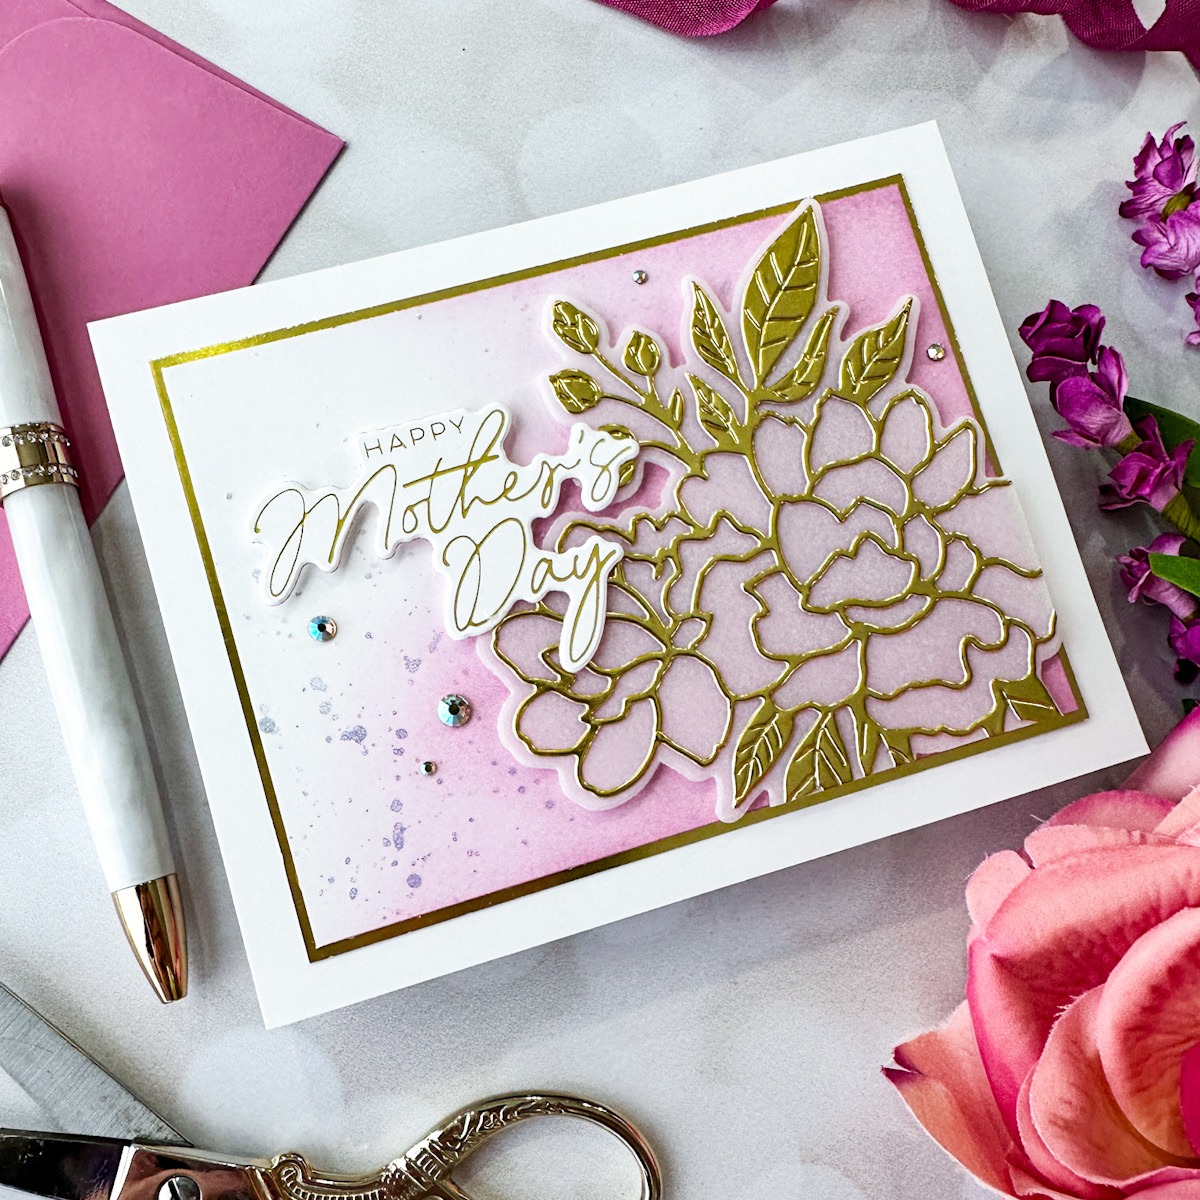
- Hot foil the Mother’s Day greeting from Let’s Celebrate Sentiments using Matte Gold hot foil, then die cut with the coordinating die.
- Add the die-cut greeting to the blended background using more foam squares, tucking it next to the peony die-cut.
- Add a few Aura AB gems for even more sparkle.
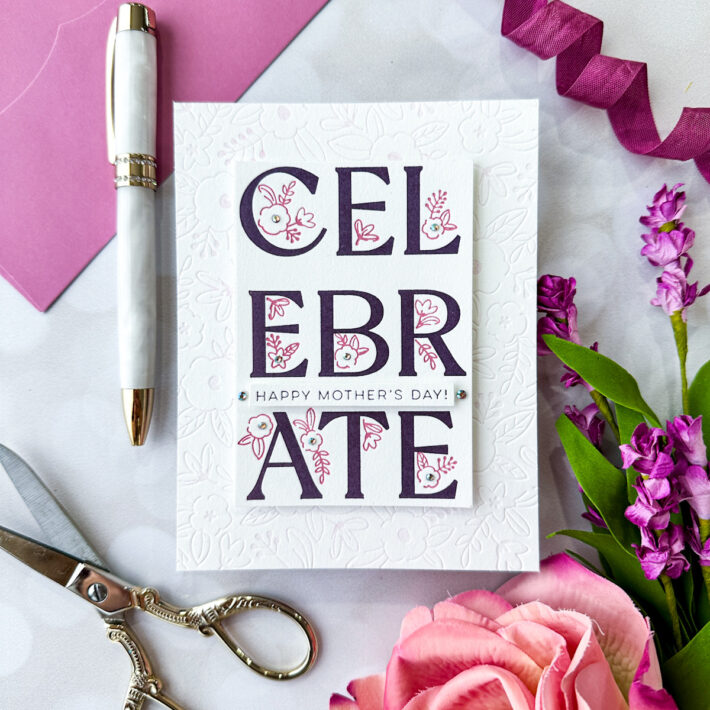
For my final project, I decided to use the Floral Celebration Better Press Plate and Celebrate Flowers Registration Press Plate sets together. The delicate sprigs of flowers on the Celebrate Flowers Registration Press Plate are a perfect match for the floral background of the Floral Celebration Press Plate!
- Start by inking up the Floral Celebration Press Plate with Garnet Better Press Ink, then run it through your machine with a panel of letterpress paper.
- Without reinking or moving your Press Plate, place another panel of Better Press paper on your Platen and run the paper through again, creating a very subtly colored letterpress impression on your clean paper and adding exquisite texture.
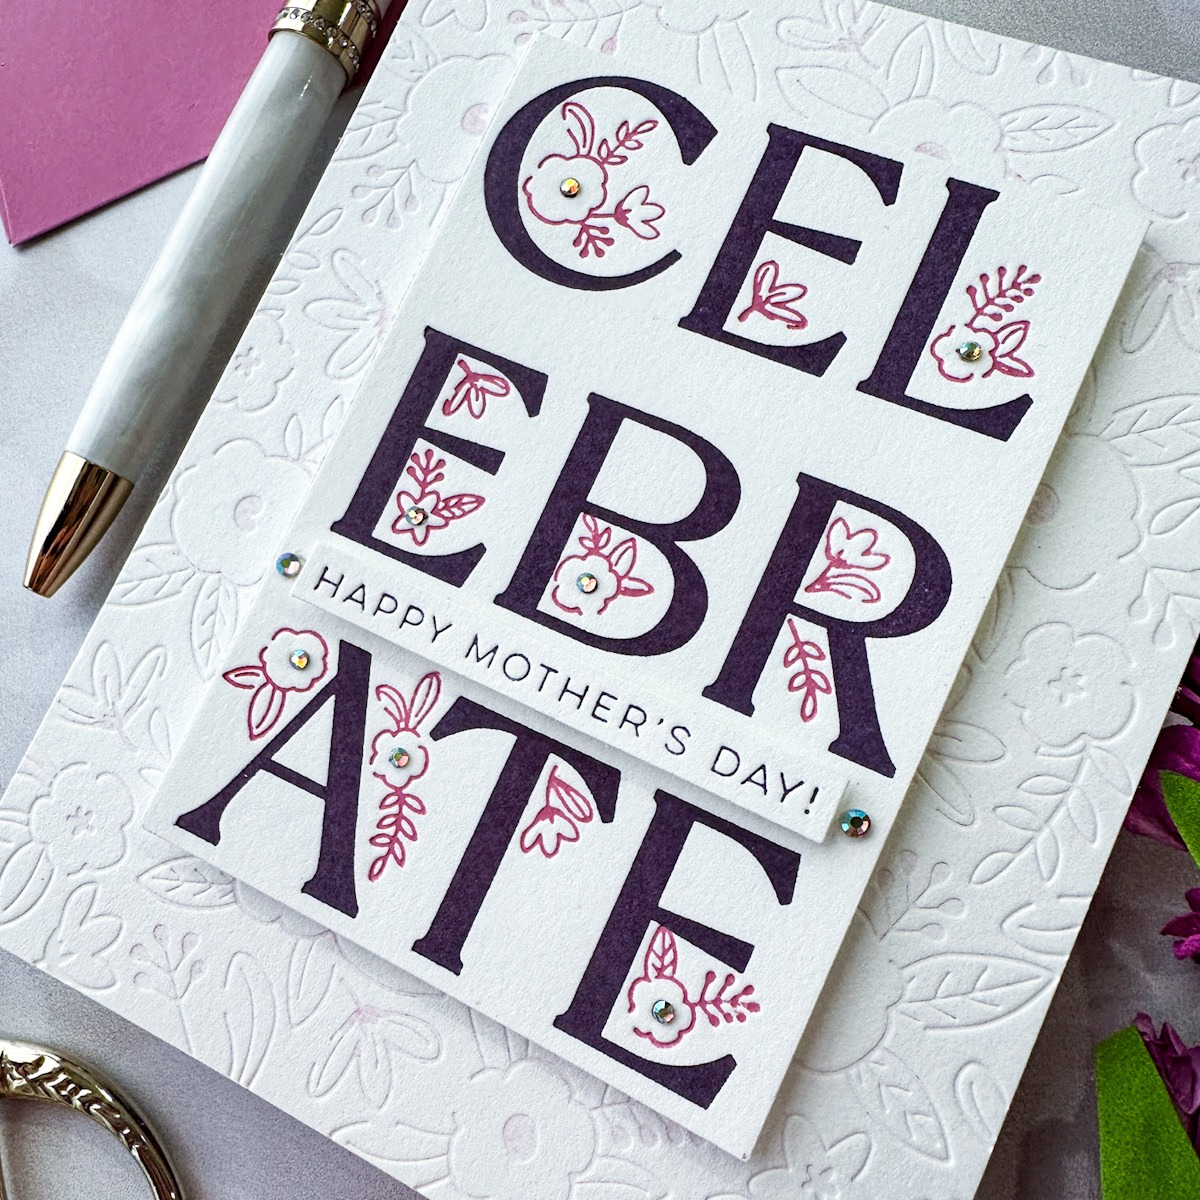
- For the greeting, use Mulberry Better Press Ink to impress the large “CELEBRATE” and “Happy Mother’s Day” greetings from the Celebrate Flowers Registration Plate set onto Porcelain letterpress paper.
- Using the printed acetate guide included with the Celebrate Flowers Registration Plate set, line up the floral sprigs and ink it up with Garnet Better Press ink.
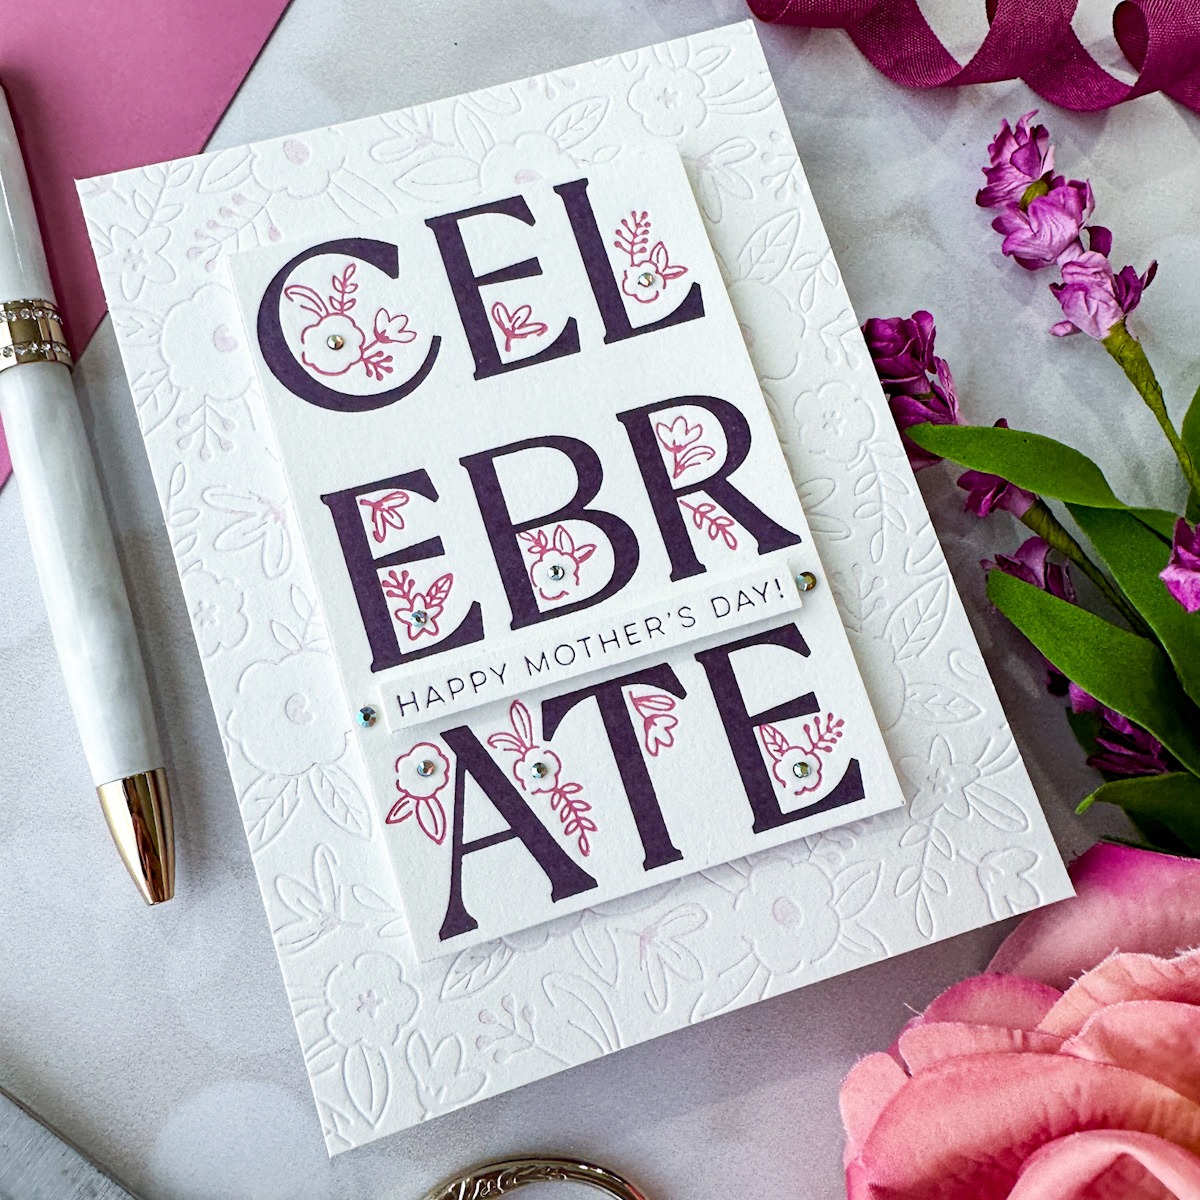
- Using a trimmer, cut the letterpress sentiments down.
- Adhere the small sentiment strip on the larger CELEBRATE piece using foam squares.
- Pop both sentiment pieces up in the center of the letter pressed panel using foam squares.
- Embellish the card with Aura AB gems in the center of the flowers on the sentiment panels.
Well, that’s all for my projects today! Being able to use the Better Press Plates with both the Glimmer machine and the Better Press machine opens up so many unique possibilities for your crafting time. The possibilities are limited only to your creative imagination! If you’d like to see more of my work, you can stop by my blog over at EmilyMidgett.com or check out my Instagram page @eamidgett. Thank you so much to Spellbinders for having me as their guest and allowing me the opportunity to work with these dazzling new products! Thanks so much for reading, and have a marvelous day!
Spellbinders Supplies:

Other Supplies
Concord and 9th Briar Rose ink, Hammermill white cardstock
BetterPress Christmas Collection – Card Inspiration with Annie Williams
Every Occasion Floral Alphabet Cards