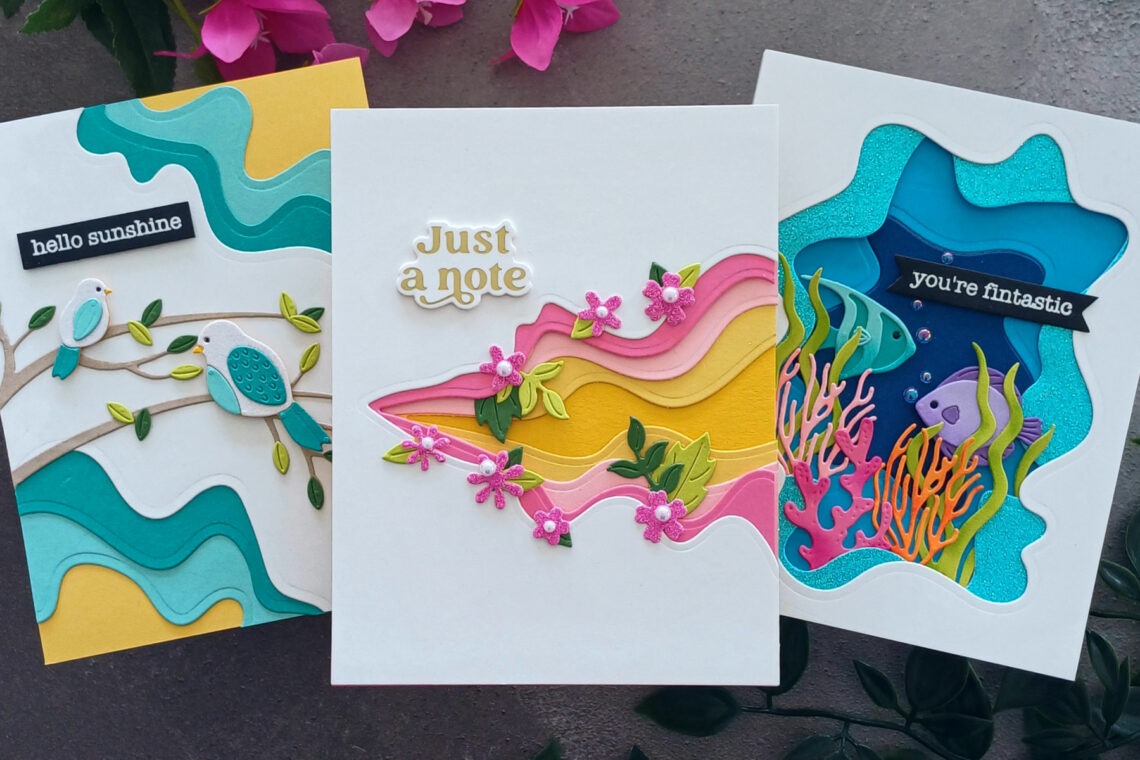
Creating Super Fun Layered Designs and Incorporating Sparkle Into Your Cards
Hello there crafters! Lisa Tilson is here with you today on the Spellbinders blog and as always, I am excited to be here! Today we are going to be taking a look at the super fun Tunnel Scapes Collection designed by Vicky Papaioannou. I have absolutely loved working with this fun, playful collection. I think the modern, quirky vibe of the three tunnel scape sets is so unique and the opportunities to play with color and design are endless. The collection consists of three sets of etched dies which allow you to create these flowing layered tunnels. You then have a plethora of different options to add to the tunnels, whether it be marine life, birds, flowers, or sky-themed images.
I recently wrote a blog post here on the Spellbinders Blog about creating with Glitter Cardstock. With that in mind, I thought for my cards today, I would use some of those ideas and so glitter cardstock features on all three cards. Let’s get started with my three cards.
Just A Note
For this first card, I played with the Rainbow Slice Etched Dies which is a set of four dies which you create your tunnel with. Along with those, you get LOTS of flower and foliage options which you can use to decorate your tunnel!
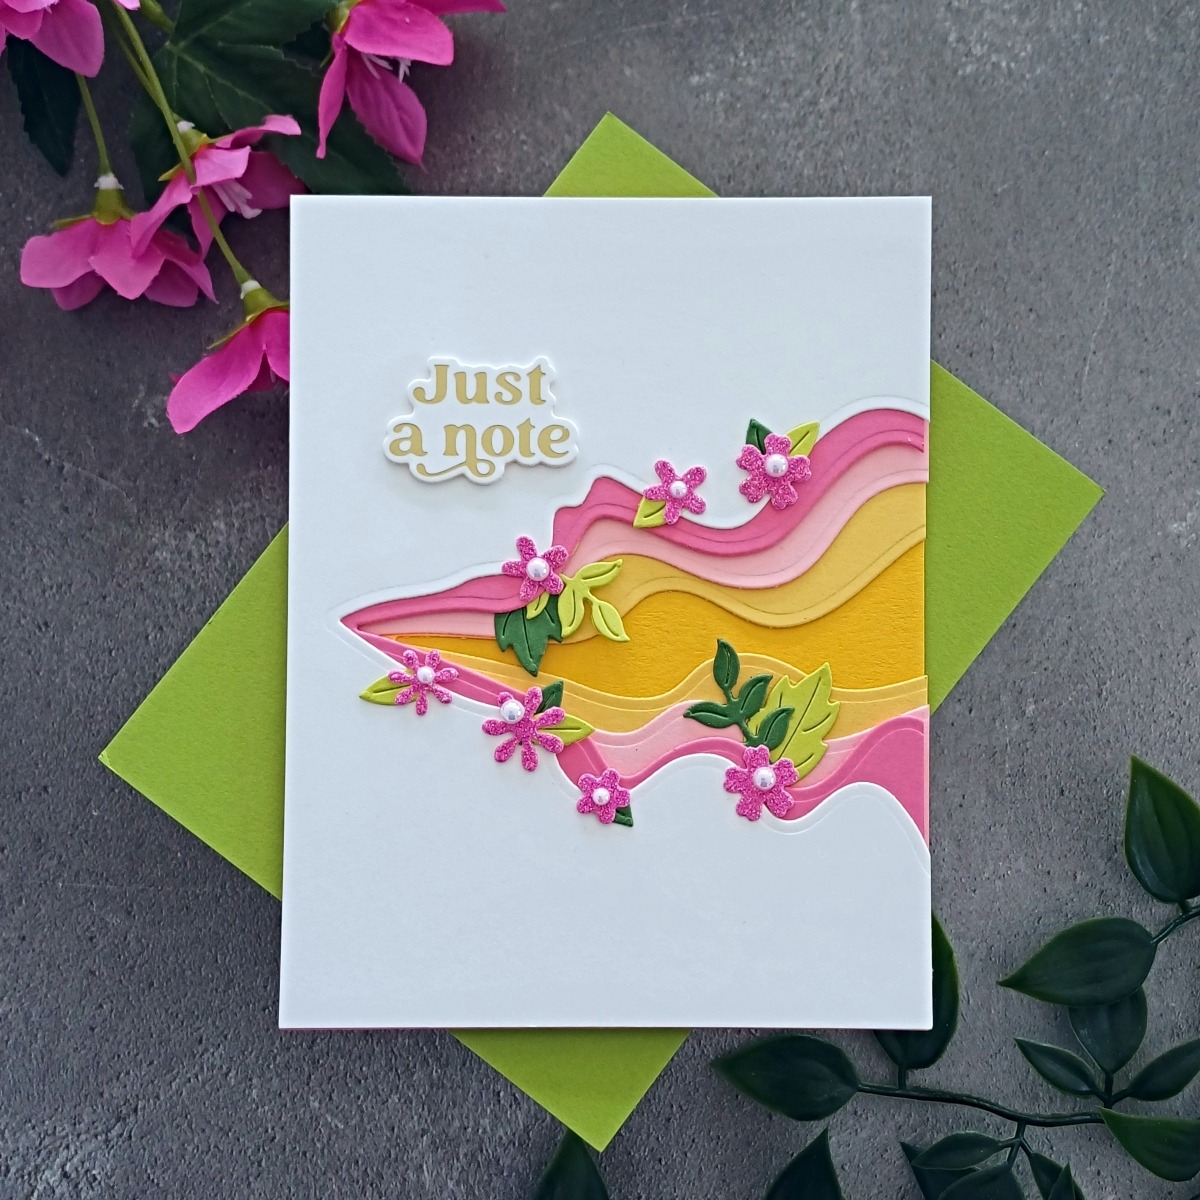
So cute, right? With each of the tunnel die sets, you can choose whether to use all the layers, or just a few. I’ve used all the layers on my cards today.
Tip – for the first (top) layer, start with the largest die. Once that is cut, you can insert another panel of cardstock behind it and easily see where to place the next die. Cut that out and then add your third panel under the second, line up the third die and cut that. Then if there is a fourth layer, you can finish with that.
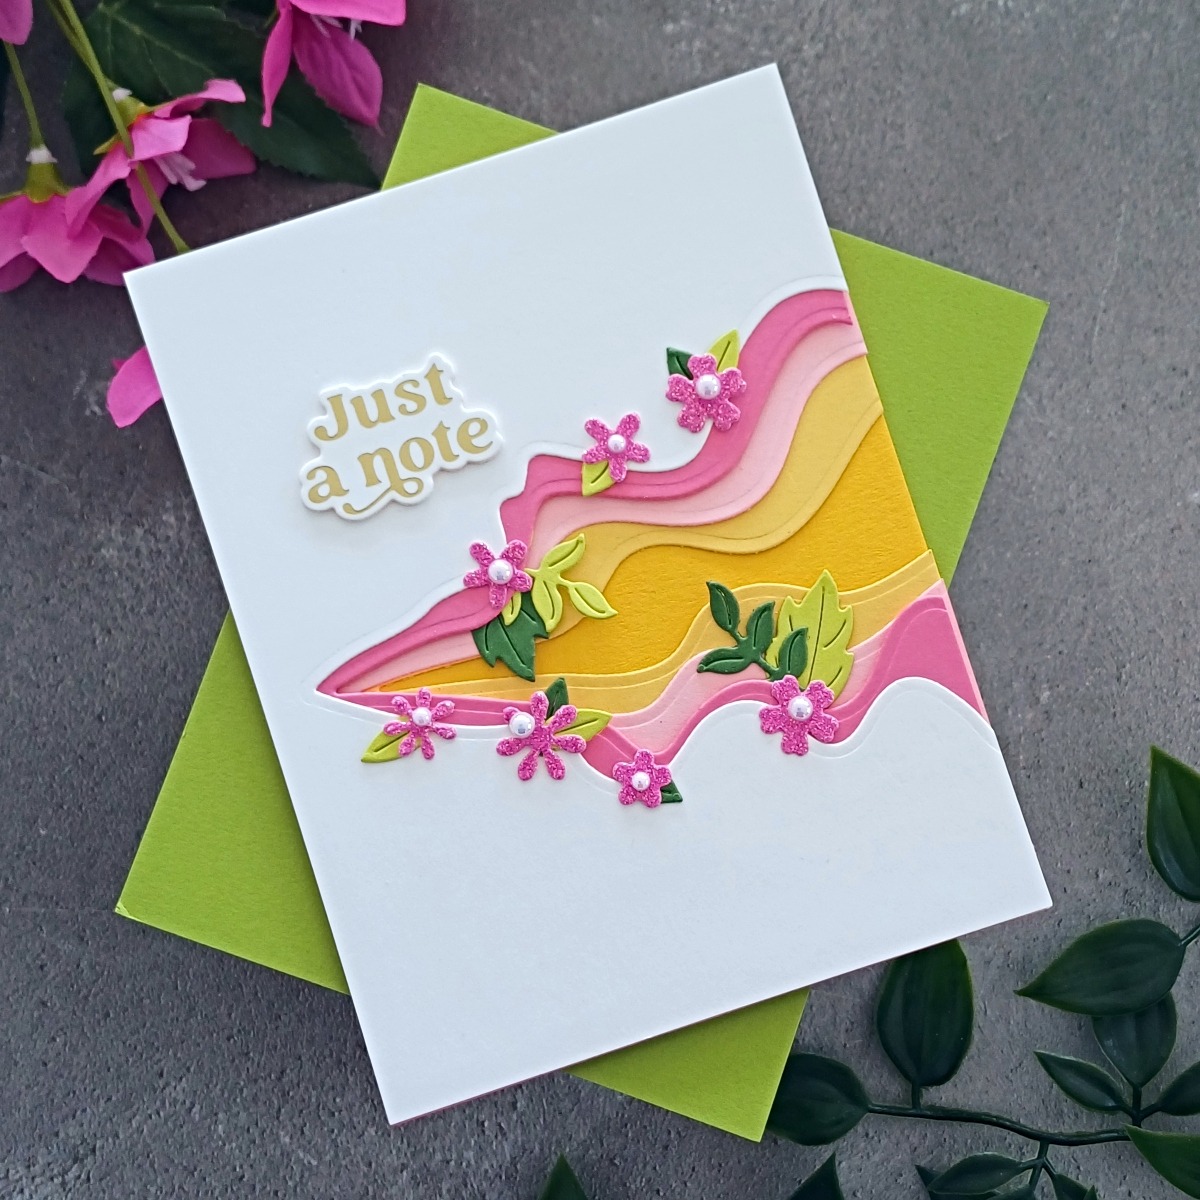
So, I began by taking a panel of 80lb Neenah Solar White cardstock and placing the largest of the Rainbow Slice Etched Dies on top. I secured it with Best Ever Craft Tape and then ran it through my Platinum 6 Die Cutting Machine. I then worked my way through the different layers. The second layer was lined up and die cut from Fruit Punch Color Essentials Cardstock, the third from Pink Sand, and the fourth from Beeswax. I popped some thin foam tape onto the back of the Fruit Punch layer and adhered all the other layers together before adding it onto a panel of Saffron Colour Essentials Cardstock.
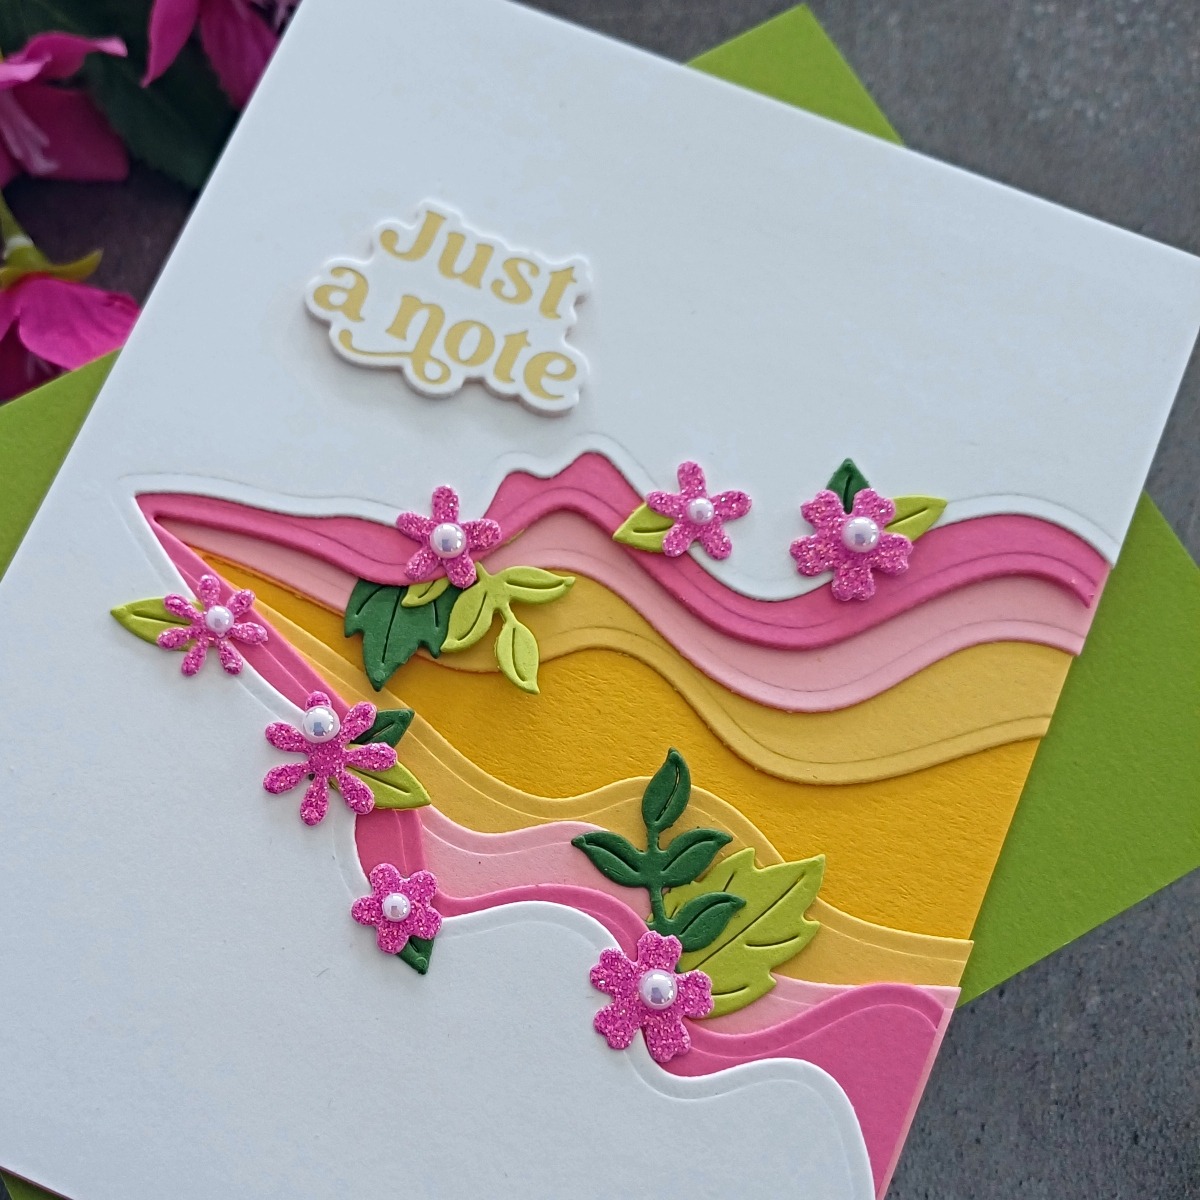
I then took some of the flower dies from the Rainbow Sliced Etched Dies set and cut them from the dark pink glitter card included in the Spring Tones Glitter Cardstock pack. Next I die cut some leaves from Fern and Peridot Color Essential Cardstock. Using Bearly Art Glue, I adhered some of the smallest leaves behind the pink flowers and then adhered them around the top layer of the tunnel. The larger leaves were then just adhered under the Fruit Punch layer (where I had added thin foam tape earlier).
I popped some white glossy pearls from my stash into the flower centers to finish them off. I always love using glitter cardstock on my cards, often in fairly small ways and these flowers look so pretty with all their sparkle!
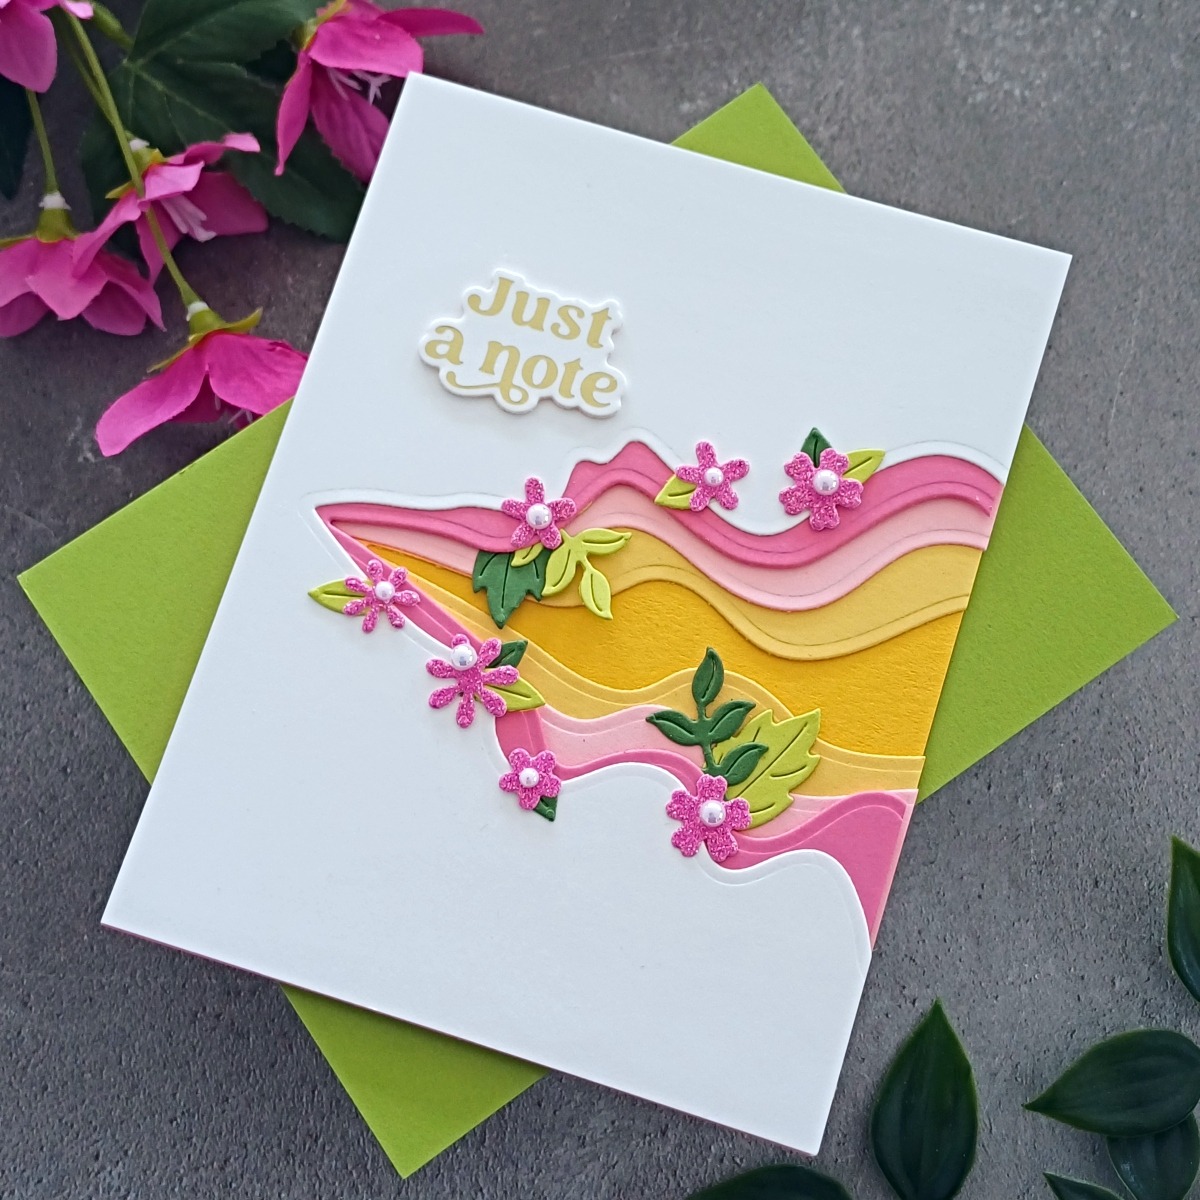
My sentiment is from Must-Have Sentiments Glimmer Hot Foil Plate and Die Set and it was foiled with Matte Gold Glimmer Hot Foil and the Glimmer Hot Foil System. I cut it out with the coordinating die and also cut a couple of extra layers from the white card. These were adhered together to form a small stack and then added onto my white panel.
To finish, I took the completed tunnel stack and adhered it onto a top folding 110lb A2 note card.
Hello Sunshine
For my next card I thought I would use the tunnel dies in a slightly different way. For this card, I used the Underwater Tunnel Etched Dies and there are three dies in this set that create the tunnel effect. These feature in their intended way on my next card but I thought it would be fun to use them just in the corners for this card.
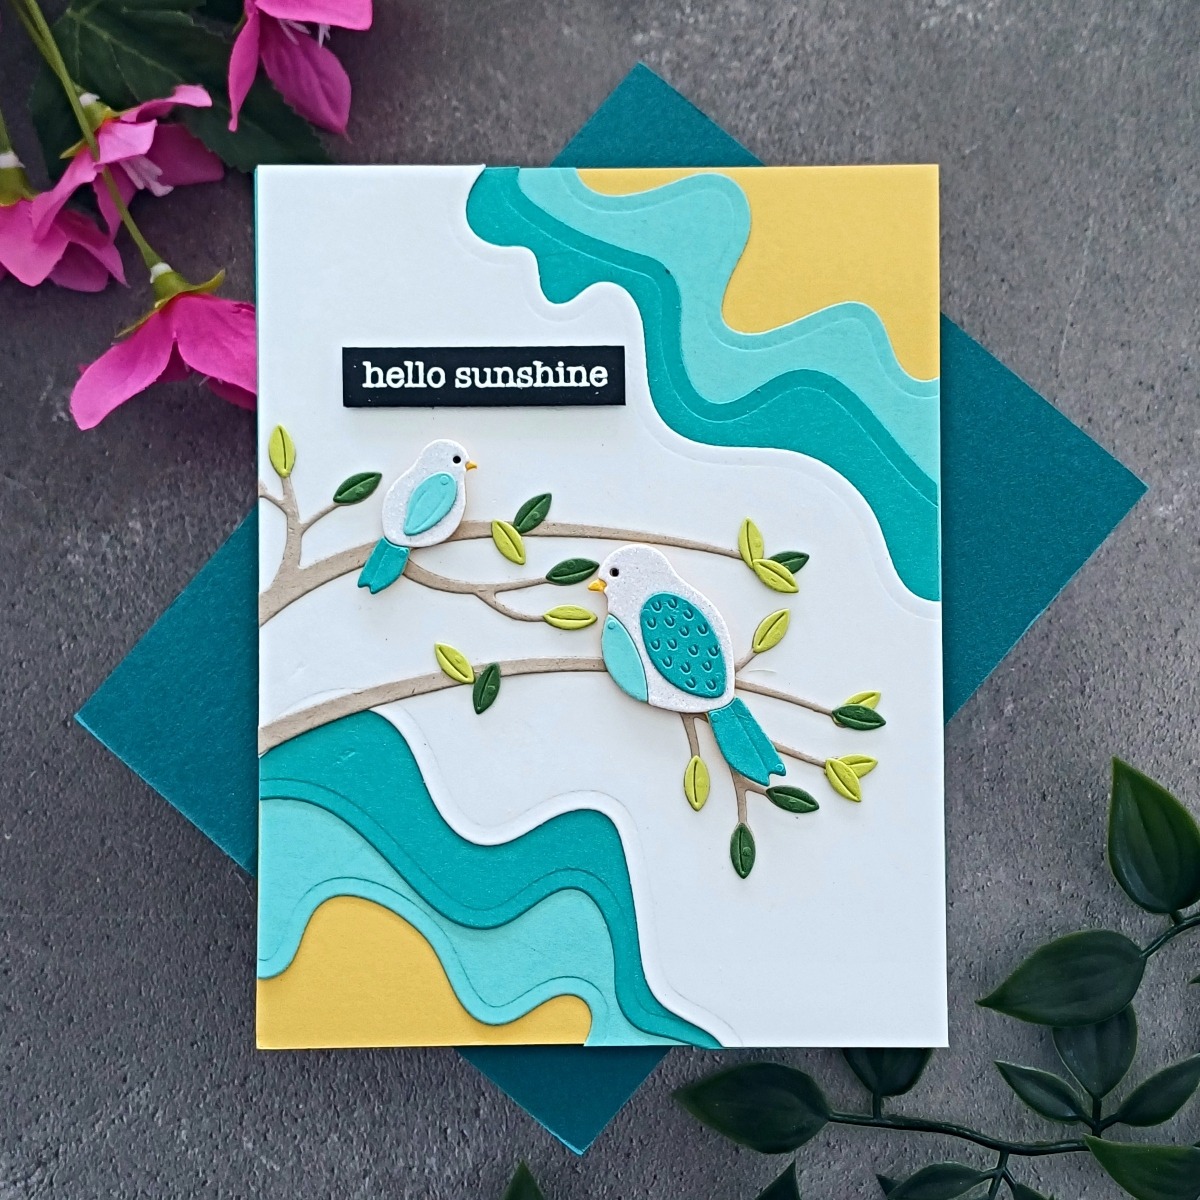
I completed one tunnel corner before moving onto the next as I found that the easiest way of creating the effect. So, once again, I cut my top layer first from 80lb white card, the second from Teal Topaz, the third from Waterfall cardstock. I then moved onto the other corner and repeated the process. Once all three layers were done for both corners, I adhered them together with Bearly Art Glue and then added them onto a panel of Beeswax Color Essential Cardstock.
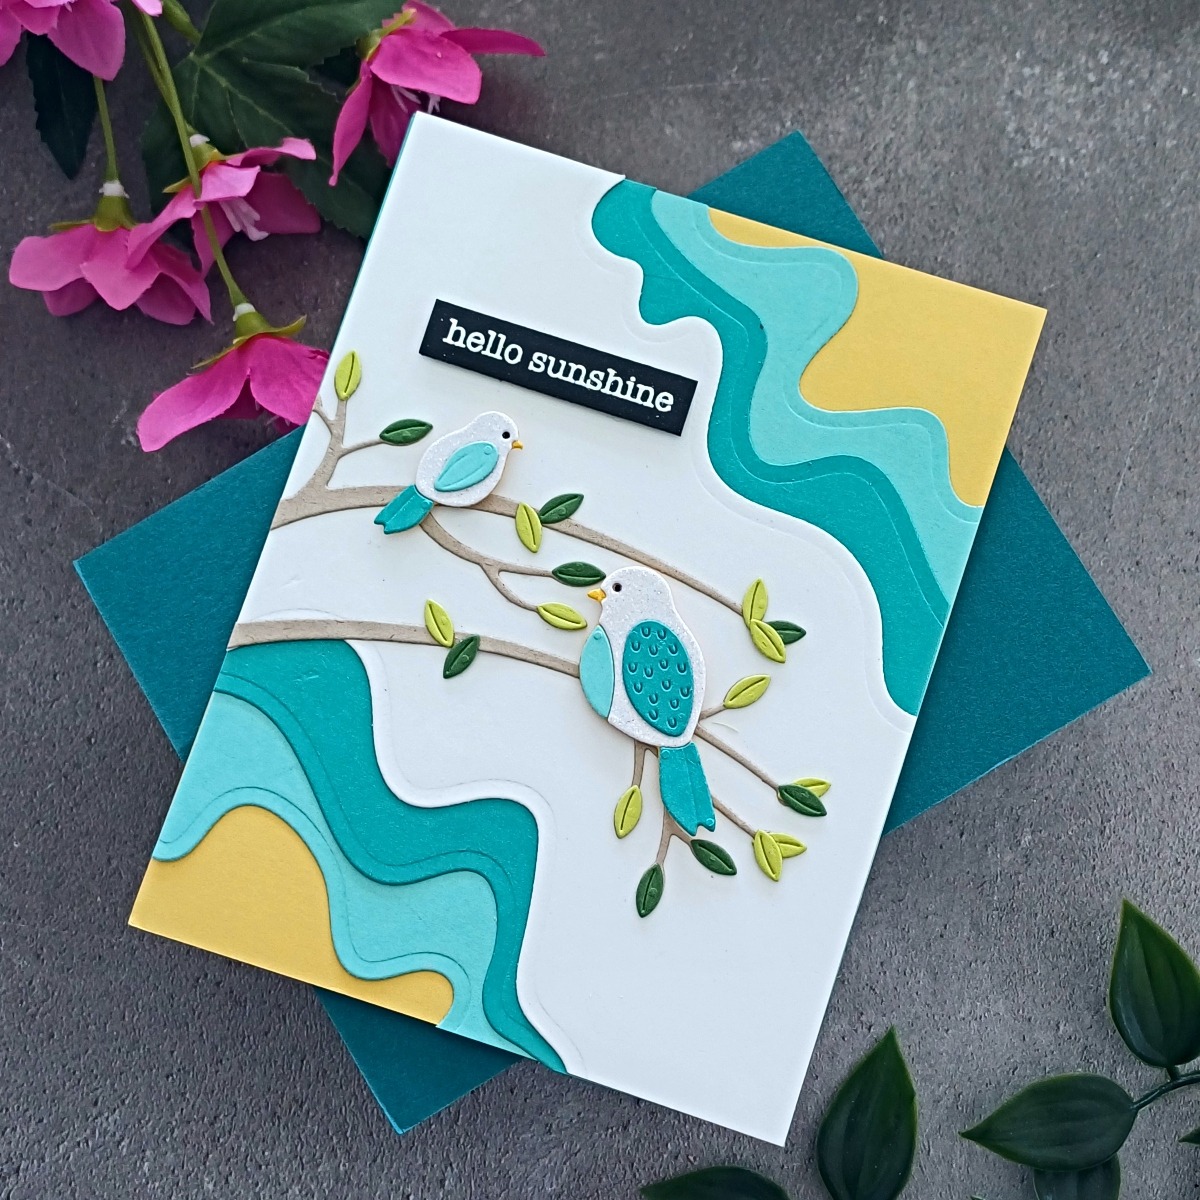
Next, I took the Perched Birds Etched Dies and cut the branches from Neenah Desert Storm and the leaves from Fern and Peridot Color Essentials Cardstock. The birds were die cut using white glitter cardstock (from the Spring Tones Glitter Cardstock pack), Teal Topaz, Waterfall and Beeswax. The base layer of the bird is cut from Beeswax and then the other pieces just adhered on top of that.
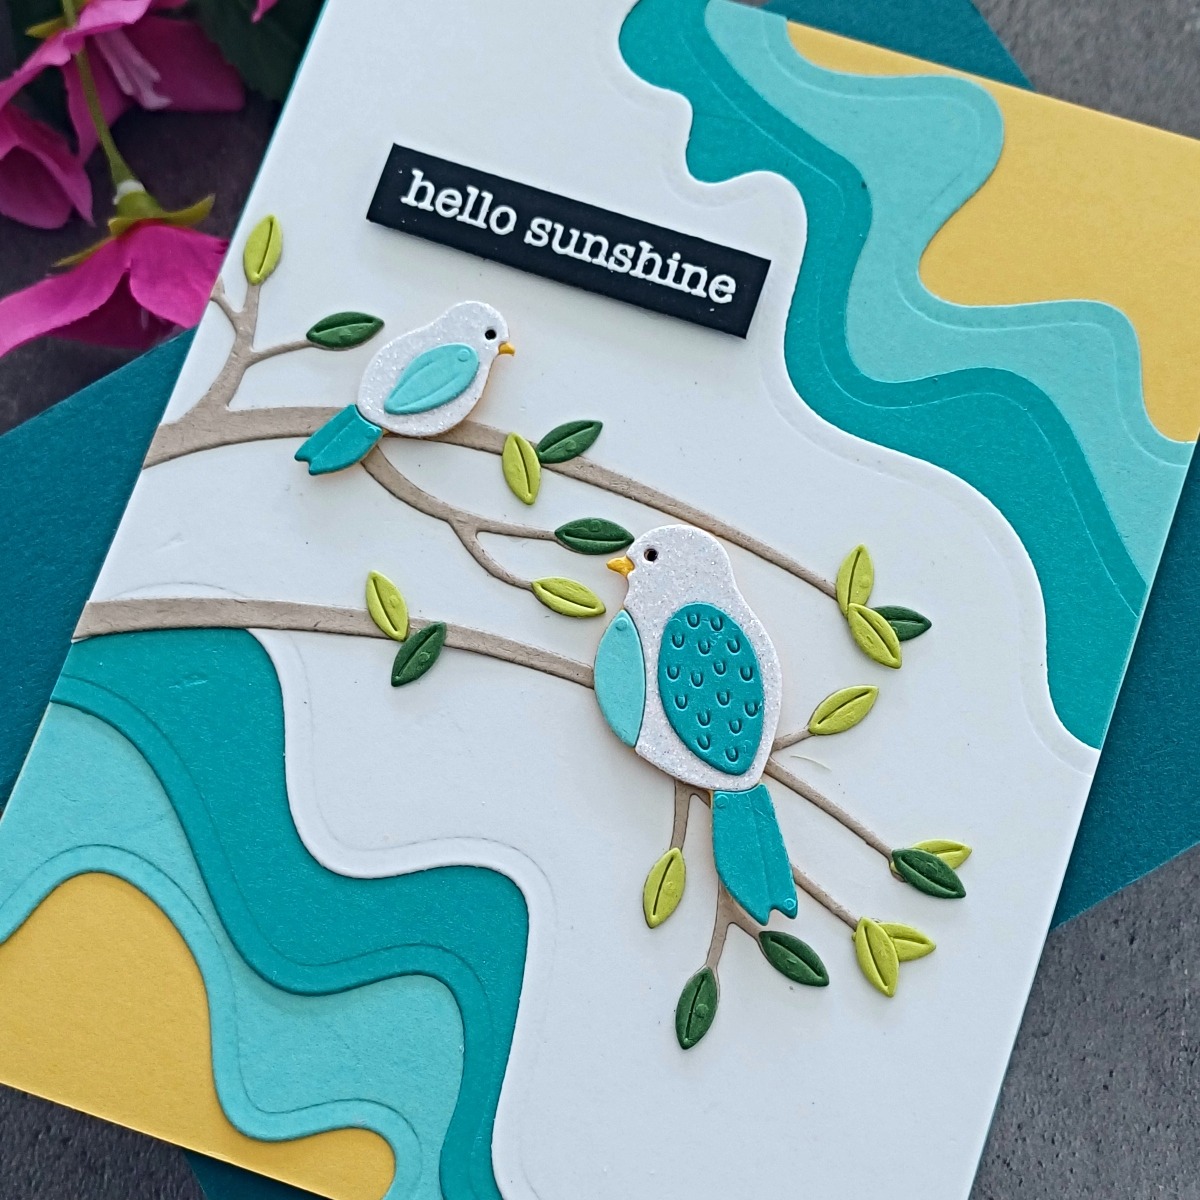
The branches and leaves were added onto the panel first and then the birds were popped up with some foam tape.
To finish the card, I stamped a sentiment from Typewriter Adventure Sentiments Clear Stamp Set onto Onyx Color Essentials Cardstock using Versamark Ink. I applied some detail white embossing powder and heat set. It was trimmed out using a banner die from Hexi-Gem Sentiments Glimmer Hot Foil Plate and Die Set. I always try to find a die that fits my sentiments as otherwise they would be totally wonky!
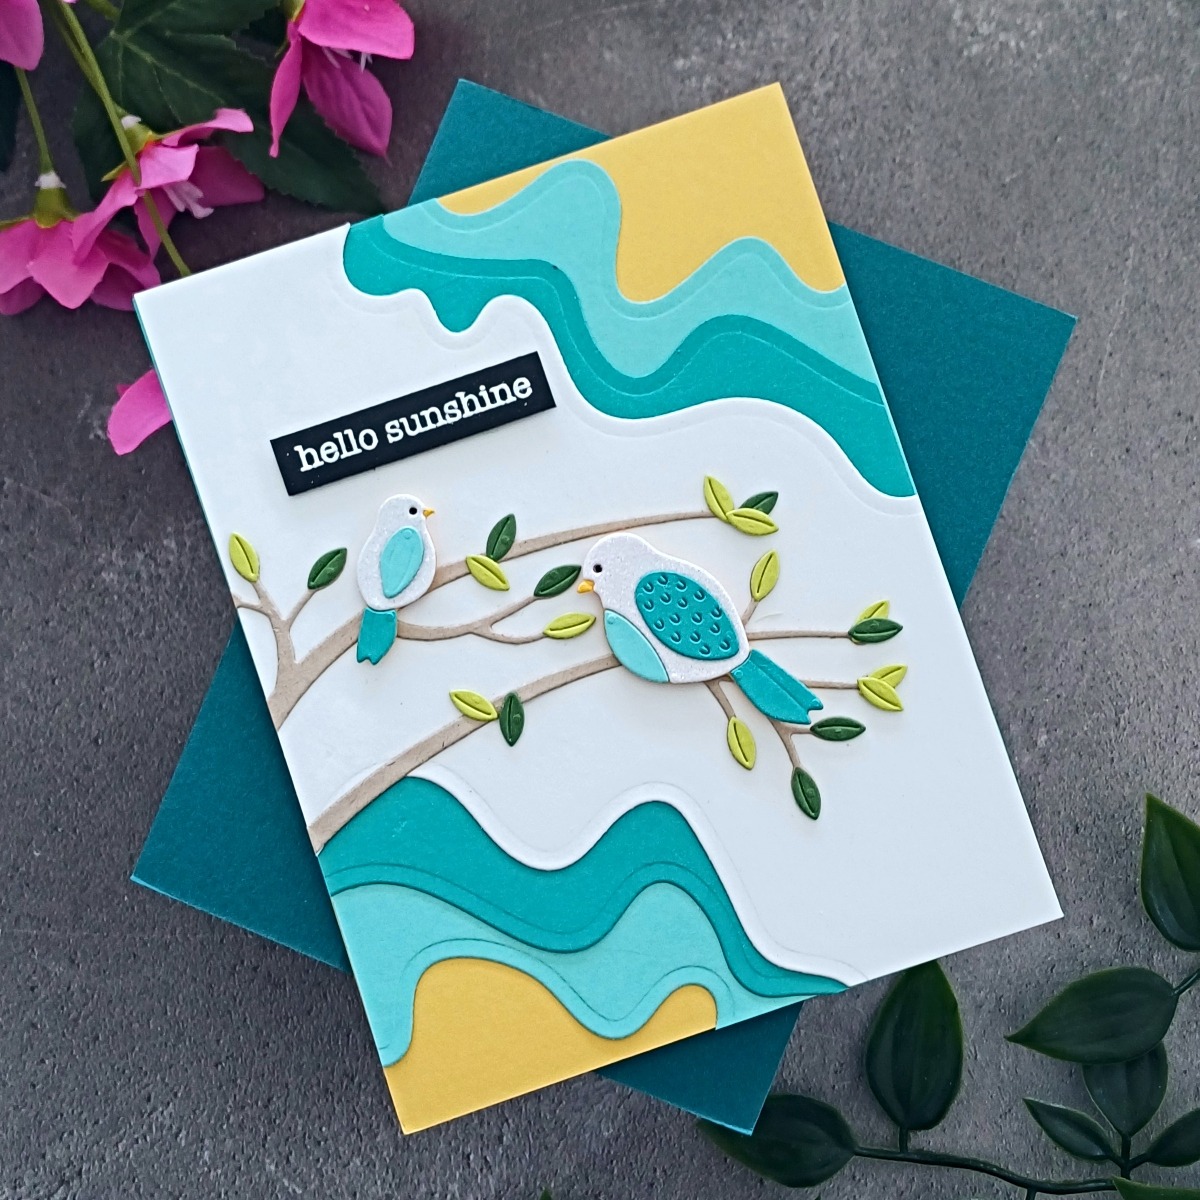
The sentiment was then added onto the card with some thin foam tape and the finished panel onto a top folding A2 white note card.
You’re Fintastic
For my final card, I went all out! This is definitely the busiest of my cards but it was so fun to create a full-on underwater scene! The glitter cardstock features in a much bigger way on this card too.
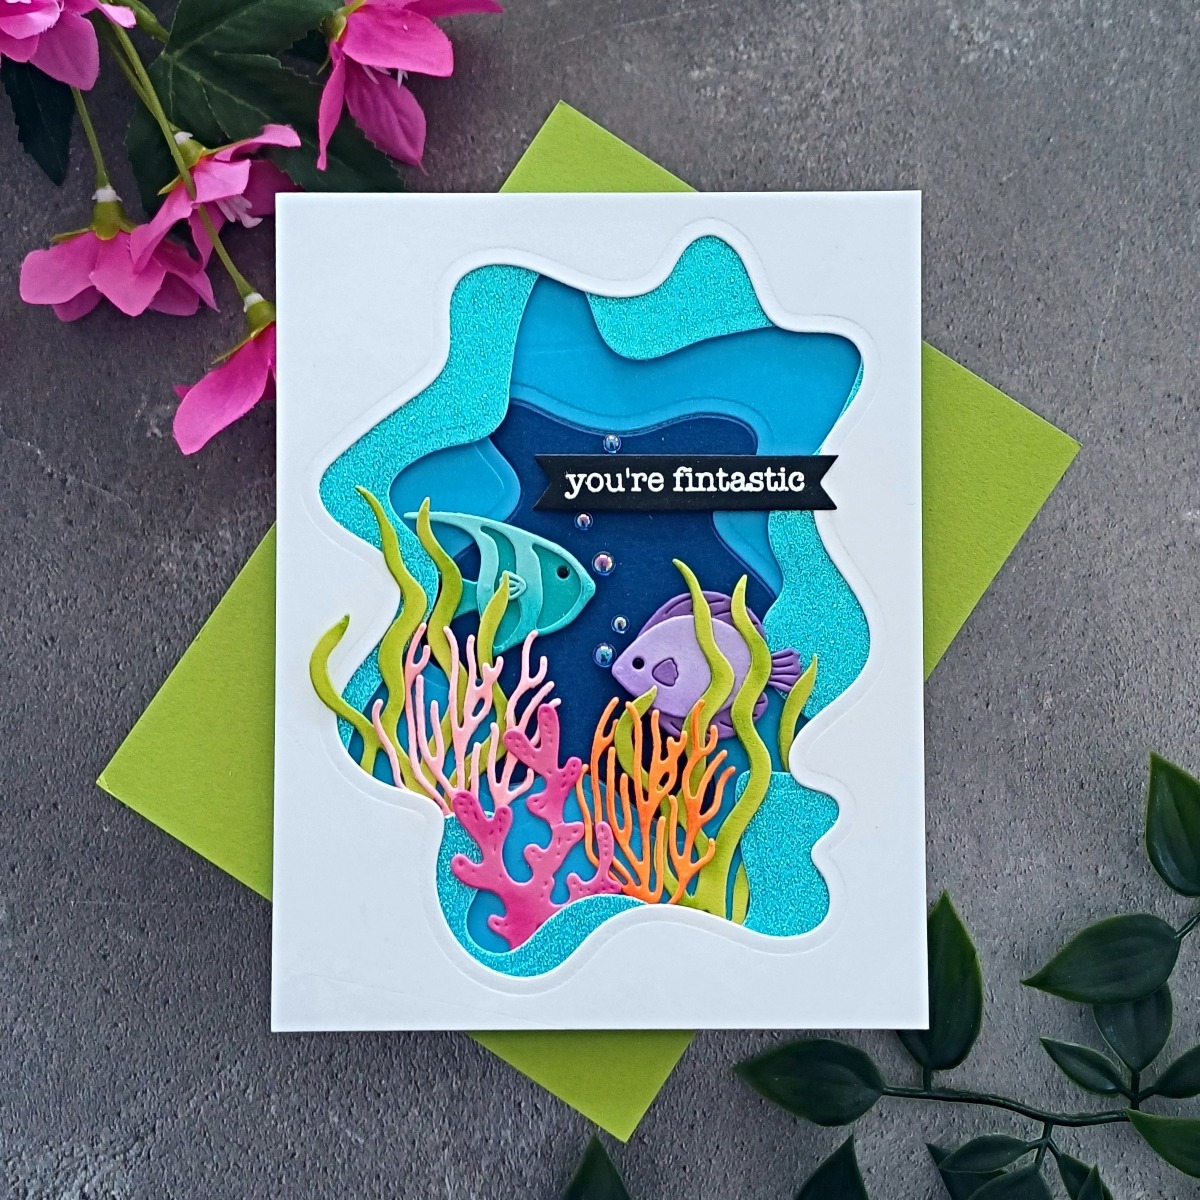
Using the Underwater Tunnel Etched Dies, the top panel was cut from an 80lb white card, and the second layer was cut from the Aqua glitter card in the Spring Tones Glitter Cardstock pack. The third was die cut from Splash cardstock and the final layer (which is inlaid) is cut from Cosmic Sky Color Essentials Cardstock. I did add some extra dimension to this card as I knew I wanted to insert some of the images, so I added thin foam tape to the back of the glitter cardstock. The other panels were just adhered with wet adhesive and then onto a white A2 panel.
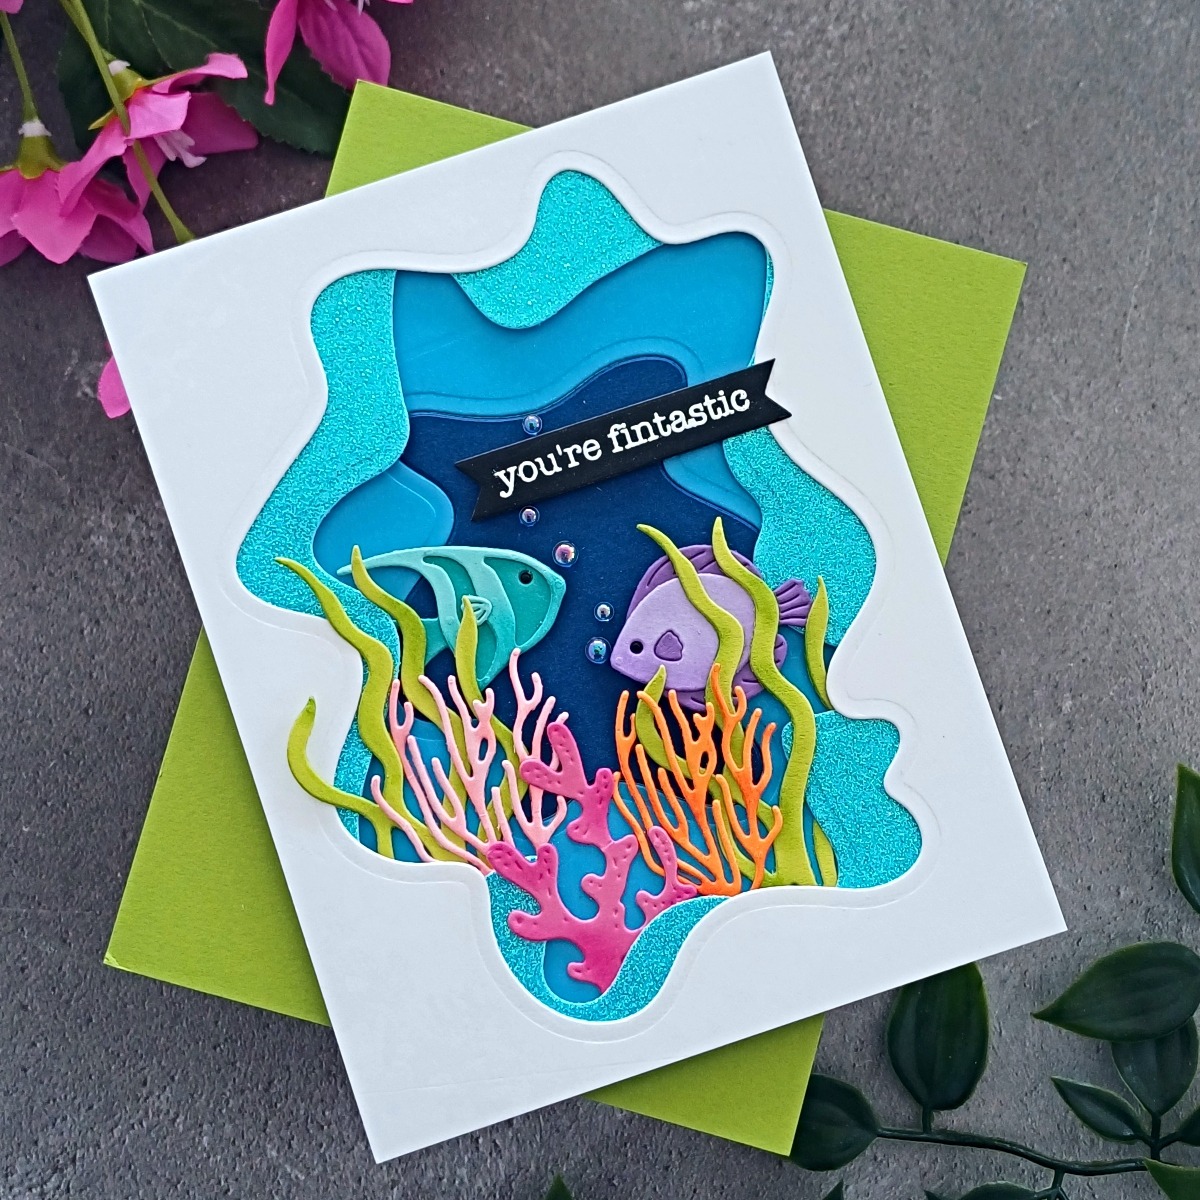
Next, I die cut all of the different elements for my scene. I used dies from both the Underwater Tunnel Etched Dies and also the Underwater Marine Life Etched Dies. The fish were cut from Waterfall, Teal Topaz, Purple Mist, Lilac Blossom, and Onyx card. Using blending brushes, I blended Peacock Feathers Distress Ink onto the Waterfall card before adhering the stripes to the base on that fish. I blended Wilted Violet Distress Ink onto the Purple Mist before adding that onto the Lilac Blossom base. I popped a tiny piece of double-sided tape behind the eyes on both fish and popped in the teeny tiny black die cuts!
The coral was cut from Pink Sand, Fruit Punch, and Persimmon card. I blended Crackling Campfire onto the Persimmon die cut. Picked Raspberry Distress Ink was added onto the darker pink coral and Saltwater Taffy onto the lighter pink coral. The seaweed was cut from Peridot and had Mowed Lawn blended onto it.

I adhered all the different die cuts into the tunnel layers, either using foam tape or Bearly Art Glue. The sentiment comes from Typewriter Adventure Sentiments and it was stamped onto Onyx card using Versamark Ink. I applied white embossing powder and heat set before cutting it out with the banner die from Hexi-Gem Sentiments Glimmer Hot Foil Plate and Die Set. I added a little foam tape onto the back and adhered it onto the panel.
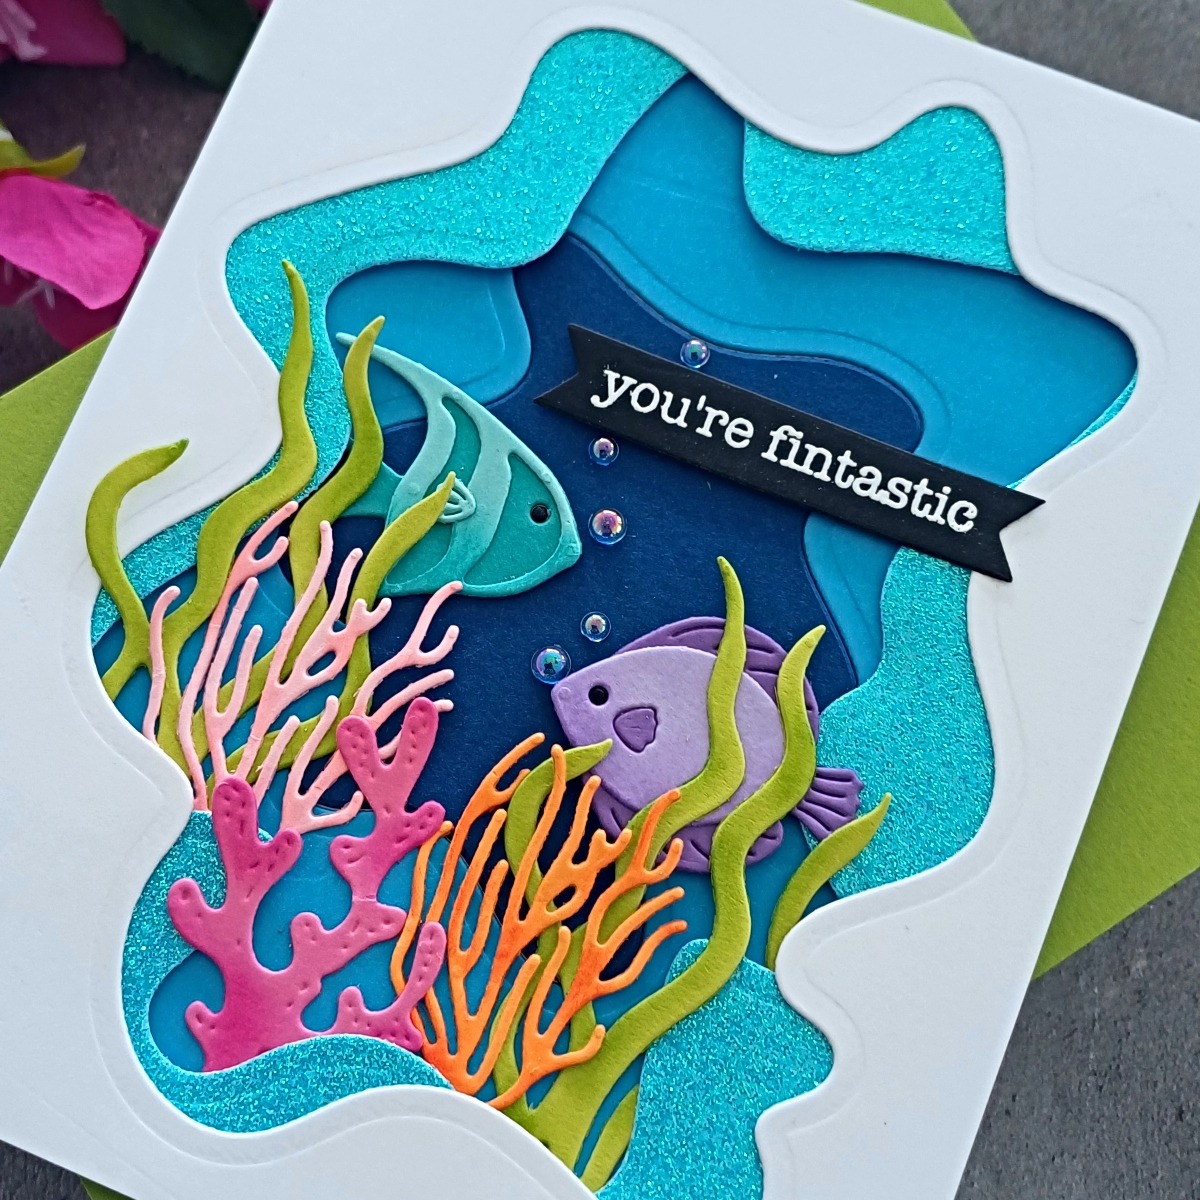
To finish, I took some Bubbles embellishments and adhered them in a wavy line coming up from the fish. Although this card did take some time, I really enjoyed putting it together. It’s been a while since I have created a scene like this!
So that brings us to the end of my cards using this fun collection! I hope that you enjoyed seeing some ways of using them. I am pretty sure I will have these out on my desk again soon as I already have another card in mind using the cutest little seahorse that is being released soon!
If you would like to see more of my cards, I would love to have you join me over on my blog, Instagram, Facebook or YouTube. In the meantime, thank you so much for joining me here on the blog today. I hope that you have a great day!
Spellbinders Supplies:

Other Supplies
Neenah Classic Crest Solar White 80 & 110lb card, Neenah Desert Storm 80lb card, Hero Arts Tweezers, Embellishment Wand, Thin Foam Tape, Glossy Porcelain Pearls from stash, Bubbles from stash, Double-Sided Tape, MISTI Stamping Tool, Hero Arts White Detail Embossing Powder, Versamark Ink, Anti-Static Powder Bag, Waffle Flower Shader 0 Plus brushes, Distress Inks Wilted Violet, Peacock Feathers, Saltwater Taffy, Picked Raspberry, Mowed Lawn, Crackling Campfire.
3 Comments
cmayne
WOW! Blown away by your fabulous tunnel-themed cards; a trio of inspiration in every way. I’m especially smitten with the last one that is, indeed, ‘fintastic’!
~carol
cnhollenbeck56
Love your cards! Great way using these dies and your color combos are wonderful! Thanks for your inspiration.
Terrie D. (StarSpry)
Wow! What fun cards! I love the underwater scene, and those birds are so cute 🙂