Watercoloring Die Cuts & Stamped Images with Karin Markers – Step-by-Step Tutorial
Hi everyone! It’s Jean Doeringsfeld and I’m super excited to be a guest on the Spellbinders Blog. Today, I’m sharing one of my favorite techniques for using Karin markers. This is a super easy watercolor technique that will help you learn about how the markers work and create stunning results every time.
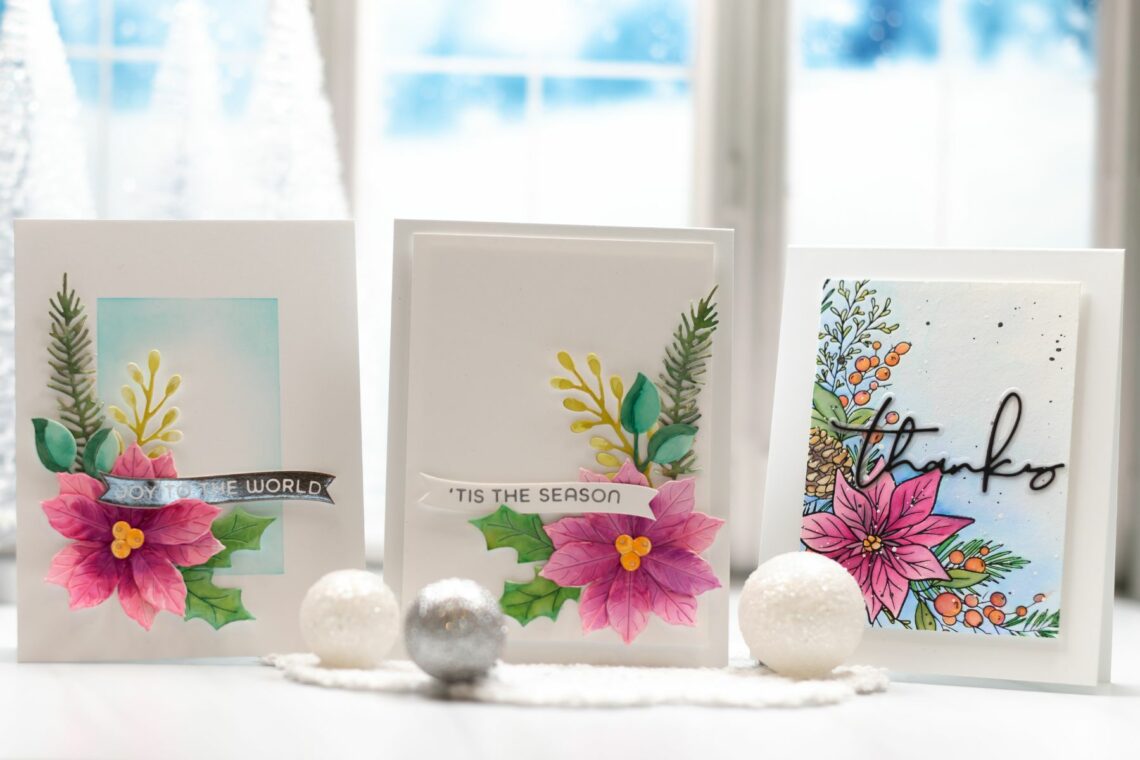
I have 3 cards to share with you today – the first two use the Karin markers to watercolor die cuts and the 3rd shows how to apply the same method to a BetterPress image (or any image, really).
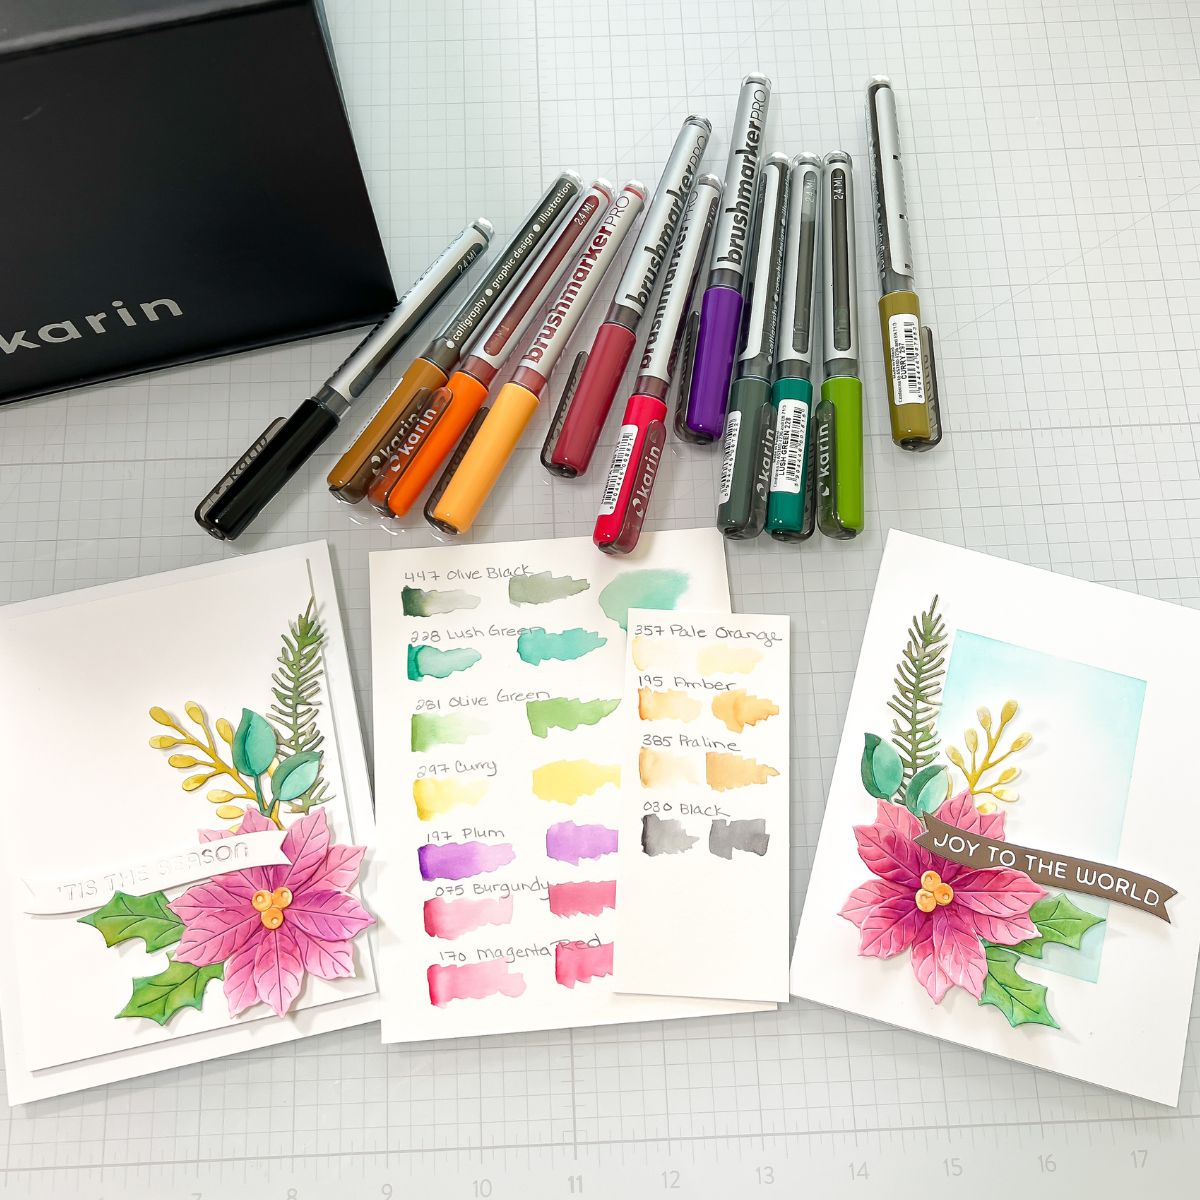
Step 1 (for All Cards): Start by swatching the markers to determine which colors you want for your project and to see how they perform on your watercolor cardstock. You can see in the picture below that each color is swatched twice. The first one (on the left) was created by applying the Karin marker directly to the watercolor paper and then using a wet brush to blend the color out. The second swatch was created by scribbling the marker on a glass mat, adding a bit of water, then picking up the color with a paintbrush and blending it out.
You can also create swatches of blended colors like I did with the green and red using the make-shift paint palette.
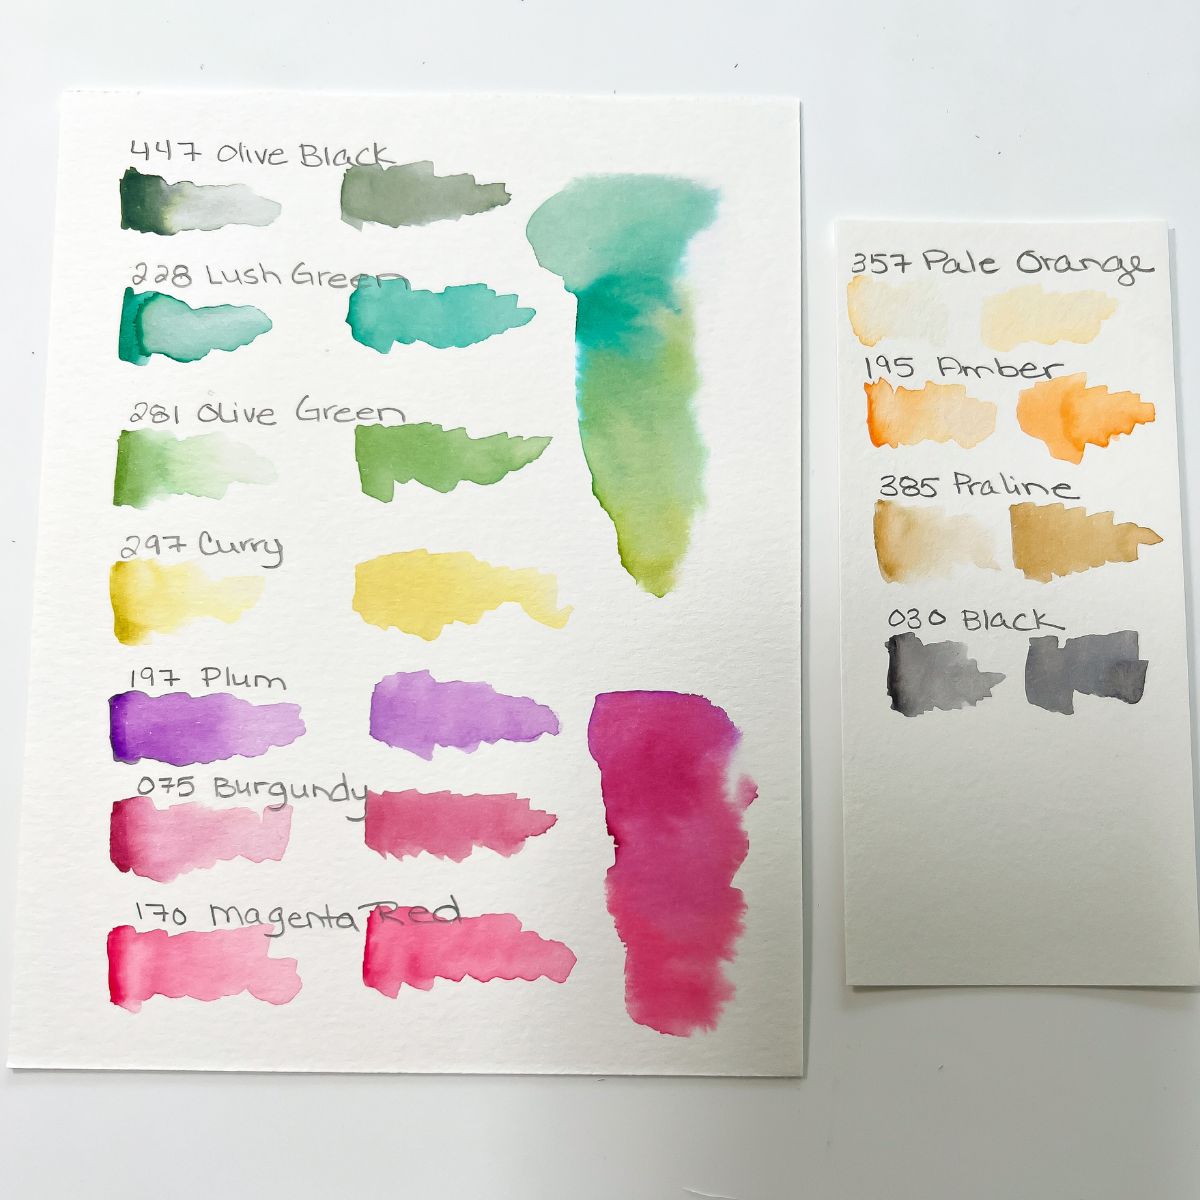
For all of the cards today we will be using the Karin Markers with the make-shift color palette method (scribbling them on a glass mat). If you don’t have a glass mat, any non-porous surface will work.
Layered Poinsettia Die Cut Cards
I have a secret: I was only planning to make one die-cut poinsettia card but I wasn’t sure how many flowers or pieces of greenery I would want, so I die-cut and watercolored extras. This turned out to be a happy accident because I was able to get 2 cards with almost no extra work!
Step 2: Die cut the poinsettia and greenery dies from the Christmas Bird Poinsettia Die Set from watercolor cardstock and prepare your Karin Marker watercolor palette.
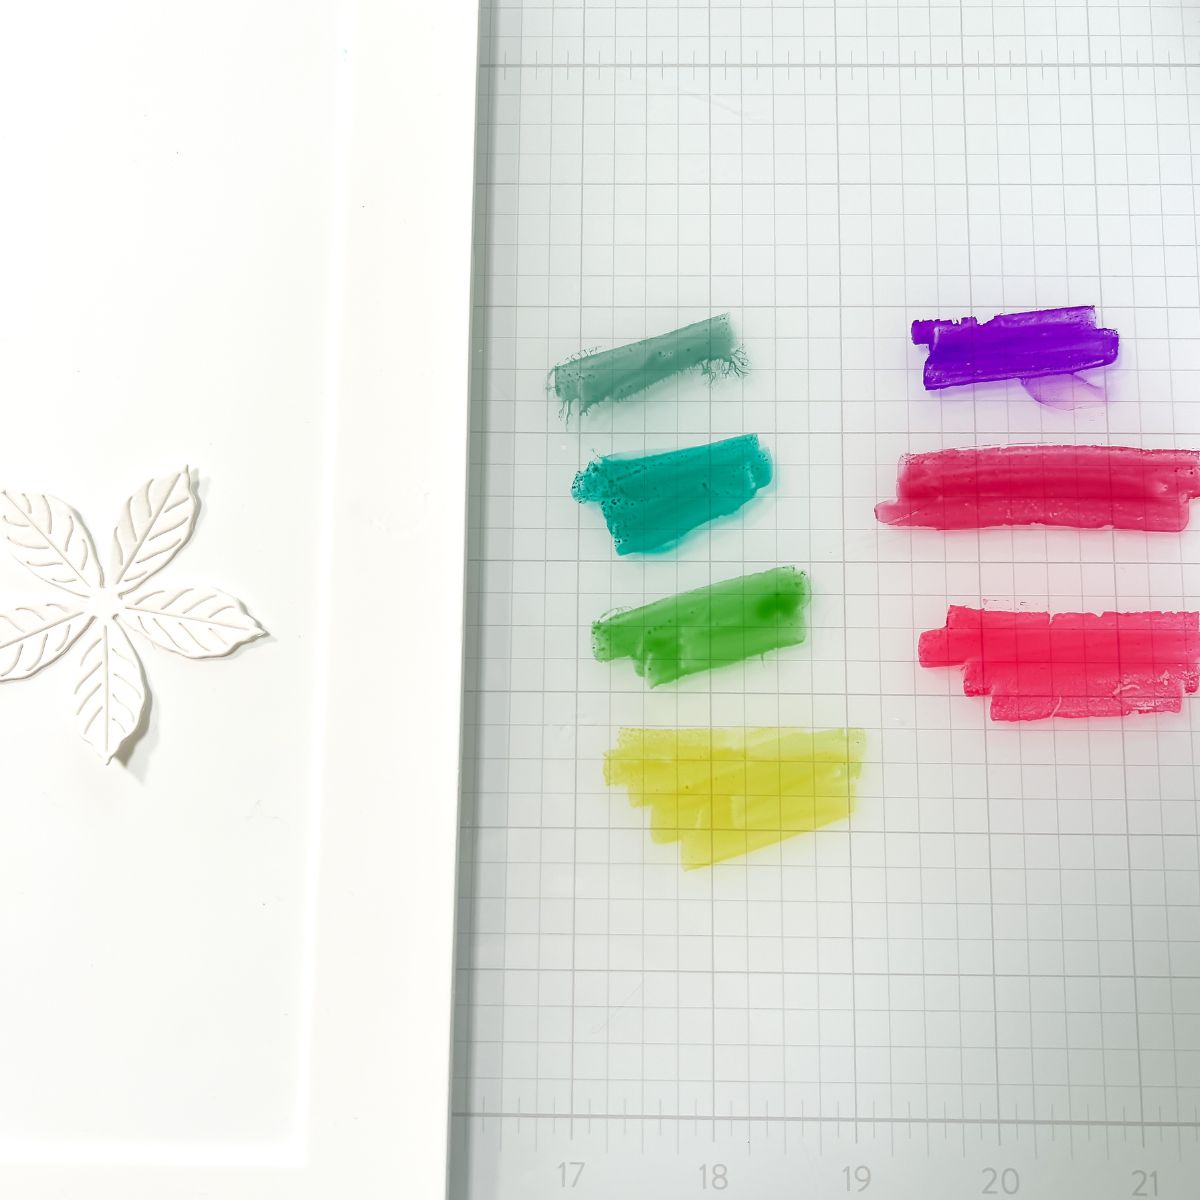
Begin by adding a light wash of color from your Karin watercolor palette to each die-cut piece. You can control the intensity of the color by adding water (more water = lighter color; less water = darker color). You do not need to have the intensity of the color the same for each layer of the poinsettia or the leaves – in fact, you’ll get even more dimension by having some petals be lighter and others darker.
Let the pieces dry completely (or heat them with a heat tool) before moving to the next step.
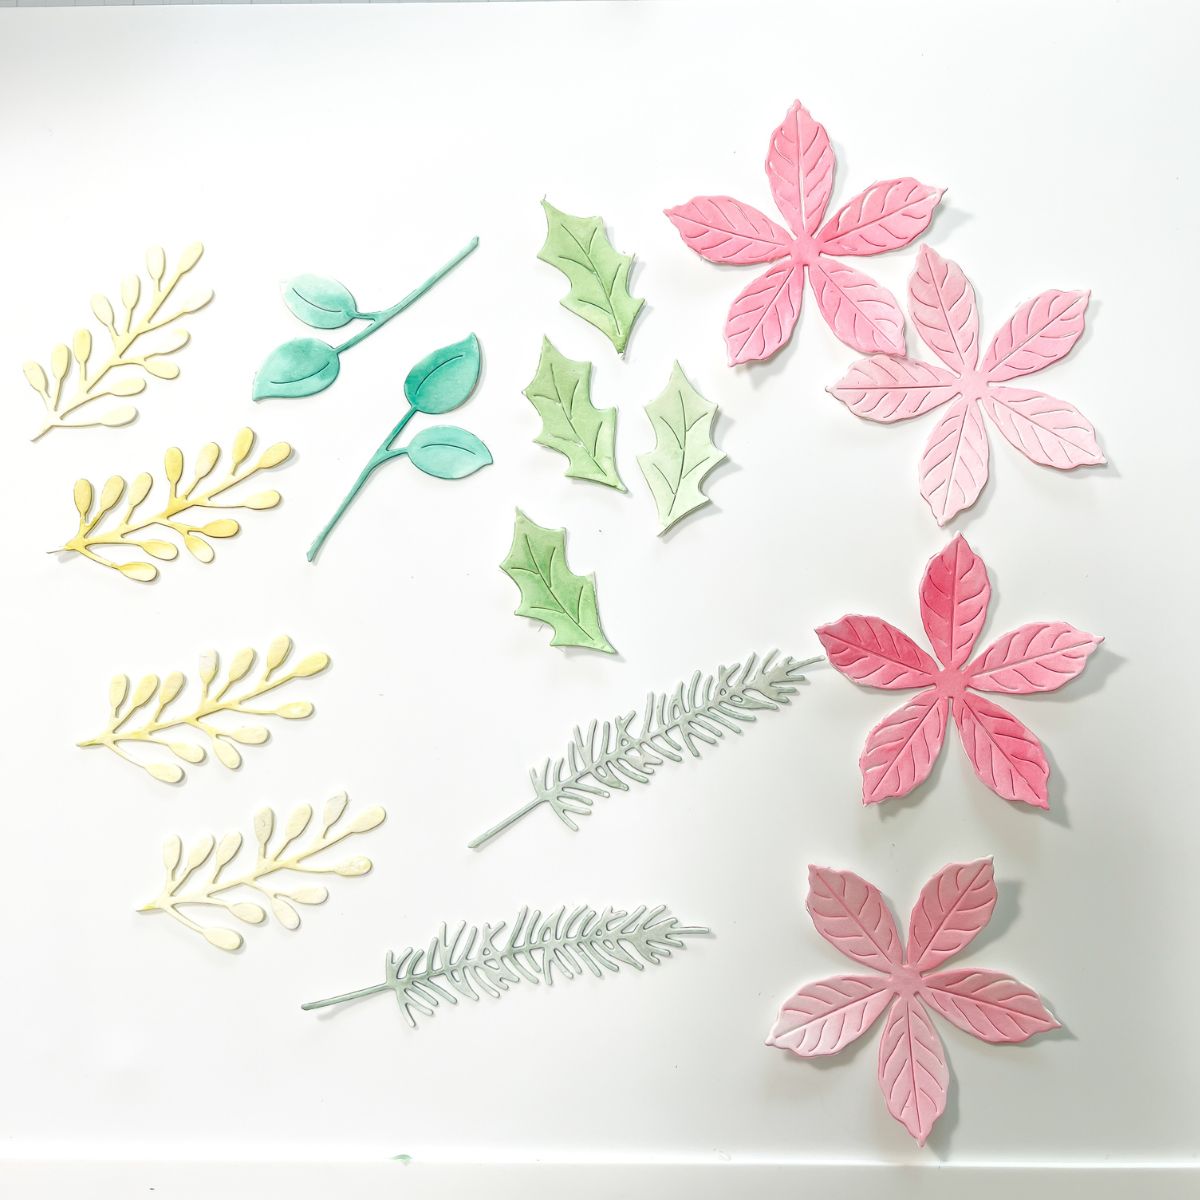
Step 3: Start building up the color by using less water for the next layer(s). If you let the die cuts dry between layers of color, the color will build on itself. The colors will re-activate to some degree when re-wetted, which will make them easier to blend.
You can always scribble more color on your palette if you add too much water!
One really great thing about Karin markers is that they have a wonderful translucency! This means that you can go over other colors to slightly change the hue. I did this on the poinsettia petals using a very light wash of Plum and on the holly leaves with a very light wash of Curry.
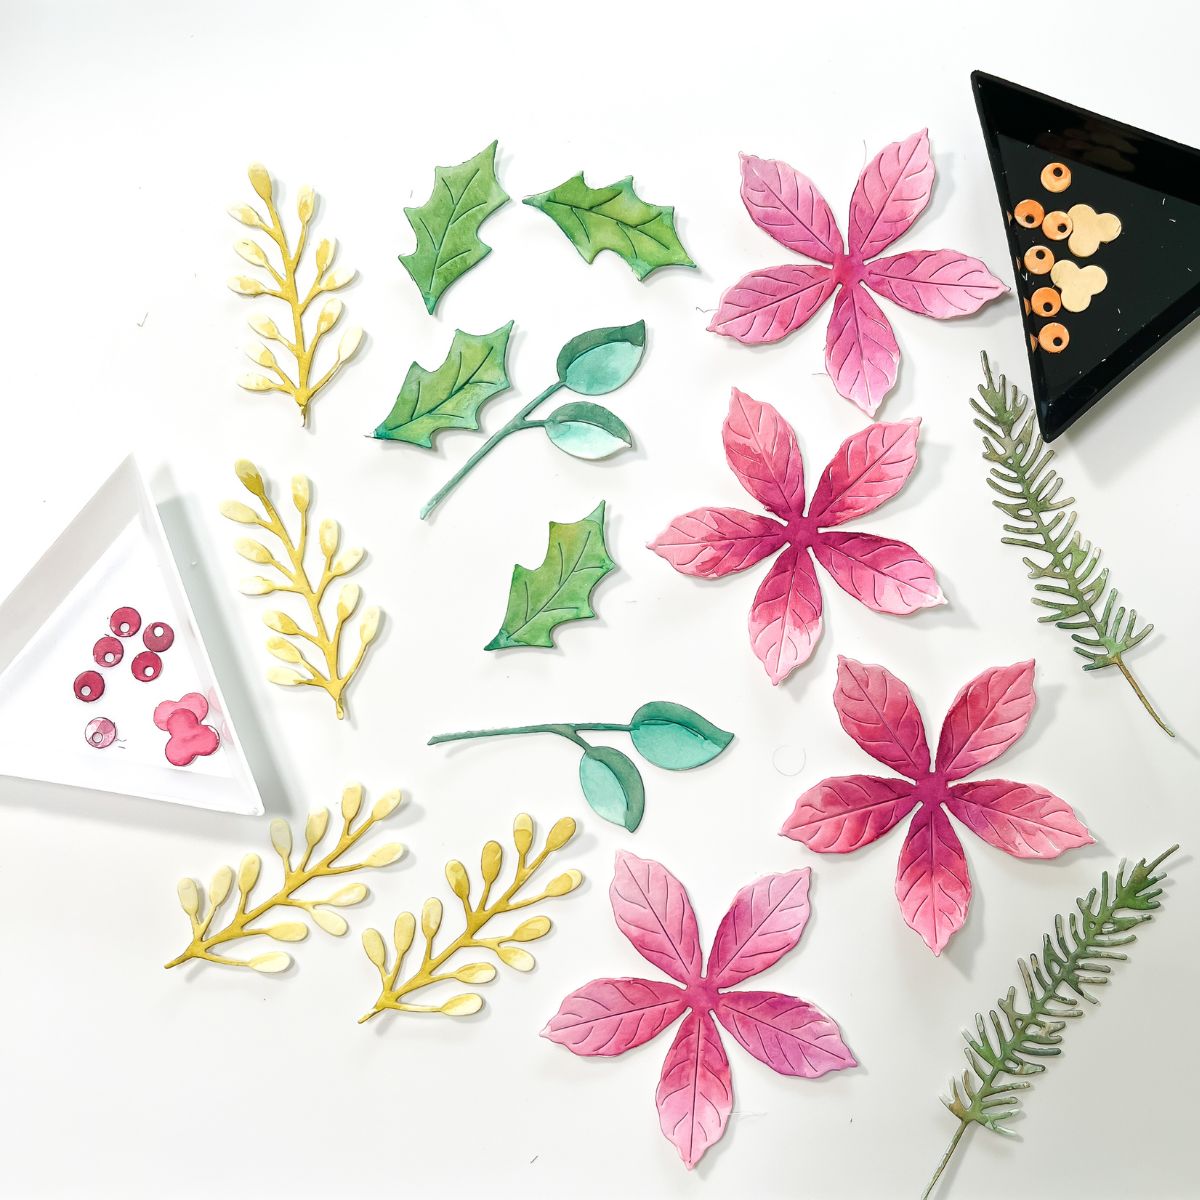
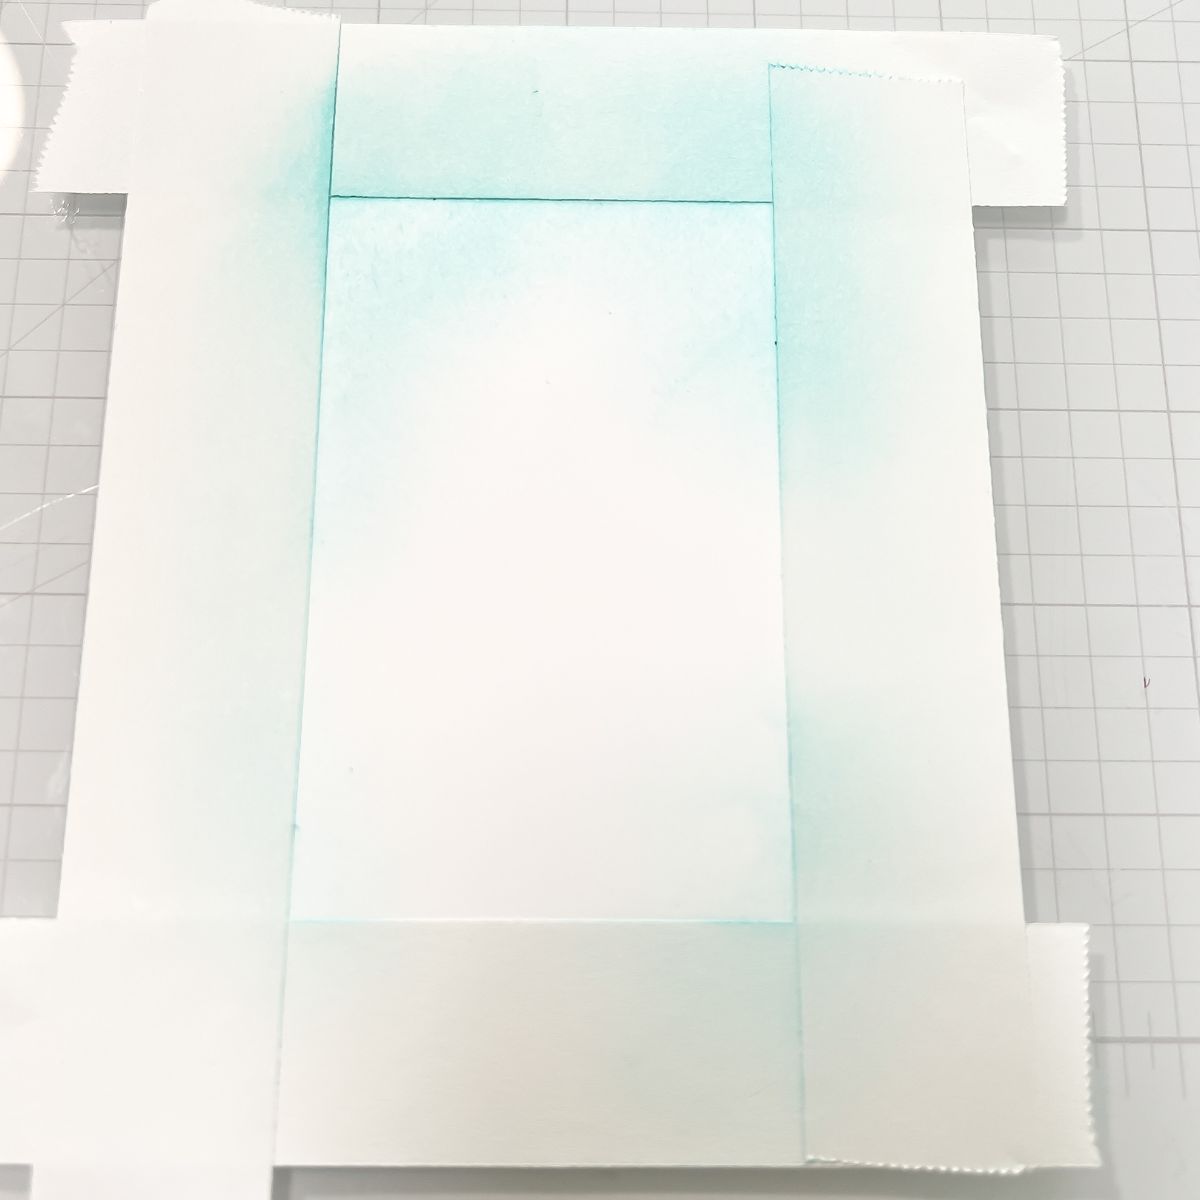
Step 4: Once all of your die cuts are dry and you have achieved the colors you like, you can assemble your poinsettias and determine your card layouts. For one of the cards, I masked off the edges of my card front and did some light ink blending to create a “frame”. For the other, I just trimmed down a piece of white cardstock and popped it up on my card base using foam adhesive.
Step 5: Adhere your poinsettias and greenery to your prepared card fronts using liquid glue. I recommend only gluing the middle of the poinsettia and the stems of the foliage so that you can get some added dimension on the card.
Step 6: Hot foil the Comfort & Joy Sentiments using the Glimmer Hot Foil System, your Platinum 6 die cutting machine, and Pewter foil, then foil the “scrap” foil using the Glimmer Solid Rectangle Hot Foil Plate. Die cut the sentiments with the coordinating die that comes in the set and use foam adhesive and liquid glue to add them to your card.
Here is a picture of both cards side-by-side.
Watercolored BetterPress Poinsettia
When I finished the die-cut cards, I still had quite a bit of color on my make-shift palette so I decided to try the same technique using the Poinsettia Corner BetterPress plate.
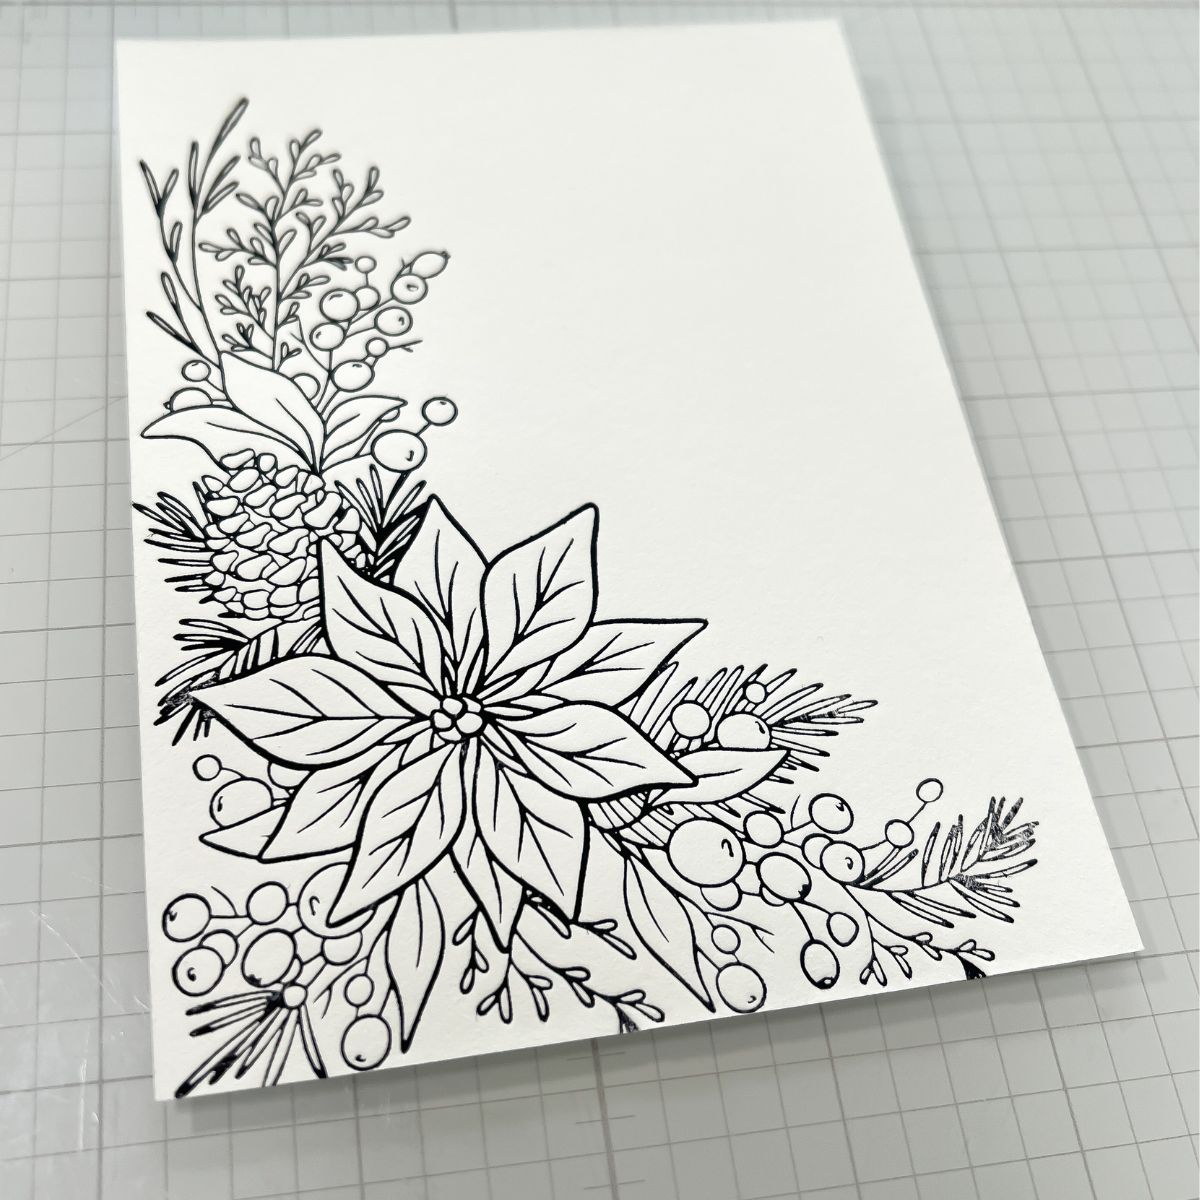
Step 1 (above): If you haven’t already, be sure to swatch your colors on the BetterPress Cotton Card Panel before you start because they type of paper you use can influence the look of the colors and how the markers perform.
Step 2: Use the BetterPress Letter Press System to letter press your Poinsettia Corner plate onto the Porcelain cotton card panel with the BetterPress Black ink.
Step 3: Using your Karin Marker watercolor palette and a paintbrush, add a light wash of color to your BetterPress image. Let the first layer of color dry before moving on to the next step.
You will notice that the impression of the BetterPress image creates a bit of a barrier that helps to keep your “paint” from going outside the lines!
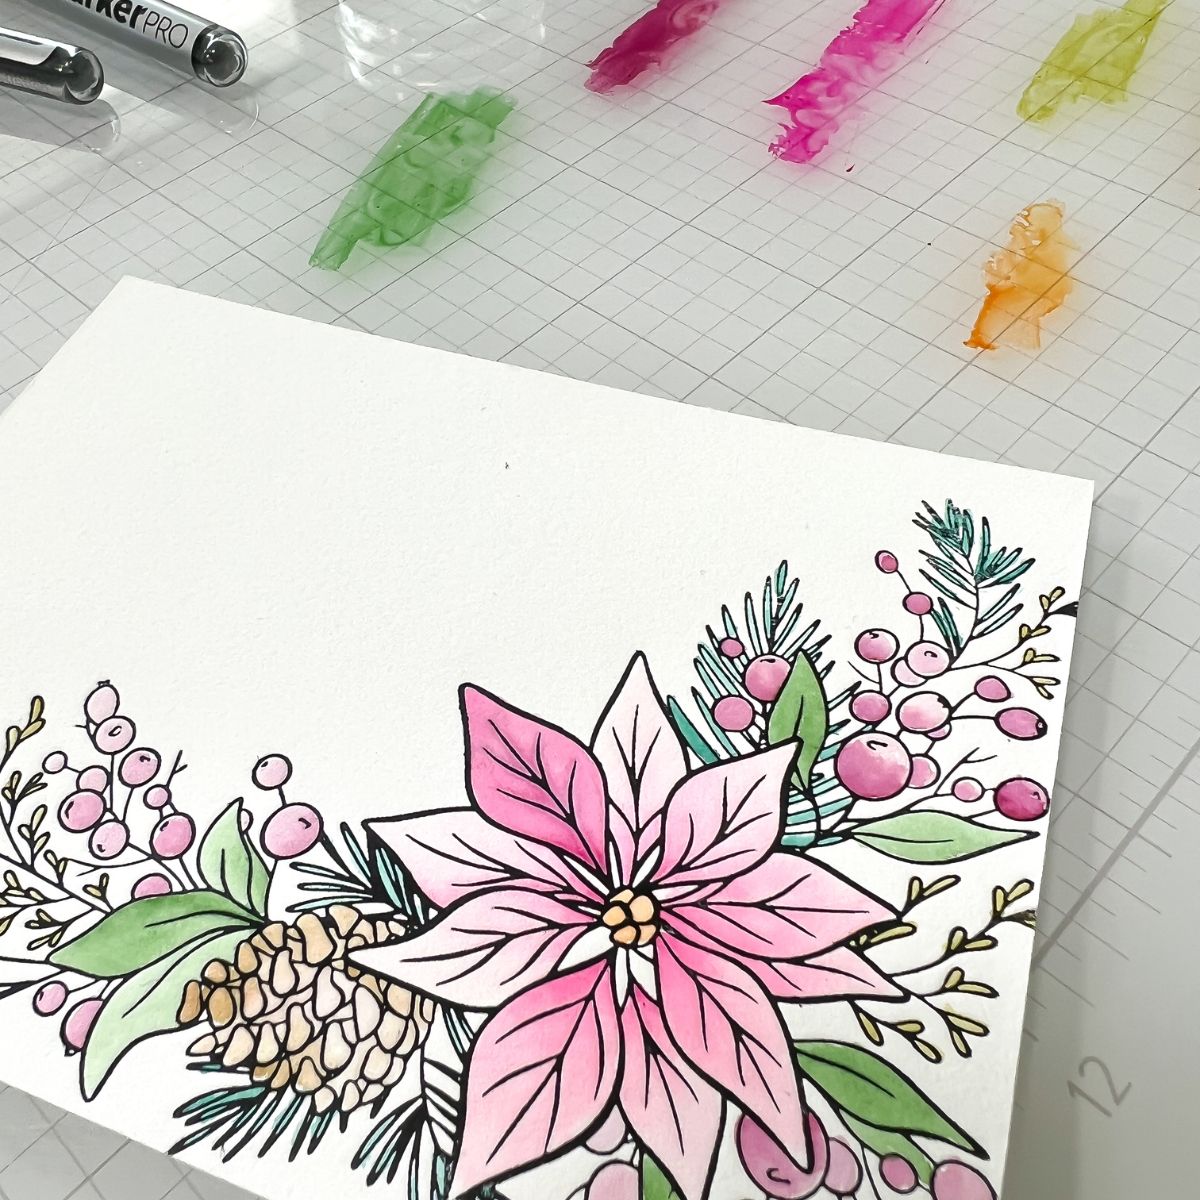
Step 4: Continue adding color, one layer at a time, until you have the desired intensity and have added in any shadows. Remember to let the layers dry before moving on to the next layer.

Step 5: Once all the layers are dry, add in a background color for the image (I used Egyptian Blue). Start painting from the poinsettia image out to the edges of the paper in order to get a gradual fade to white. You can use clean water on a clean brush to help move the color to a fade.
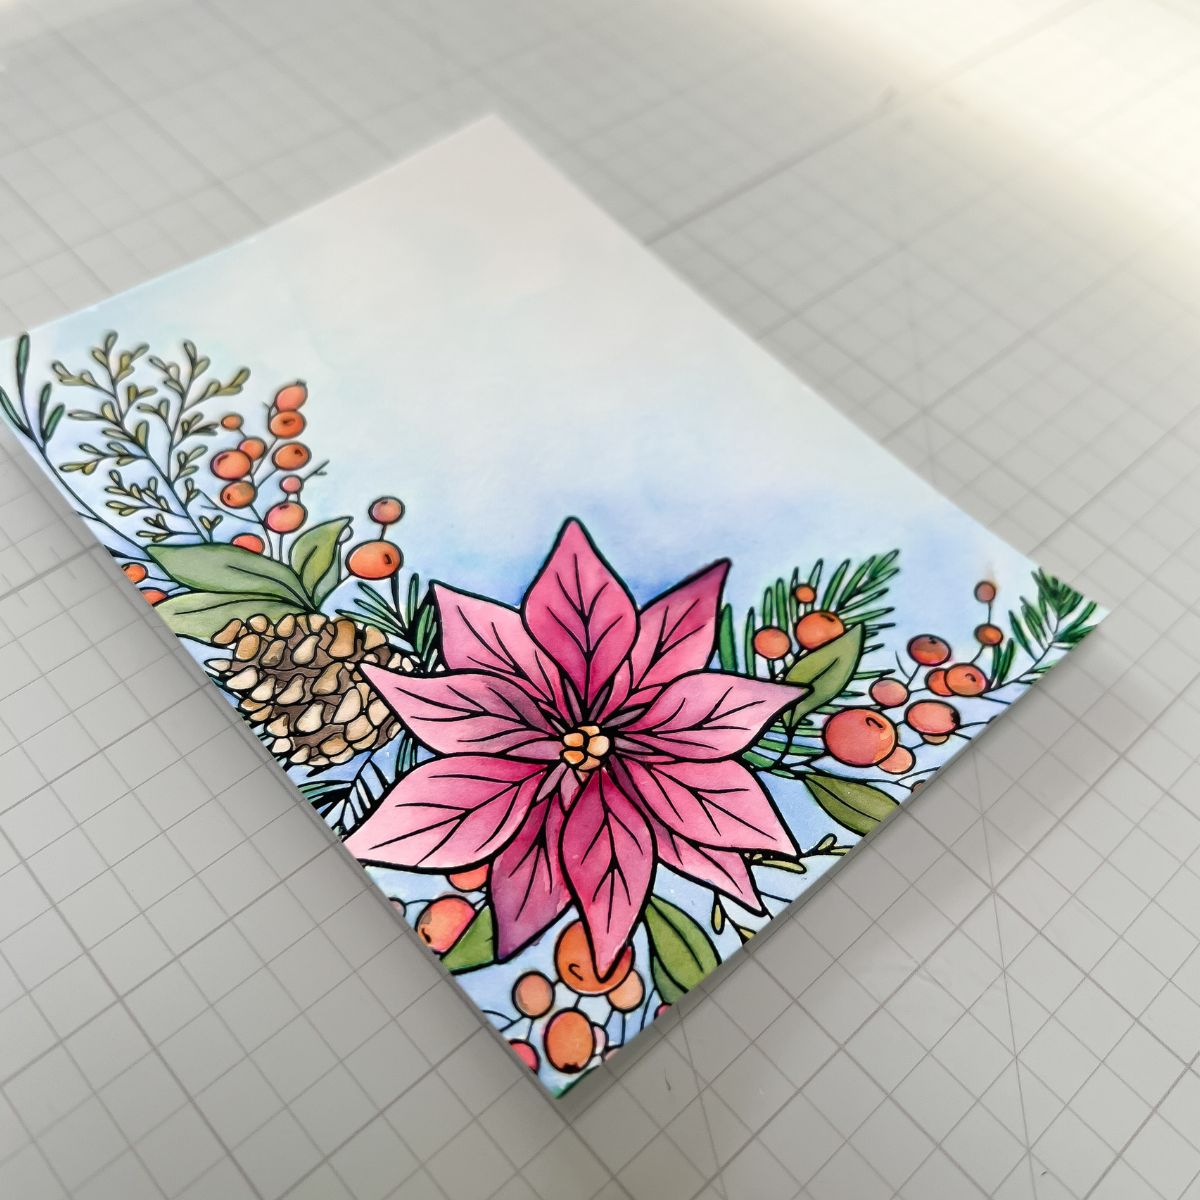
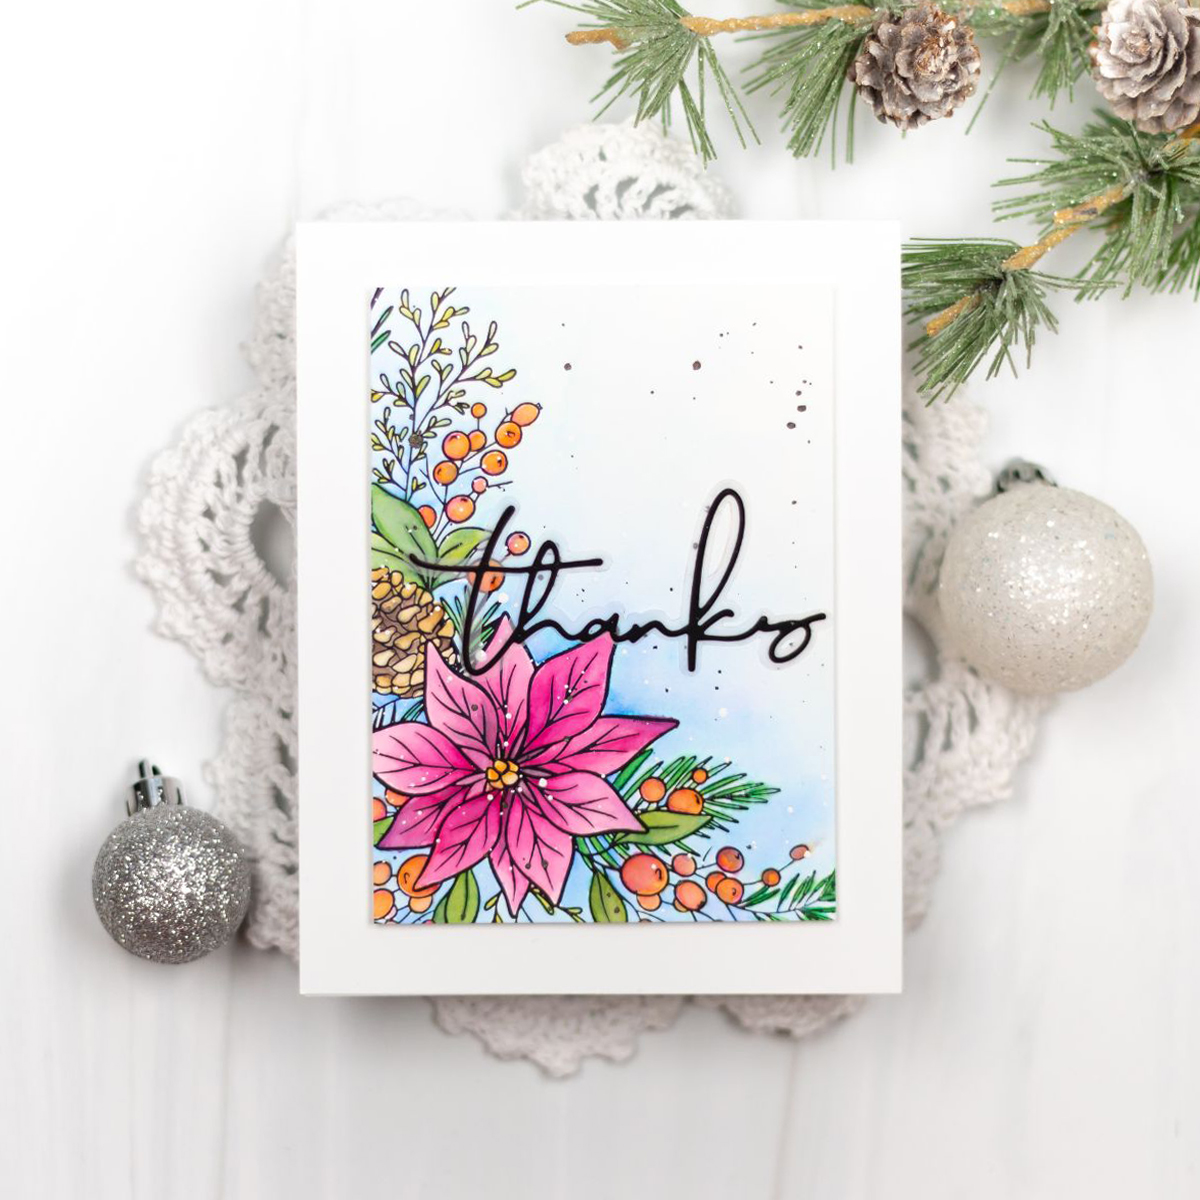
Step 6: Once the panel is completely dry, add a few splatters with some watered-down white and black acrylic paint. Trim the panel and add it to your card base with foam adhesive.

Step 7: Die cut the “Thanks” die from Yana’s Layered Script Sentiments die set – use black for the word and vellum for the shadow.
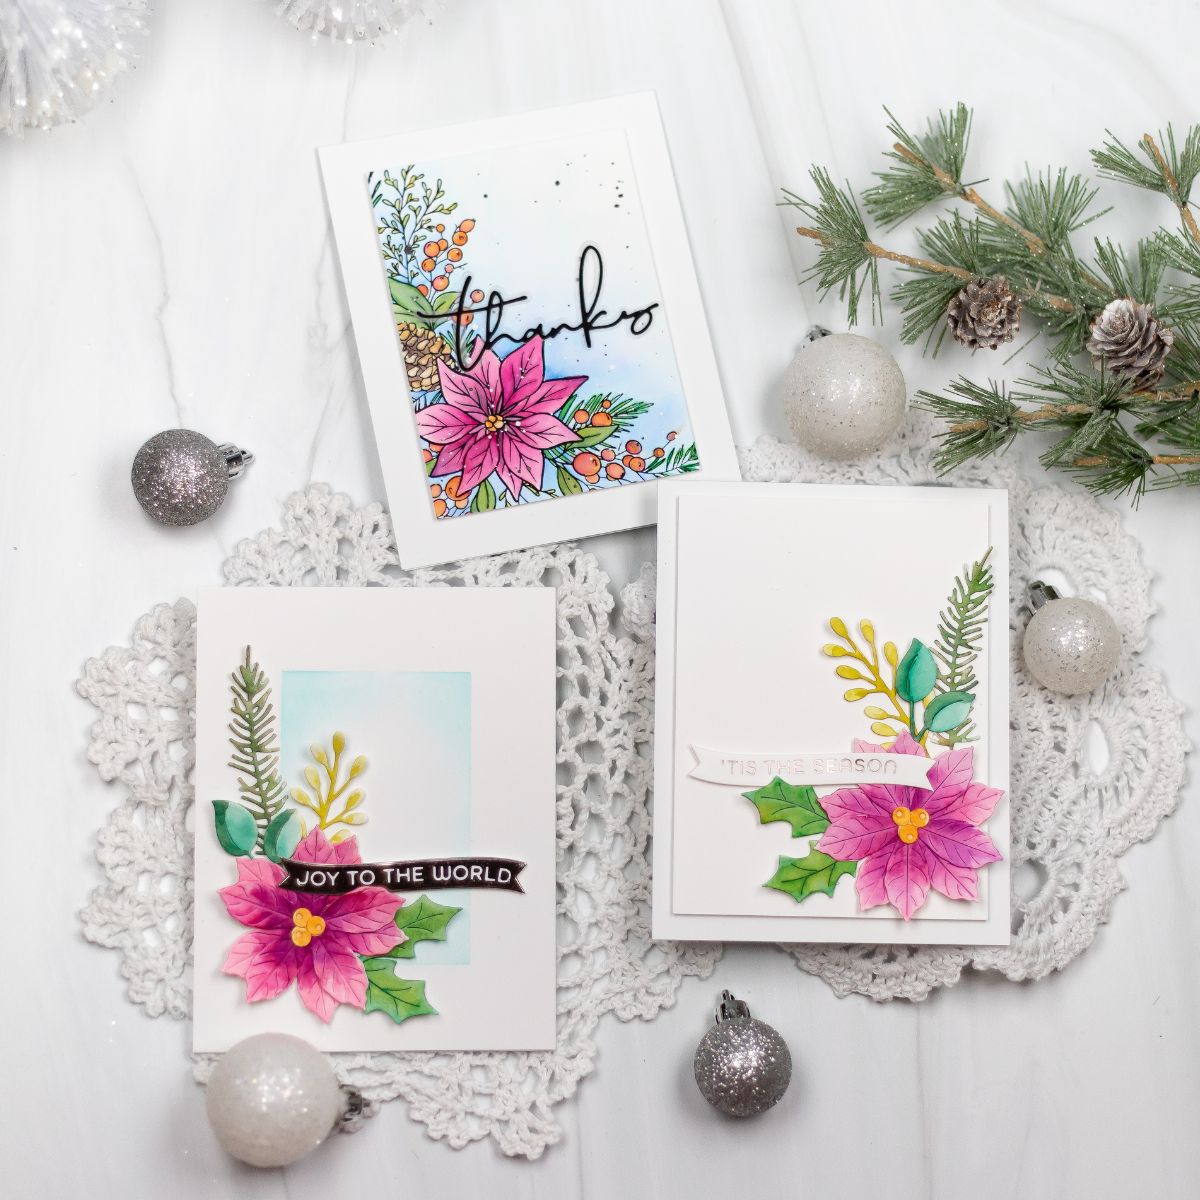
Here’s a picture of this card:
I hope you like these cards and that they inspire you to use your Karin Markers to create your own paint palette! Thank you so much for stopping by the blog and I hope you have a wonderfully creative day!
Jean
Spellbinders Supplies:

Other Supplies
Canson XL Cold Press Watercolor Paper, Concord & 9th Oceanside Ink, Tonic Nuvo Deluxe Glue.
One Comment
dtoledo56
Beautiful cards. Love the watercolor technique to color the die cuts. TFS.