3 Techniques To Try With Art Glitter
Hello friends! This is Lisa from My Card Trip and I am excited to be a guest on the Spellbinders blog today. I am here to share some sparkly fun with you as I am going to be showing some different ways to use Art Glitter on your projects. All of the three techniques are simple to do and I have lots of tips and tricks to share along the way. After each of the techniques, I have a card which shows the final project using that particular technique. It’s always nice to see an end result, right?!
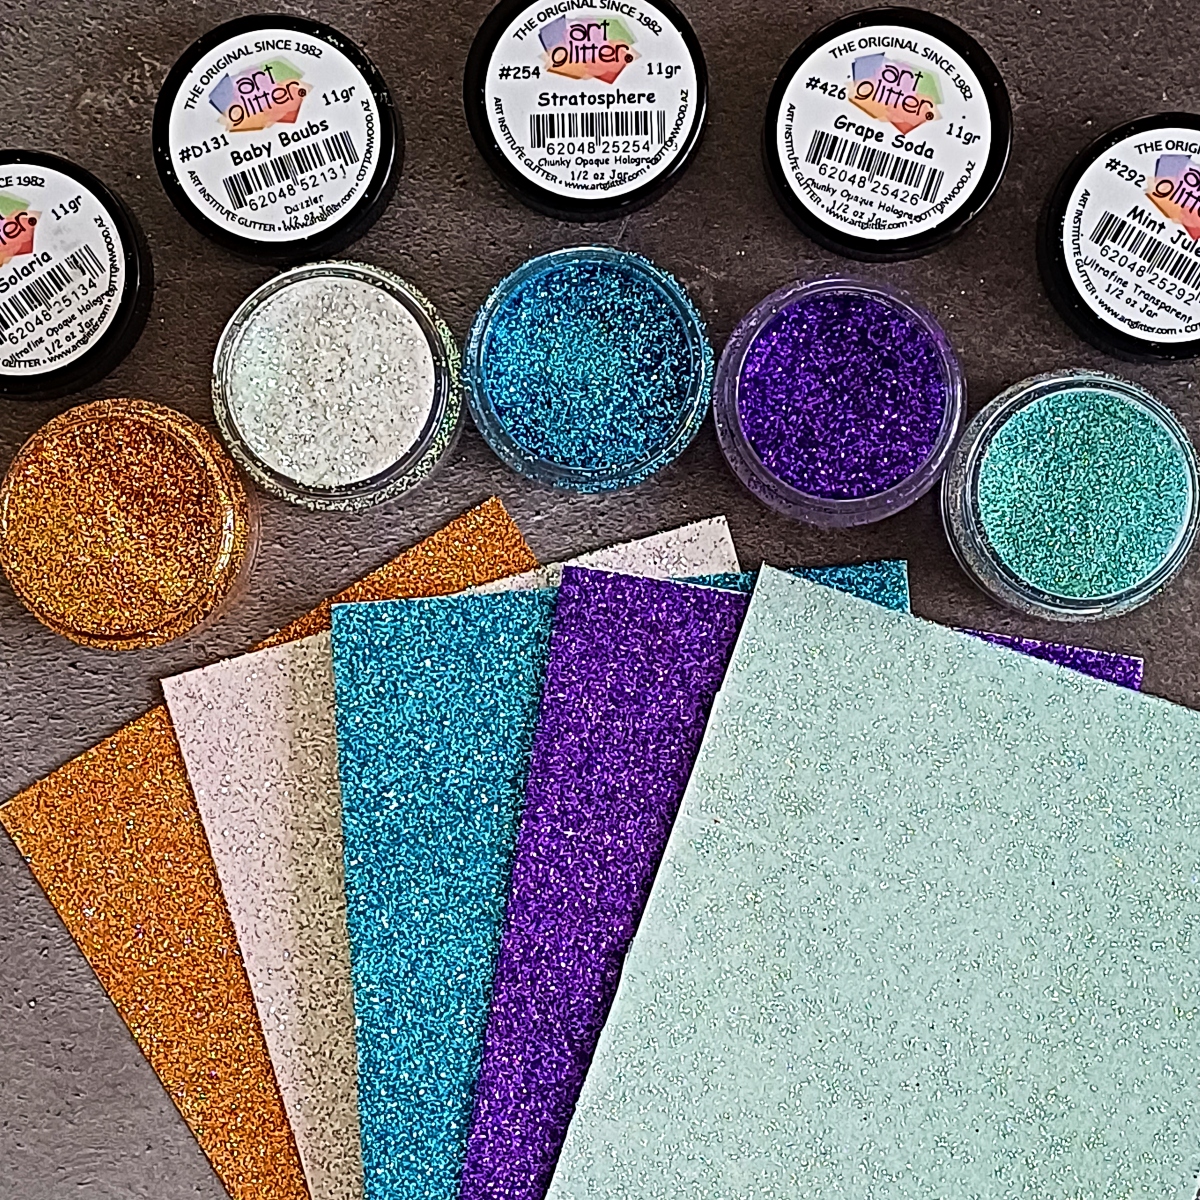
But first, a bit about Art Glitter. I am using five different colours of glitter today and all of them are stunning. The glitter itself reflects light at different angles and is a variety of sizes. For the most part, they are slightly more on the chunky side, but they do vary. So let’s get into the techniques.
Technique 1 – Glitter Edges
This is one of the simplest and prettiest ways of applying glitter to your projects and I am going to show you two ways to do it. The first example is a more organic, free-flowing, loose look.
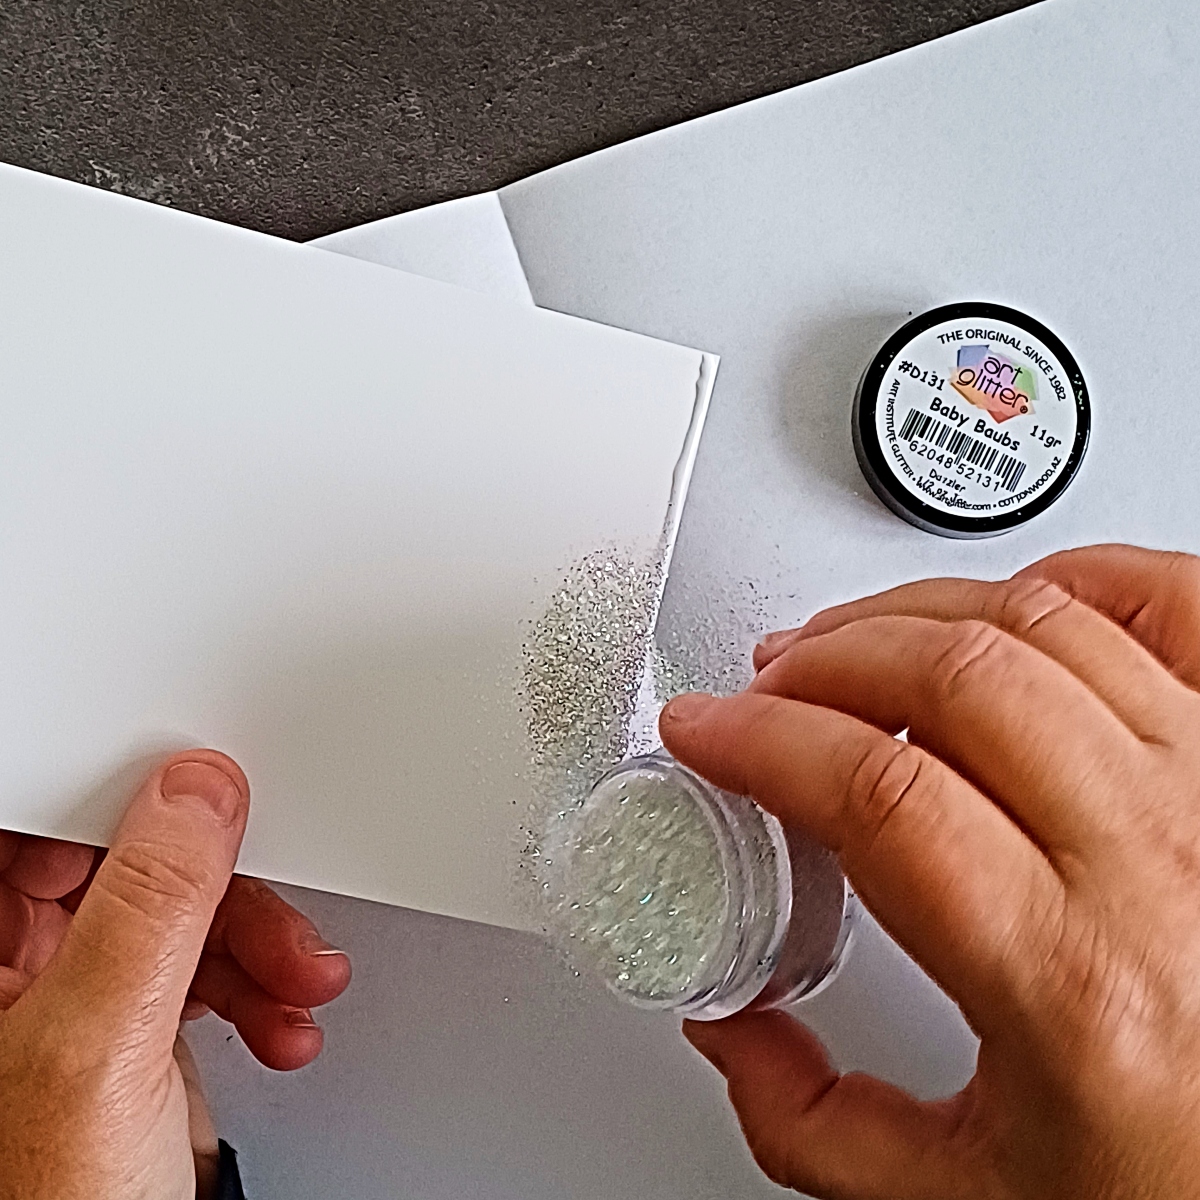
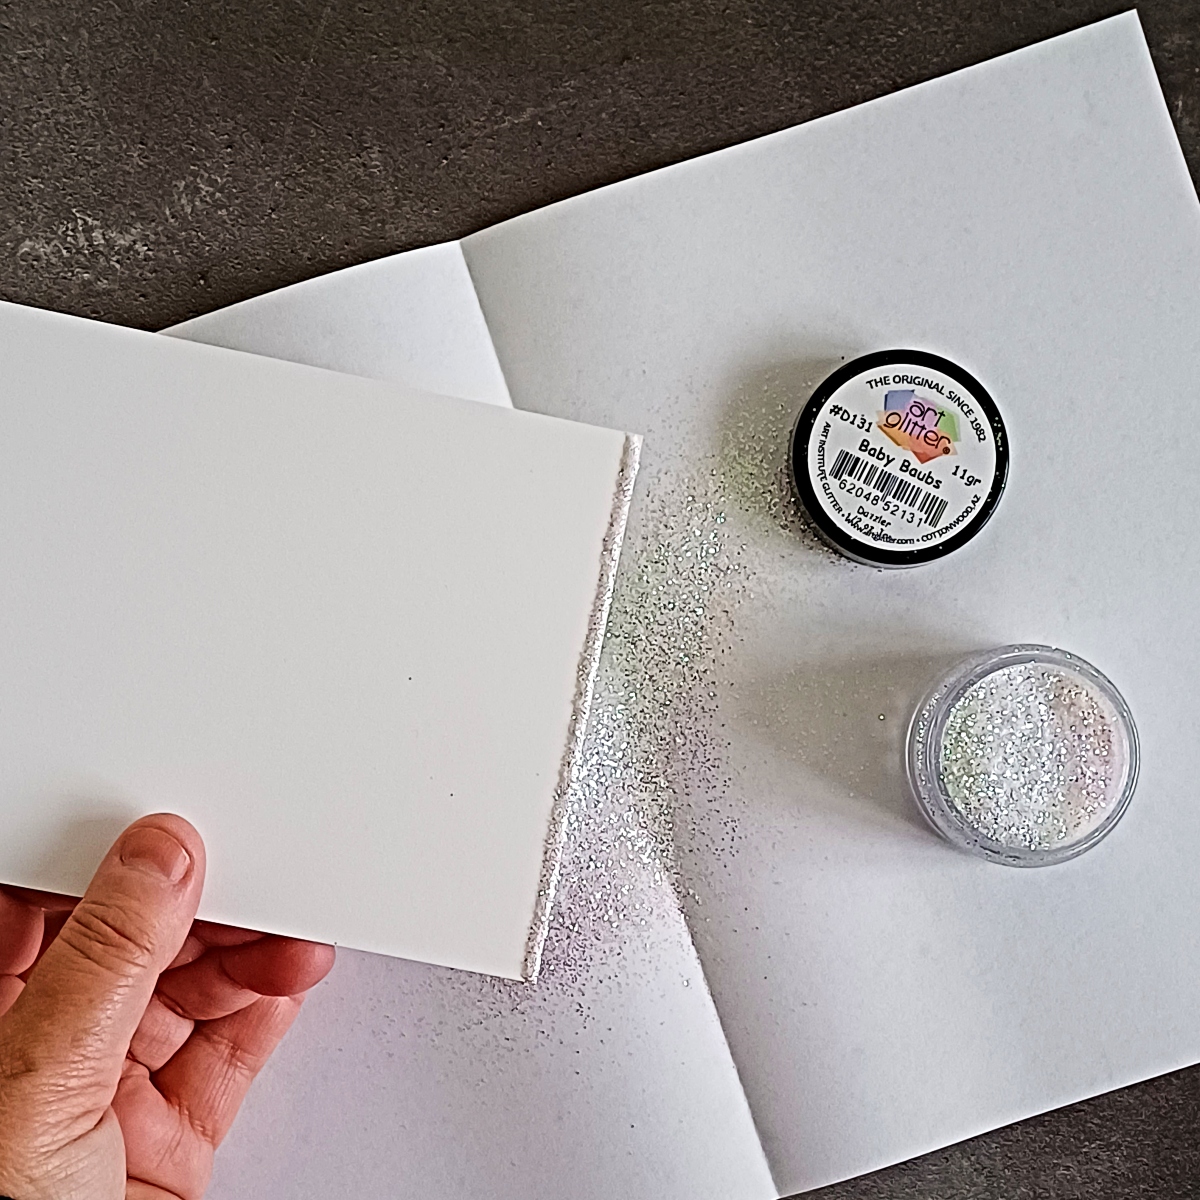
I take a panel of white card and apply Bearly Art Glue along the bottom edge. As I am applying it by hand, the glue goes on slightly wonky. My hand is not that steady! That’s okay. Make sure you have enough glue applied to cover the card right up to the edge, then pour your glitter over the top. I used Baby Baubs as I wanted a white-on-white look. Simply repeat on the other three edges and leave to dry. The Baby Baubs Art Glitter is a white iridescent glitter so you get flecks of pink and purple in it. It’s GORGEOUS!
Tip – Make sure you have a creased piece of paper or coffee filter under your card to catch the glitter. You can then funnel this back into the glitter pot.
Tip – keep Swiffer cloths at the ready. I cannot stress this enough but they are your best friend as they easily pick up the stray bits of glitter!
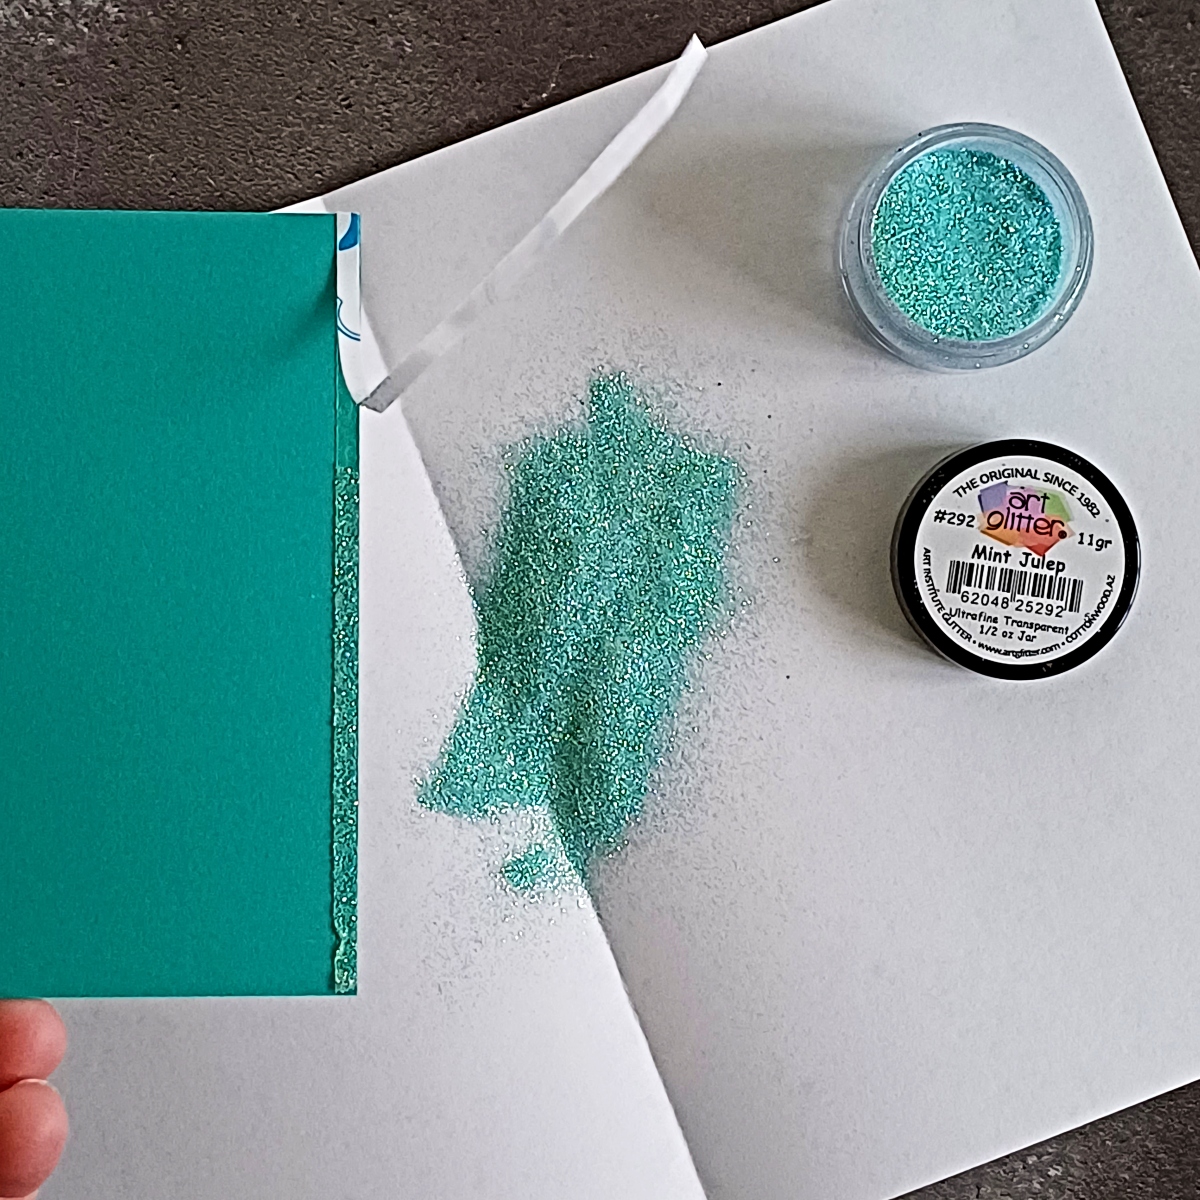
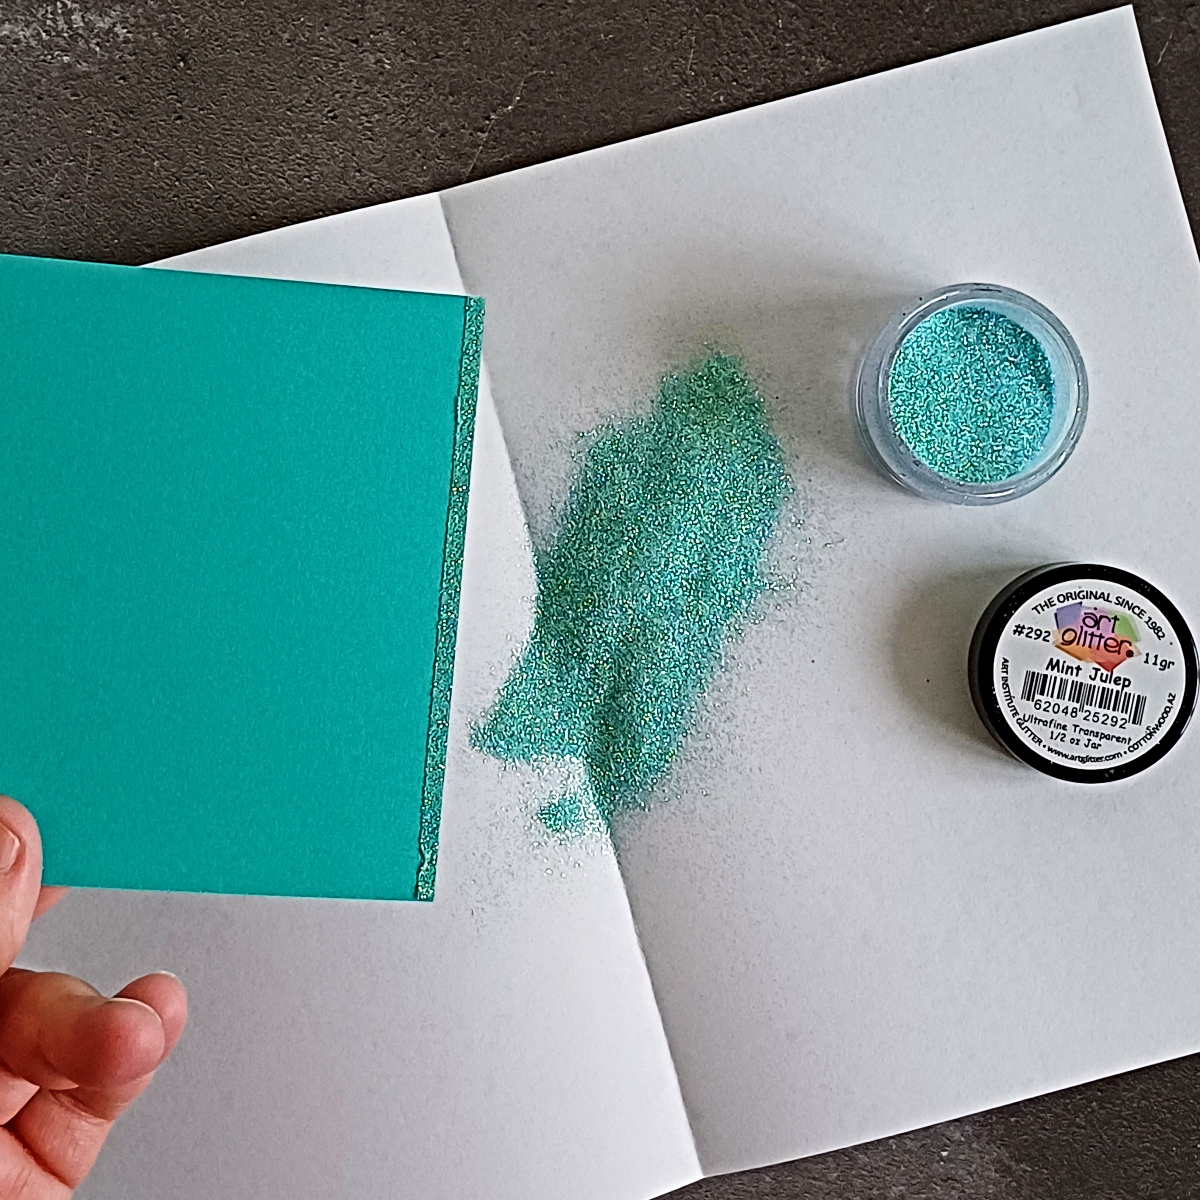
For the second way of applying the glitter, use some double-sided adhesive tape. I used a 3MM tape and some Teal Topaz cardstock. For this example, I used Mint Julep Green Art Glitter to give a super pretty tone-on-tone look. This glitter is finer than the other colours I am using today and therefore works really well with adhesive tape.
Once you have applied your glitter, place a piece of clear acetate packaging over the top. Use your bone folder or finger to burnish the glitter into the adhesive.
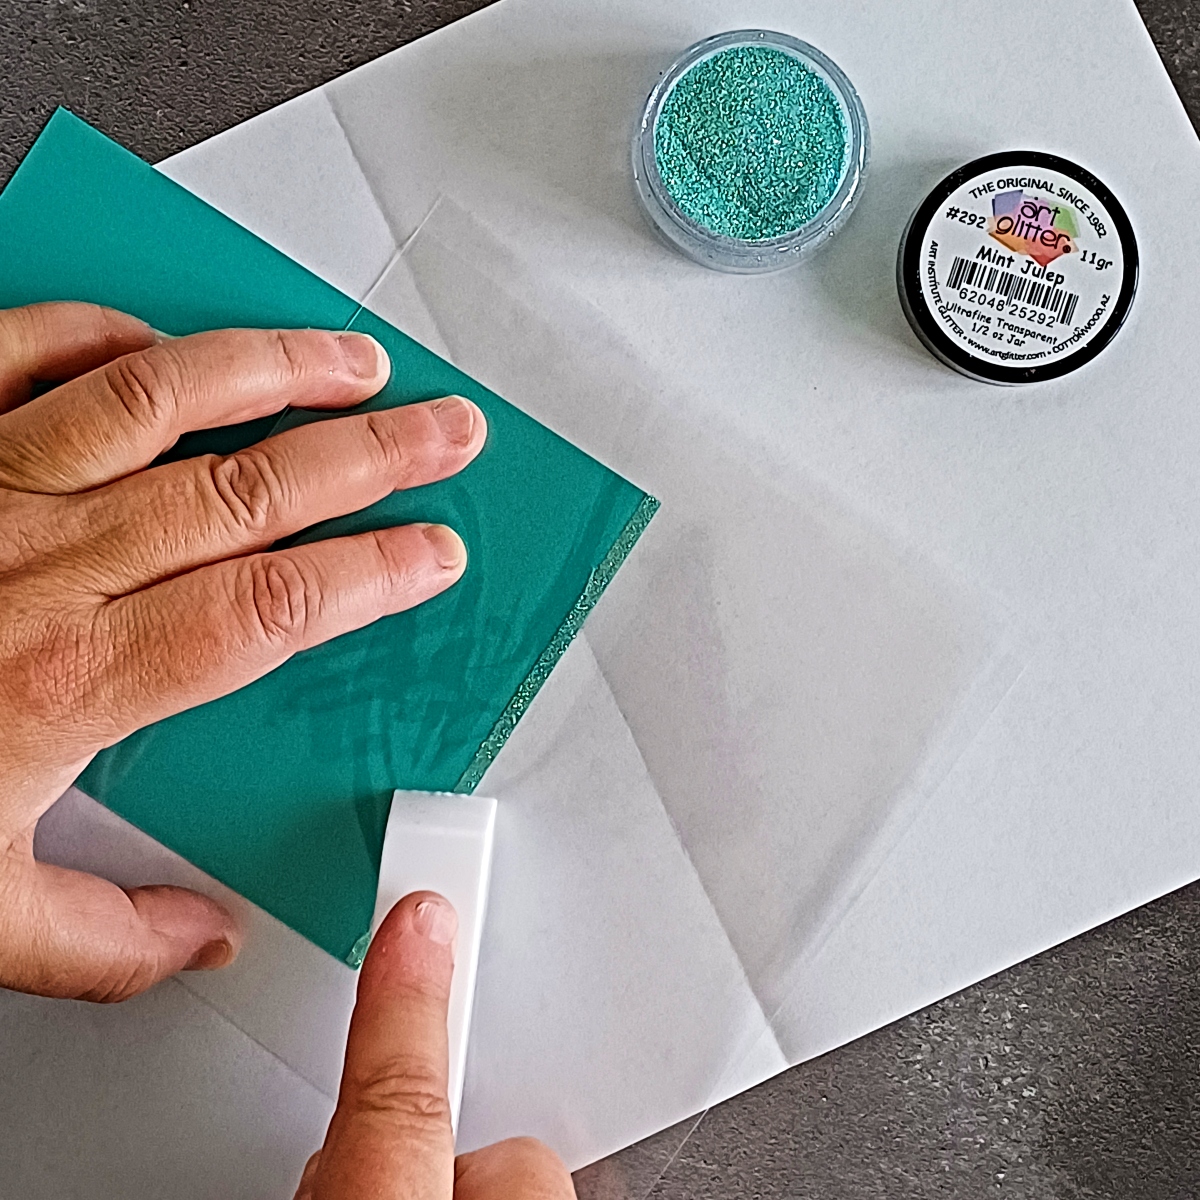
Tip – pressing the glitter into the adhesive tape keeps the end result really tidy and helps ensure the glitter stays in place.
Tip – although this glitter is quite fine, you can still use chunky glitter with double-sided adhesive tape. Just make sure you have good coverage and burnish well!
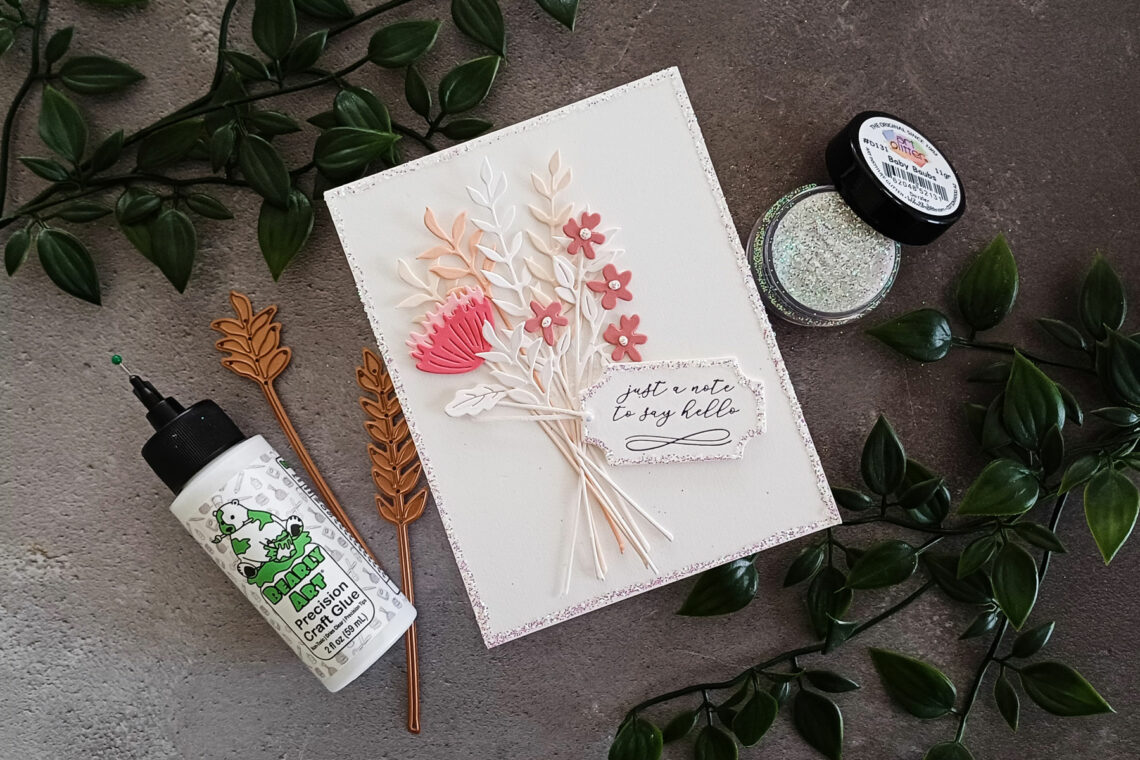
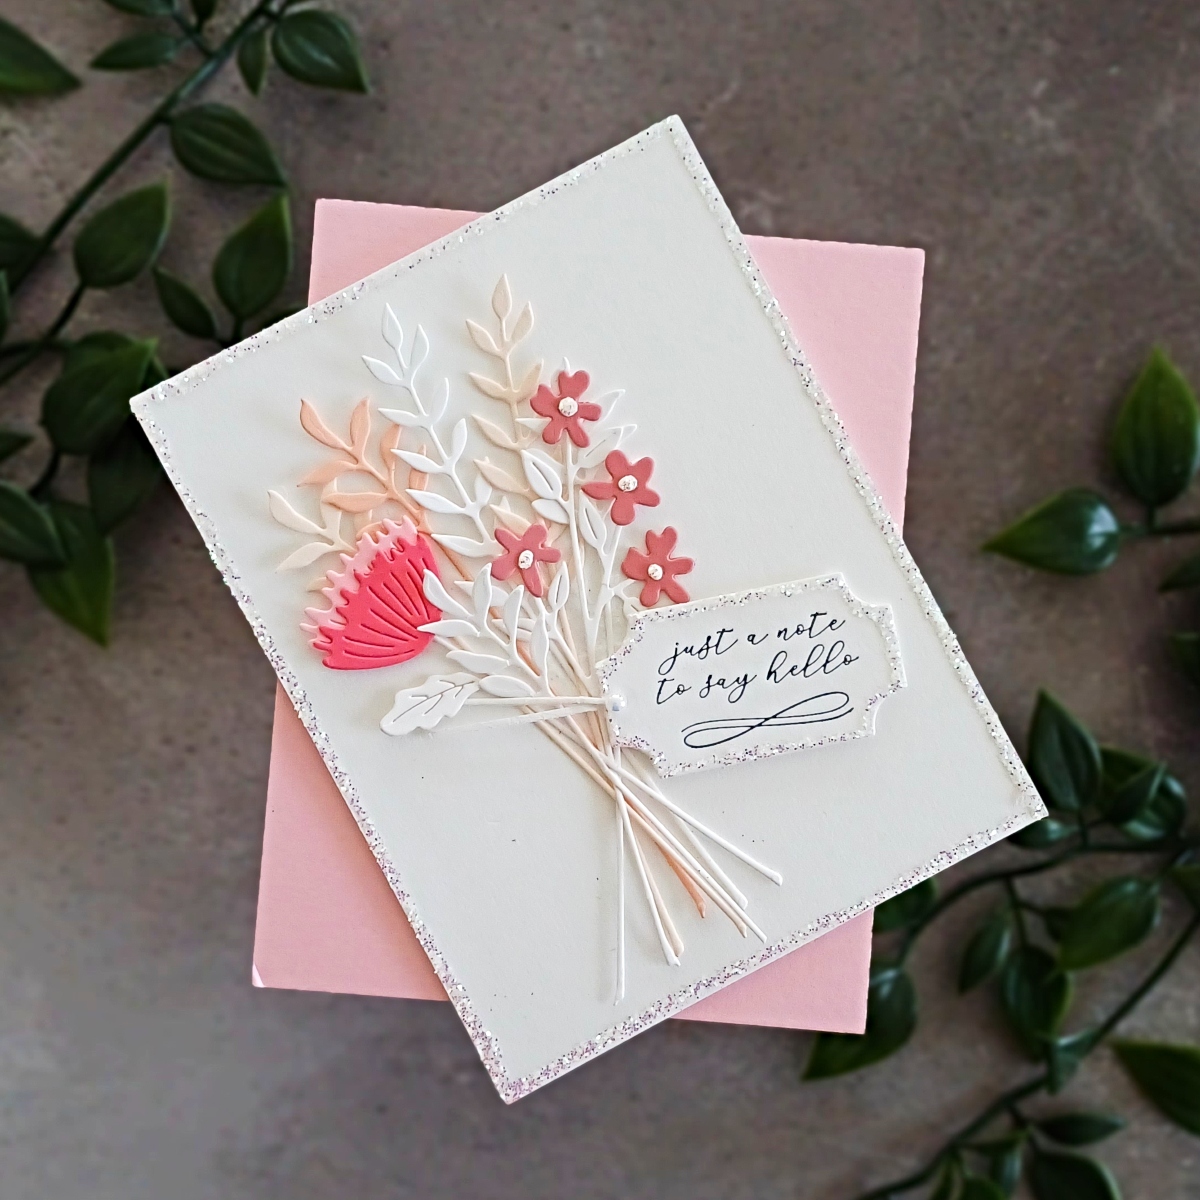
In my finished card below, I used Baby Baubs glitter around the edges of the tag as well as the main card. The flowers are from Sealed Wildflowers Etched Dies and they were cut from Dahlia, Velvet Rose, Pink Sand, Peach Sorbet, and a peach from my stash along with some white card. I used a Betterpress sentiment from Sentiments of Wonder Betterpress Plate and Die Set. The tag is from Envelope of Wonder Etched Dies. Both my front panel and tag are Porcelain cardstock.
Technique 2 – Glitter With Stencils and Paste
For my second technique, we are going to get a little messy with paste! I love an excuse to get my paste out and using it in conjunction with glitter gives it a real wow factor.
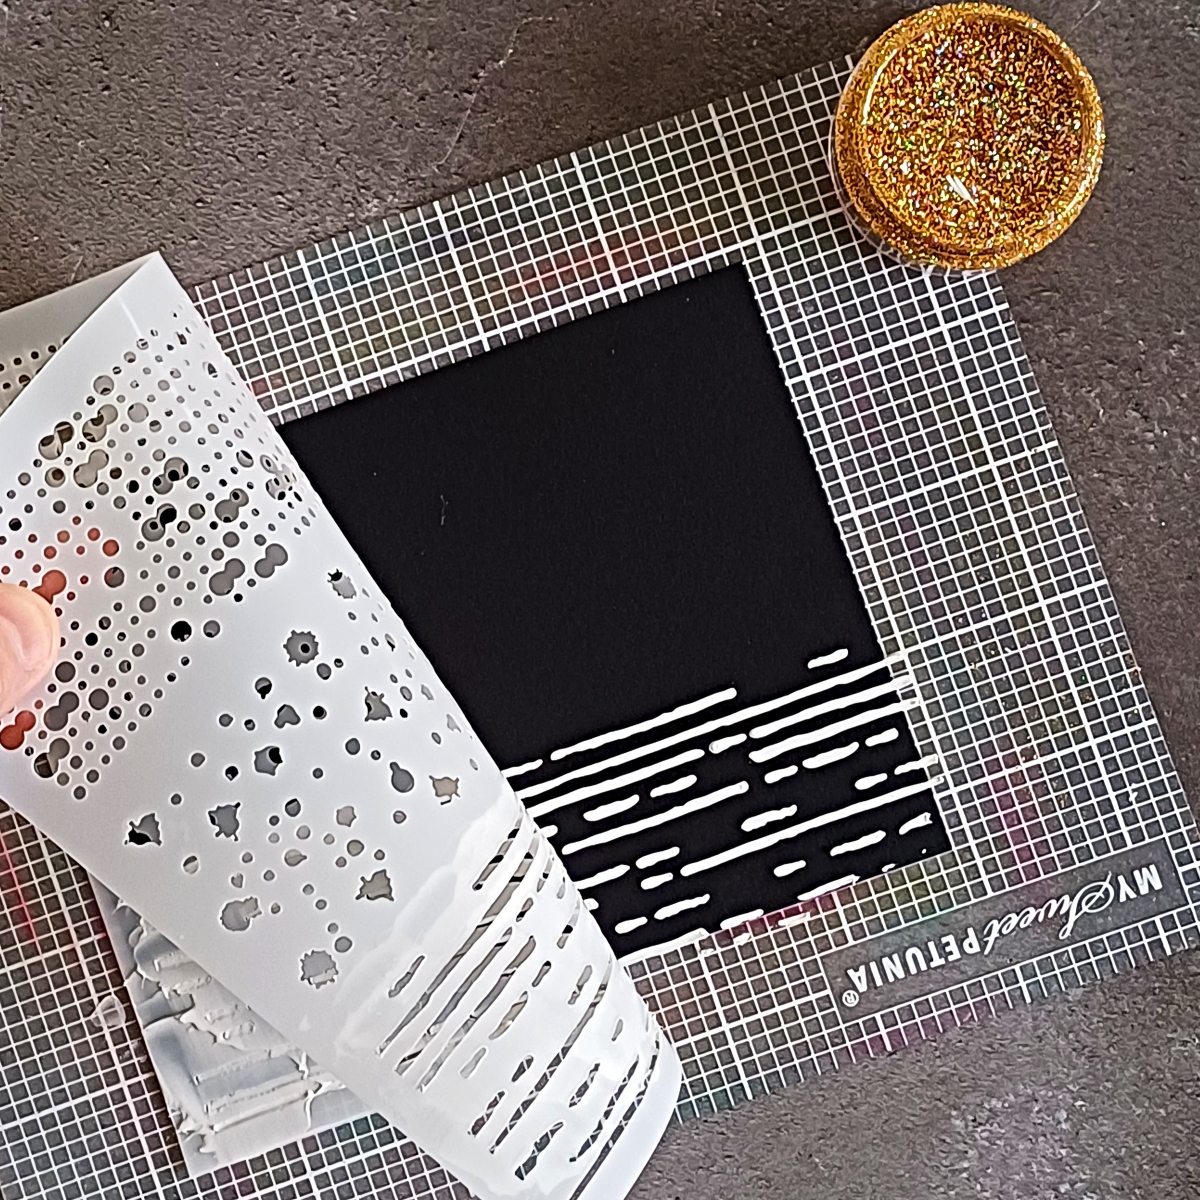
I started by taking a panel of Onyx Color Essentials Cardstock and placing it onto a MISTI Sticky Mat. I then secured the Hummingbird Textures Stencil over the top. Using a palette knife I applied TCW Modelling Paste through the slashed lines section.
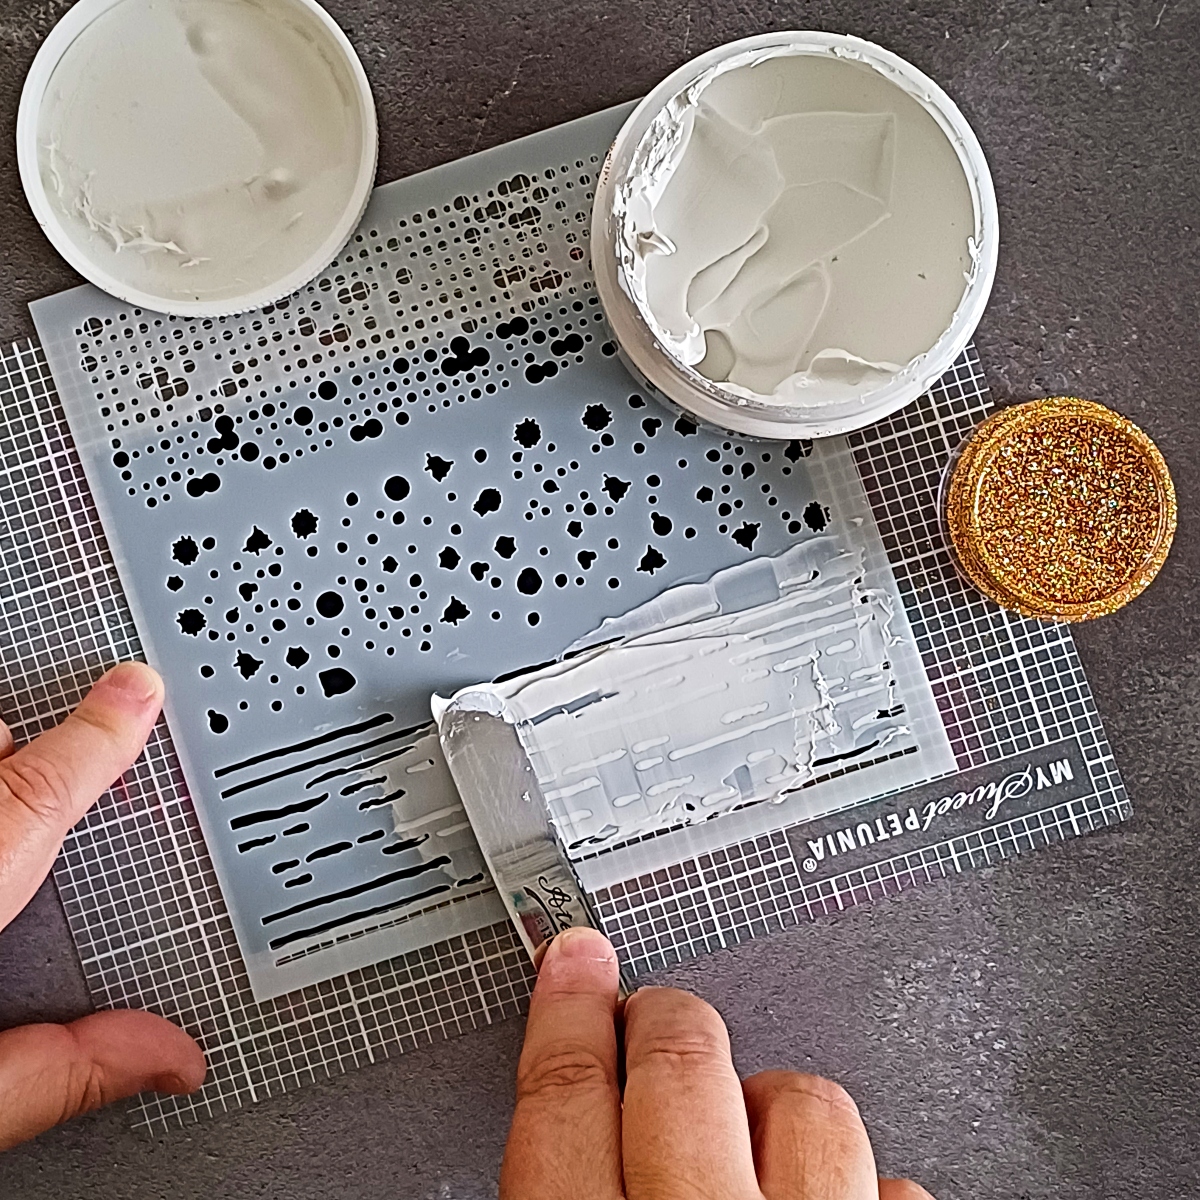
Once I had added the paste all the way along, I removed the stencil and applied Solaria Gold Art Glitter. I think this glitter is BEAUTIFUL! It looks dazzling on a black card and so pretty on white.
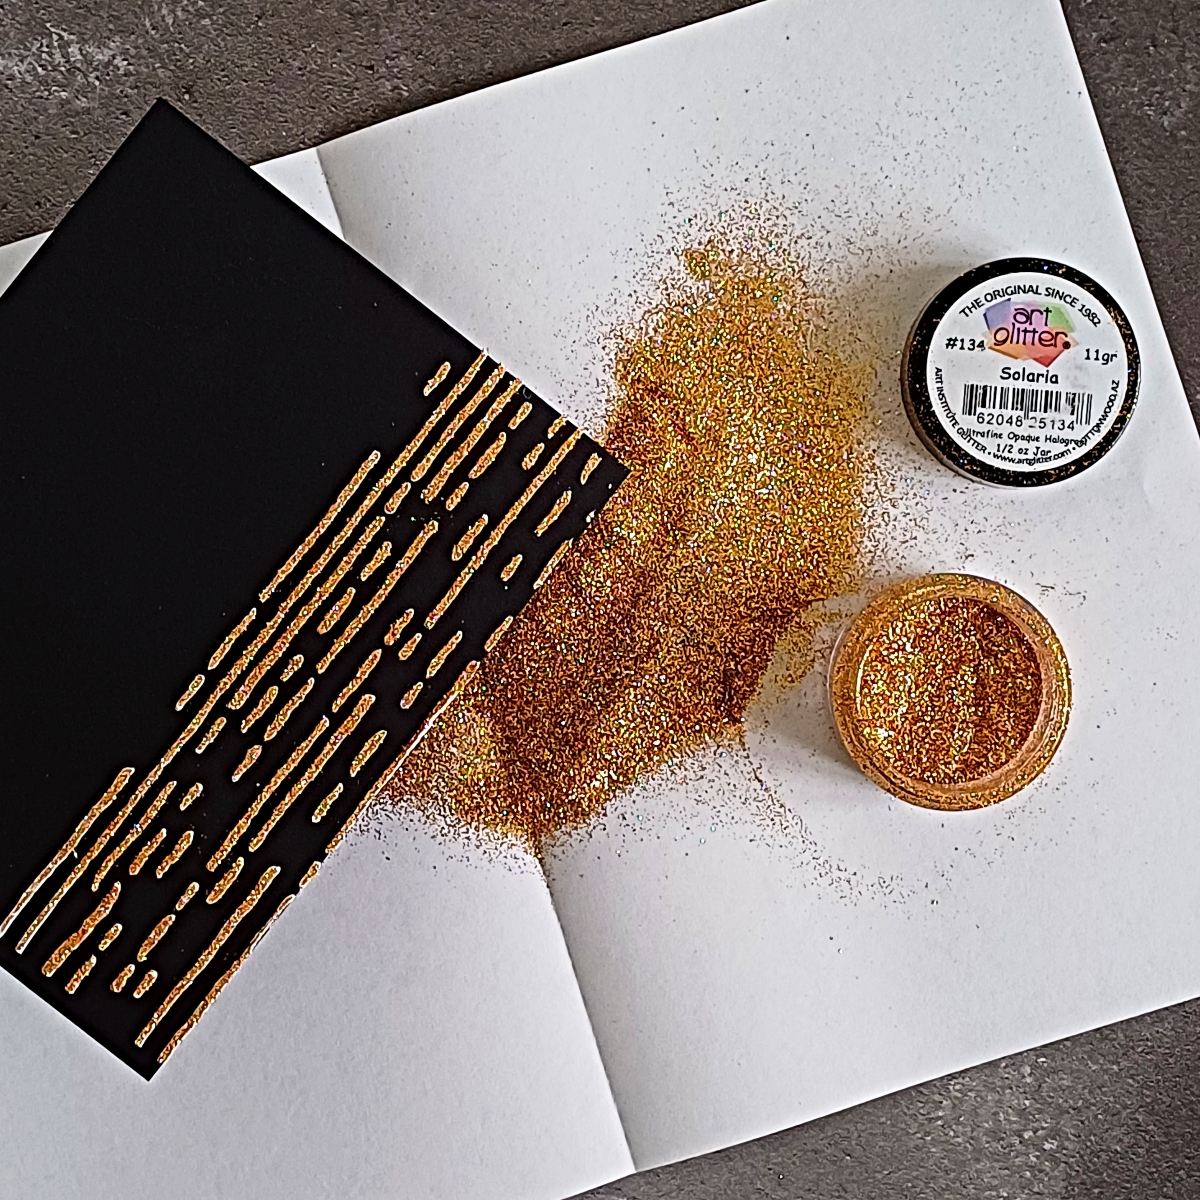
Tip – make sure you have a container of water to place your stencil in. This way you can clean it later when time allows.
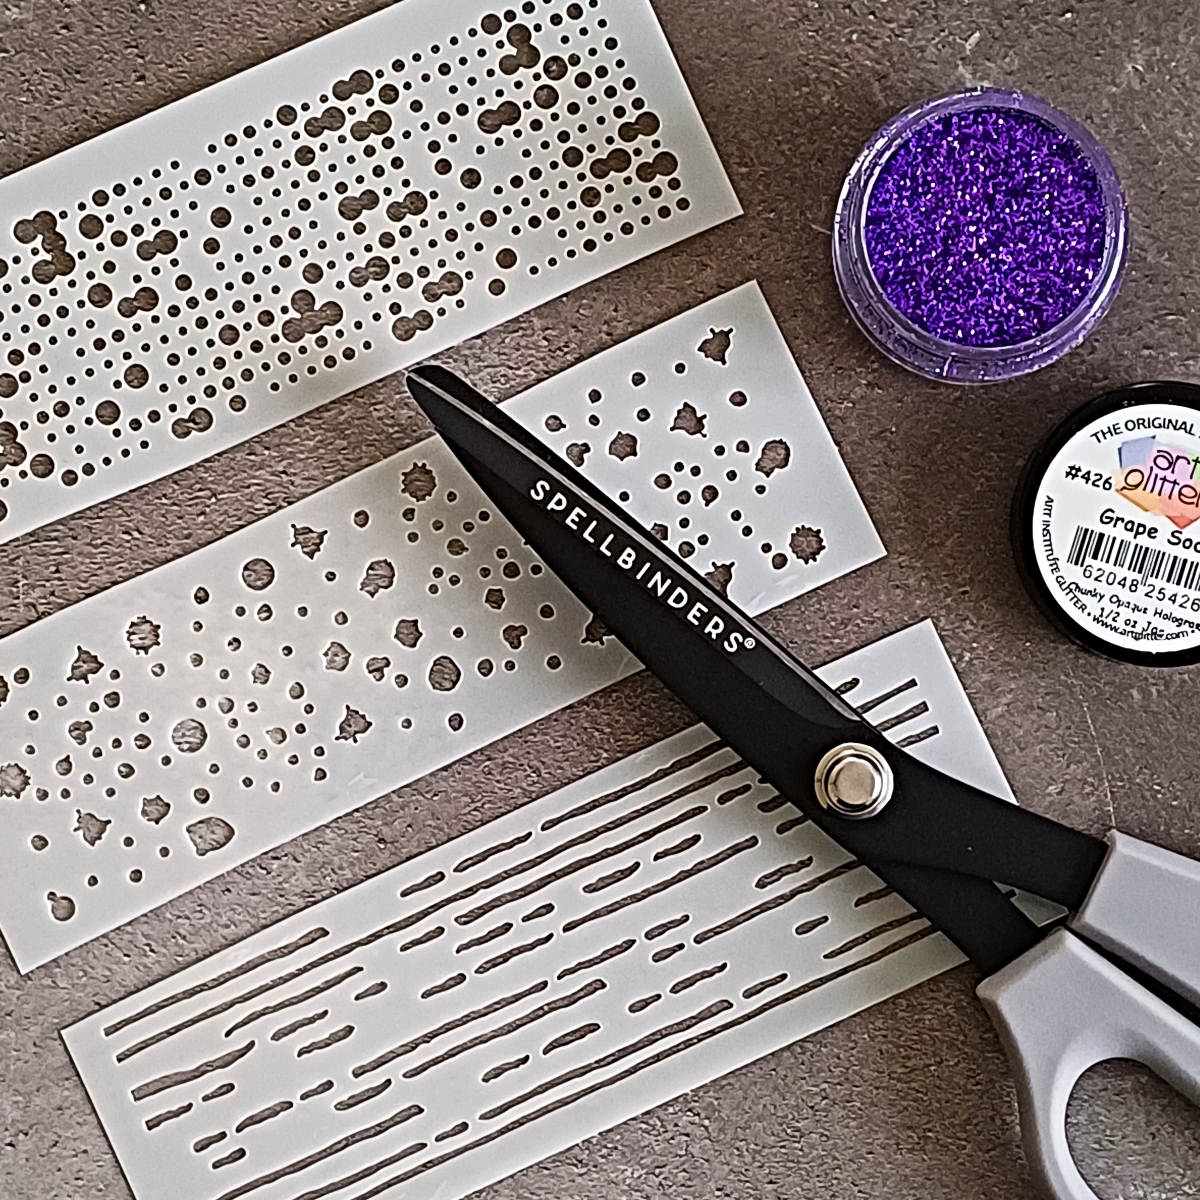
Tip – when you have a stencil like Hummingbird Textures, don’t be afraid to take your scissors to it. Cutting it into smaller sections will give you more flexibility when using it, especially if you want to add colour or paste to different areas on one card.
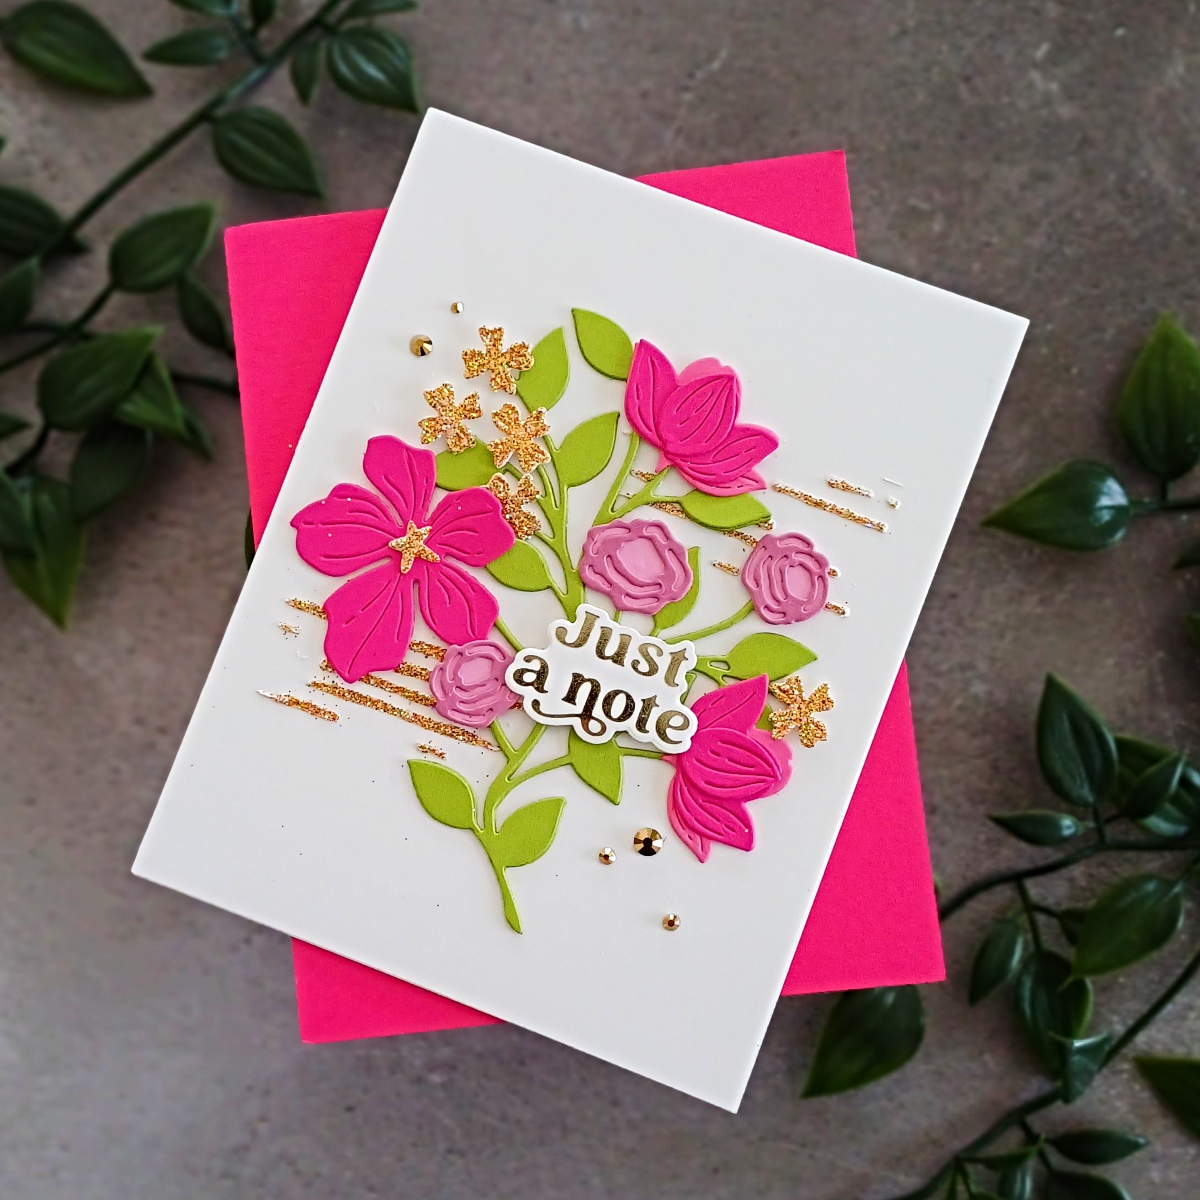
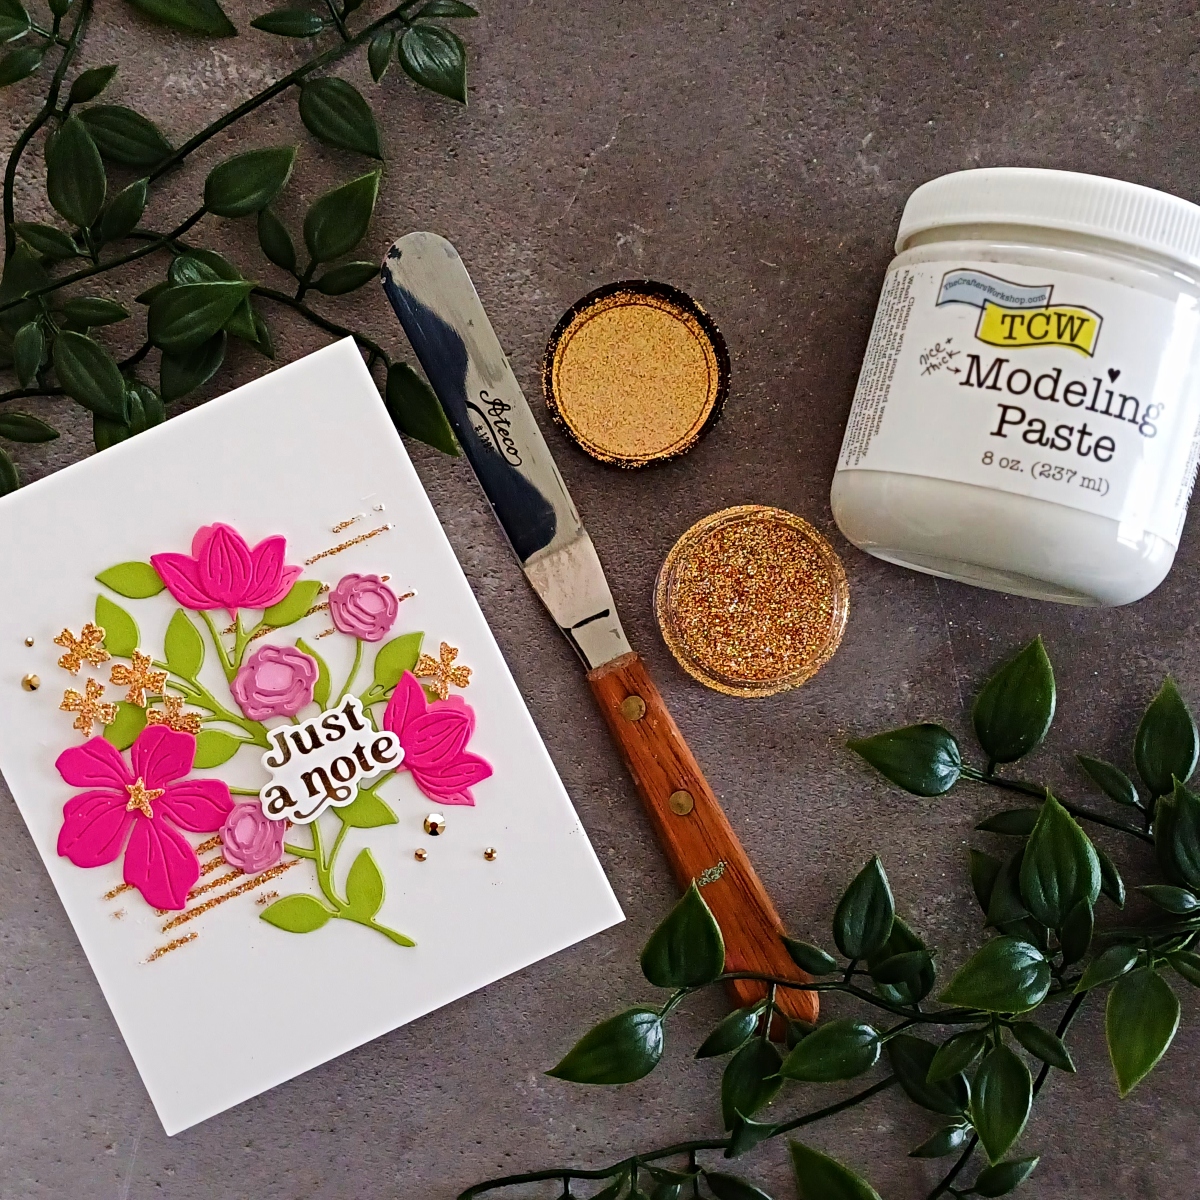
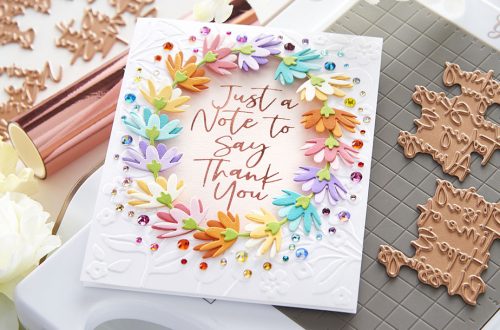
In my finished card above, I applied the modelling paste to two sections of my card panel. I applied Solaria Gold glitter and left it to dry. The flower arrangement is from Four Petal Thank You Floral Etched Dies and it was cut from Rainforest Card and some pinks from my stash. I added some Gold Mix Gems for embellishment.
The sentiment is from Must-Have Sentiments Glimmer Hot Foil Plate and Die Set and it was foiled with Champagne Foil and the Glimmer Hot Foil System.
Tip – For the small gold flowers, and the flower centre, I made a panel of gold card using Solaria Gold glitter and then I die cut them from that. This way all the gold is the same on the card and gives a more polished finish.
Technical 3 – Glitter Strips
For the final technique, I create some glitter cardstock panels, cut some strips and then die-cut the strips using a butterfly die. Again, this is a very simple way of adding glitter to your card. Start by taking a panel of white card and adding an adhesive sheet to one side. Remove the backing and apply your glitter. In my sample, I use Stratosphere Blue.
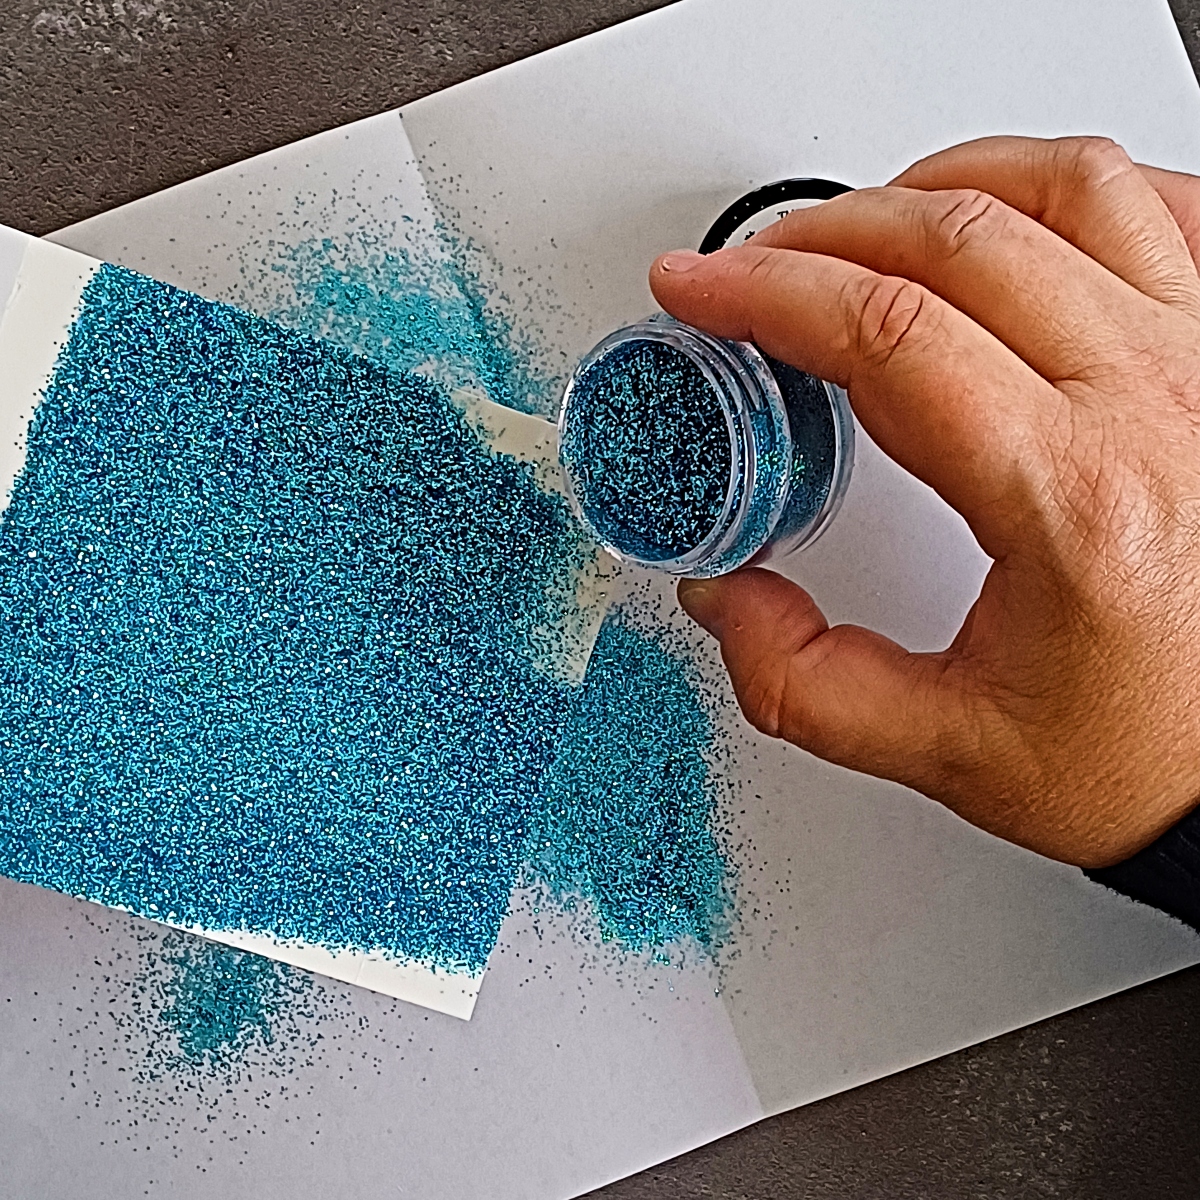
Tip – don’t remove all the backing paper at once, leave a small area to hold onto so your fingers don’t stick to the glue! When you remove that final piece, you can just hold the card at the sides.
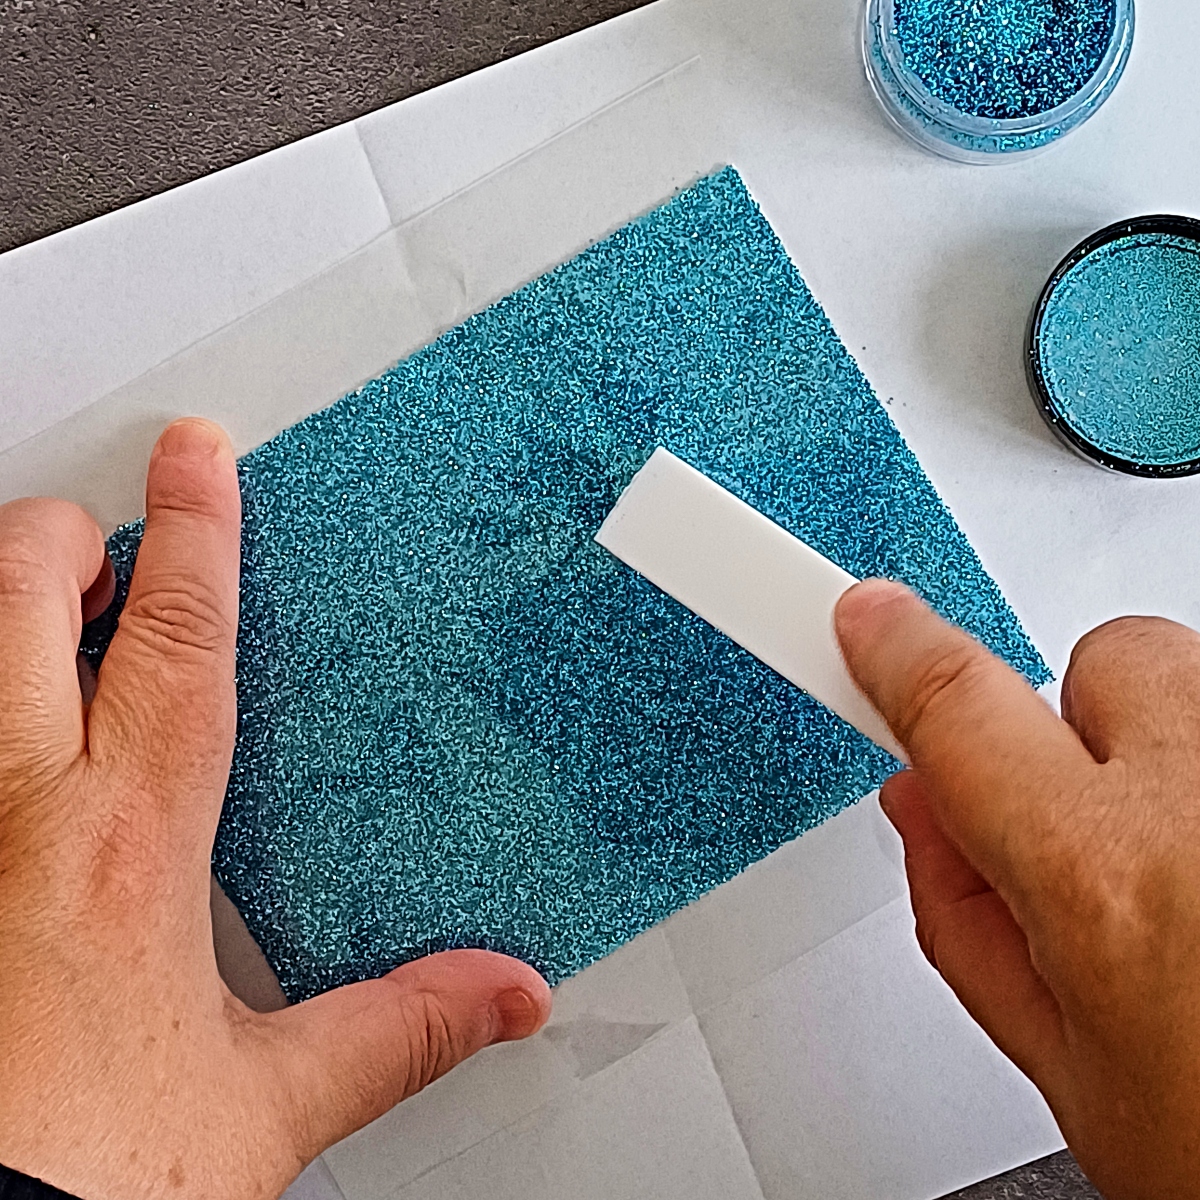
Shake off the excess glitter, remove the rest of the backing and finish coating the panel. Once you have finished, place some acetate packaging over the top and using a bone folder, really burnish that glitter into the adhesive. As it’s a chunky glitter, some will still come free but you still get a good coverage.
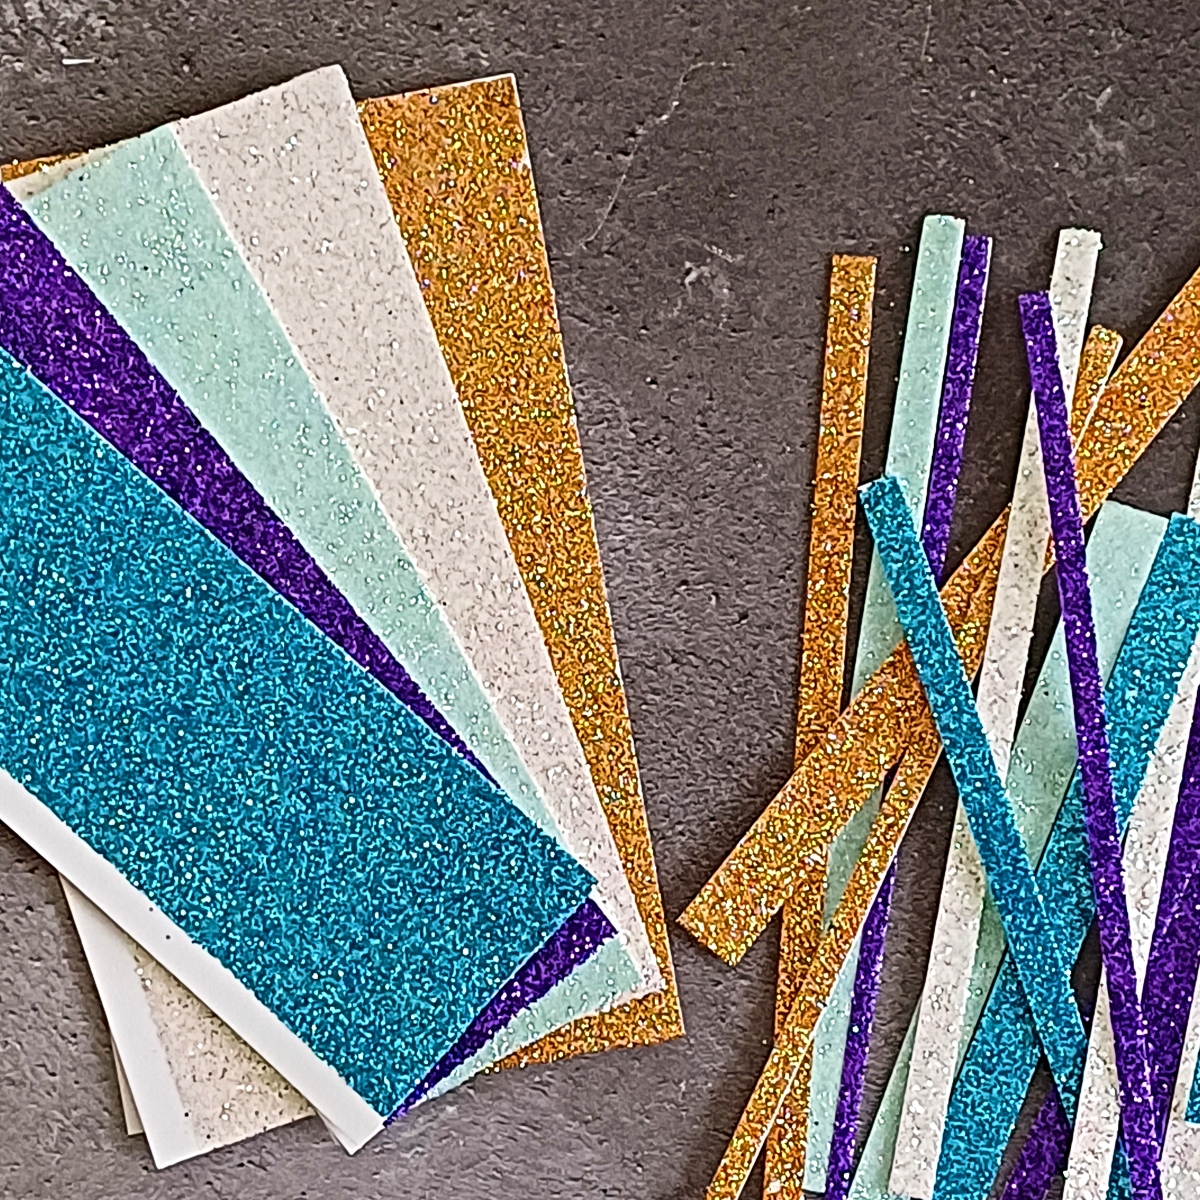
Tip – Repeat the process for all your glitter colours so that you have plenty on hand for when you need it! I used Grape Soda Purple, Stratosphere Blue, Mint Julep Green, Solaria Gold and Baby Baubs.
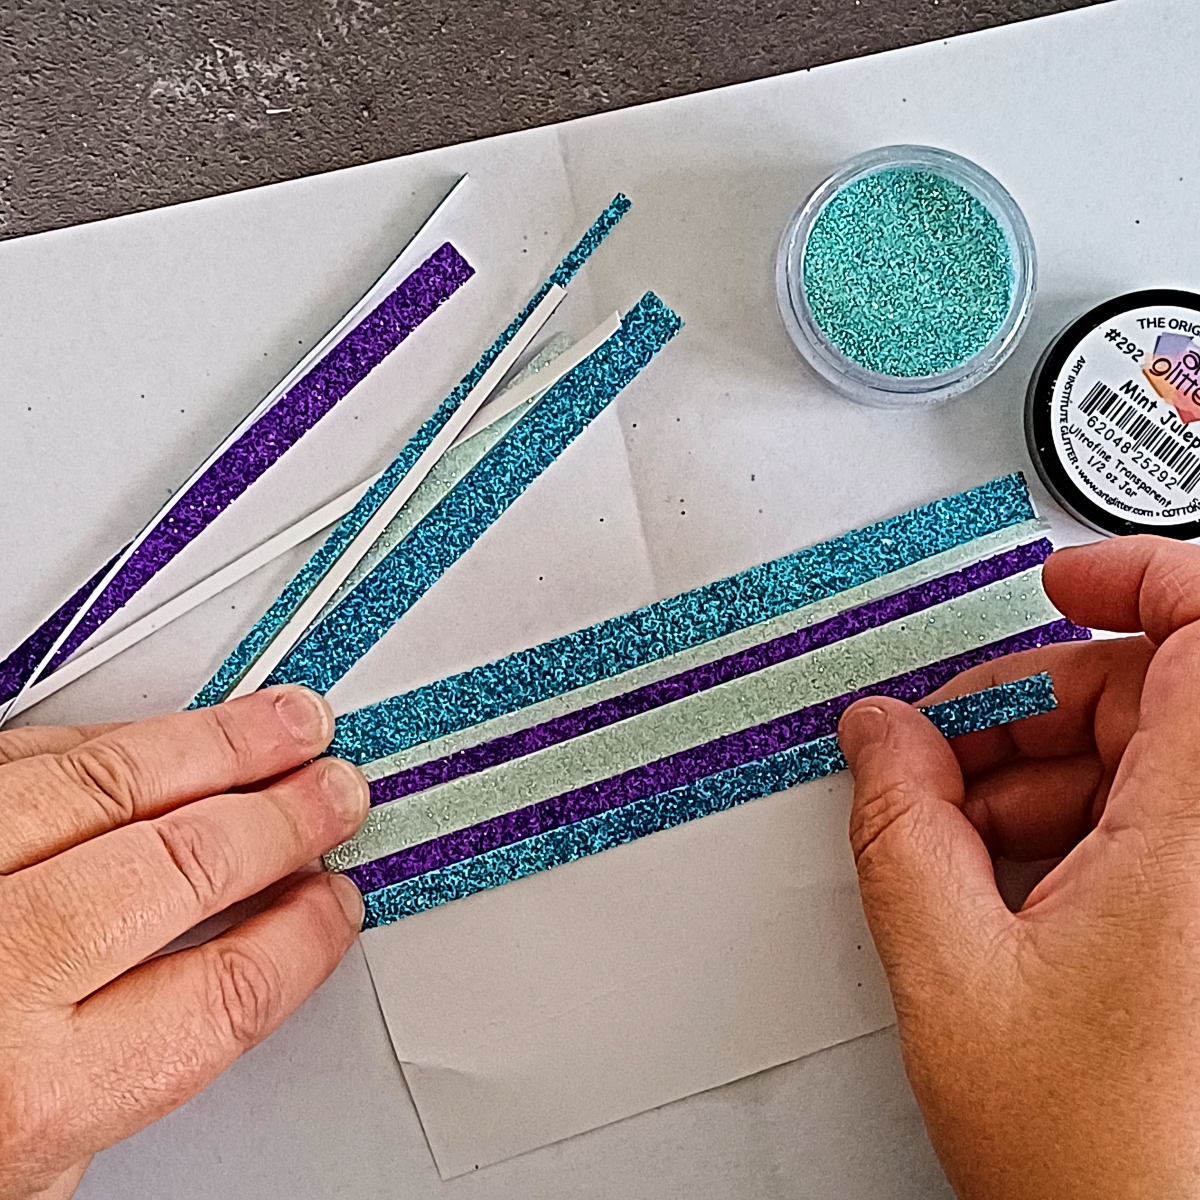
I then created some smaller panels from the same colours and cut them into differing-width strips.
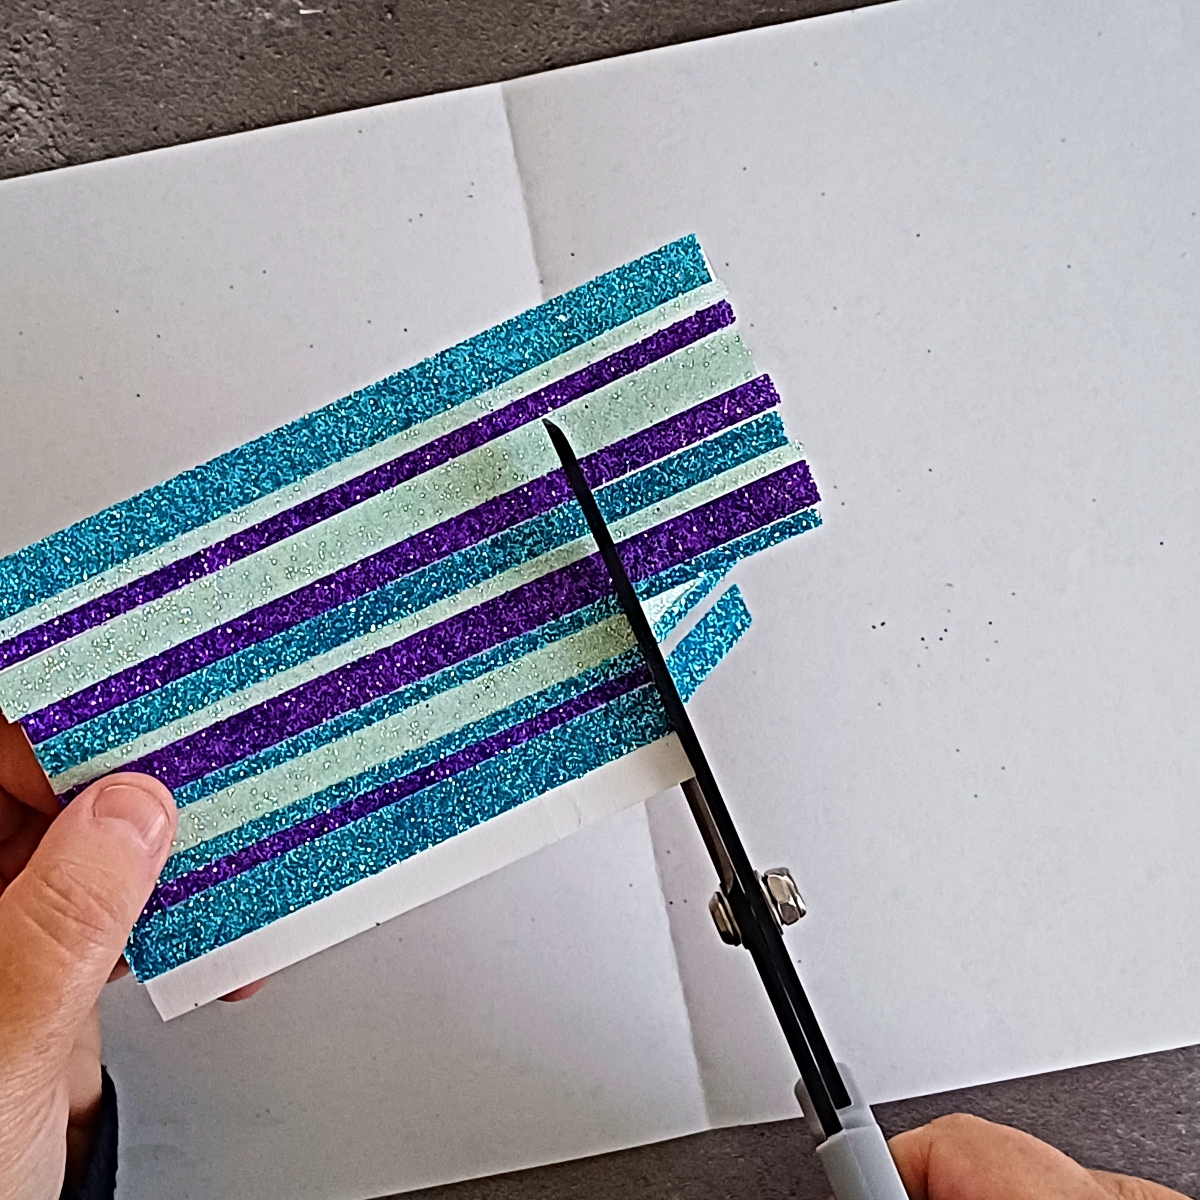
Next, I took a small panel of white printer paper and added some adhesive sheets to it. I then placed the strips on it one by one until it was covered.
Once I had covered my printer paper, I cut the excess from the side.
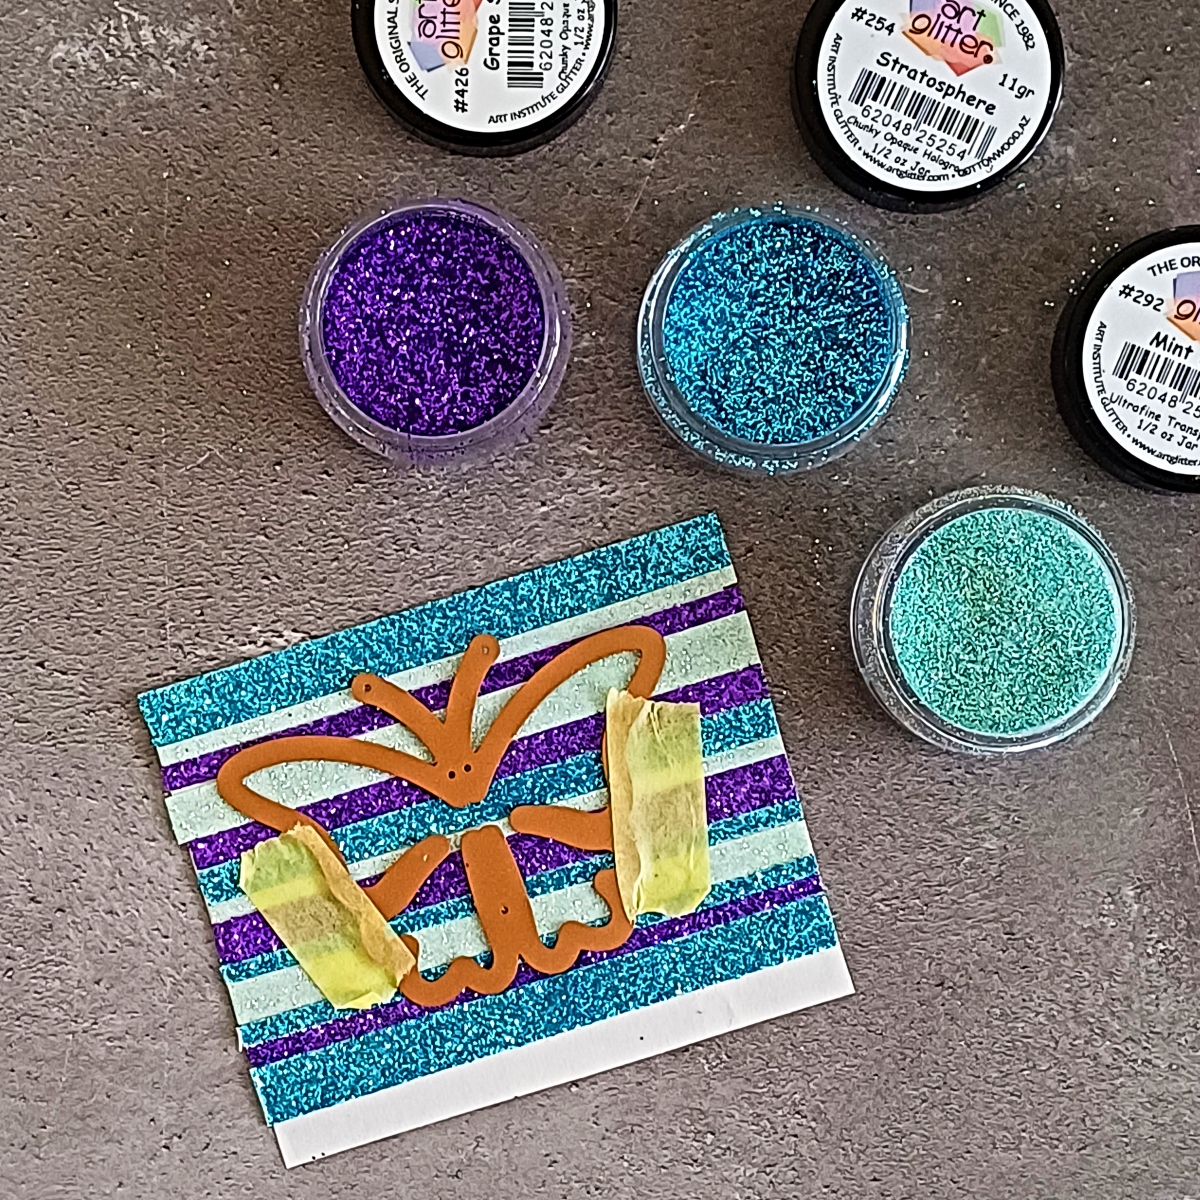
I then took the Layered Butterfly Etched Dies and die-cut the base layer of the butterfly from the strips. It looks so sparkly and colourful!
To finish the card (pictured below), I cut the second butterfly layer, body and antennae from white card and adhered them with Bearly Art Glue. They were then popped up onto a white panel which I had scored some lines onto. The white panel was then added onto a base card created with Lilac Blossom card.
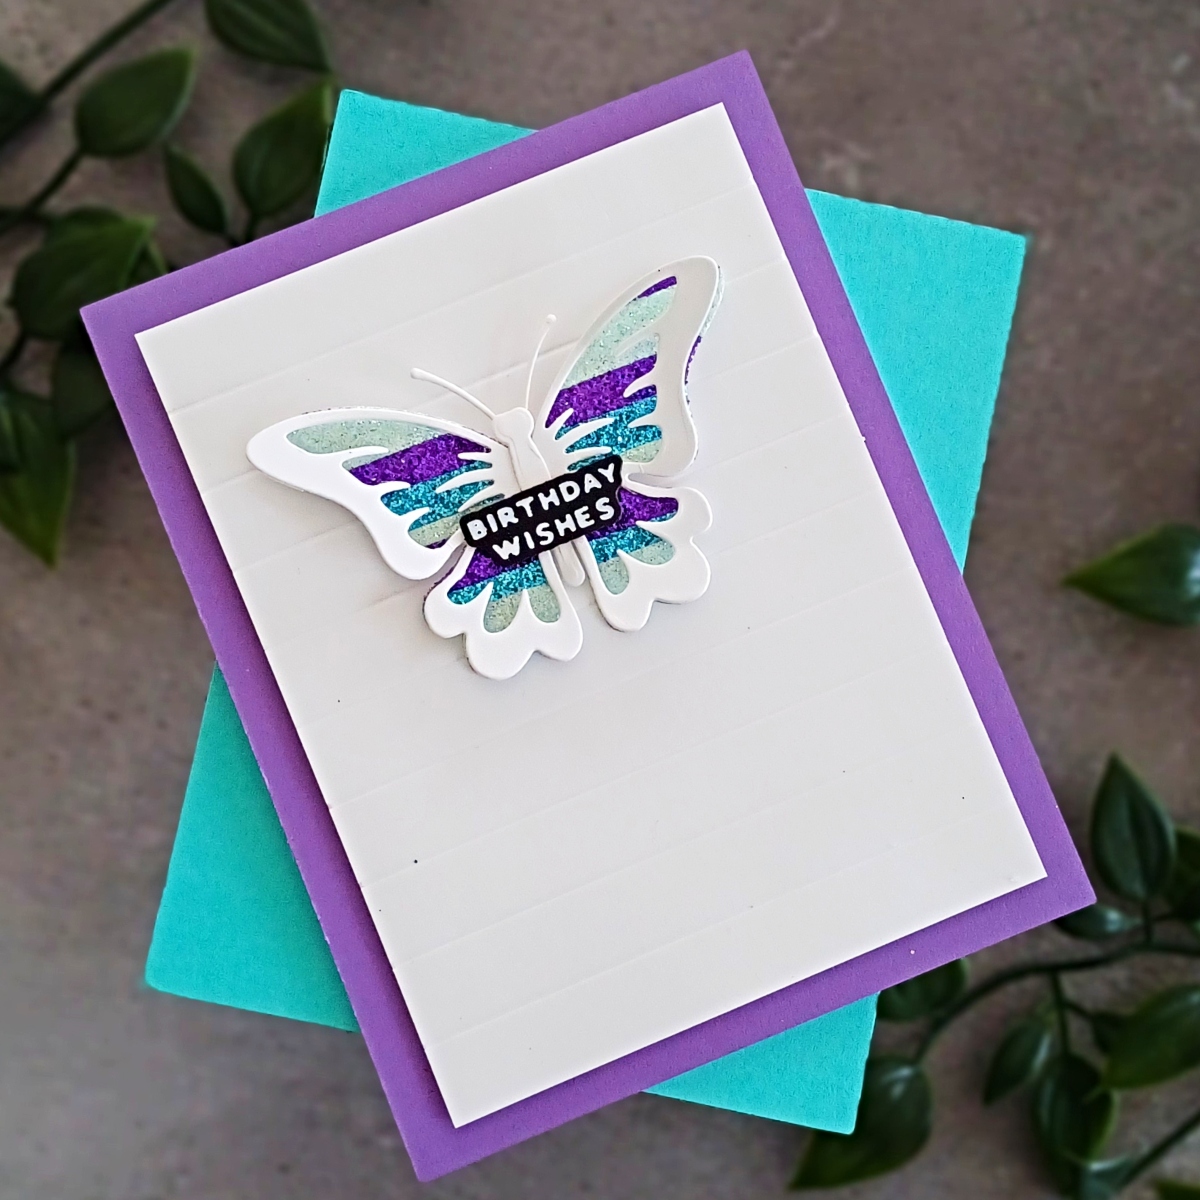
The sentiment is from Making Me Smile Sentiments Glimmer Hot Foil Plate and Die Set and it was foiled onto Onyx card using White Hot Foil. I cut it out with the coordinating die and added it with a little thin foam tape behind it.
There are so many more ways to add glitter to your cards. I cover just a few above but you could also try the following:
- add glitter into a shaker to create a really unique celebratory card which is sure to sparkle!
- Create an ombre background using glitters that are close to each other in colour. If you need a transition colour, you can mix the glitters in a separate pot to create an interim colour and a smoother ombre look.
- You can add beautiful sparkly accents to your die cuts, but just adding dabs of glue to petals or leaves etc. and then applying some glitter over the top.
- A background can be turned from plain into sparkly gorgeousness just by adding small glue dots over it and then applying glitter on top. You don’t even need a stencil to create this type of background and it looks great as stars or snow!
- Add glitter into the wax when creating a wax seal. This results in an even more special embellishment for your envelope or card.
Whatever way you chose to go with your glitter, have fun with it! Don’t mind the mess, remember to have your Swiffer cloths ready to clean up as you go. It’s worth a little bit of mess as it adds a touch of luxe like no other.
Thank you so much for joining me here today, If you want to see more of my work, do hope over to follow me on my blog, YouTube or Instagram. I hope that you have a great day!
Spellbinders Supplies:

Other Supplies
Die cutting machine, Neenah Solar White Classic Crest 80/110lb, thin foam tape, Hero Arts tweezers, embellishment wand, Lucy’s Cards Glossy Porcelain Mix, Scor Tape 3mm, Swiffer Cloths, palette knife, Teflon bone folder, Concord & 9th Dragonfruit, Sweet Pea, Carnation and Briar Rose, Peach cardstock, Double Sided Adhesive Sheets.
2 Comments
Michelle
Where do you buy the acetate that you use in your projects?
Yana Smakula
We have acetate available in our shop – https://spellbinderspaperarts.com/products/clear-acetate-sheets-from-the-card-shoppe-essentials-collection?_pos=1&_sid=cd07ca540&_ss=r