Mixing and Layering Wax Beads to Level Up Your Seals
Hey there! Daniel West, here, with some great tips on mixing and layering wax beads to take your seals to the next level. If we graded this tutorial for difficulty, I would say it ranks a 5 out of 10. I prefer this method of layering seals to coloring them with a marker because it makes for a very sharp and clear seal impression with contrast. It also is permanent and won’t wipe off with your finger. Later in January, I will have a YouTube tutorial on my channel.
Instructions for layering waxes on seals:
- Warm your seal a bit over the flame of your votive candle or just let it stay in the melted wax for a good minute to allow the wax to wipe off after the first dip.
- Be ready with your palette knife to clean up the seal after the first dip.
- Dip your wax seal into the melted wax you want to layer over the poured wax.
- Scrape the seal along the edge of the spoon, then use the palette knife to take off any excess wax on the edges and flat part of the seal. This will take some practice, but it’s super relaxing and you can get into a zone doing it.
- Set the seal aside to cool completely.
- Then, clean out your spoon with a napkin and melt the beads you want for the base of your seal.
- Here, you can make the seal marbled with different colors or shades of the same color!
- Pour your bottom layer out on your rubber mat and place your pre-waxed and cooled seal into the hot wax as you normally would.
- Let it cool down completely, then remove your seal to reveal your glorious layered wax seal.
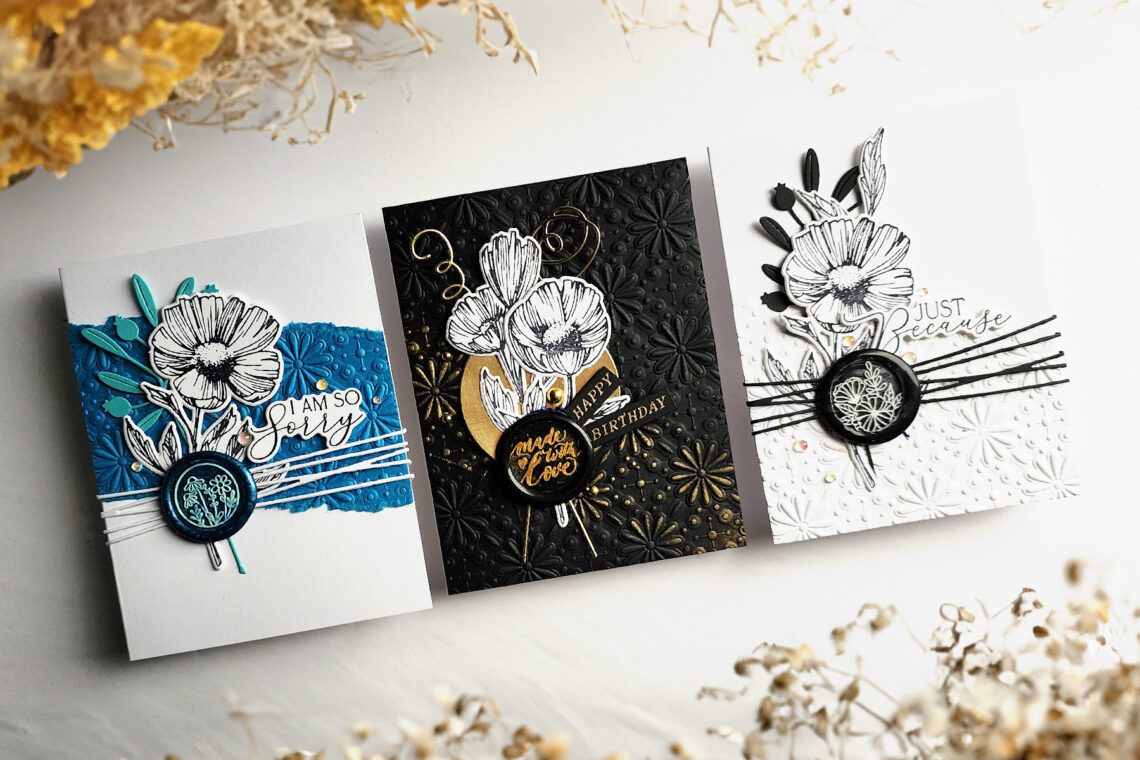
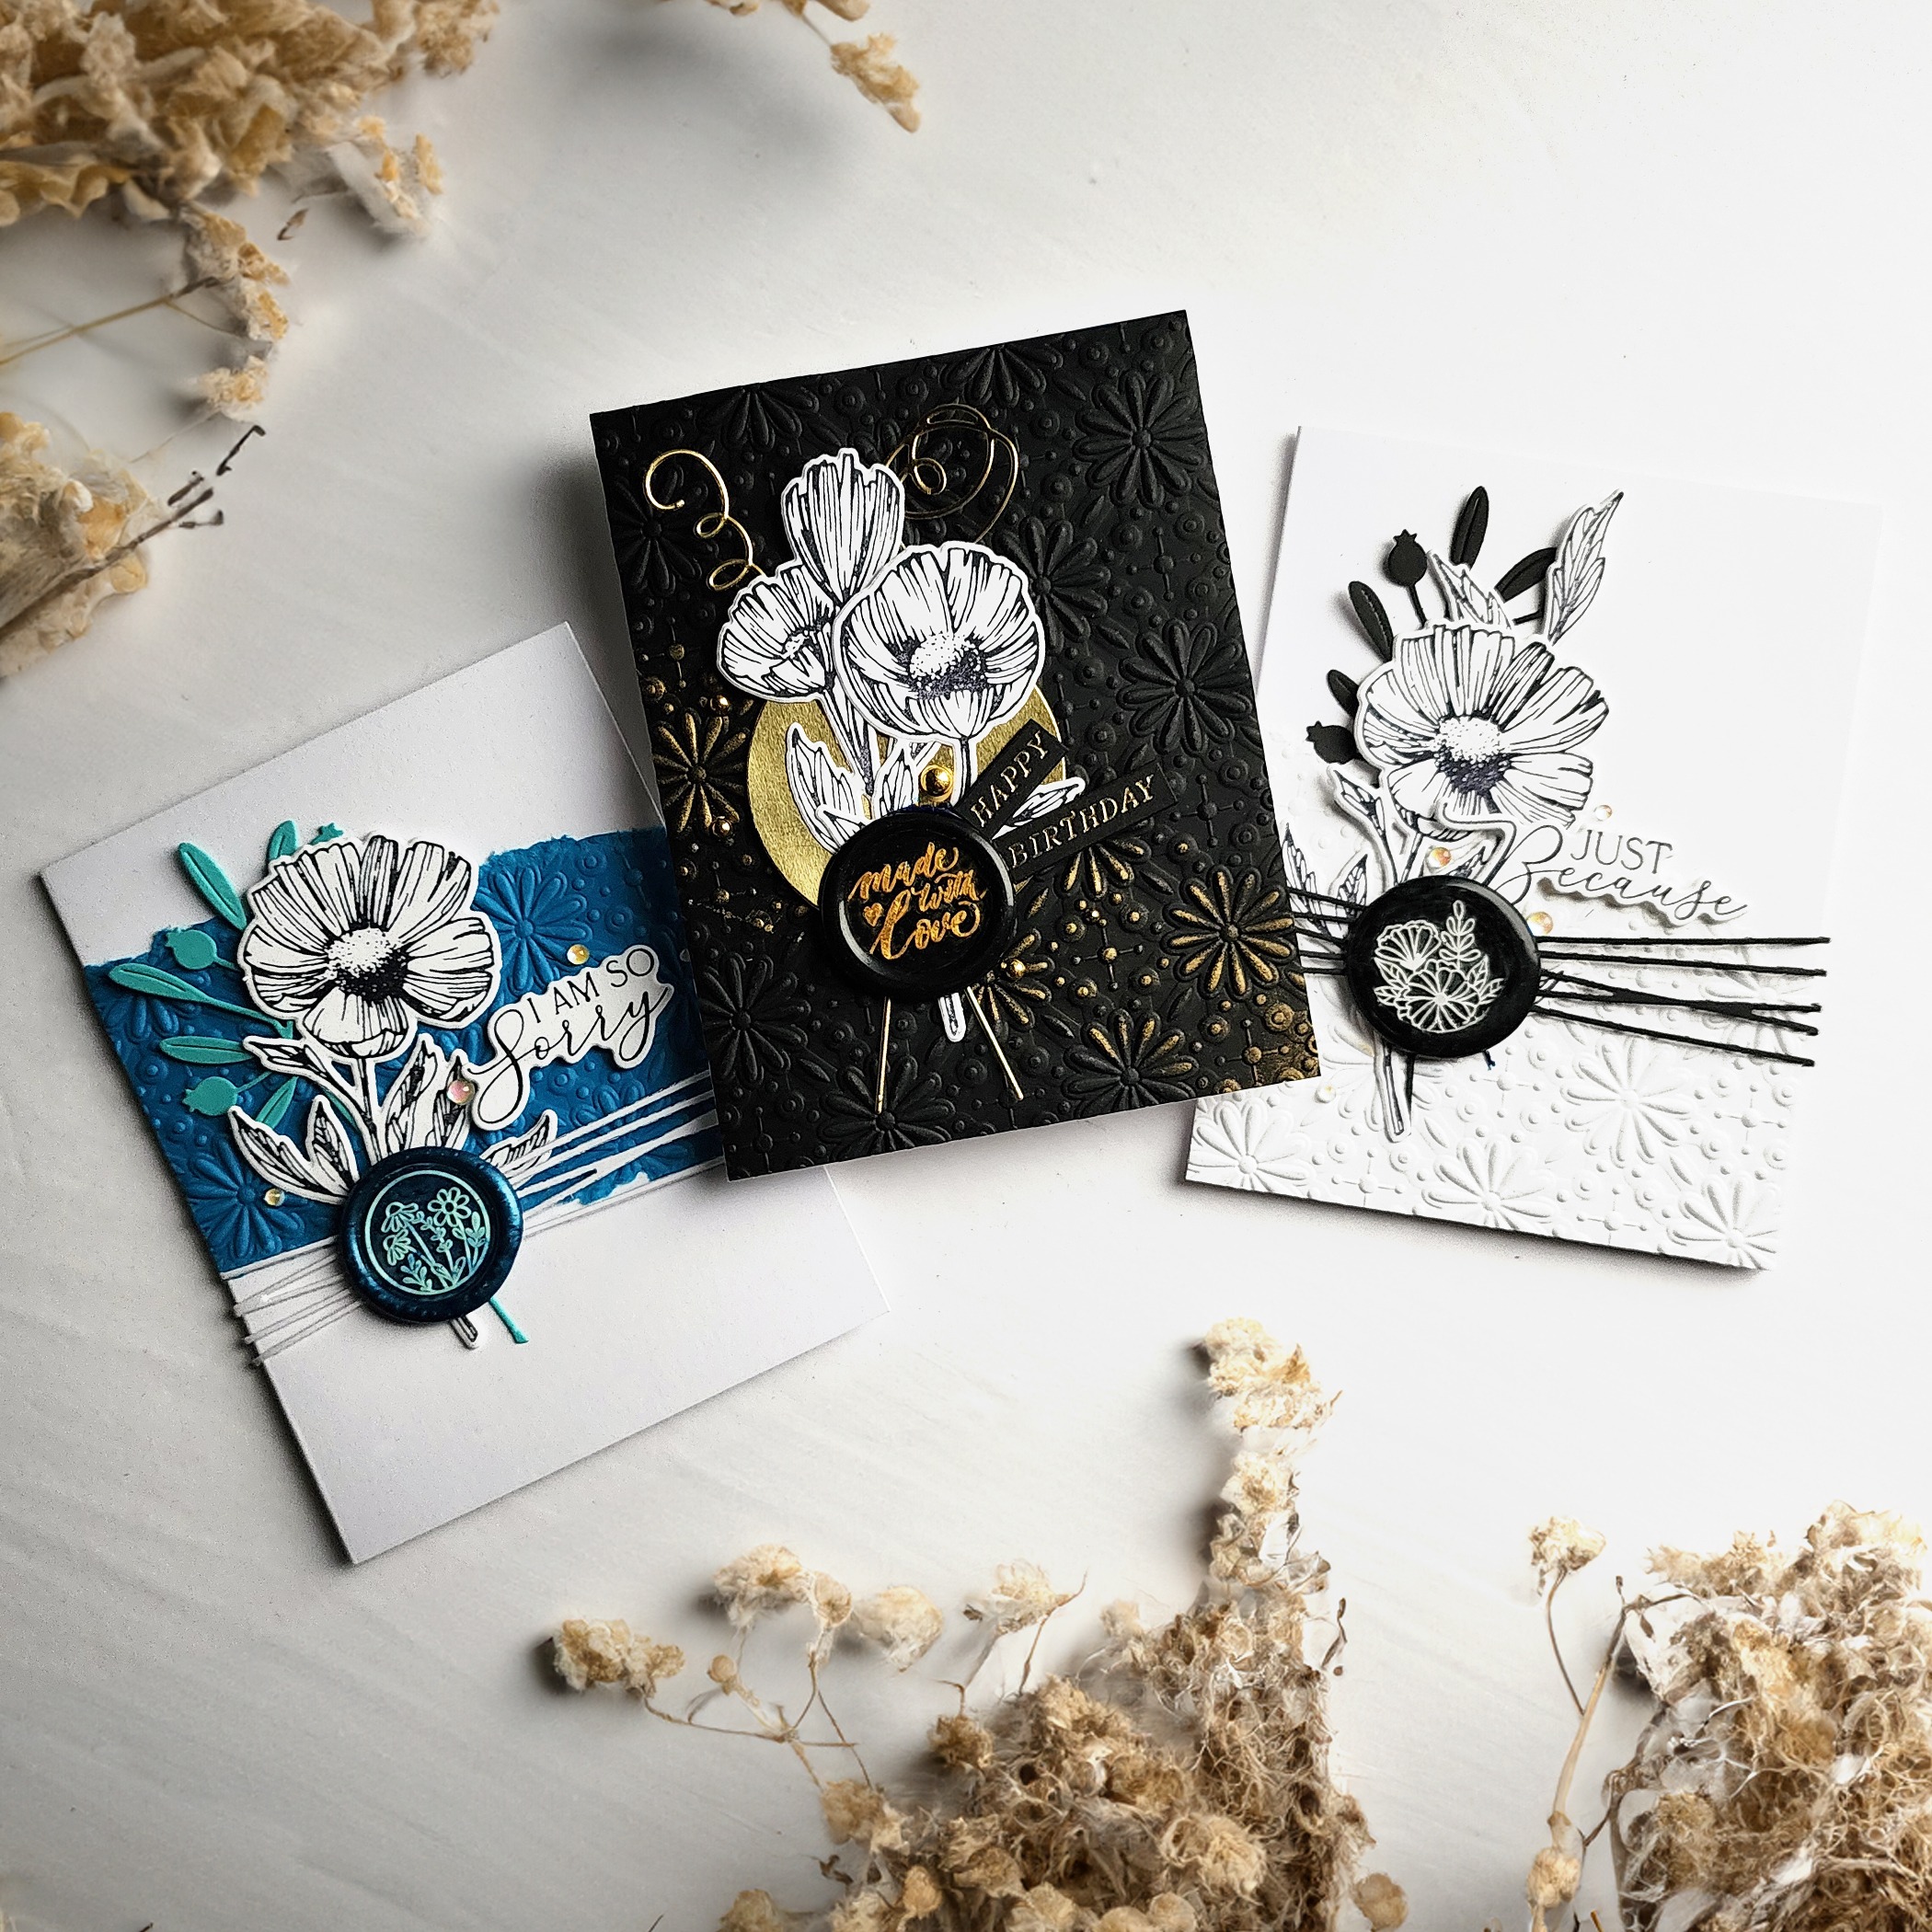
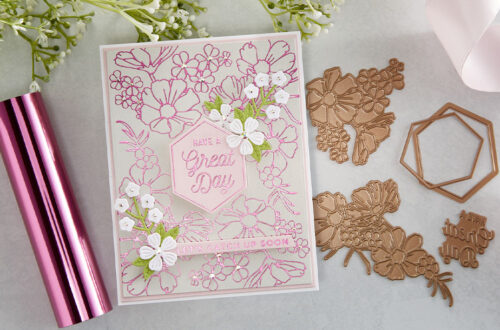
For all of my projects, I used the Criss Cross Motif 3D Embossing Folder for a background. I used the Mighty Mister Spray Bottle to moisten each panel of cardstock prior to running it through my Platinum 6 Machine. The BetterPress Spring Collection Pressed Posies came in handy on each card, as well. I just inked up the plates with BetterPress Black Ink and pressed them into BetterPress Porcelain A2 Cotton Card Panels. Then, I cut them out with their coordinating dies. I did the same with the BetterPress You Are Everything Sentiments Press Plate to create sentiments for two of the cards.
Just Because Project
For the “Just Because” card, I embossed the white cardstock, tore it in half at an angle, and adhered it to the front of an A2-sized white card base with liquid adhesive.
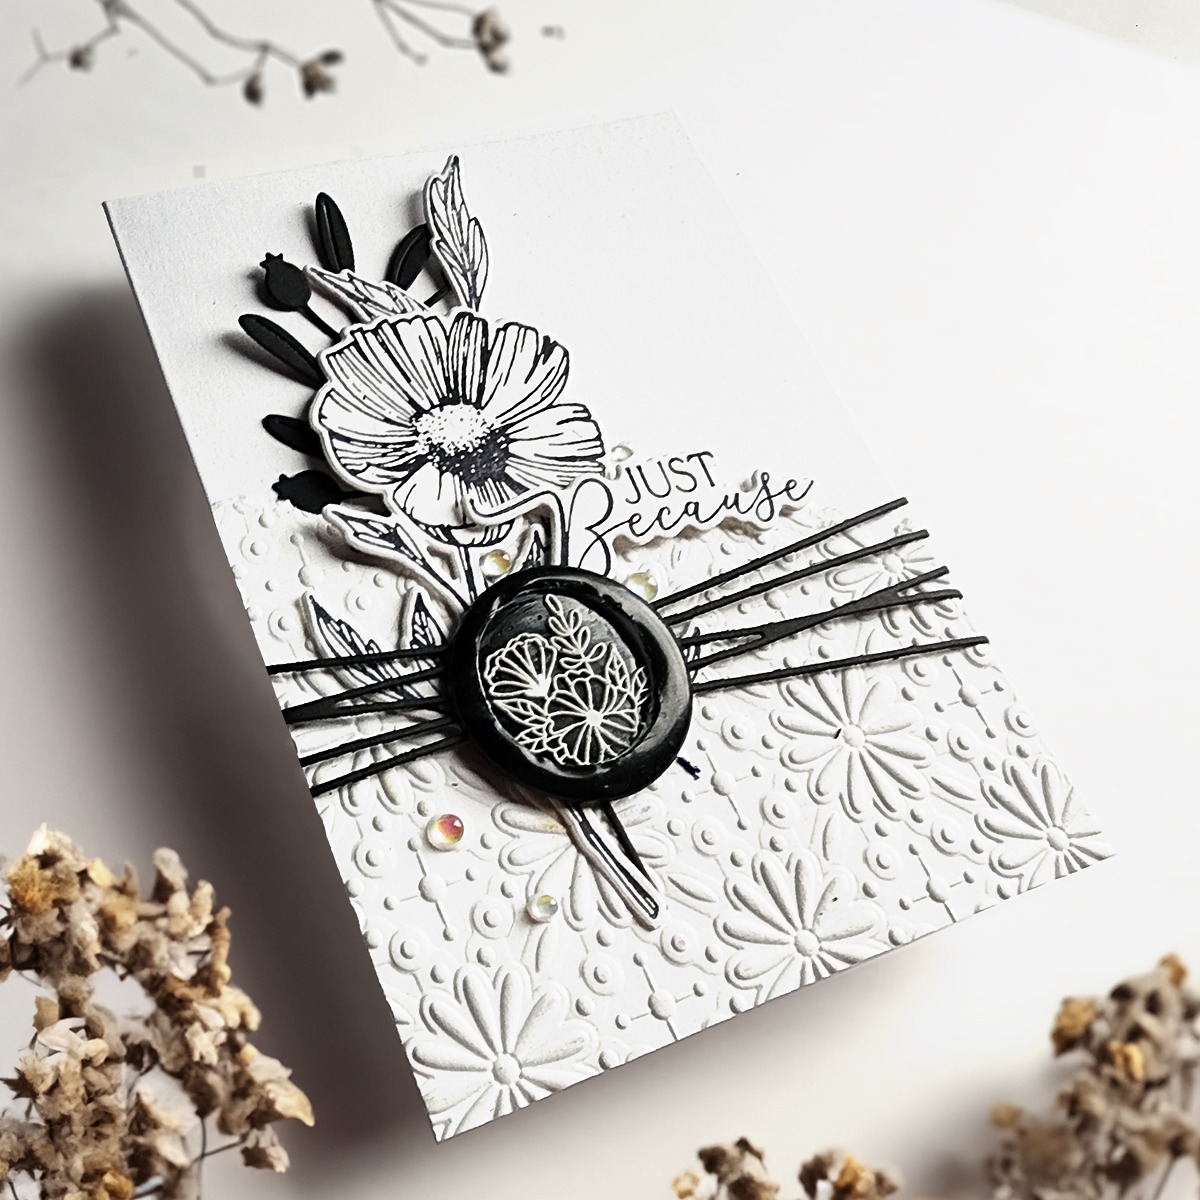
Then, I die cut the Sealed Berry Sprig and the Sealed Twine dies out of Brushed Black Cardstock.
Next, I stacked the sprig, a flower and petals from the Pressed Posies die cuts, and the Sealed Twine onto the front of the card with liquid adhesive. I also connected the back of the twin die cut with liquid glue, wrapping it around the back of the card.
Finally, I created the wax seal using the process above and the white beads on top of the black one from the Must Have Wax Bead and Mix and the Timeless Blooms Wax Seal.
I finished it off with the Just Because Sentiment, popped up with foam tape and some iridescent embellishments.
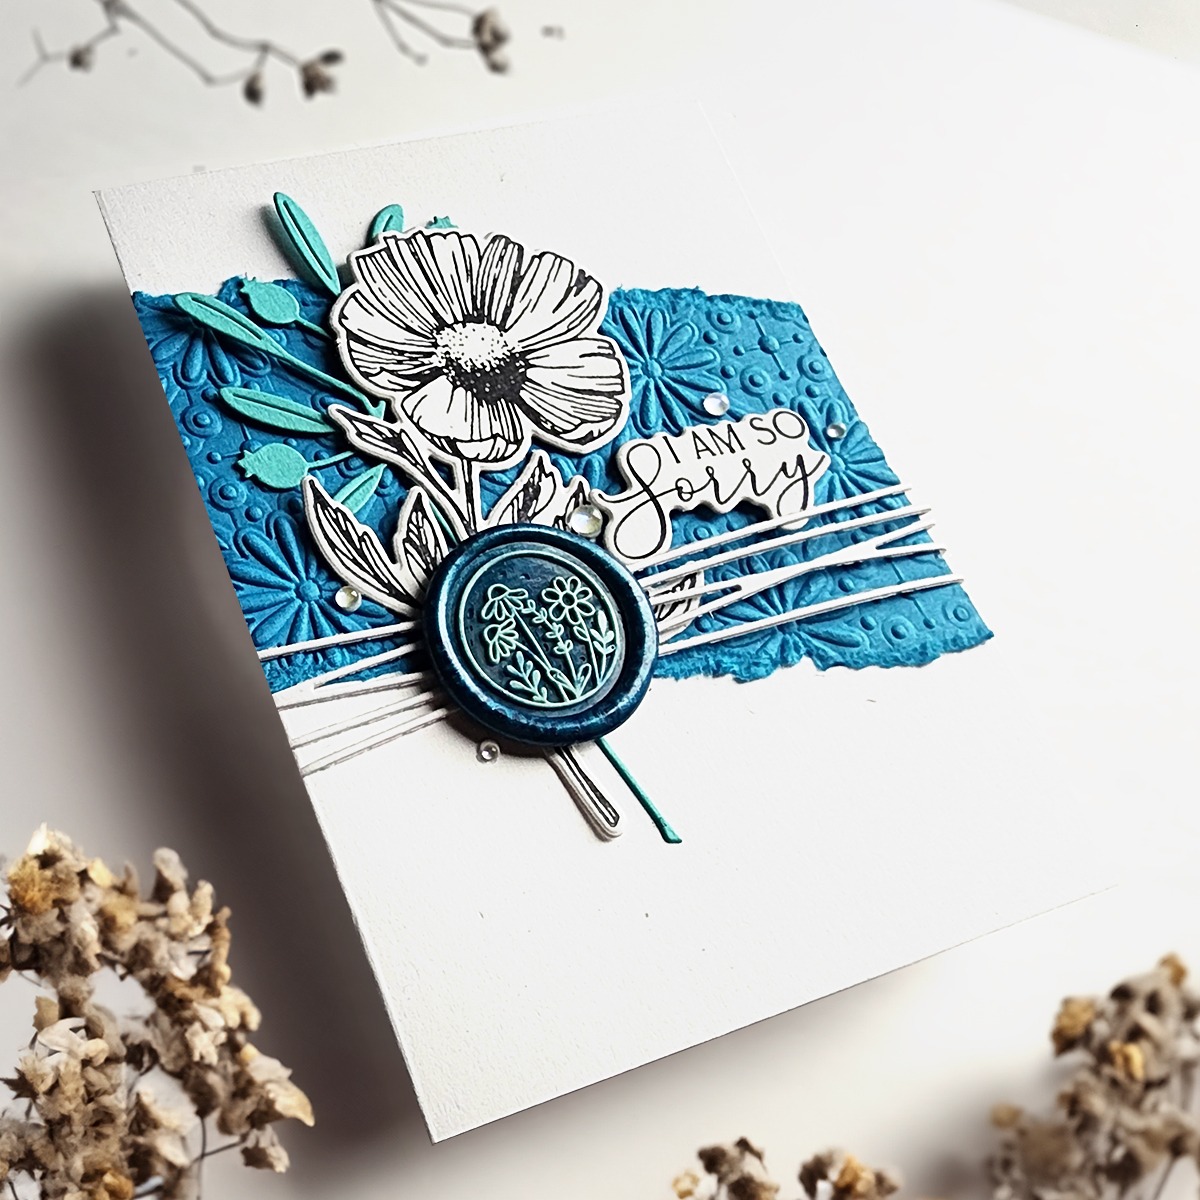
I Am So Sorry Project
For this “I Am So Sorry” card, I used the same process but switched out the colors of the cardstock to match the seal I had created. This seal features the Teal Mix beads, but I darkened up the base by melting in one of the Ink Wax Beads. I love the light teal over dark teal on this one and the mix of teals in the base.
Made With Love Project
Here, I used Brushed Black cardstock for the background and separated the sprigs and flowers from it with a circle of Mirror Gold cardstock. I also added a swipe of gold metallic ink.
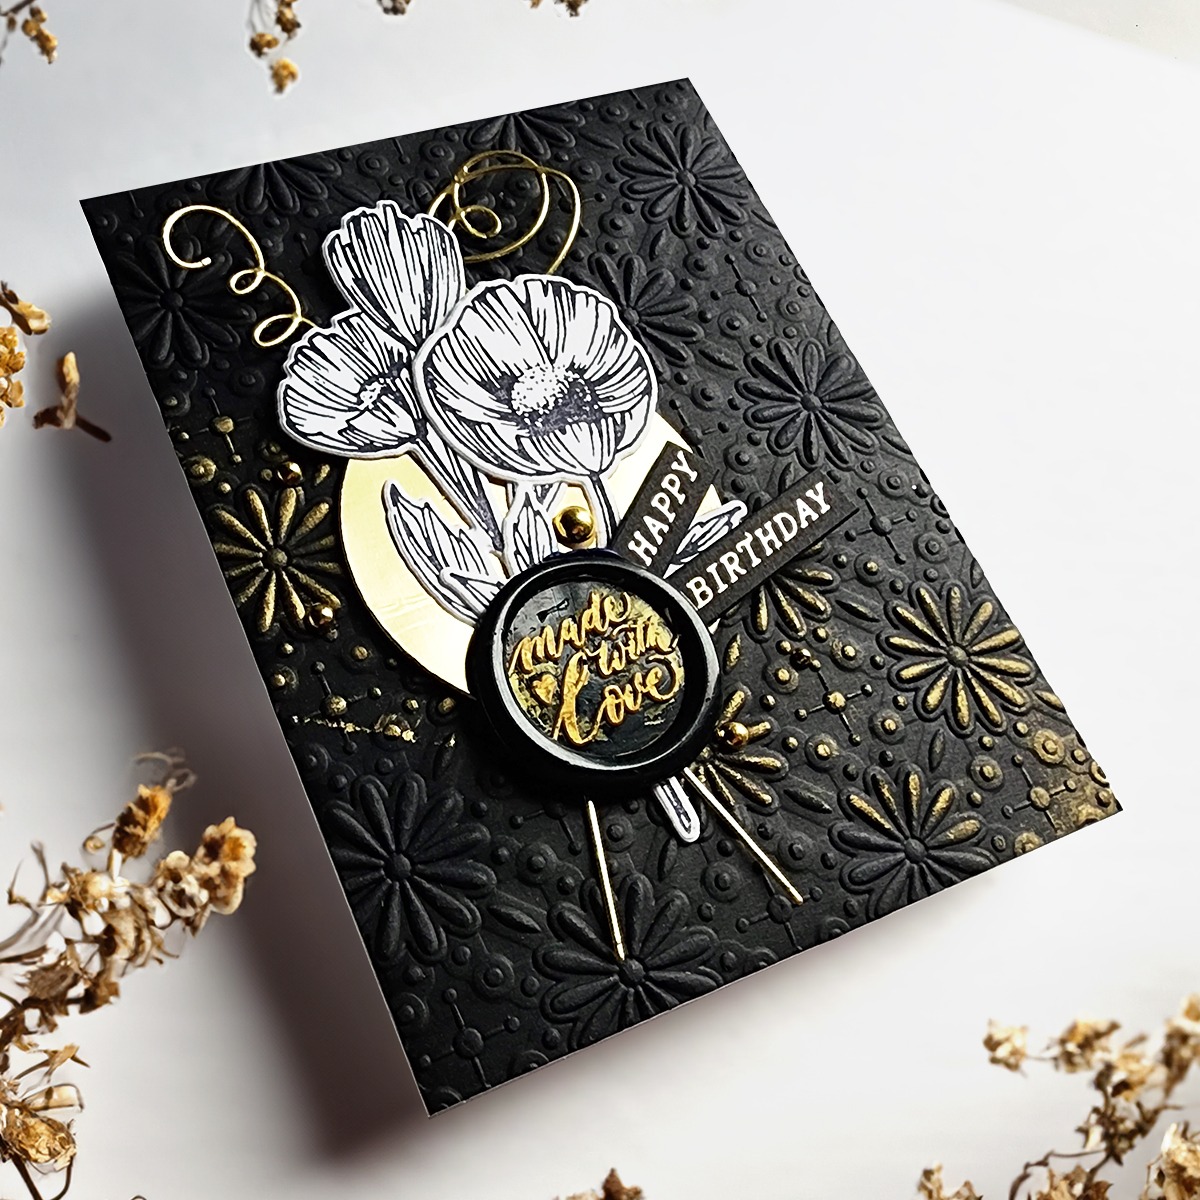
The seal for this one came together with the gold wax over the black wax beads from the Basic Must-Have Mix. It’s quite a stunner with a gold-foiled sentiment strip split in two and tucked underneath. I had created a bunch of these sentiments back in November when this Glimmer of the Month came out. So I fished it out of the storage pocket, trimmed off the flag ends and popped them up by the seal. I finished it all off with some gold embellishments.
Spellbinders Supplies:

Other Supplies
Embellishments, liquid adhesive.
One Comment
Nancy Bachman
I love these three cards and can’t wait for the video to clarify it a bit more for me. The addition of the die cuts and the role of the pieces of embossed cardstock bring new dimension to these cards that I had not thought about before. Thank you.