Stretching Your Stash: Pairing Dies with the New Card Maker’s Kit!
Hello, crafty friends, I’m Adrienne Boese, better known as Alice Scraps Wonderland online, and I’m thrilled to be on the Spellbinders blog for my first guest post! I’m known for my love of florals—I try to tuck in at least one floral element into every project I create.
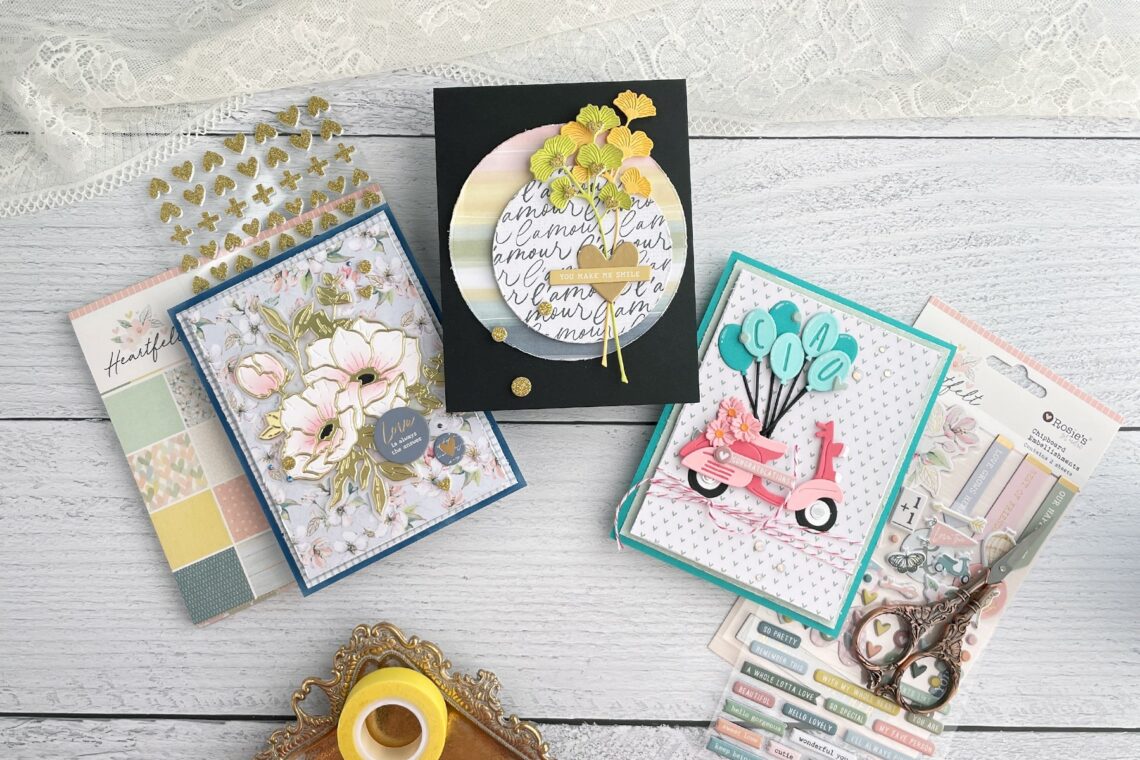
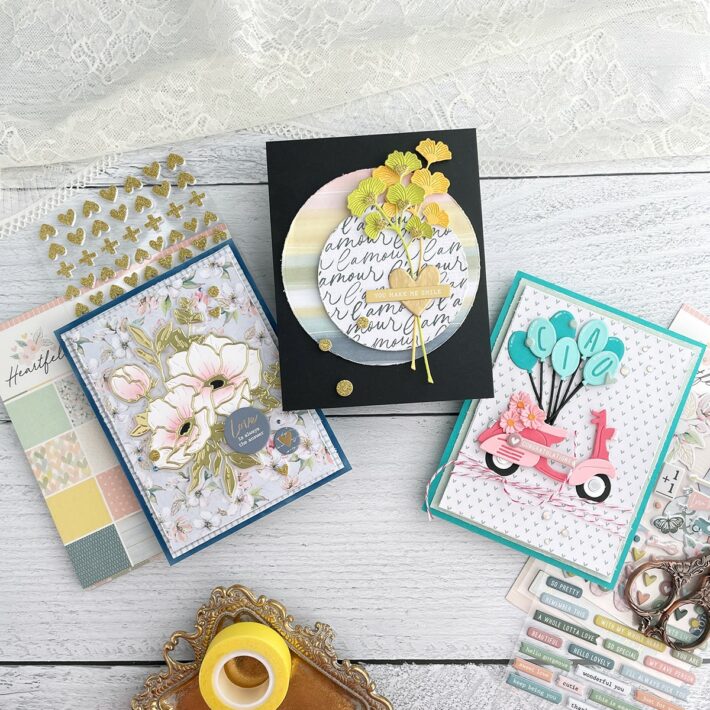
Today’s project features three cards made with Rosie’s Studio Heartfelt Card Maker’s Kit and the Ciao die. Each card is designed with some shabby chic touches and either features florals at the center, or has a few tucked in. This collection offers some fun opportunities to pull out Spellbinders dies you already have in your collection that allows you to match or show off some of the gorgeous patterns on these papers, helping you stretch your paper crafting budget and stash to the max! Let’s get right into it!
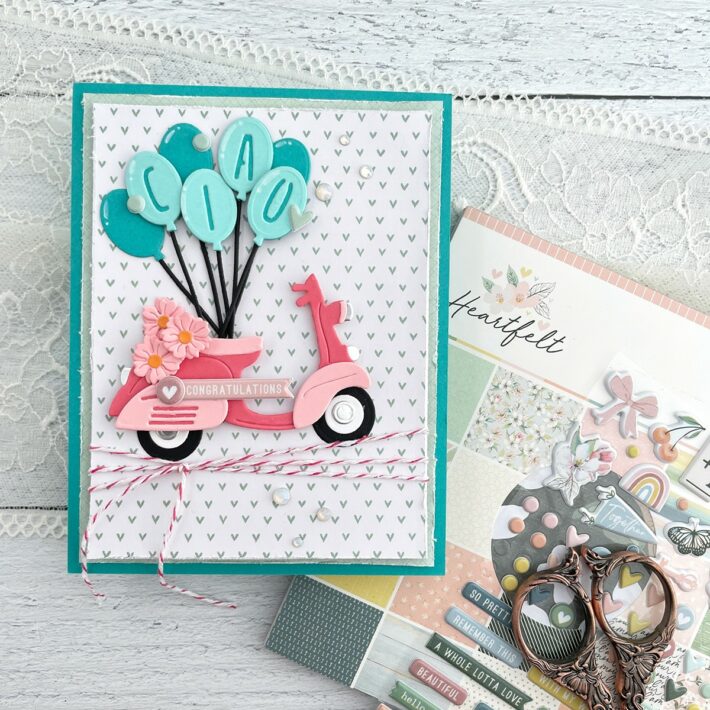
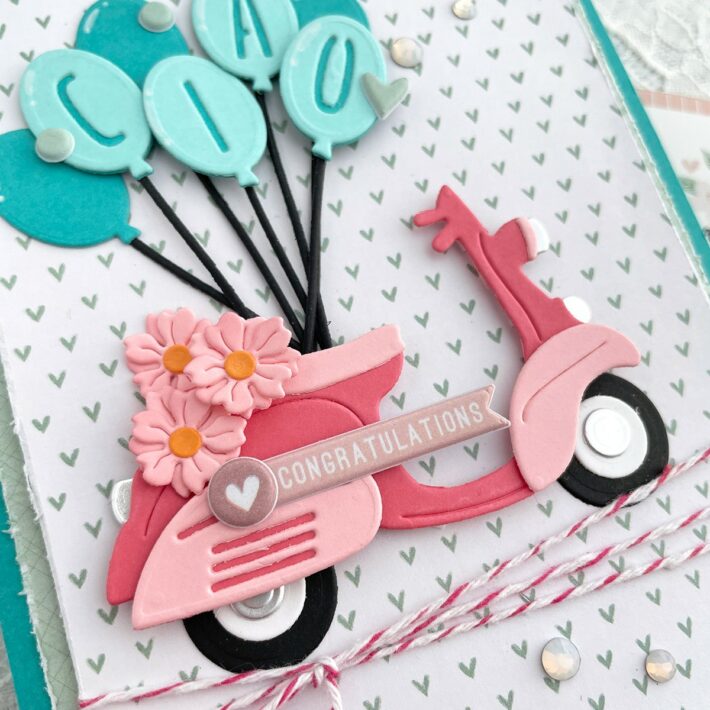
Ciao Moped
I’ve always imagined someone starting a new adventure by driving off on a moped. So this congratulatory card features the Ciao moped die paired with stickers and patterned papers from the Heartfelt Card Maker’s Kit.
- Cut an A2 (4.25 x 5.5 inch) card base from Spellbinders Teal Topaz
- Using the Heartfelt 6×6 Designer Paper Pad, trim one mint patterned paper to 4 by 5.25 inches; then trim another mint patterned paper to 3.75 by 5 inches.
- Distress the edges of the patterned papers with the edge of a blade on a distressing tool.
- Wrap a little twine around your top patterned paper layer and tie it off.
- Adhere your patterned papers to your card base. (I popped the top patterned paper up with foam adhesive.)
- Die cut the Ciao moped die pieces from Spellbinders Pink Sand, Dahlia, Onyx, and Silver Mirror cardstocks then assemble the pieces using liquid glue and foam adhesive.
- Die cut the Ciao balloons with ciao letters and the string from Spellbinders Teal Topaz, Waterfall, and Onyx cardstocks and assemble the layers using liquid adhesive.
- Die cut some tiny flowers from Spellbinders Pink Sand and Persimmon cardstocks and assemble. (I used the tiny daisy-like flower from the 2024 February Small Die of the Month, but any small floral die will work here, like the Mini Blooms and Sprigs Etched Dies!)
- Bunch up the balloons and layer them, using foam adhesive to pop some up.
- Glue your bunch of balloons and the moped to your card base.
- Decorate your moped with the tiny flowers and.
- Pop on some Opal Color Essentials Gems and some of the Heartfelt Puffy Stickers.
Tip: For the lightweight patterned paper that you pop up on your card base, back it first with a piece of white cardstock to keep it from drooping on the edges.
Tip: Don’t have a distressing tool? No problem! Use the edge of a ruler or palette knife to achieve the same distressed edge effect on your papers.
Tip: Use a white Gelly Roll pen to add highlights to your balloons for more realism.
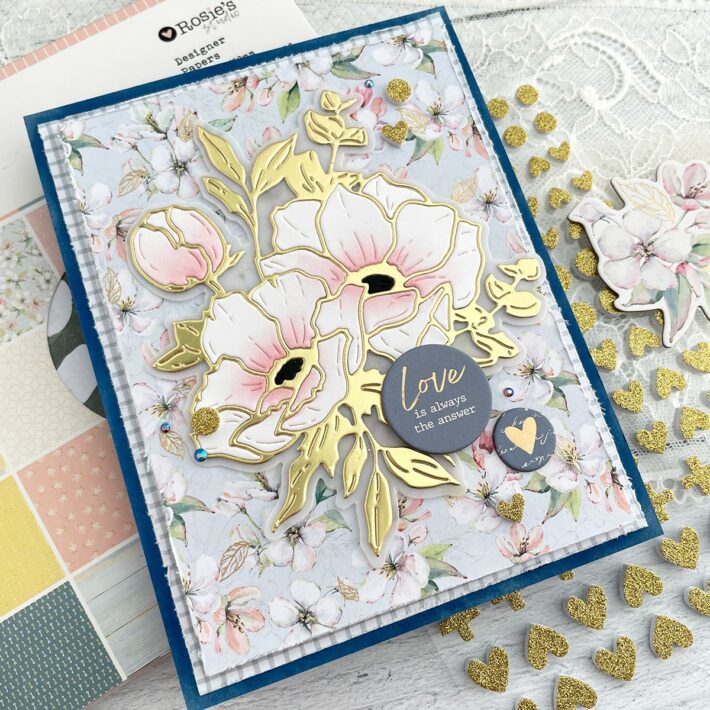
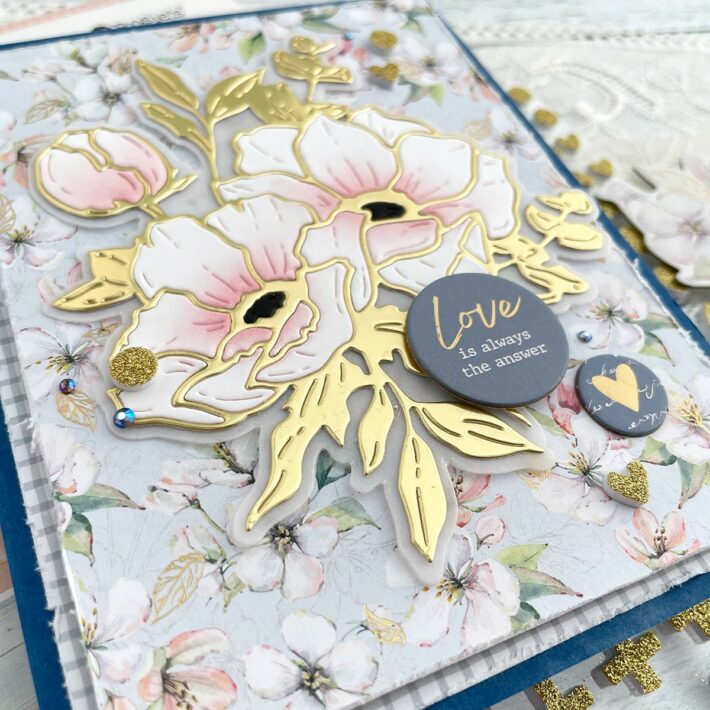
White, Pink and Blue Floral
The delicate floral pattern in the Heartfelt 6×6 Designer Paper Pad is a great opportunity to pull out the Anemones Etched Die and use it again. I haven’t used this die in a while, and I truly believe in pulling out your old dies and pairing them with new products. You’ve invested the money in them so you should get as many uses out of them as possible!
- Cut an A2 (4.25 x 5.5 inch) card base from Spellbinders Cosmic Sky
- Using the Heartfelt 6×6 Designer Paper Pad, trim the blue gingham paper to 4 by 5.25 inches; then trim the blue and white floral paper to 3.75 by 5 inches.
- Distress the edges of the patterned papers with the edge of a blade on a distressing tool.
- Adhere your patterned papers to your card base. (Again, I popped the top patterned paper up with foam adhesive.)
- Die cut the Anemones die from vellum, Spellbinders White, Mirror Gold, and Onyx
- Blend pink ink onto the white cuts of the Anemone flower then assemble the pieces with liquid glue.
- Pop the Anemone die onto your card with some foam adhesive.
- Add some of the Heartfelt Chipboard Embellishments and Glitter Foam Stickers.
- For a bit of extra bling, pop on some Prism AB Color Essential Gems.
Tip: Add even more shabby chic touches to your card by inking the edges of your card layers with your favorite coordinating inks to provide more depth. I added a lighter blue ink to the edges of the card base for this floral card.
Tip: A low-tack adhesive craft mat will hold tiny die cuts in place while you add ink blending to them.
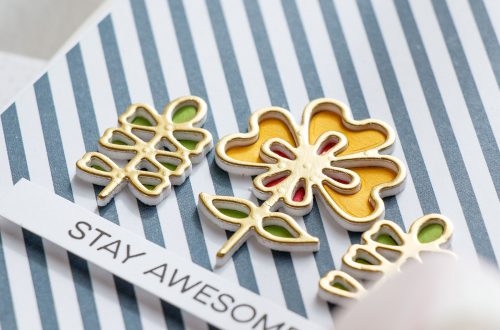
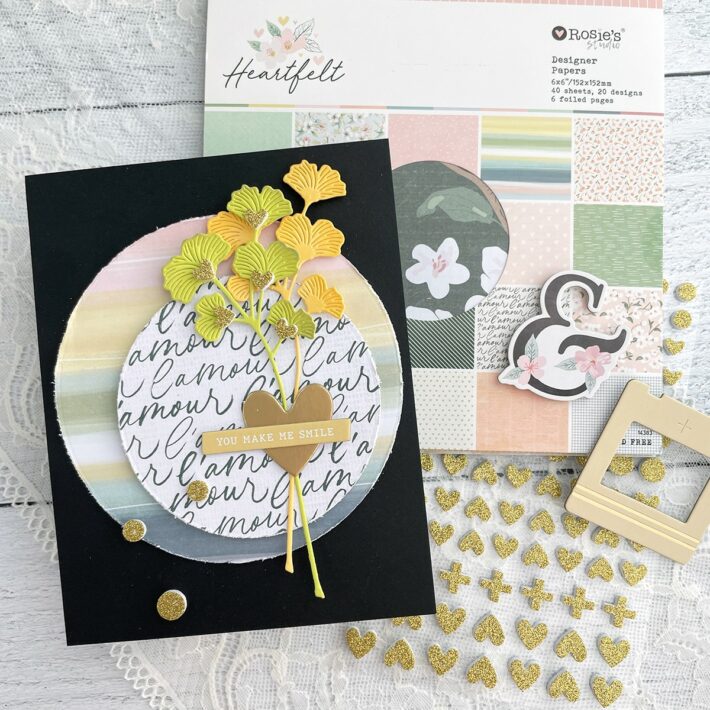
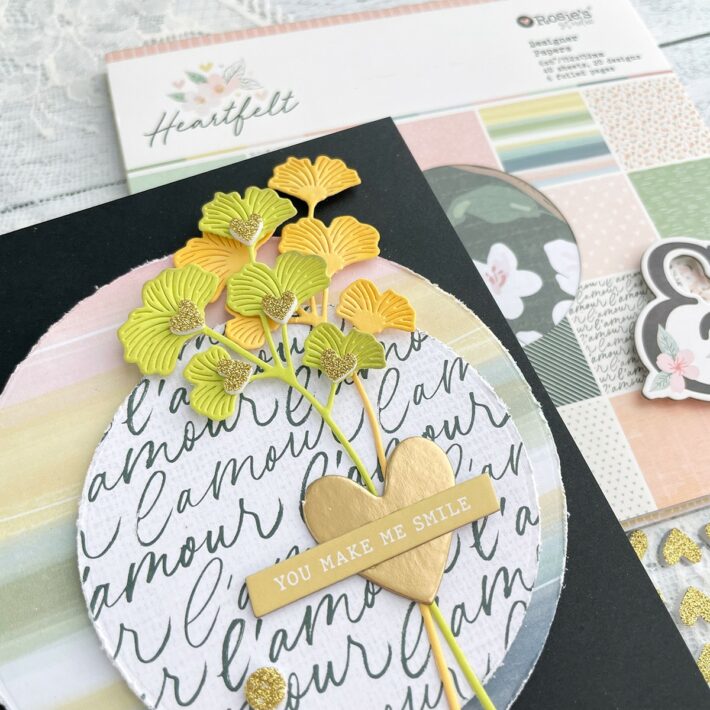
Gingko and Circles
While I do love monochromatic projects and pastel hues, I also love something that full of contrast! For this card, I paired the Sealed Gingko die in bright hues with die-cut circles of the rainbow and black and white script papers from the Heartfelt 6×6 Designer Paper Pad. I think it makes for quite a stunning combination!
- Cut an A2 (4.25 x 5.5 inch) card base from Spellbinders Onyx
- Using the Heartfelt 6×6 Designer Paper Pad, die cut the two largest solid circles from the Essential Circles die set, cutting the larger circle from the rainbow paper and the smaller of the two circles from the black and white script paper.
- Distress the edges of the patterned papers with the edge of a blade on a distressing tool.
- Die cut the Sealed Gingko twice, once from Spellbinders Peridot cardstock and the second from Sunkissed
- Ink the Ginkgo cuts with your favorite coordinating ink to add a little depth and dimension.
- Adhere your patterned papers to your card base, offsetting the circles slightly. (Again, I popped the top patterned paper up with foam adhesive.)
- Adhere the two stems of Gingko with liquid and foam adhesive.
- The small hearts from the Glitter Foam Stickers are the perfect fit for the base of the Gingko leaves—add one to the base of each leaf on the top stem.
- For a finishing touch, add sentiment and heart stickers from the Heartfelt Chipboard Embellishment. Then pop on a few circles from the Glitter Foam stickers.
Tip: Offsetting the circles and the Gingko adds more interest and helps lead the eye to your sentiment stickers.
Spellbinders Supplies:

Other Supplies
Tim Holtz Distress Oxide Ink in Victorian Velvet, Tim Holtz Distress Oxide Ink in Fossilized Amber, Tim Holtz Distress Oxide Ink in Speckled Egg, Tim Holtz Blending Brushes, Tim Holtz Paper Distresser and Thread Cutter Tool, Scrapbook.com 1mm Thick ¼ inch Wide Foam Adhesive, Scrapbook.com Artis Liquid Glue, American Crafts Baker’s Twine
Thanks so much for allowing me to show how you can pair the Rosie’s Studio Heartfelt Card Maker’s Kit with dies you may already have in your stash, helping you get the most of your amazing Spellbinders dies! I also hope that you enjoyed the little shabby chic touch of distressing your patterned background papers. I’d love to see what you create with this card maker’s kit, and which dies you pull from your stash to pair with it. Be sure to tag me on Instagram when you share your projects—you can find me there as AliceScrapsWonderland.
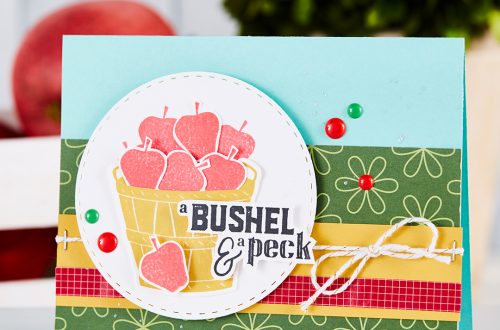
A Bushel and a Peck Handmade Card for All Occasions
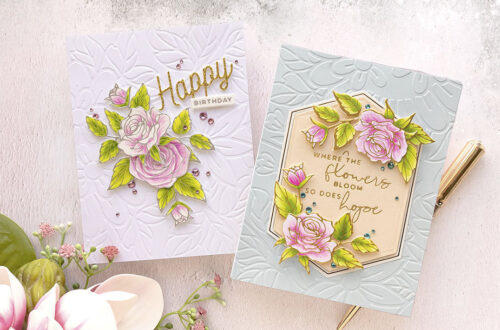
March 2022 Glimmer Hot Foil Kit of the Month Preview & Tutorials – Glimmer Edge Roses