-
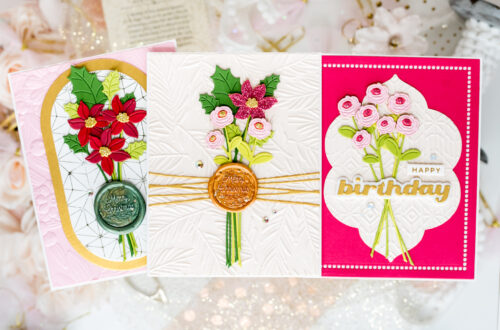
Open House Collection – Card Inspiration with Annie Williams
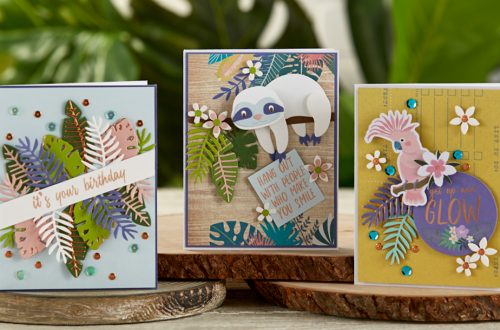
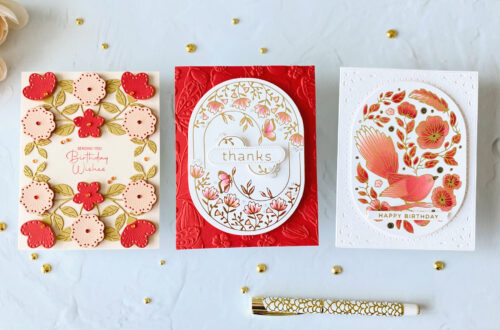
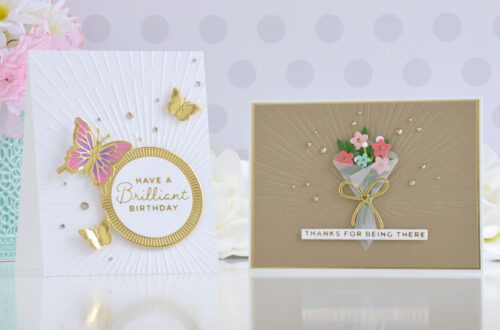
Hi there, this is Annie Williams and I’m thrilled to be back on the blog today to share a couple of projects using the new Open House Collection from Spellbinders. The fun and welcoming scene-building die sets in this collection inspired me to create three cheerful cards perfect for sending a warm hello or a special note . Open House Hello Scene-building die sets can be a little intimidating, so I wanted to start by creating a simpler front door step with just a few special touches first. Using mainly the Open House Door Base Die set, this cheerful door card is perfect for sending a happy hello, especially to…
-
The Slimline Holiday Collection – Exploring Pattern and Texture with Jean Manis
Hello crafty friends! It’s Jean here sharing three slimline holiday cards created with the Slimline Holiday Collection. This versatile collection of slimline die sets and embossing folders can be used to create distinctive projects for any number of occasions, including Christmas. Let’s take a look! Did you know? The word kaleidoscope is derived from Greek and translates to “observation of beautiful forms.” I’ve created a Christmas card in which I cut kaleidoscope layers from foil and glitter cardstock to add color and texture. Cut Circle Kaleidoscope frame from Snowdrift cardstock; back with red foil cardstock. Adhere to 8 ½” x 3 ½” Brushed Gold cardstock base. Die cut three sets…
-
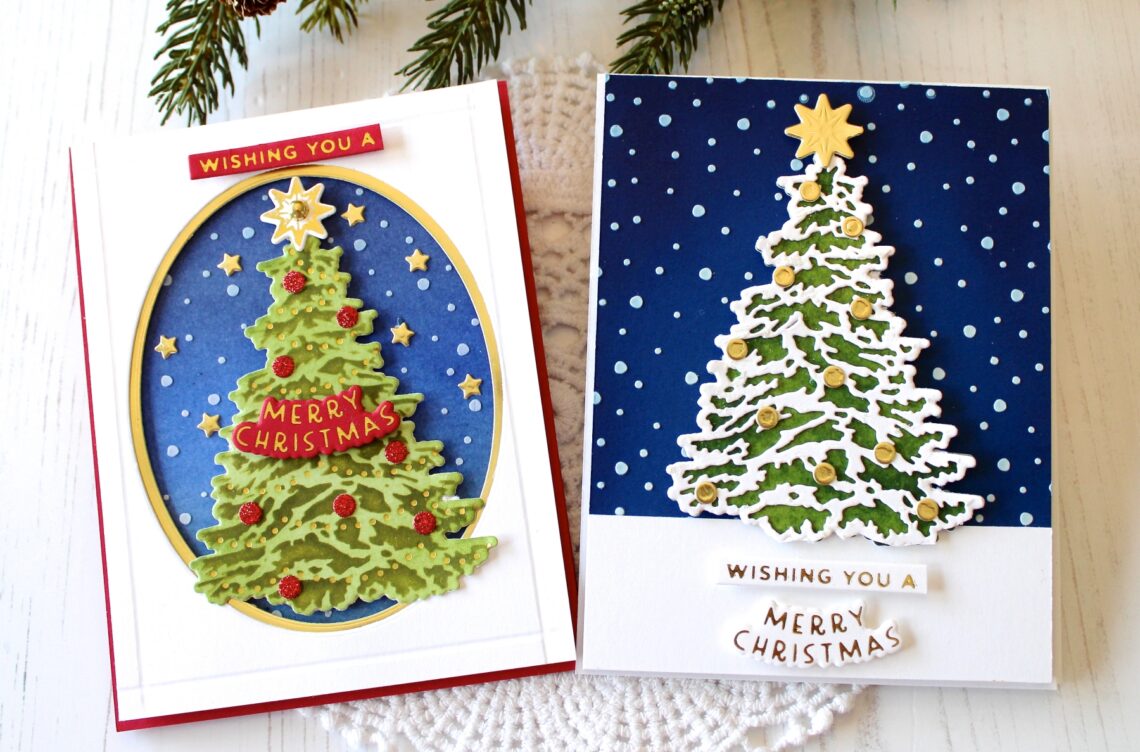
Open House Collection – Holiday Card Inspiration With Michelle Short
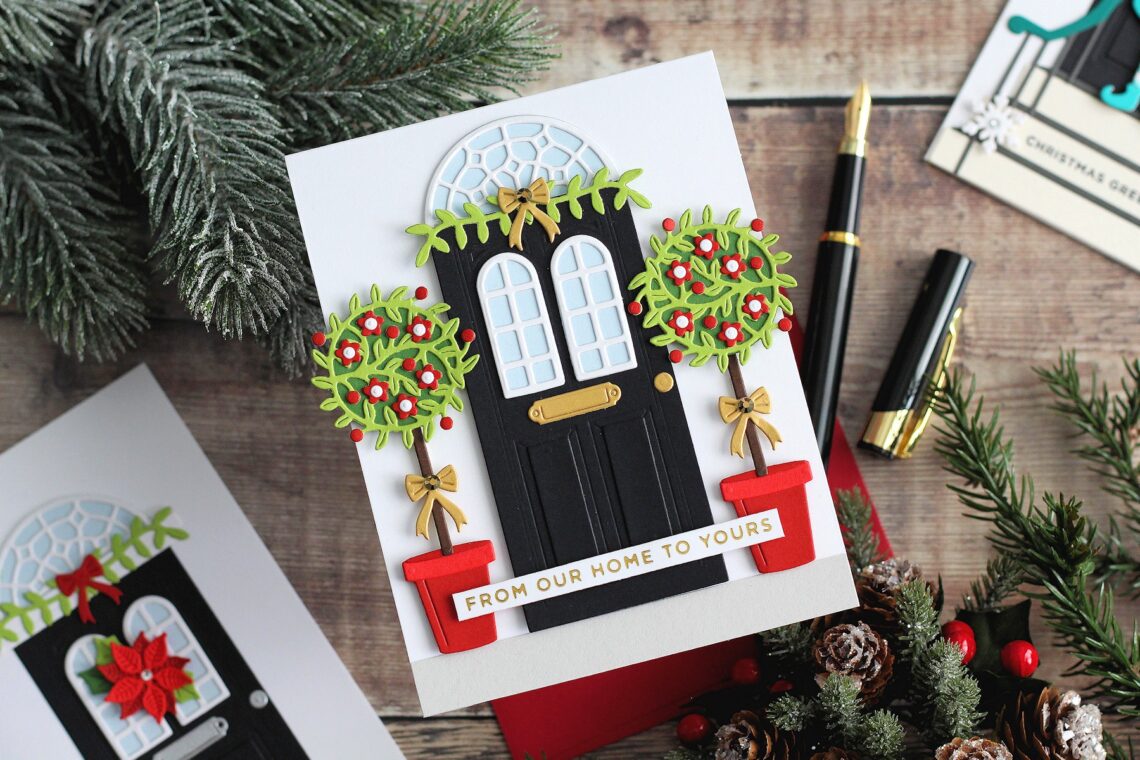
Hello there, Michelle Short here and I am delighted to be sharing three cards with you today using the new Open House Collection. This die cutting collection features four sets that you can mix and match to create wonderful front door scenes. These are perfect for Christmas/winter cards, like I have used them today, but these would work equally well for non-holiday cards too. FROM OUR HOME TO YOURS CARD My first card is a card that would be lovely to send to holiday guests inviting them to stay, or simply as a holiday card in general. It could even be used as a non-holiday card! I started off by…
-
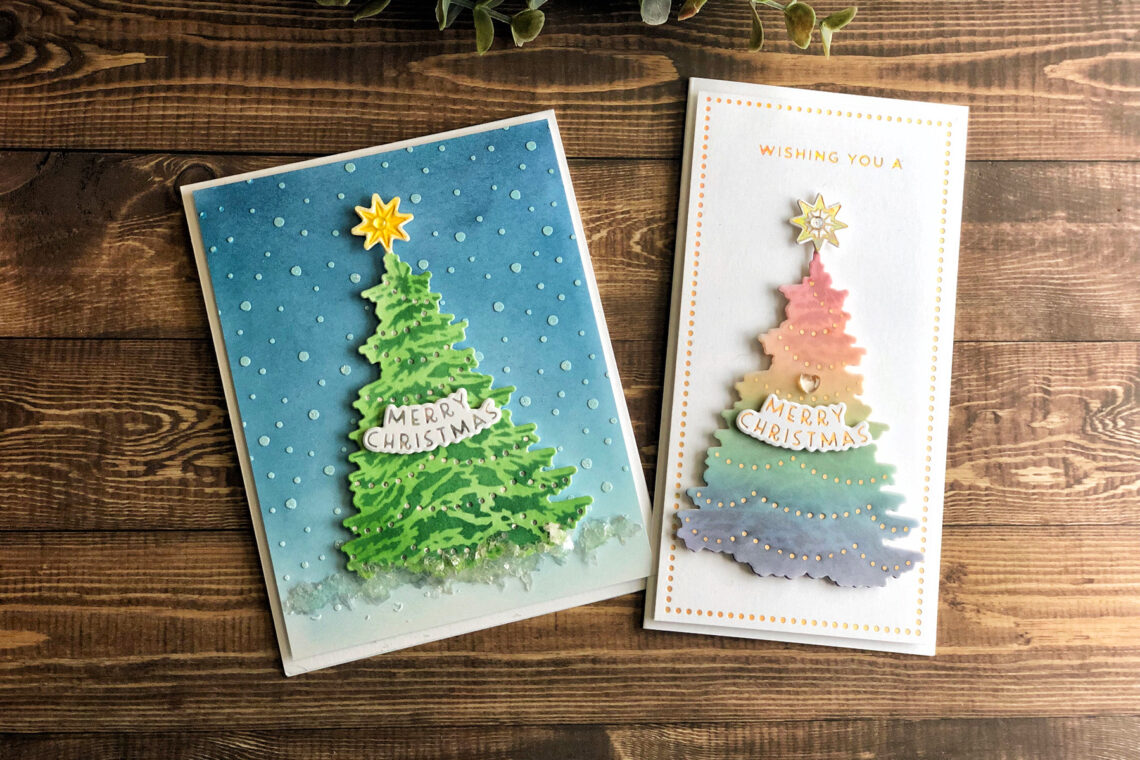
Christmas Slimline Inspiration with Marie Heiderscheit
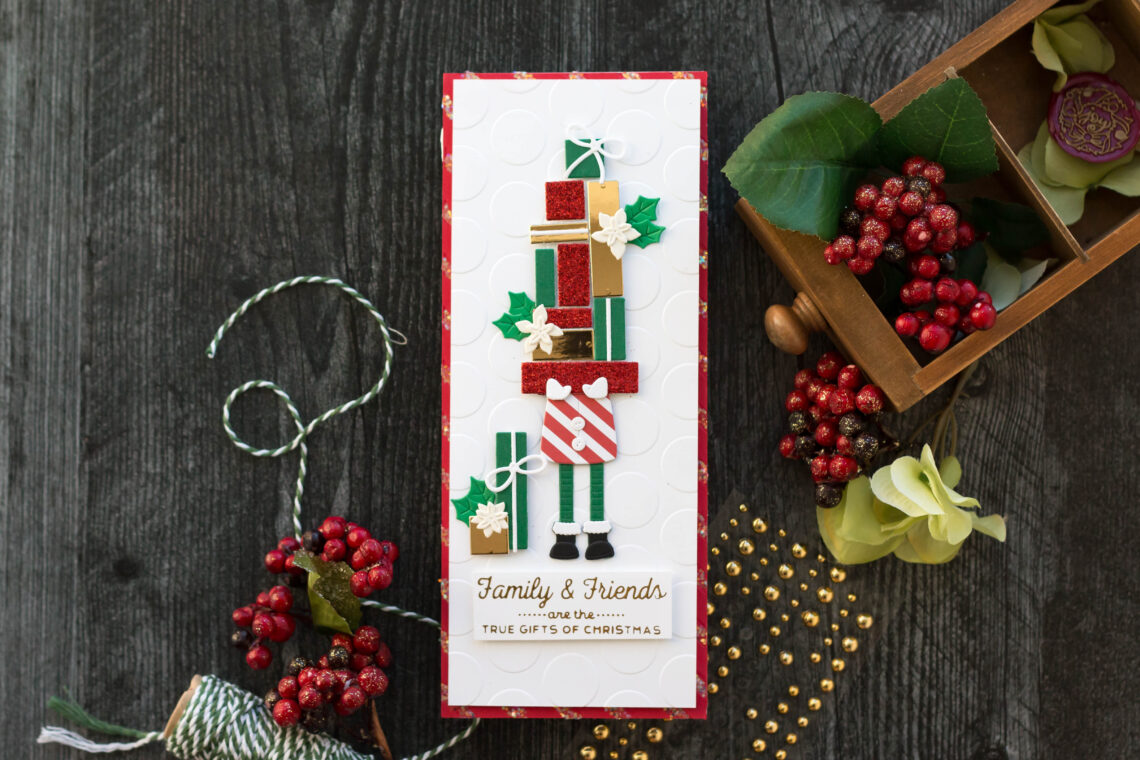
Hello, crafty friends! Are you ready for some Christmas inspiration? I’m sharing three slimline cards today showcasing the Holiday Slimline collection by Spellbinders! There are so many fun die and glimmer sets in this collection that you can mix and match to get a head start on your Christmas cards! Die Cut Greenery My first card features these gorgeous pinecone, poinsettia, and greenery dies that you can layer and add to your cards. I cut a large amount of these pieces, ink blended them a bit, and then layered them over my card front. Before adding my die cut pieces, I dry embossed the background with one of Spellbinder’s slimline…
-
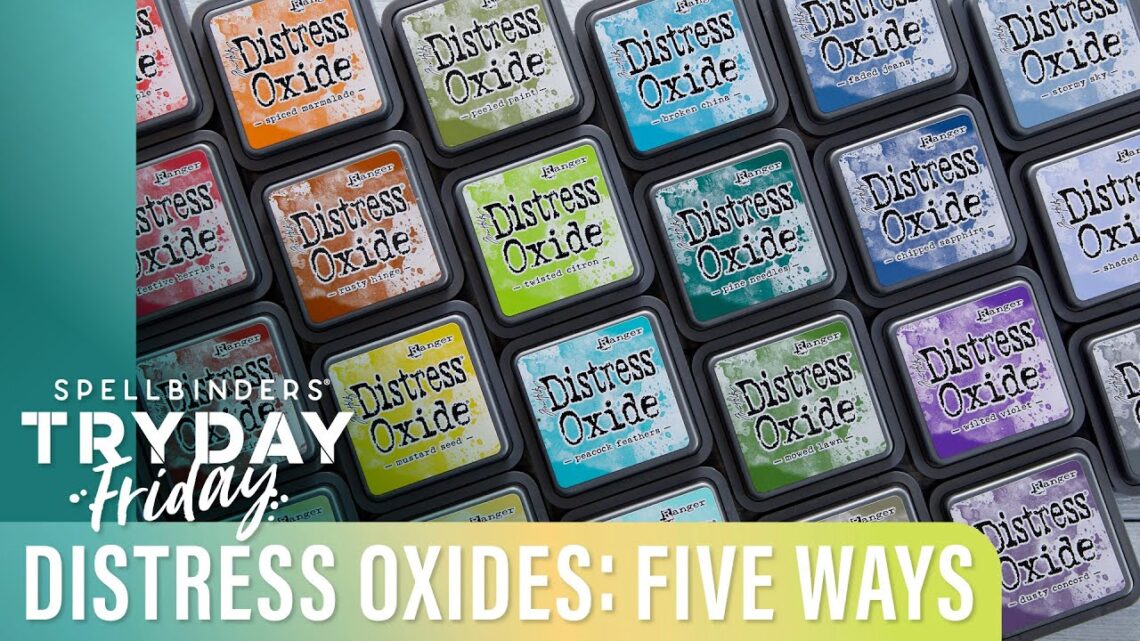
Distress Oxides Five Ways | Spellbinders Live
Join Kim Kesti in the Creative Classroom as she shares 5 fun ways to use the beautiful Distress Oxide ink pads, now in stock on our website. Watch today’s video and then try one of these fun techniques on your next project! Watch below or on our Youtube channel: Spellbinders has curated a collection of 30 colors of Distress Oxide inks to coordinate with the 30 shades of our Color Essentials cardstock. Pick your favorite colors or start collecting them all today! In today’s video, Kim shares some of her favorite tools for working with Distress Oxide inks. They include sponge daubers, misting bottles, paint brushes and a non-porous sheet. The magic of Distress Oxide inks is…
-
Trim A Tree Collection Inspiration with Melody
Hello! It’s Melody here on the blog today. This is my first time as a Guest Designer on the Spellbinders Blog and I am excited to be here. I have two projects to share with you that I created with the new Trim A Tree Collection. The collection included a Layered Christmas Tree Stencil, O Christmas Tree Etched Dies, and the Shining Christmas Tree Glimmer Hot Foil Plate & Die Set. To create the background I cut a piece of dark blue cardstock to fit the card front and blended Chipped Sapphire Distress Ink on the outside edges. Then I used the Layered Christmas Tree Stencil with Journey Modeling Paste to add the snow to the background. Next I…
-
Trim a Tree Collection Inspiration with Jennifer Kotas
Hello! I am Jennifer Kotas from Who Stole My Glitter. I am so happy to be on The Spellbinders Blog today. I have got two cards to share with you using the Trim a Tree Collection. The stencil in this collection was where my projects began, and they grew from there. It was quite an enjoyable process and led me to create one traditional card and one more modern card. Before I started designing either card, I stenciled a bunch of trees. I tried different color combinations including ombre and rainbow trees. There are so many ways to make these trees. You could die cut the layers from coordinating colors…
-
Trim a Tree for the Holidays with Bobbi Lemanski
Hello, friends of Spellbinders! It’s Bobbi Lemanski here sharing some festive trees for the holidays as the guest designer for Spellbinders. At our house, we celebrate big for Christmas with four trees in the home and countless decorations. We love to decorate each tree uniquely to fit the space. Today, I am decorating trees for my holiday cards instead. I’ve got three cards to share that show the many different ways you can use the Trim a Tree Collection of products together to create lovely winter trees. O Christmas Tree Image My first 5” X 7” card features the O Christmas tree dies. You get a base and layered die…
-
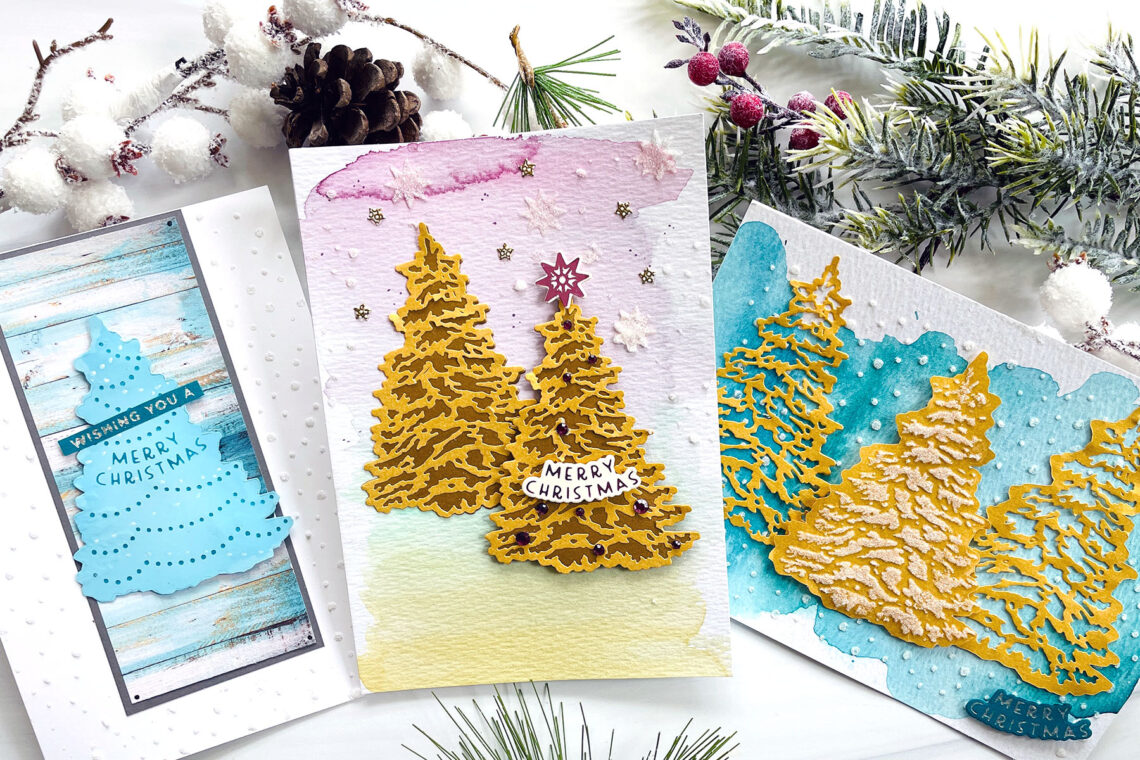
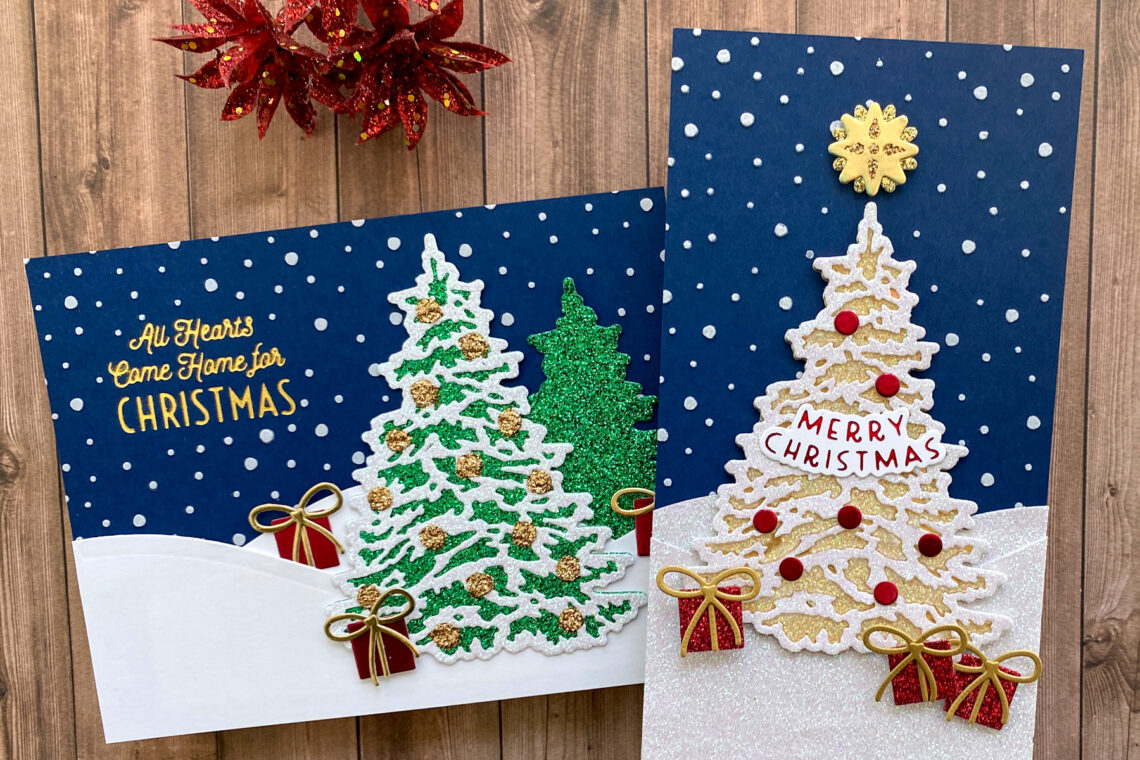
How to Trim a Tree in 3 Easy Steps with Jean
Hello crafty friends! It’s Jean here sharing two holiday cards created with the Spellbinders Trim a Tree Collection, which includes dies, glimmer plates, and a stencil that work together or separately. I’m showing how to create cards with this collection using a three-step approach: create the background, create the focal point(s), and embellish. Let’s take a look! A snowy, forest scene captures the magic of the holidays Create background: Create A2-size card base. Cut A2-size panel from navy cardstock. Foil Gifts of Christmas sentiment in Gold in upper-left. Mask sentiment area and apply white embossing paste through the Layered Christmas Tree Stencil (snow portion) to panel. Set aside to dry.…
-
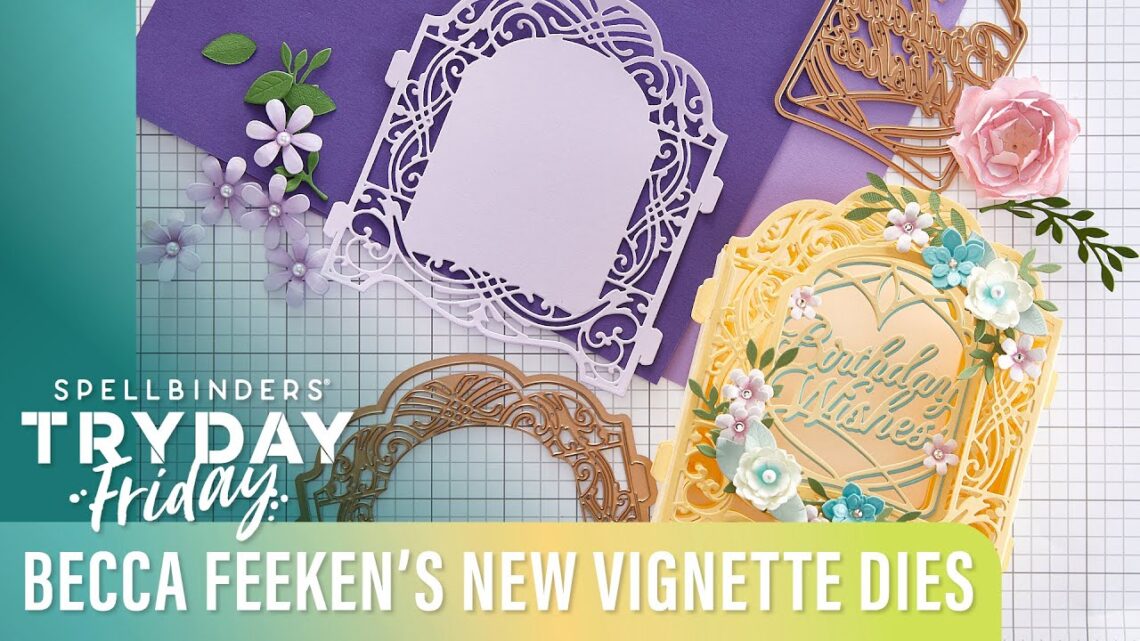
Becca Feeken’s New Vignette Dies | Spellbinders Live
Join Kim Kesti in the Creative Classroom as she plays with new additions to Becca Feeken’s elegant 3D collection of Vignette dies. Watch today’s video and then try one of these fun techniques on your next project! You can watch below or on our Youtube channel: The Vignette dies create dimensional 3D layers but the finished project also lays flat to fit in an envelope. You can create a stand-up cabinet style card project or an album style with tab pages for photos or die cut elements. For extra versatility, use the die cut elements to add to a standard card too! In today’s video Kim walks you through exactly what…