-
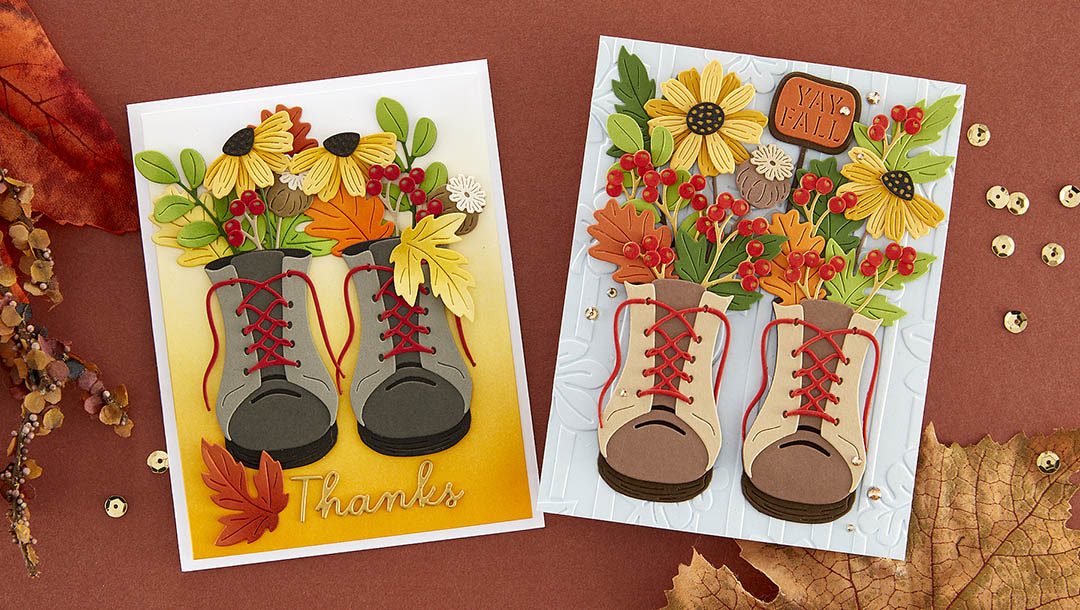
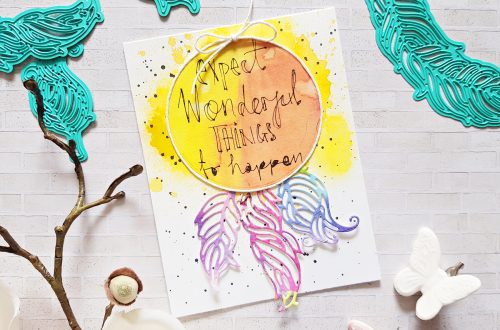
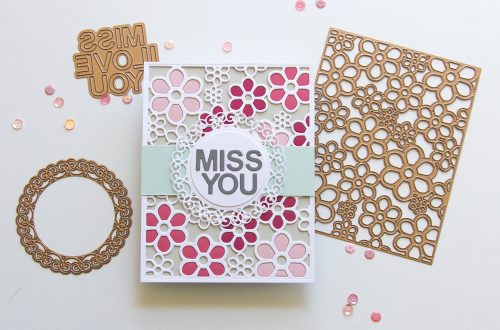
September 2023 Small Die of the Month Preview & Tutorials – Hiking Through the Meadows
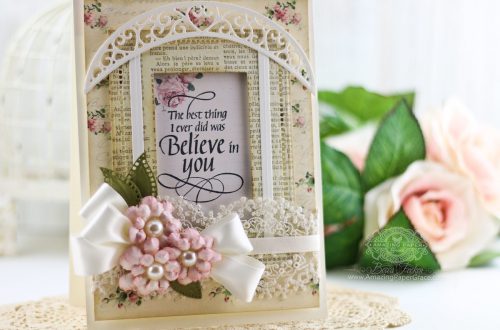
Our September 2023 Small Die of the Month preview & tutorials are here! This “Hiking Through the Meadows” die set features 15 cutting dies. Enjoy the step-by-step tutorial below as well as the video tutorial to get you started with this month’s kit. Make sure to show us what you create by tagging #SpellbindersClubKits on social media! Please note, new Subscription Sign-Up Window will now open on the 6th of each month and close on the 27th (once existing club members subscriptions have been processed.) If there is additional inventory remaining, then they will be made available for new subscriptions and will have limited availability. Continuing Subscriptions will charge on…
-
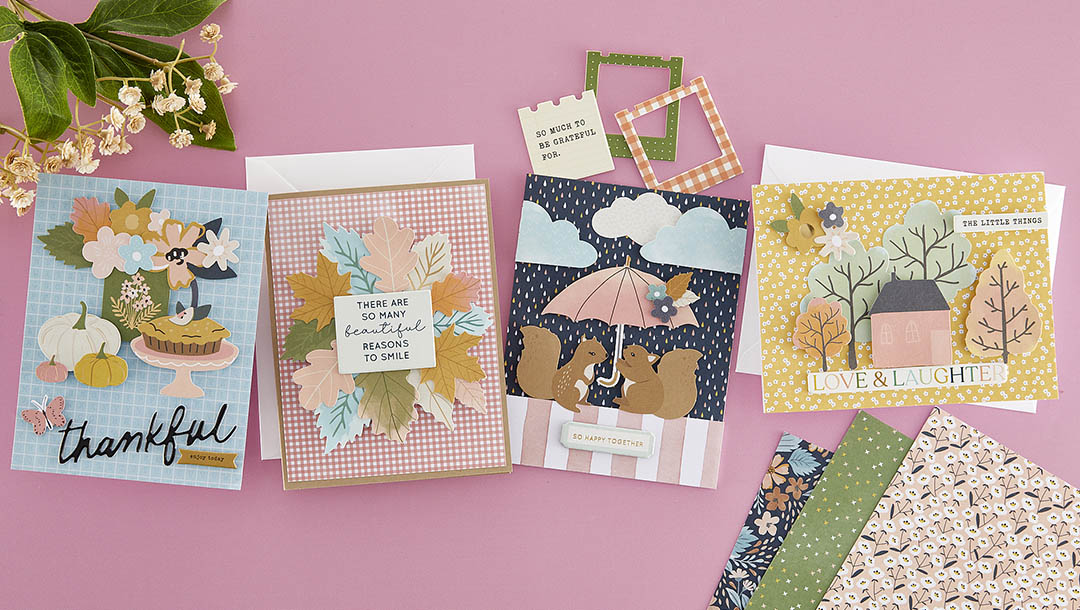
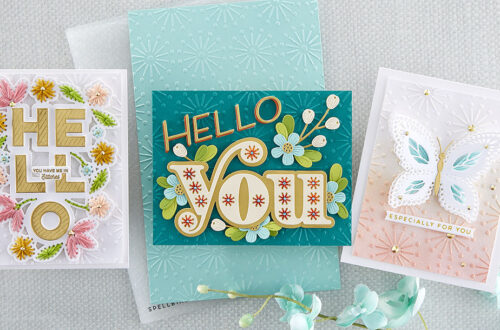
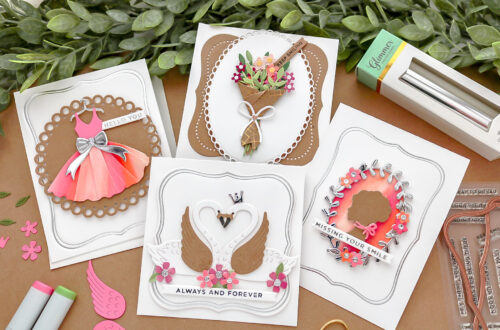
September 2023 Quick & Easy Card Kit of the Month Preview & Tutorials – Jump Into Fall
Hello, Spellbinders’ fans! Our September 2023 Quick & East Card Kit of the Month preview & tutorials are here! We have adjusted the contents down and reduced the price so that the kits no longer require a die cutting machine. This month’s “Jump Into Fall” Quick & Easy Card Kit includes a 6×6 patterned papers, die cut shapes, tons of embellishments, card bases, and more! Please note, new Subscription Sign-Up Window will now open on the 6th of each month and close on the 27th (once existing club members subscriptions have been processed.) If there is additional inventory remaining, then they will be made available for new subscriptions and will…
-
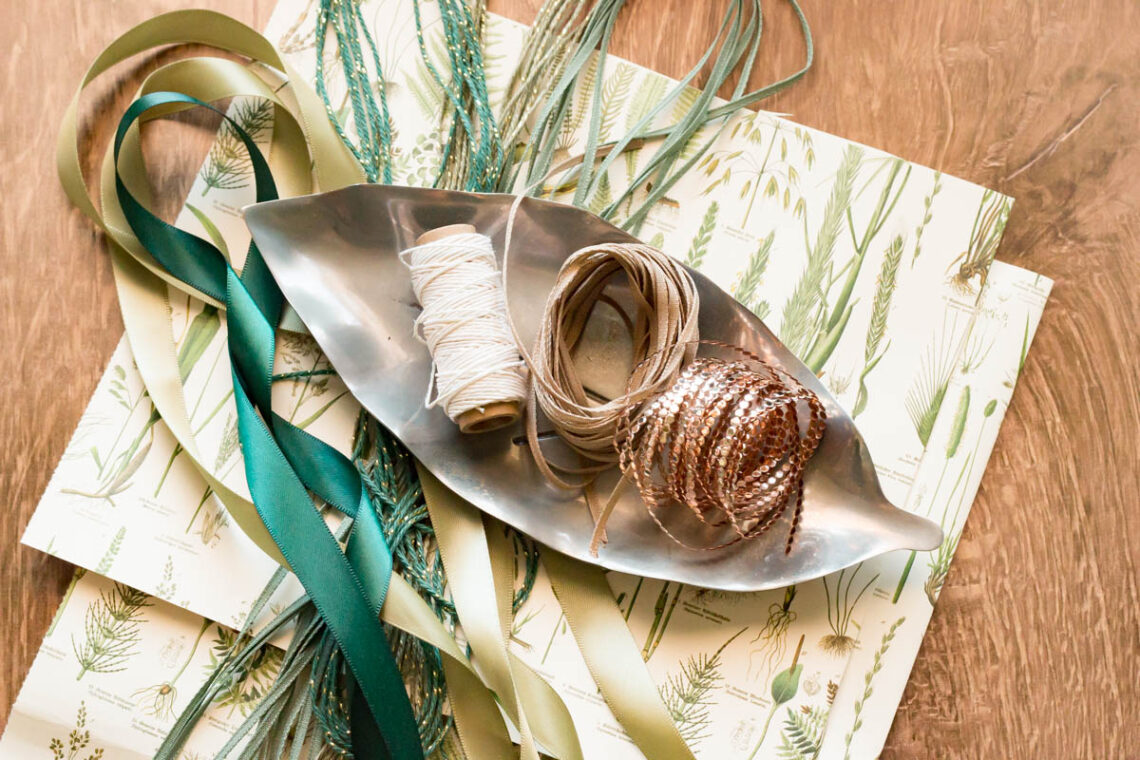
Gift Wrapping with Vivant and Pepin Press
Hello there, crafty friends! Marie here again from Marie Nicole Designs. I have a fun post to share today, featuring the papers and ribbons from Vivant and Pepin Press! I’ll be creating a few projects with these items and paring them with some glimmering and wax seals from Spellbinders. Let’s get started! FOILING ON RIBBON Did you know that you could foil on ribbon? Some of this satin ribbon from Pepin is perfect for this technique! I grabbed a roll of my copper foil and some of the Dark Green Vivant ribbon and started to heat up my Glimmer machine. This is easy to do and it adds so much…
-
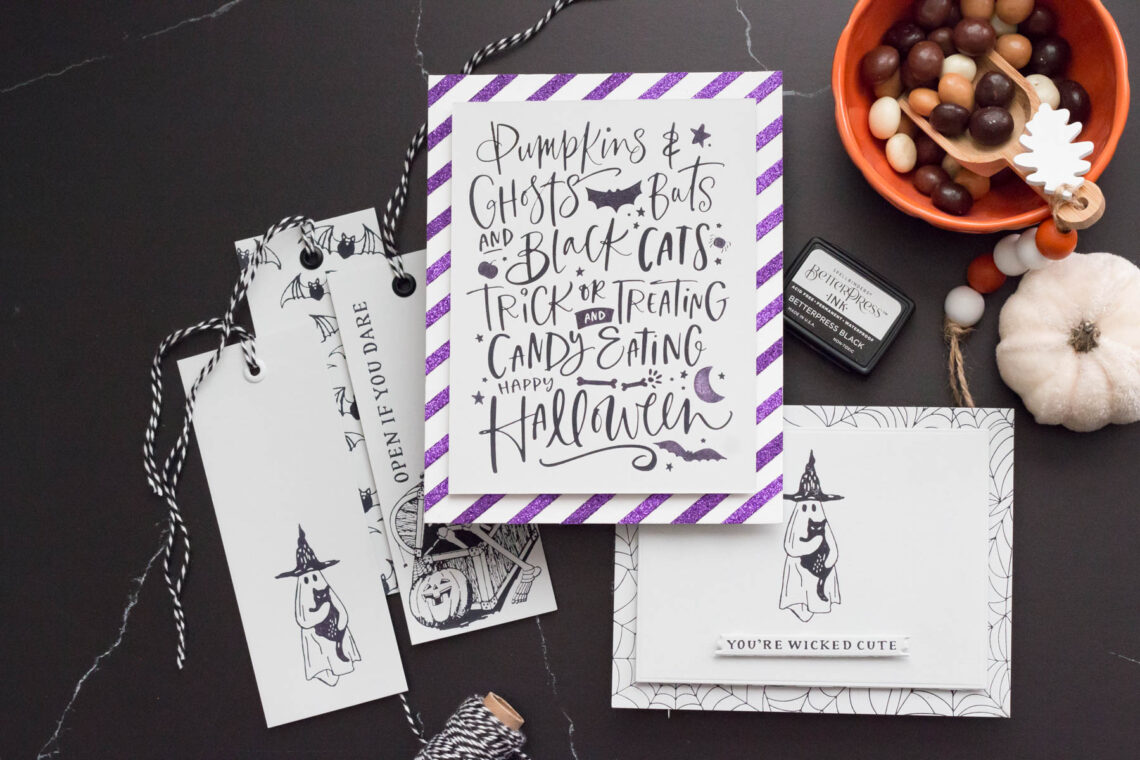
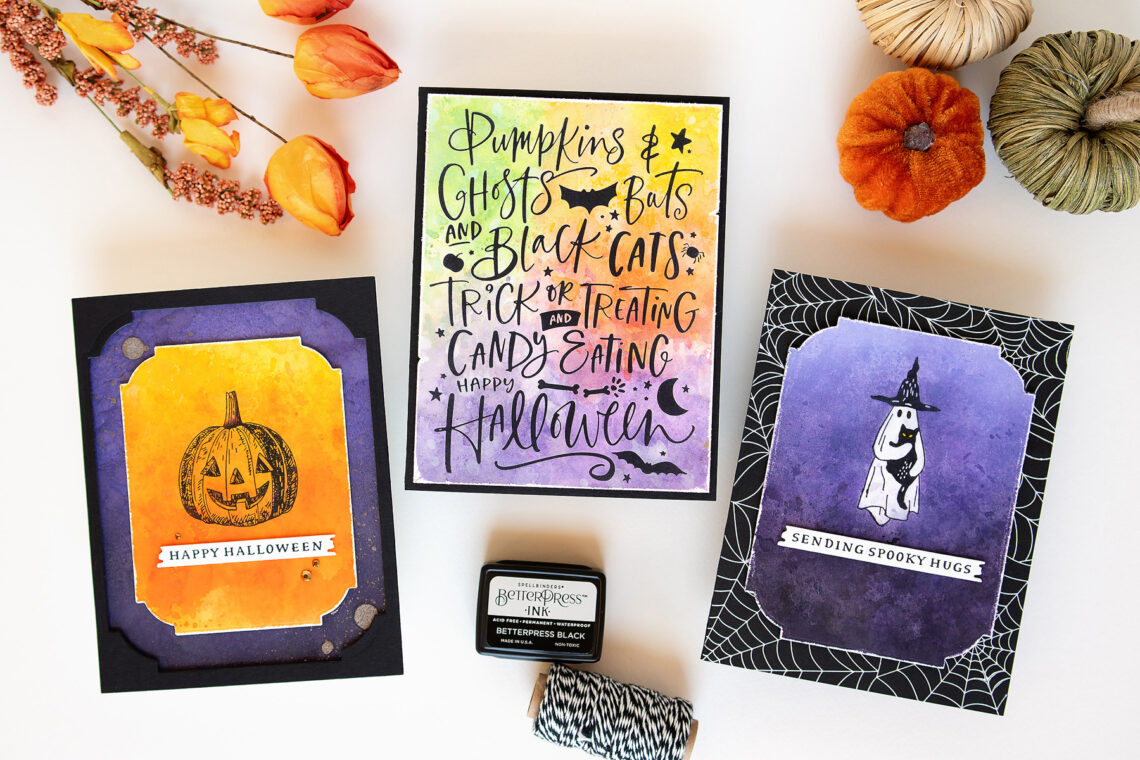
Better Press Halloween Ideas with Marie Heiderscheit
Hello, crafty friends! Marie here again from Marie Nicole Designs. I hope you are ready for some spooky crafting! I’m using the new Better Press Halloween images to make some simple and fun items! I first want to say that this was the first time using my Better Press and I am so impressed by the results! The Better Press plates combined with this cotton paper give such a professional finish! Even just making some simple cards with black ink looks amazing. Let’s take a look! SIMPLY PRESS IT! For my first card, I used the Pumpkins and Ghosts Betterpress plate to press the design into a 4×6 Pebble-colored card…
-
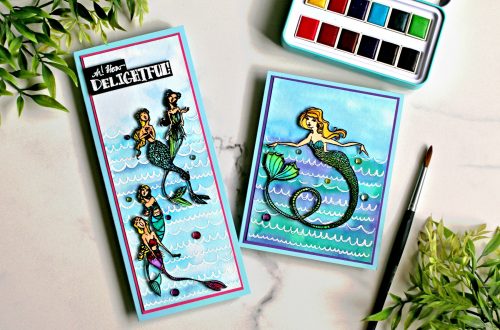
Betterpress Halloween: Watercolor Backgrounds
Hello crafty friends! It’s Jung here, and I am back with another guest post on the Spellbinders blog. For my projects today, I’m working with the Betterpress Halloween collection. I made fun watercolor backgrounds playing with Distress inks and Distress Oxide inks. I love how they compliment the Betterpress plates. For my first card, I used the Pumpkins & Ghosts Background Press Plate. I started by adding some color to an A2 Bisque cotton card panel. I used several techniques on the background. First I wanted to add a base layer wash of color. I smooshed mini Distress ink cubes onto my glass mat and sprayed generously with water. Then,…
-
Unleashing Creativity with Texture Pastes
Texture pastes add dimension and tactile appeal to your projects, taking your paper crafting endeavors to new heights. In this blog post, we’ll delve into the world of texture pastes, exploring how to use them properly, what is the difference between them, what tools to use, tips for cleaning up, and smart storage solutions to keep your supplies organized. In Spellbinders online shop you can find all kinds of pastes from regular ones to shimmering, but which one to pick? Let’s start with the basics. Texture pastes are versatile mediums that allow you to add raised designs, patterns, and textures to your paper crafting projects. They come in various formulations,…
-
Full Bloom Poinsettia – Glimmered Three Ways
Hello, friends! It’s Marie again from Marie Nicole Designs. I’m sharing some more glimmered Christmas cards with you. This time, I’m using the Full Bloom Poinsettia Glimmer Plate but Im showing how to get three different glimmered designs. Let’s get started! GLIMMER A FULL CARD FRONT We will start by glimmering the plate onto a piece of white cardstock to create a full design for a card front. I have the plate warming up on the Glimmer machine while I cut some gold foil. After you cut a piece of foil you can lay it over your glimmer plate as it’s warming. I like to think of the backside of…
-
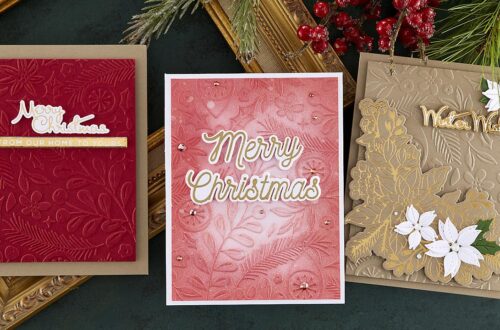
Glimmer Holly Background 3 Ways – How-to Step-by-step
Hello there, Michelle Short here to share a step-by-step tutorial with you using the Glimmer Holly Background and Layered Glimmer Holly Background from the De-light-ful Christmas Collection by Yana Smakula. This is such a pretty background and can be used in lots of different ways. Today I have three cards to share with you – 1. Using the Glimmer Holly Background and Layered Glimmer Holly Background together. 2. Using the Glimmer Holly Background on its own, and 3. Using the Layered Glimmer Holly Background on its own. GLIMMER HOLLY BACKGROUND + LAYERED GLIMMER HOLLY BACKGROUND STEP 1 Let the Glimmer Hot Foil System platform heat up while you place Champagne…
-
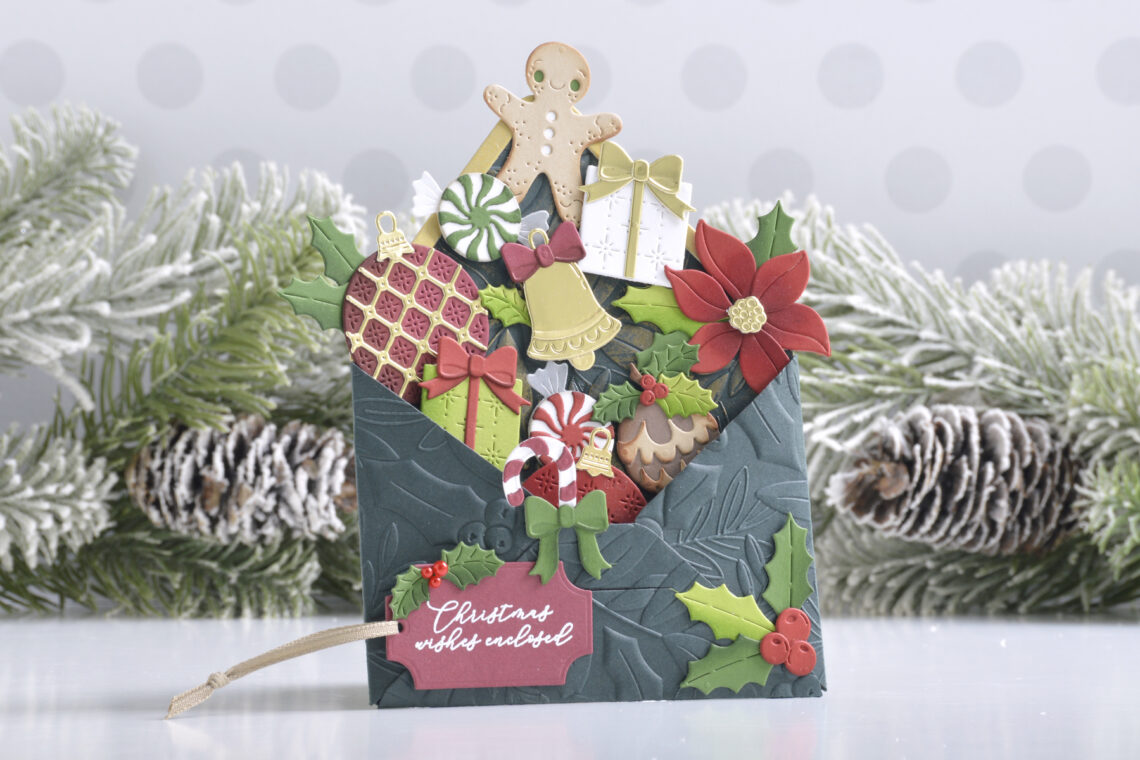
Christmas Envelope of Wonder Card Tutorial
Hi there, this is Annie Williams and I’m excited to be back on the blog today to share how I created this fun Christmas envelope card using the new Envelope of Wonder Collection from Spellbinders. I love the idea of stuffing a big envelope full of festive elements and thought it would be fun to add some details to the envelope itself as well. Start by cutting the main parts of the envelope out of Forest Cardstock and the top flap layer out of Brushed Gold Cardstock. Emboss all of the main envelope parts using the Holly & Foliage 3D Embossing Folder. Lightly rub Gold Rush Lunar Paste over the…
-
Shake! Shake! Shake! Shaker Cards Made Easy!
Are you ready to add some extra pizzazz to your handmade creations? Well, we’ve got just the thing for you – shaker cards! If you’re not familiar with this delightful trend, don’t worry, because today we’re going to dive into the world of shaker cards and share everything you need to know. What Are Shaker Cards? Imagine sending someone a card that not only looks stunning but also brings an element of surprise and playfulness. That’s exactly what shaker cards offer! These interactive cards feature a clear window filled with small embellishments like sequins, confetti, or beads. When you shake the card, the contents inside the window move around, creating…