-
Spread Some Love With Florals!
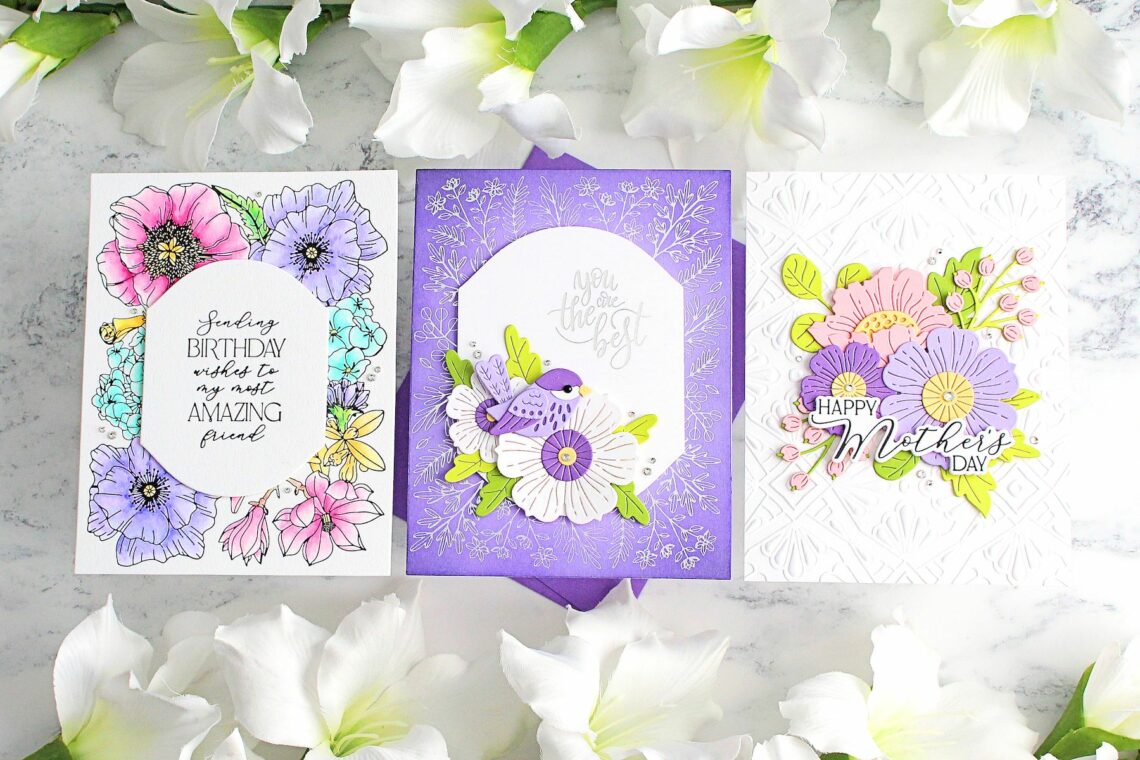
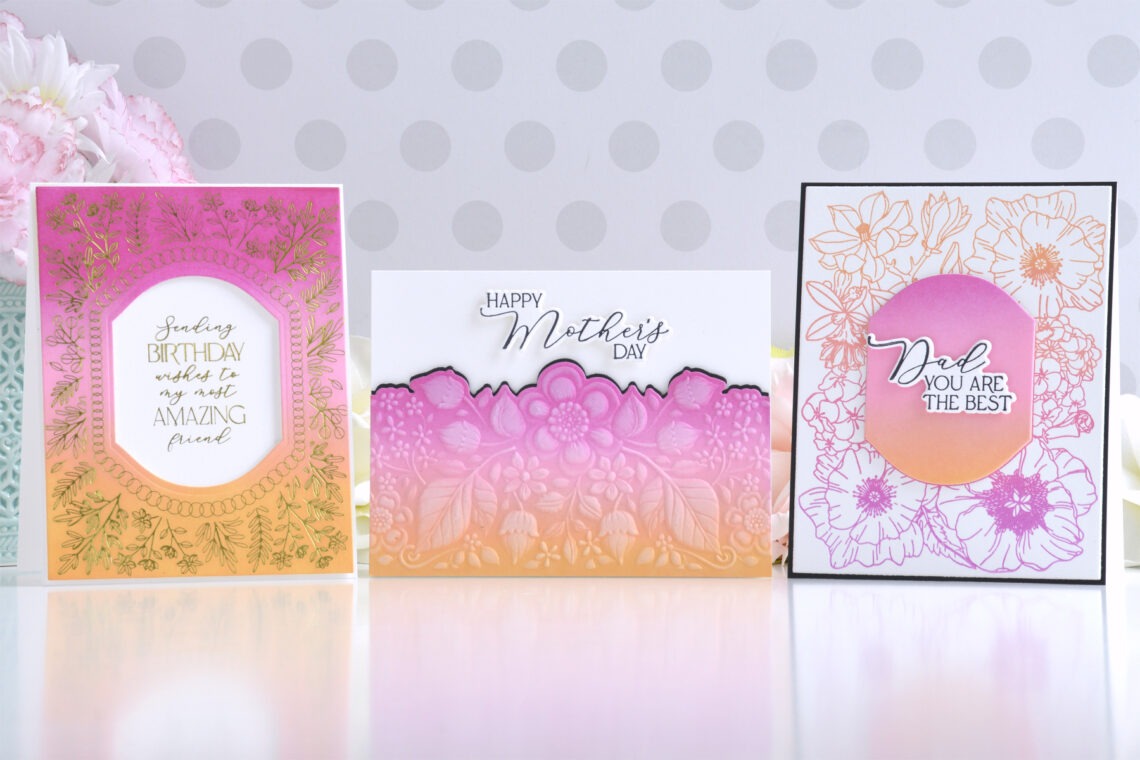
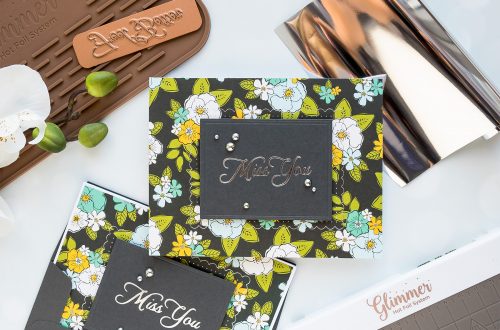
Hello there, Michelle Short here and I am delighted to be back on the Spellbinders blog using the Mirrored Arch collection. This beautiful collection is perfect for sending love to friends and family. AMAZING FRIEND For my first card, I wanted to show how you can create a card with minimal supplies. I used just one plate set, plus one die set (although not necessary). To make this card: I placed the Mirrored Arch Blooms Press Plate (not including the sentiment) onto the chase of the BetterPress Letterpress System. I added a Porcelain BetterPress A2 Cotton Card Panel on the platen and held it in place with Best Ever Craft…
-
Creating Three Cheery Cards With the Same Color Blend
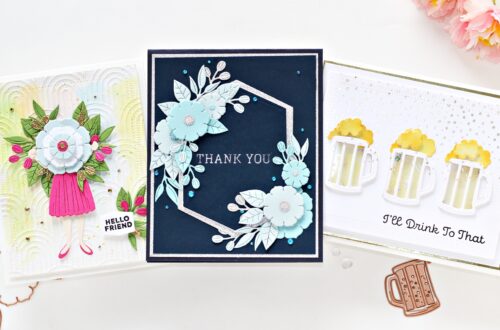
Hi there, this is Annie Williams and I’m thrilled to be back on the blog today to share a couple of brightly-blended cards made with the new Mirrored Arch Collection from Spellbinders. I love this new modern take on the classic oval frame and combined it with the same bright color blend to create three cards for different occasions. Bright Blended Birthday Card I loved all of the options provided by the Mirrored Arch Nested Sprigs Press Plate, so picked this setup first. With four concentric frame plates, you can create an ornate frame with tons of different layers. Here I used just the largest two layers to foil a…
-
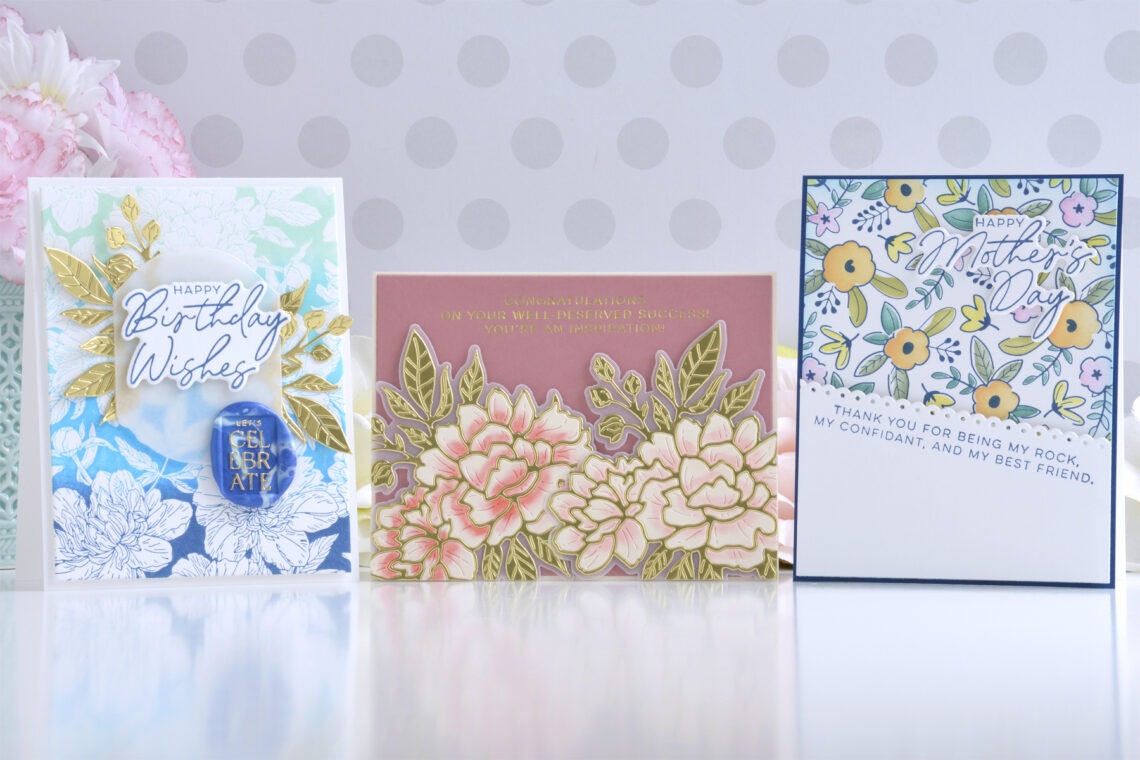
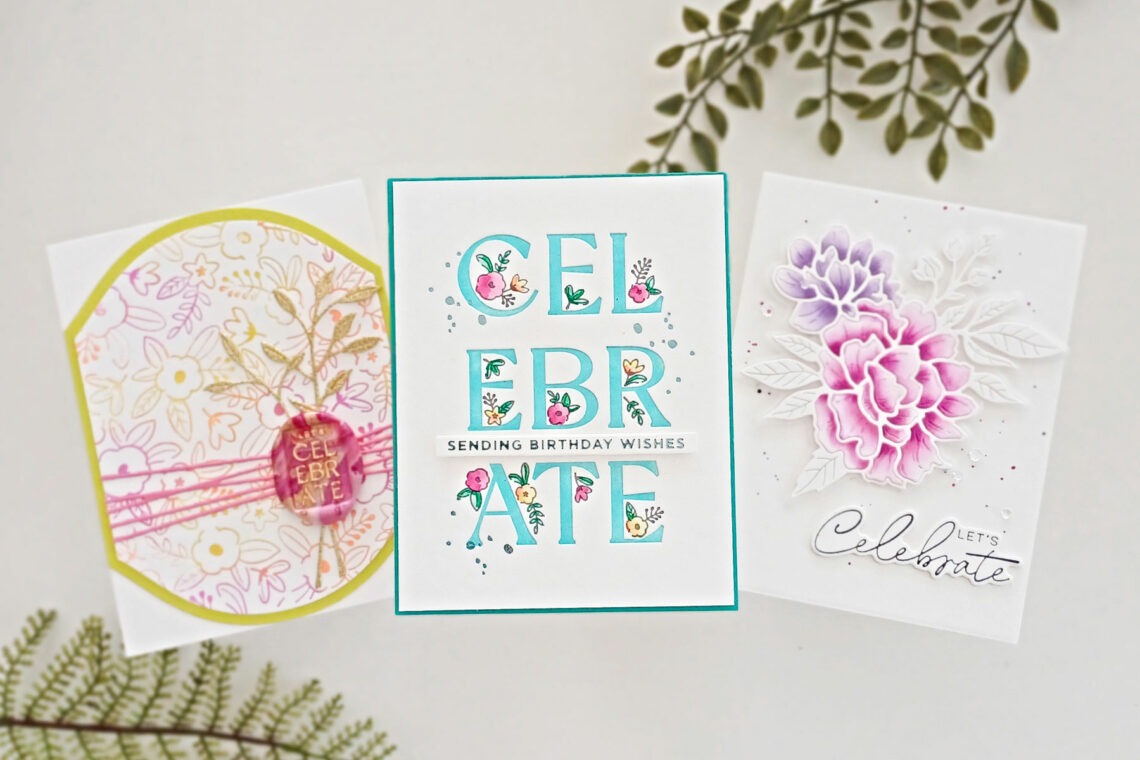
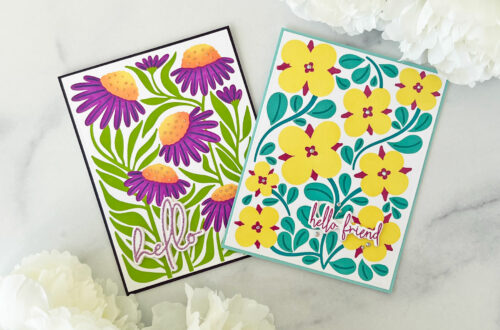
Colorful Floral Designs With the Let’s Celebrate Collection
Hi there, this is Annie Williams and I’m excited to be back on the blog today to share a couple of colorful cards made with the new Let’s Celebrate Collection by Yana Smakula. The gorgeous floral designs and sweet sentiments in the collection inspired me to create three cards in pretty spring color schemes for all different occasions. Birthday In Blues Card The floral design in the Peony Background Press Plate is so intricate it reminded me a little of toile, so I inked it in several different shades of blue to create a backdrop for this fun floral birthday card. Apply Cruise, Teal Topaz, Azure, and Cosmic Sky BetterPress…
-
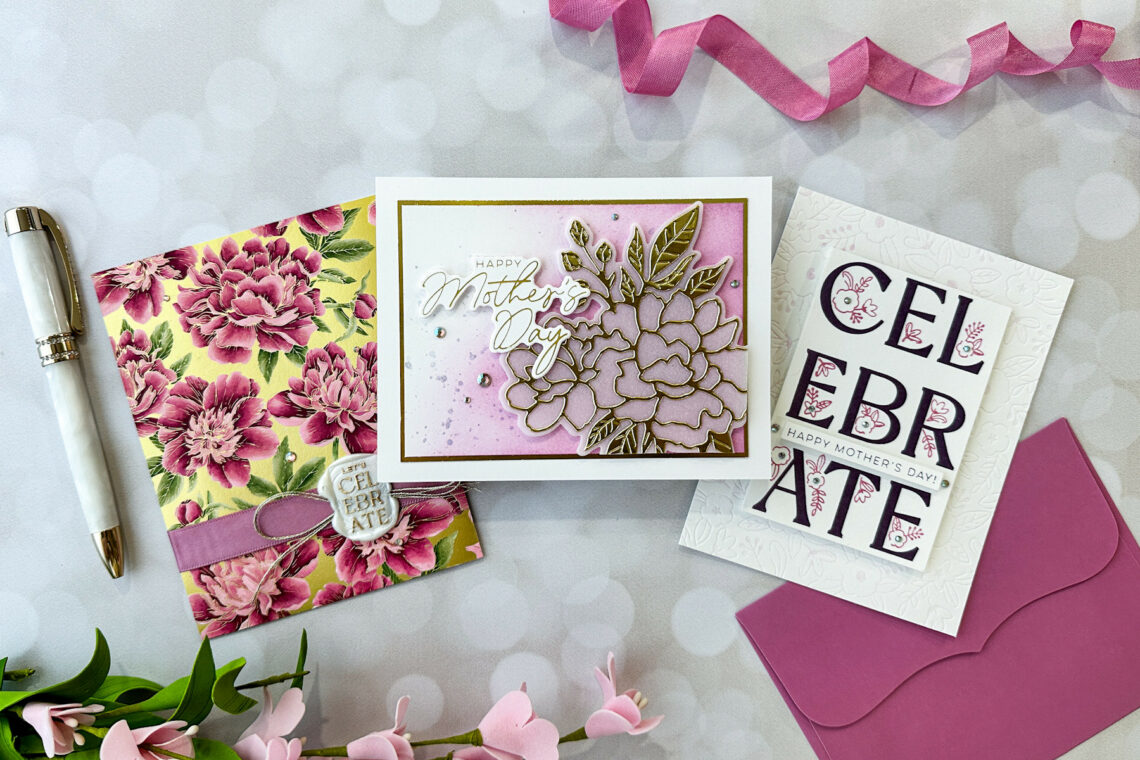
New Let’s Celebrate Collection: Mother’s Day with Mauve and Gold
Hi friends! Emily Midgett here with you today on the Spellbinders blog, and I’m thrilled to be sharing some inspiration using the utterly luscious new collection from Yana Smakula called Let’s Celebrate. Yana’s signature style with elegant florals and beautiful calligraphic sentiments is laced throughout this collection, and it was a true pleasure to play with! The shining star of the collection, for me at least, is the divine Peony Better Press Plate. The Better Press Plates work beautifully with both the Better Press system and the Glimmer Hot Foil System, and both methods work incredibly well with this exquisitely detailed press plate. Whenever I am creating a card set,…
-
Make Your Blooms Bloom and Create Three Pretty Floral Cards
Hello there! This is Lisa from My Card Trip and I am happy to be back here on the Spellbinders blog with you. Today, I am sharing three ideas using the beautiful new collection from Yana Smakula. This collection is called Let’s Celebrate and it’s definitely a reason to do just that! You’ve got some gorgeous new press plates, a die set, and a wax seal, along with the latest in the line of BetterPress Registration Press Plates. There is also a coordinating layering stencil set for the new BetterPress Registration set if you want to add some more options for using it. I had a blast creating with these…
-
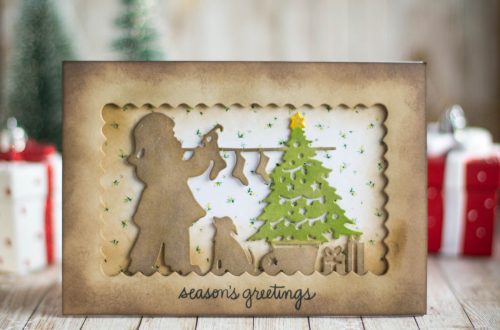
Stretching Your Stash: Pairing Dies with the New Card Maker’s Kit!
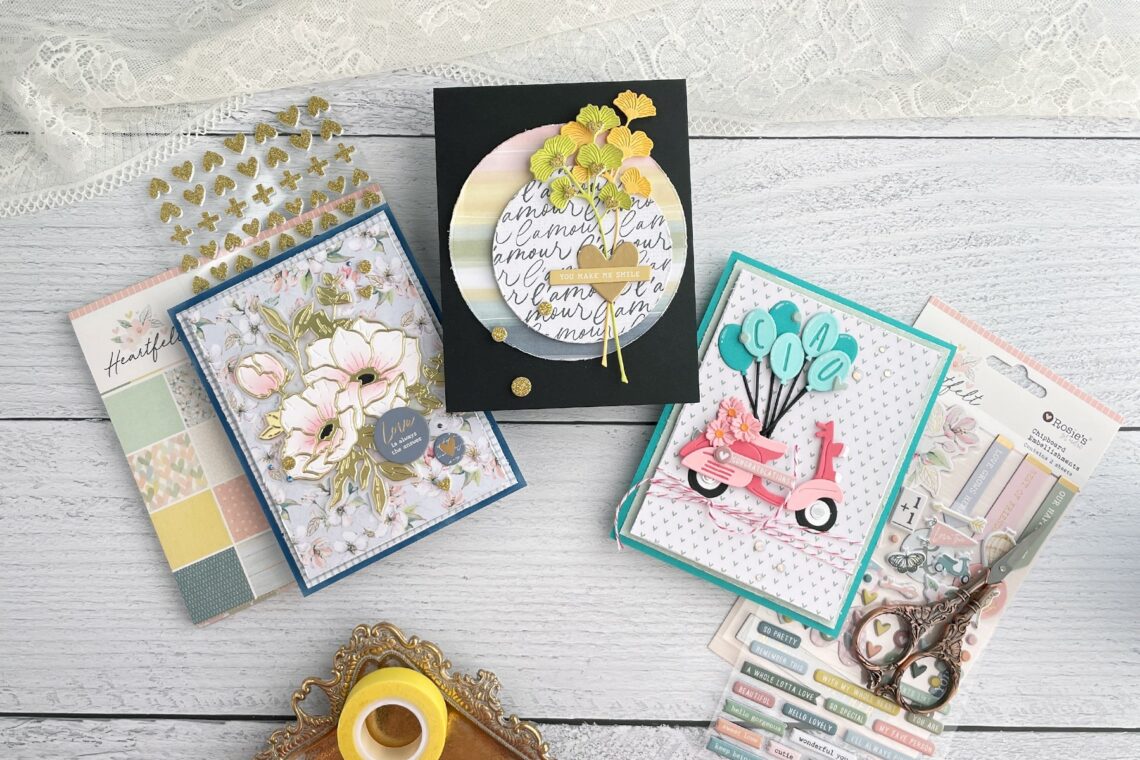
Hello, crafty friends, I’m Adrienne Boese, better known as Alice Scraps Wonderland online, and I’m thrilled to be on the Spellbinders blog for my first guest post! I’m known for my love of florals—I try to tuck in at least one floral element into every project I create. Today’s project features three cards made with Rosie’s Studio Heartfelt Card Maker’s Kit and the Ciao die. Each card is designed with some shabby chic touches and either features florals at the center, or has a few tucked in. This collection offers some fun opportunities to pull out Spellbinders dies you already have in your collection that allows you to match or…
-
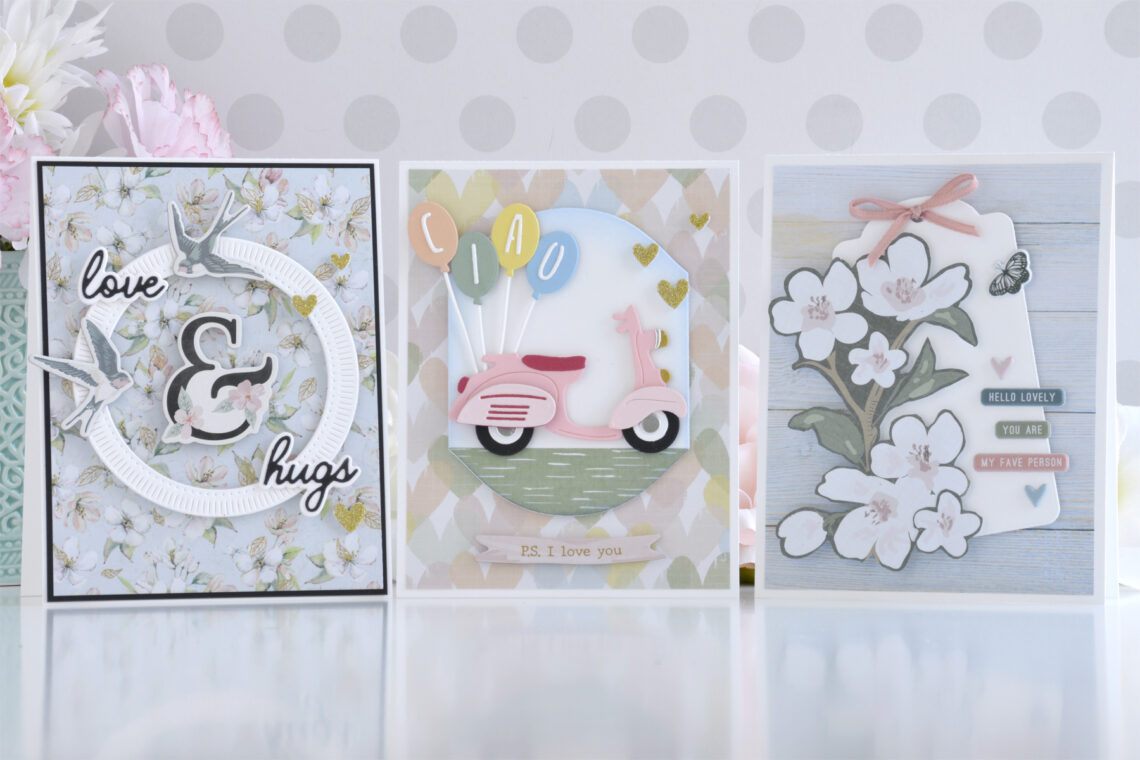
Creating Sweet Love Cards with the Heartfelt Cardmakers Kit
Hi there, this is Annie Williams and I’m thrilled to be back on the blog today to share a couple of sweet love cards made with the Heartfelt Cardmakers Kit. The beautiful patterned papers and pretty embellishments in this kit inspired me to create three easy cards perfect for sending love this spring. Love & Hugs Card The gorgeous floral chipboard ampersand and pretty matching patterned paper in the kit caught my eye immediately. Here I paired them with some die-cuts and stickers to create this soft and pretty love card. Trim a piece of patterned paper from the paper pad to 4” x 5.25”, mat it with Onyx Cardstock,…
-
Spring Has Sprung!
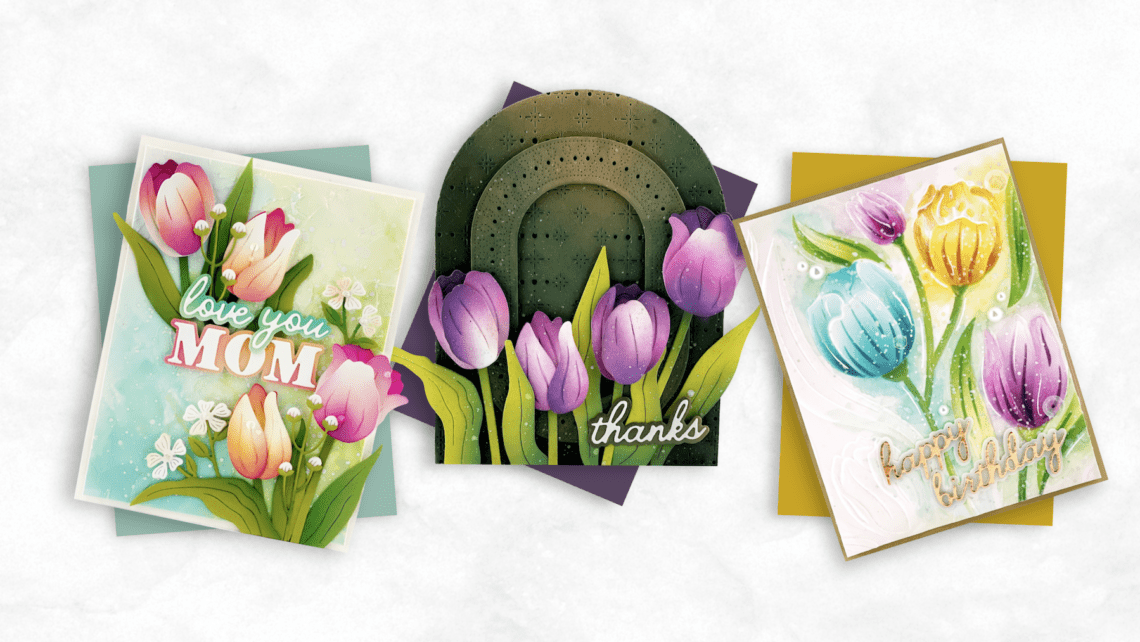
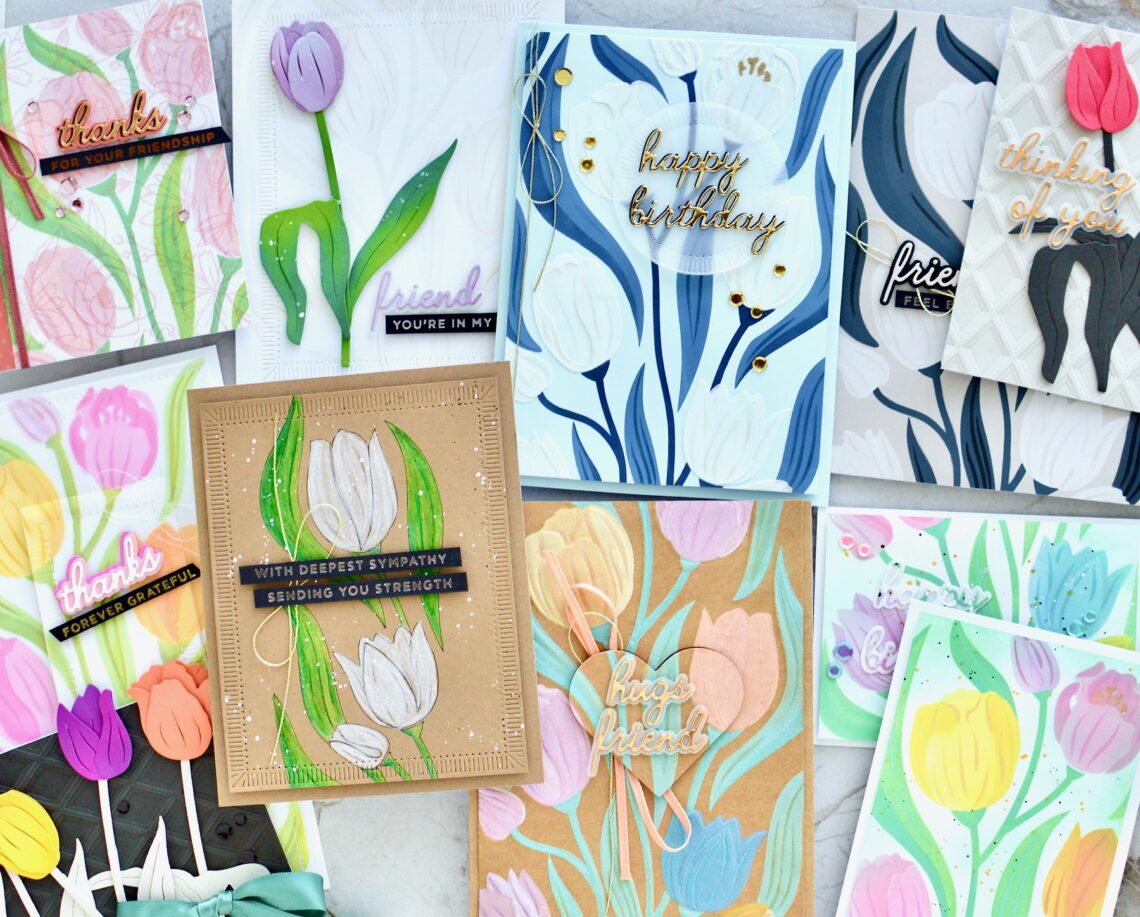
Hi folks, Kavya from @handmadebykavya is here with some fun inspiration for Simon Hurley’s new collection – Tulip Garden. I love playing with dies, especially ones that can be used in multiple ways. You will find that the collection is versatile as well! I have three cards for you today, all inspired by different painting styles! Renaissance Tulip Painting My first card was inspired by Renaissance paintings. Muted florals on dark green faded background provides enough contrast for an interesting card! I started off by ink-blending some dark green cardstock with dark green and black dye inks. Then, I die cut the card using Stitched Starry Argyle die, Infinity Punch…
-
STENCILS: Multiple Ideas and Creations from ONE Product
Hello, friends! It’s Savannah O’Gwynn from Savannahland2. I’m honored to be sharing some of my ideas using the Spellbinders Tulip Garden Collection by Simon Hurley. #SAVfact: I have MORE ideas than I have time to create! Be sure to check out all 11 of my projects using the Tulip Garden Collection and all the tips and bonus ideas throughout this post!! When I saw all of these products from the collection, I was drawn to the STENCILS! That’s typically NOT me!! I am a fussy cutter, patterned paper user, that loves loves loves to add layers and dimensions using stamps, dies, and embellishments. Stencils and ink blending actually scared me!…
-
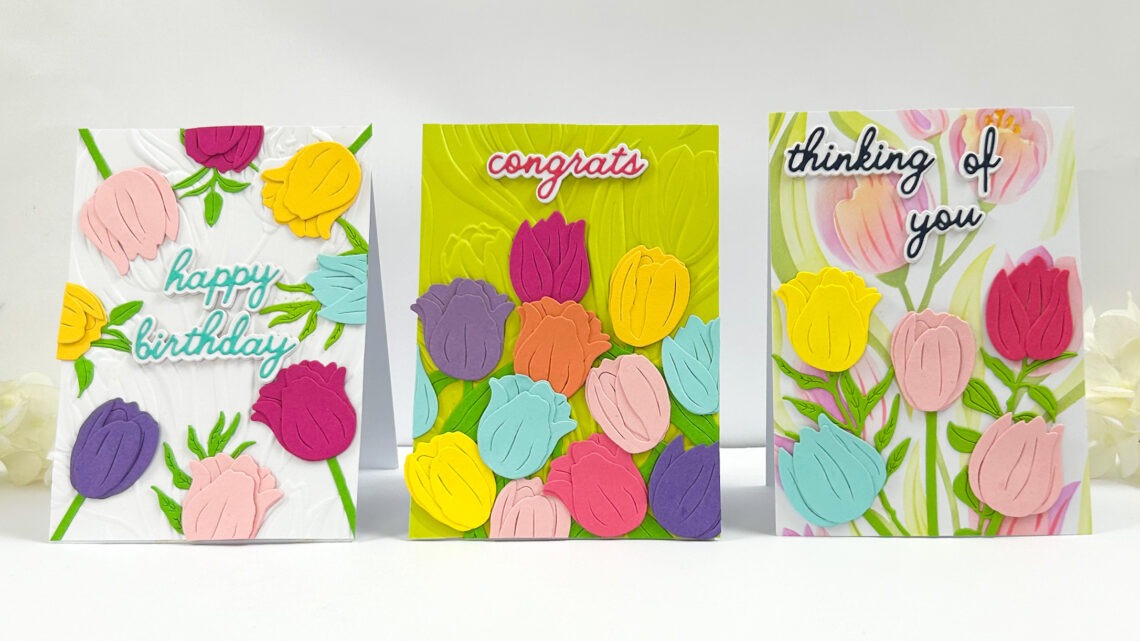
Tulips To Make You Smile
Hi friends, Vic here today and I am so excited to be back on the Spellbinders blog. I have created three cards using the gorgeous Tulip Card Collection by Simon Hurley. This collection is just absolutely beautiful and I really love how big the Tulips are. I had so much fun creating with this collection. I am such a big fan of Tulips! I have used some bright and cheerful colors of card to go along with my cards today. I hope they make you smile! For my first card, I used a piece of white card that I embossed using the Twirling Tulips 3D Embossing Folder. This embossing folder…