-
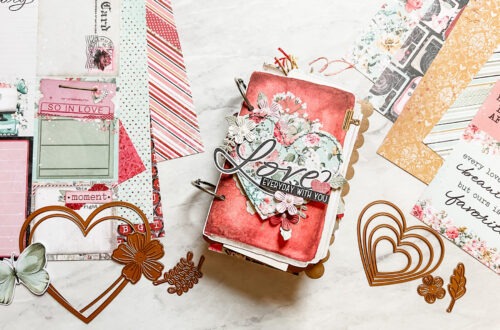
3 Dazzling Cards featuring the New Wax Seal Beads and Bead Mixes
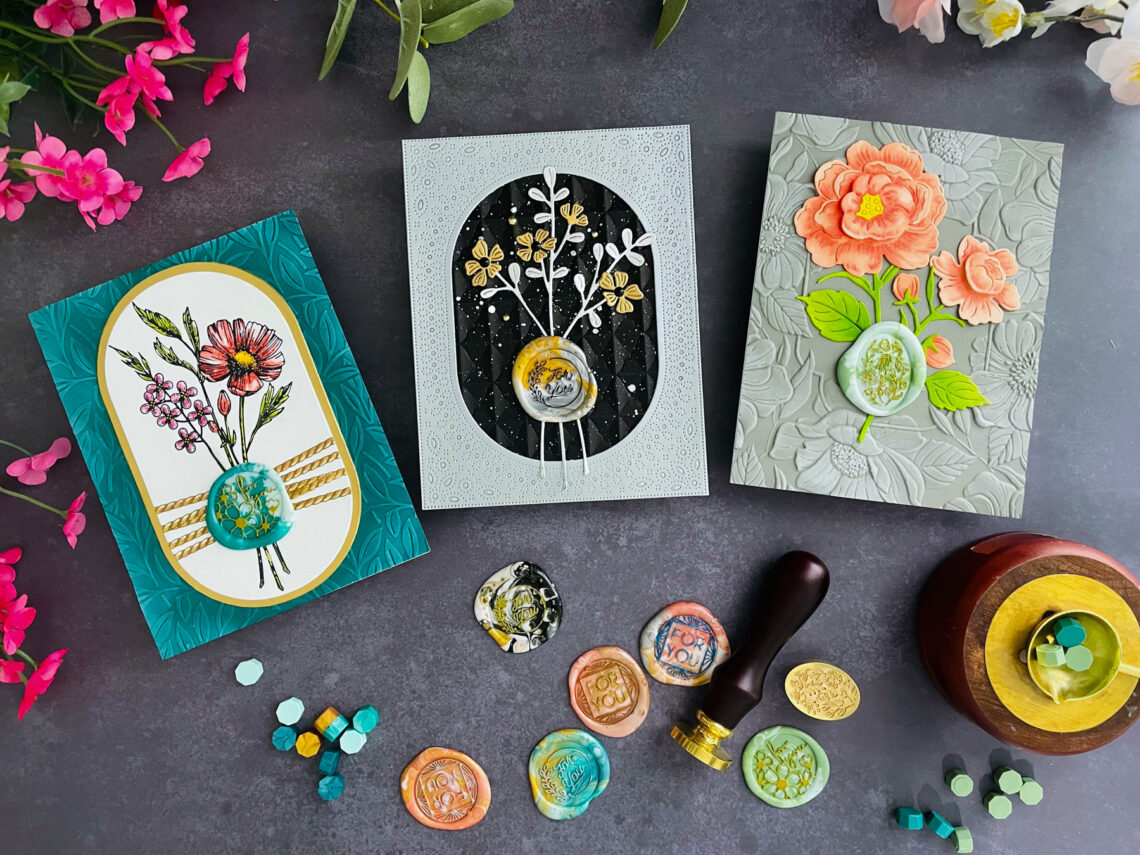
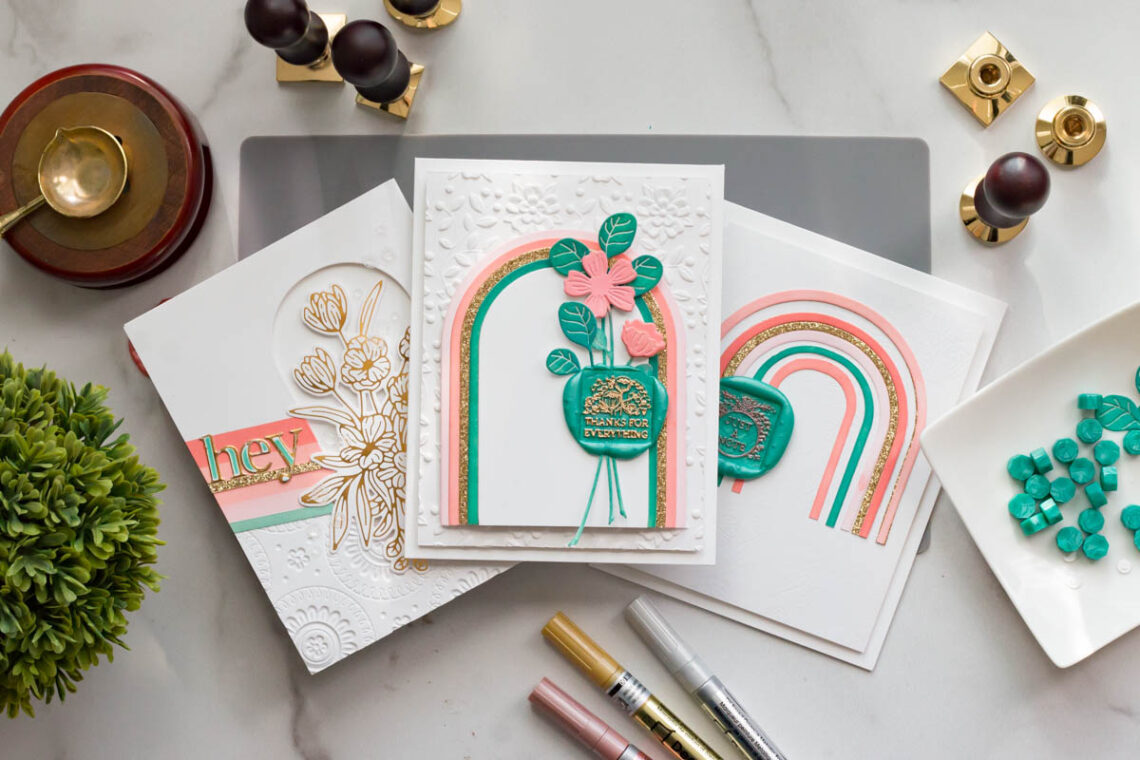
Hello, crafty friends! My name is Heejung Hunsberger, and I am excited to be a guest designer this month. Today, I will share some of my latest projects using the new beads and bead mixes from Spellbinders. The Spellbinder wax beads and bead mixes are stunning. Today, I am showcasing three sets of color-coordinated beads and cards. If you want to know me better, visit my blog or Instagram. I also have a YouTube channel where I post a lot of video tutorials. Spruce & Pistachio Wax Beads Mix Card I made a card using the Sealed Florals BetterPress Plate and the Sealed Cord & Faux Seal Sentiment BetterPress Plate. The card base is…
-
Pretty Wax Seal Projects Made With All New Wax Beads & Bead Mixes
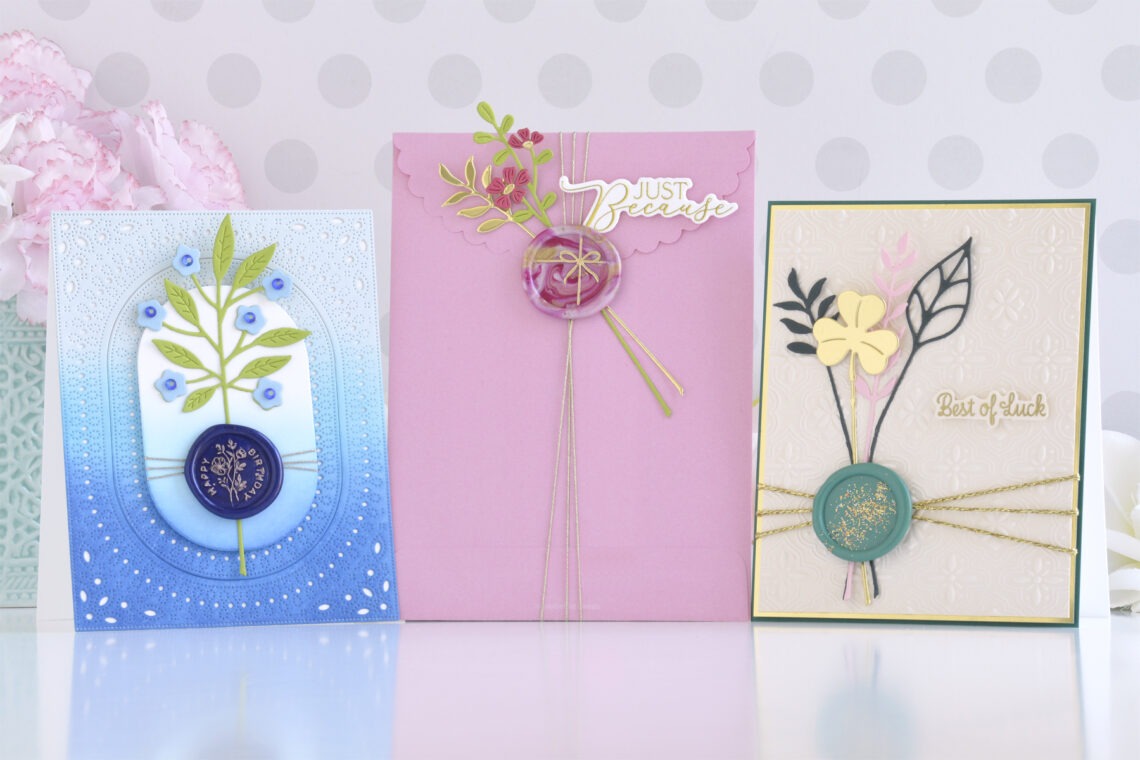
Hi there, this is Annie Williams and I’m thrilled to be back on the blog today to share a couple of projects using wax seals made with the latest wax bead colors and bead mixes from Spellbinders. The fun new colors and mixes give you so many more color scheme possibilities when adding wax seals to your projects and I was inspired to create two cards and a pretty embellished envelope. Birthday in Blues Card I loved the richness of the new Ink Wax Beads and thought it would be fun to create a monochromatic (mostly) birthday card with all of my favorite blue Spellbinders supplies. Melt Ink Wax Beads…
-
Mixing and Layering Wax Beads to Level Up Your Seals
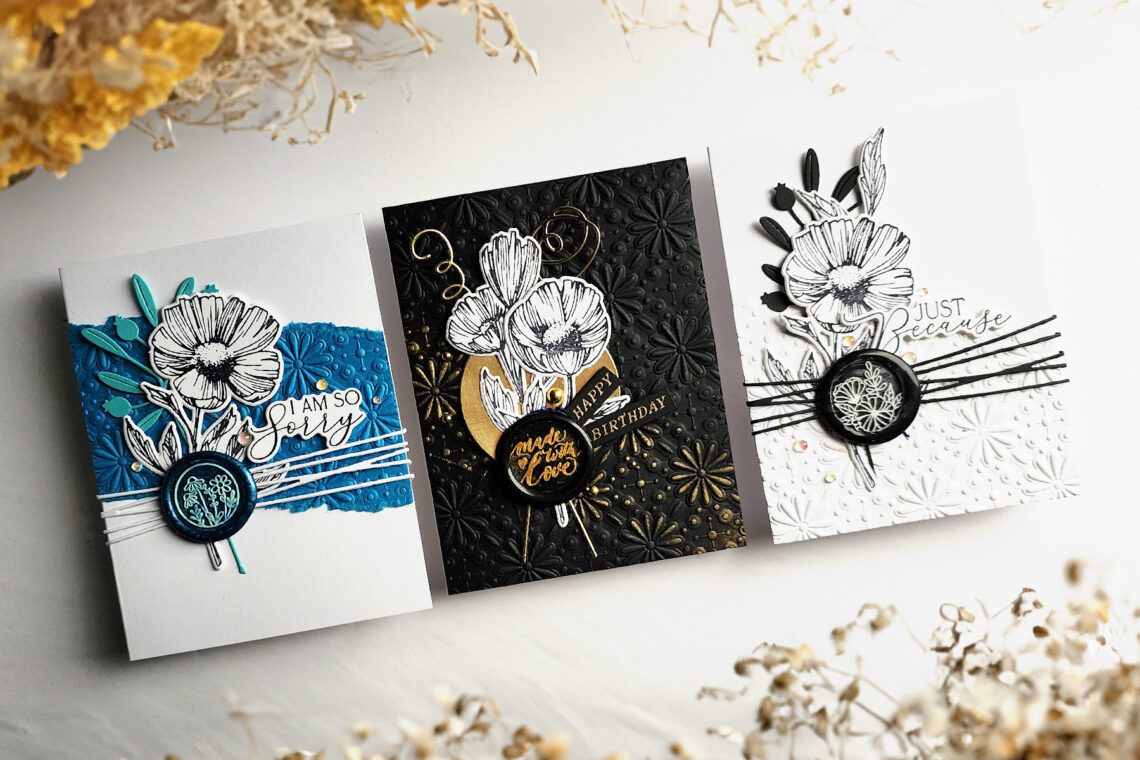
Hey there! Daniel West, here, with some great tips on mixing and layering wax beads to take your seals to the next level. If we graded this tutorial for difficulty, I would say it ranks a 5 out of 10. I prefer this method of layering seals to coloring them with a marker because it makes for a very sharp and clear seal impression with contrast. It also is permanent and won’t wipe off with your finger. Later in January, I will have a YouTube tutorial on my channel. Instructions for layering waxes on seals: Warm your seal a bit over the flame of your votive candle or just let…
-
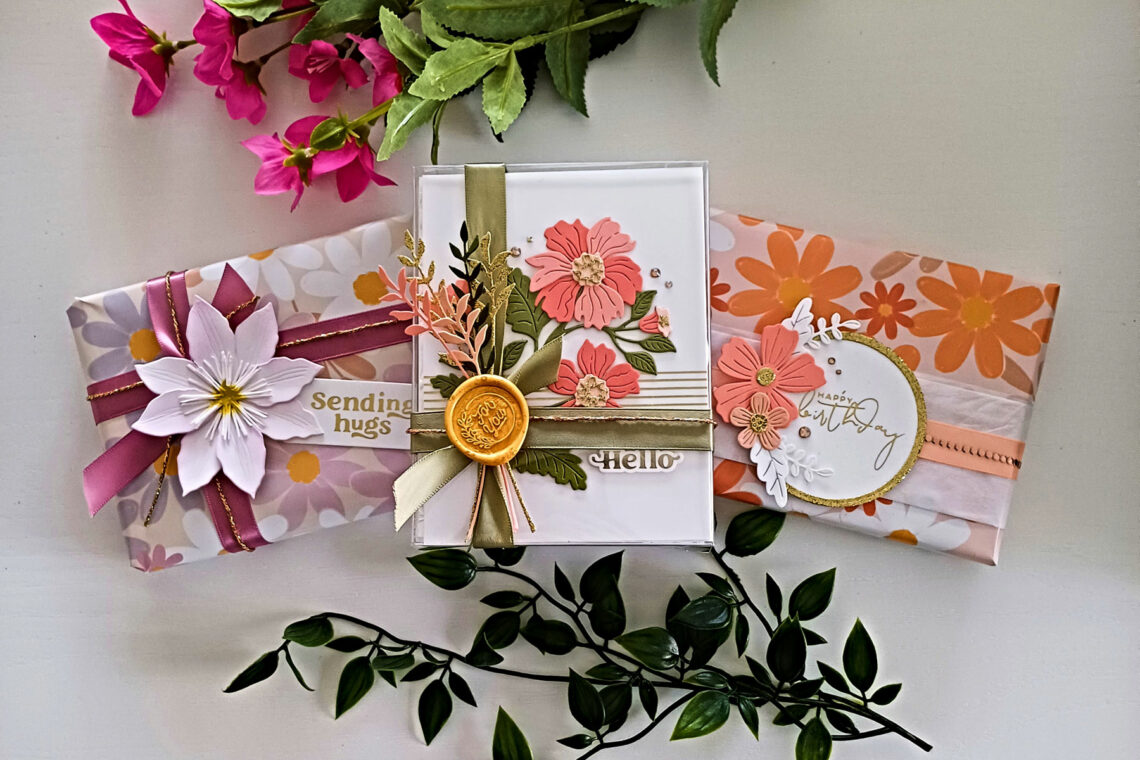
Packaging Ideas With Clear Boxes You Need To Try!
Hello there! This is Lisa from My Card Trip and I am excited to be a guest again on the Spellbinders blog. Today I am sharing a few ideas for gift wrapping clear acetate boxes using beautiful papers and ribbons and also my own decorations. The Crystal Clear boxes I am using today come in a pack of 25. They are so simple to put together as all you need to do is open the box up and tuck the flaps in. The acetate is scratch resistant and the tabs fold very easily. Not only that but the boxes have been made with a material that won’t brittle or crack…
-
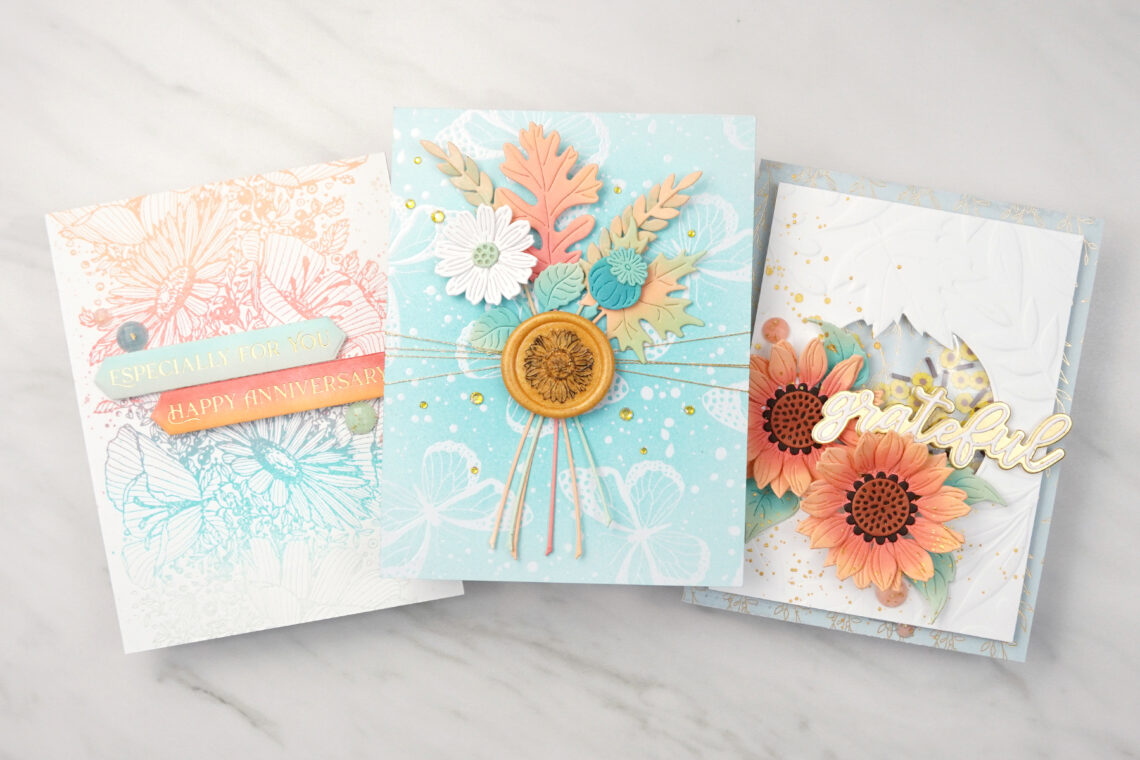
3 Autumn Themed Flower Cards for All Occasions + Bonus Scrapbook Layout
Hi there my Spellbinders’ friends, welcome back to the Spellbinders Blog! My name is Jaycee Gaspar and I’m so excited to share three cards and a scrapbook layout featuring the Serenade of Autumn collection. This collection features BetterPress press plates, steel dies, ephemera, and embellishments! I focused on a cohesive color palette that matches the Serenade of Autumn Gems. I recently crafted some beautiful papercrafts using an enchanting color palette consisting of coral, rose quartz, jade, and aquamarine. By blending inks, I achieved soft tones that perfectly complemented each other, and I also incorporated color complements to create a more muted tone. Although these colors are perfect for autumn themes and…
-
Gift Wrapping with Vivant and Pepin Press
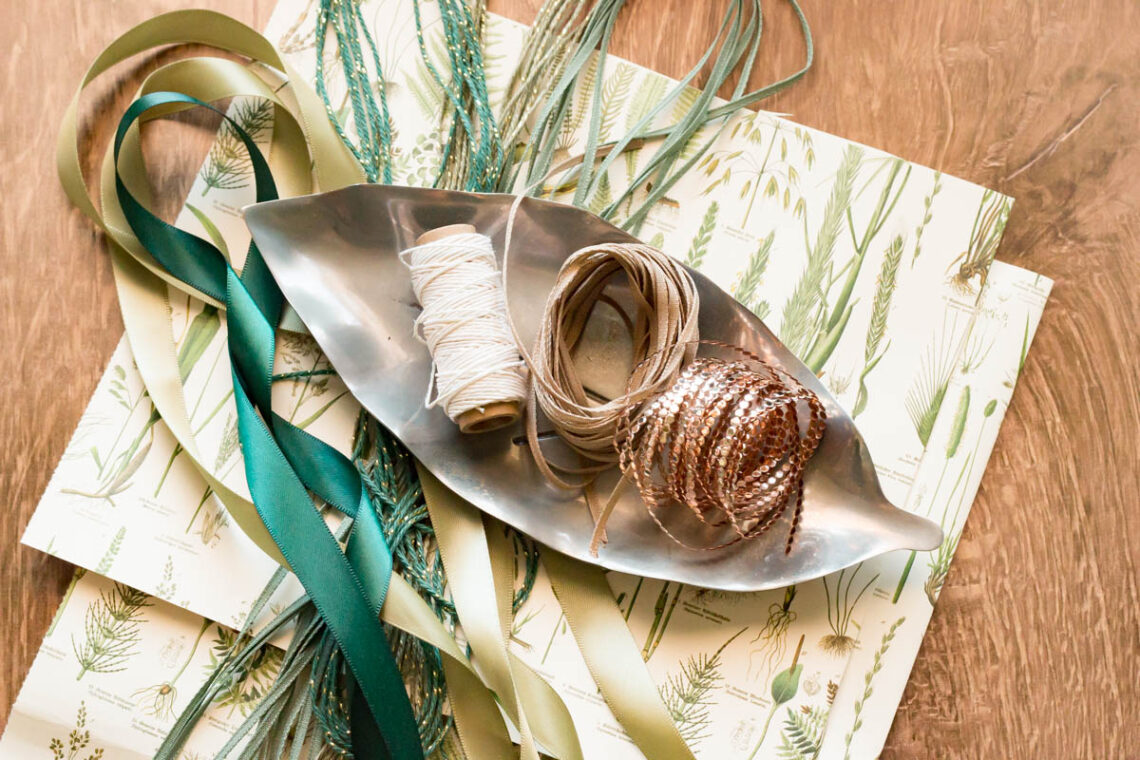
Hello there, crafty friends! Marie here again from Marie Nicole Designs. I have a fun post to share today, featuring the papers and ribbons from Vivant and Pepin Press! I’ll be creating a few projects with these items and paring them with some glimmering and wax seals from Spellbinders. Let’s get started! FOILING ON RIBBON Did you know that you could foil on ribbon? Some of this satin ribbon from Pepin is perfect for this technique! I grabbed a roll of my copper foil and some of the Dark Green Vivant ribbon and started to heat up my Glimmer machine. This is easy to do and it adds so much…
-
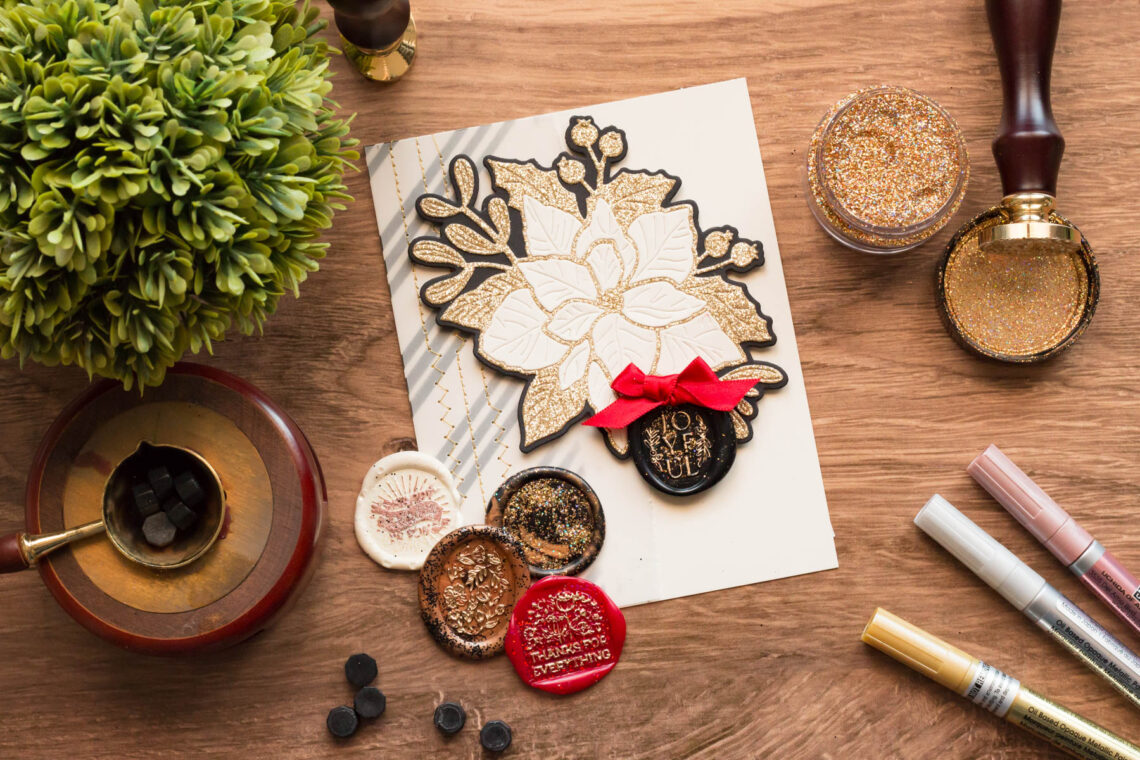
Mix Your Wax Seals with Glitter!
Did you know you can add glitter to your wax seals? Yes! There are so many options! Go with the same color wax bead and glitter for a tone-on-tone look, or better yet add contrasting color glitter for a striking effect. You can sprinkle glitter into the wax as it is melting in your spoon or as soon as you’ve poured it onto your surface before pressing the stamp. So many options to explore! Today we are welcoming guest designer Marie Nicole as she shares her wax seals & glitter experiments! Take it away, Marie Nicole! Hello there, craft friends! It’s Marie again from Marie Nicole Designs. I’m sharing some…
-
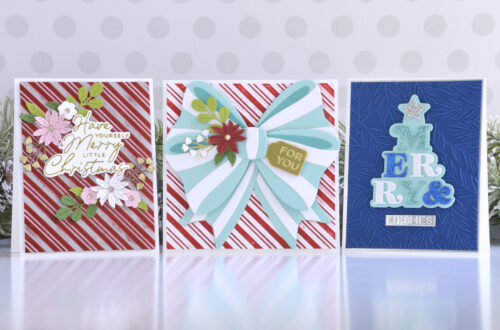
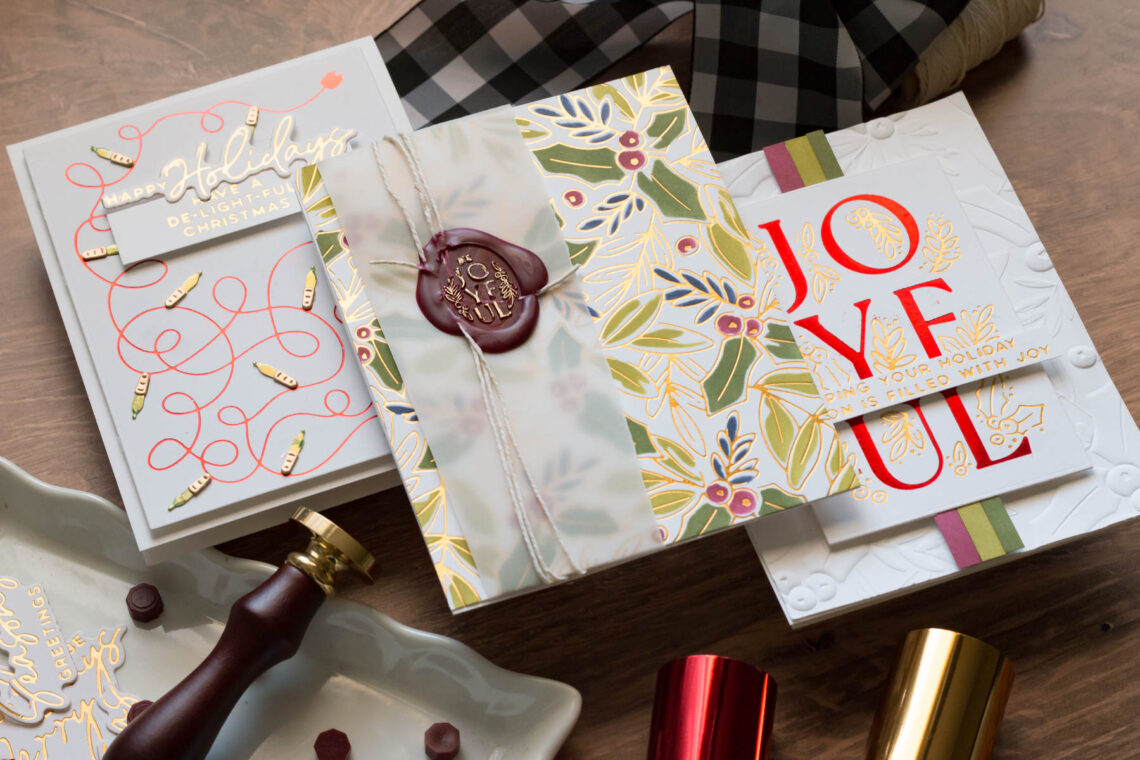
De-Light-Ful Christmas Card Ideas
Hello, dear friends! Marie here again from Marie Nicole Designs. I have a trio of festive, glimmery cards to share today. This new De-Light-Ful collection from Spellbinders has all the things for you to take your Christmas cards to the next level. Embossing folder, wax seal, and multiple glimmer plates. I’ll also walk you through a step-by-step process for our first card. Let’s get started! SEALED WITH JOY Here’s our first card out of our trio. The background is glimmered and then stenciled, and a wax seal is added for the sentiment. As promised, I have a handy step-by-step ready for you! STEP 1- Glimmer the Background We need to…
-
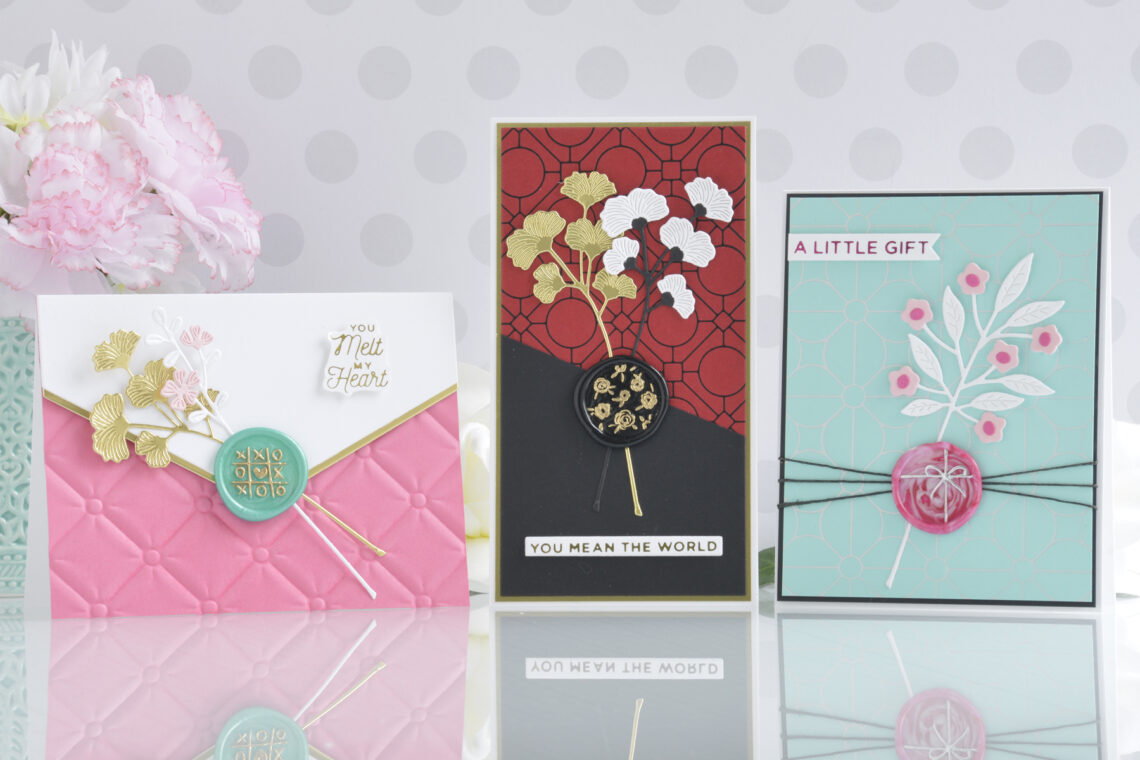
Wax Seals Weekend Inspiration!
Hi there, this is Annie Williams and I’m excited to be back on the blog to share a couple of ideas featuring Wax Seals. Mini Slimline Friendship Card I loved the detail in the Scattered Flowers Wax Seal Stamp so decided to try that design first. Here I chose rich colors and gold accents for this pretty mini slimline friendship card. Melt Black Wax Beads and press with the Scattered Flowers Wax Seal Stamp on a silicone mat. Once cool, lightly apply a gold metallic marker over the raised areas of the seal. Die cut white, Onyx, and Mirror Cardstock with the Sealed Gingko Die Set and assemble the sprigs…
-
Sealed for Summer Trio with Marie Nicole
Hello again, crafty friends! Marie here from Marie Nicole Designs. I hope the start of your summer has been fun and fabulous! I’ve been able to create with the new Sealed for Summer collection from Spellbinders and let me tell you- this collection is definitely fun and fabulous. Let’s take a look! FLORAL WINDOW One of the sets in this collection that I really loved was the Modern Ovals set. These nested ovals are perfect for cutting out card layers, windows, and as you will see in my next cards, even rainbows! For this first card, I cut out an oval window to layer my Glimmer Bouquet over. Before cutting…